1.新建maven项目
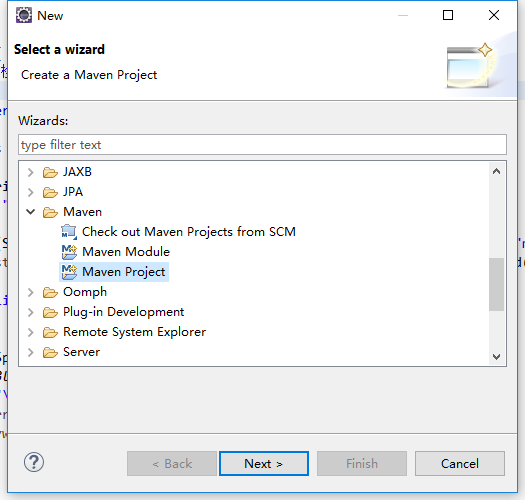
2.选择webapp

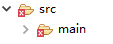
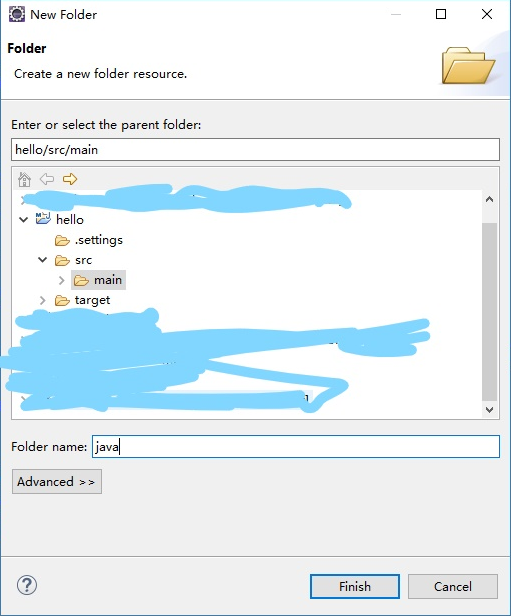
3.若是项目没有 src/main/java 则在下图中新建main下新建java文件夹

4.在 src/main/java 文件夹下 新建 cn.com.test 包

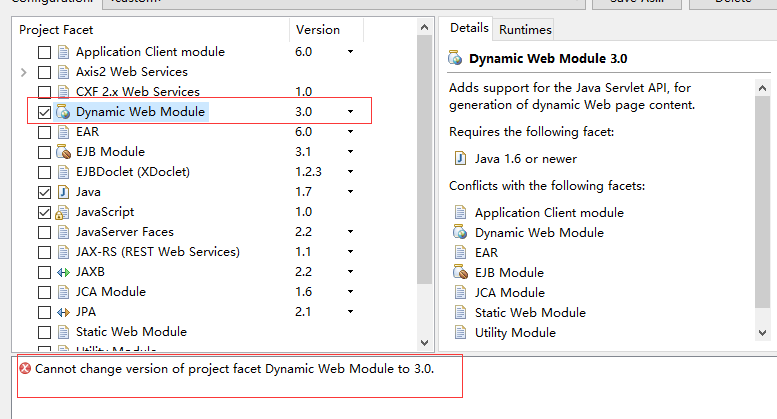
5.右键 properties => project facets 发现 dynamic web module 是 2.3 并且无法修改
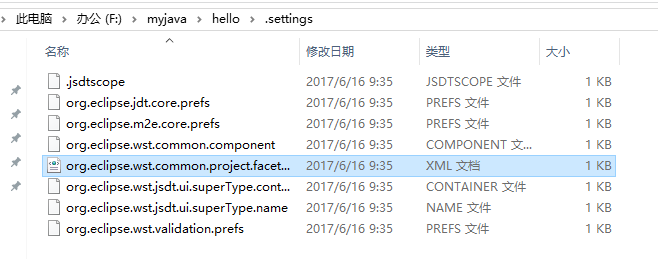
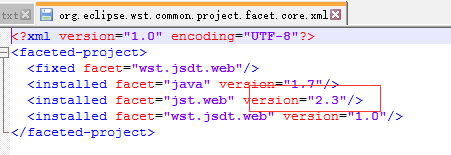
6.到项目根目录,修改下图文件,jst.web 2.3 改为 3.0
7.修改 pom.xml


<project xmlns="http://maven.apache.org/POM/4.0.0" xmlns:xsi="http://www.w3.org/2001/XMLSchema-instance"
    xsi:schemaLocation="http://maven.apache.org/POM/4.0.0 http://maven.apache.org/maven-v4_0_0.xsd">
    <modelVersion>4.0.0</modelVersion>
    <groupId>cn.com.test</groupId>
    <artifactId>hello</artifactId>
    <packaging>war</packaging>
    <version>1.0</version>
    <name>syncmv Maven Webapp</name>
    <url>http://maven.apache.org</url>

    <!-- 指定maven仓库 -->
    <repositories><!-- 发现依赖和扩展的远程资源库 -->
        <!-- maven自己官方仓库 -->
        <repository>
            <id>maven</id>
            <name>Maven Repository Switchboard</name>
            <layout>default</layout>
            <url>http://repo1.maven.org/maven2</url>
            <snapshots>
                <enabled>false</enabled>
            </snapshots>
        </repository>
        <!-- 阿里巴巴发布版本仓库 -->
        <repository>
            <id>alibaba-opensource</id>
            <name>alibaba-opensource</name>
            <url>http://code.alibabatech.com/mvn/releases/</url>
            <layout>default</layout>
        </repository>
        <!-- 阿里巴巴快照版本仓库 -->
        <repository>
            <id>alibaba-opensource-snapshot</id>
            <name>alibaba-opensource-snapshot</name>
            <url>http://code.alibabatech.com/mvn/snapshots/</url>
            <layout>default</layout>
        </repository>
    </repositories>

    <properties>
        <!-- base setting -->
        <project.build.sourceEncoding>UTF-8</project.build.sourceEncoding>
        <project.build.lacales>zh_CN</project.build.lacales>
        <project.build.jdk>1.7</project.build.jdk>

        <!-- plugin versions -->
        <plugin.maven-compiler>2.3.2</plugin.maven-compiler>
        <plugin.maven-source>2.1.2</plugin.maven-source>
        <plugin.maven-eclipse>2.8</plugin.maven-eclipse>
        <plugin.maven-deploy>2.7</plugin.maven-deploy>
        <plugin.maven-war>2.2</plugin.maven-war>

        <!-- spring版本号 -->
        <spring.version>3.2.4.RELEASE</spring.version>
        <hibernate.version>4.2.5.Final</hibernate.version>
        <axis.version>1.4</axis.version>
        <!-- log4j日志文件管理包版本 -->
        <!-- <slf4j.version>1.7.10</slf4j.version> -->
        <log4j.version>1.2.17</log4j.version>
    </properties>
    <!-- maven打成war包放到tomcat目录下,即可运行 -->
    <build>
        <finalName>hello</finalName>
        <plugins>
            <plugin>
                <groupId>org.apache.maven.plugins</groupId>
                <artifactId>maven-compiler-plugin</artifactId>
                <version>${plugin.maven-compiler}</version>
                <configuration>
                    <failOnError>true</failOnError>
                    <verbose>true</verbose>
                    <fork>true</fork>
                    <compilerArgument>-nowarn</compilerArgument>
                    <source>1.7</source>
                    <target>1.7</target>
                    <encoding>UTF-8</encoding>
                    <compilerArguments>
                        <verbose />
                        <bootclasspath>${java.home}/lib/rt.jar</bootclasspath>
                    </compilerArguments>
                </configuration>
            </plugin>
            <plugin>
                <groupId>org.apache.maven.plugins</groupId>
                <artifactId>maven-war-plugin</artifactId>
                <version>${plugin.maven-war}</version>
                <configuration>
                    <webResources>
                        <resource>
                            <!-- 元配置文件的目录,相对于pom.xml文件的路径 -->
                            <directory>src/main/webapp/WEB-INF</directory>
                            <!-- 是否过滤文件,也就是是否启动auto-config的功能 -->
                            <filtering>true</filtering>
                            <!-- 目标路径 -->
                            <targetPath>WEB-INF</targetPath>
                        </resource>
                    </webResources>
                </configuration>
            </plugin>

        </plugins>

        <!-- 配置Maven 对resource文件 过滤 -->
        <resources>
            <resource>
                <directory>src/main/resources</directory>
                <includes>
                    <include>**/*.properties</include>
                    <include>**/*.xml</include>
                </includes>
                <filtering>true</filtering>
            </resource>
            <resource>
                <directory>src/main/java</directory>
                <includes>
                    <include>**/*.properties</include>
                    <include>**/*.xml</include>
                </includes>
                <filtering>true</filtering>
            </resource>
        </resources>
    </build>
    <dependencies>
        <!-- junit测试包 -->
        <dependency>
            <groupId>junit</groupId>
            <artifactId>junit</artifactId>
            <version>4.11</version>
            <scope>test</scope>
        </dependency>

        <dependency>
            <groupId>net.sourceforge.jexcelapi</groupId>
            <artifactId>jxl</artifactId>
            <version>2.6.12</version>
        </dependency>


        <!-- servlet api jar -->
        <dependency>
            <groupId>javax.servlet</groupId>
            <artifactId>servlet-api</artifactId>
            <version>3.0-alpha-1</version>
            <scope>provided</scope>
        </dependency>
        <!-- jstl -->
        <dependency>
            <groupId>javax.servlet</groupId>
            <artifactId>jstl</artifactId>
            <version>1.2</version>
        </dependency>
        <dependency>
            <groupId>javax.servlet.jsp</groupId>
            <artifactId>jsp-api</artifactId>
            <version>2.1</version>
            <scope>provided</scope>
        </dependency>
        <!-- 文件上传 -->
        <dependency>
            <groupId>commons-fileupload</groupId>
            <artifactId>commons-fileupload</artifactId>
            <version>1.2.2</version>
        </dependency>
        <dependency>
            <groupId>commons-discovery</groupId>
            <artifactId>commons-discovery</artifactId>
            <version>0.5</version>
        </dependency>

        <!-- fastJson json数组有关的 -->
        <dependency>
            <groupId>com.alibaba</groupId>
            <artifactId>fastjson</artifactId>
            <version>1.1.26</version>
        </dependency>

        <!-- 使用 Jackson 把 Java 对象转换成 JSON 字串 -->
        <dependency>
            <groupId>org.codehaus.jackson</groupId>
            <artifactId>jackson-mapper-asl</artifactId>
            <version>1.9.11</version>
        </dependency>
        <!-- mysql驱动包 -->
        <dependency>
            <groupId>mysql</groupId>
            <artifactId>mysql-connector-java</artifactId>
            <version>5.1.29</version>
        </dependency>

        <!-- 添加oracle jdbc driver -->
        <dependency>
            <groupId>ojdbc</groupId>
            <artifactId>ojdbc</artifactId>
            <version>14</version>
        </dependency>

        <!-- 阿里巴巴数据源包 -->
        <dependency>
            <groupId>com.alibaba</groupId>
            <artifactId>druid</artifactId>
            <version>1.0.2</version>
        </dependency>
        <!-- 日志文件管理包 -->
        <!-- log start -->
        <dependency>
            <groupId>log4j</groupId>
            <artifactId>log4j</artifactId>
            <version>${log4j.version}</version>
        </dependency>
        <!-- <dependency> <groupId>org.slf4j</groupId> <artifactId>slf4j-api</artifactId>
            <version>${slf4j.version}</version> </dependency> <dependency> <groupId>org.slf4j</groupId>
            <artifactId>slf4j-log4j12</artifactId> <version>${slf4j.version}</version>
            </dependency> -->


        <!-- aspectjweaver.jar这是Spring AOP所要用到的包 -->
        <dependency>
            <groupId>org.aspectj</groupId>
            <artifactId>aspectjweaver</artifactId>
            <version>1.7.1</version>
        </dependency>

        <!-- hibernate4 -->
        <dependency>
            <groupId>org.hibernate</groupId>
            <artifactId>hibernate-core</artifactId>
            <version>${hibernate.version}</version>
        </dependency>
        <dependency>
            <groupId>org.hibernate</groupId>
            <artifactId>hibernate-entitymanager</artifactId>
            <version>${hibernate.version}</version>
        </dependency>
        <dependency>
            <groupId>org.hibernate</groupId>
            <artifactId>hibernate-ehcache</artifactId>
            <version>${hibernate.version}</version>
        </dependency>
        <dependency>
            <groupId>org.hibernate.javax.persistence</groupId>
            <artifactId>hibernate-jpa-2.0-api</artifactId>
            <version>1.0.1.Final</version>
        </dependency>

        <!-- spring mvc -->
        <dependency>
            <groupId>org.springframework</groupId>
            <artifactId>spring-webmvc</artifactId>
            <version>${spring.version}</version>
        </dependency>

        <!-- spring3 -->
        <dependency>
            <groupId>org.springframework</groupId>
            <artifactId>spring-core</artifactId>
            <version>${spring.version}</version>
        </dependency>
        <dependency>
            <groupId>org.springframework</groupId>
            <artifactId>spring-context</artifactId>
            <version>${spring.version}</version>
        </dependency>
        <dependency>
            <groupId>org.springframework</groupId>
            <artifactId>spring-jdbc</artifactId>
            <version>${spring.version}</version>
        </dependency>
        <dependency>
            <groupId>org.springframework</groupId>
            <artifactId>spring-beans</artifactId>
            <version>${spring.version}</version>
        </dependency>
        <dependency>
            <groupId>org.springframework</groupId>
            <artifactId>spring-web</artifactId>
            <version>${spring.version}</version>
        </dependency>
        <dependency>
            <groupId>org.springframework</groupId>
            <artifactId>spring-expression</artifactId>
            <version>${spring.version}</version>
        </dependency>
        <dependency>
            <groupId>org.springframework</groupId>
            <artifactId>spring-orm</artifactId>
            <version>${spring.version}</version>
        </dependency>
        <dependency>
            <groupId>org.springframework</groupId>
            <artifactId>spring-test</artifactId>
            <version>${spring.version}</version>
        </dependency>

        <!-- axis2 -->

        <dependency>
            <groupId>org.apache.axis</groupId>
            <artifactId>axis</artifactId>
            <version>${axis.version}</version>
        </dependency>

        <dependency>
            <groupId>org.apache.ws.commons.axiom</groupId>
            <artifactId>axiom-impl</artifactId>
            <version>1.2.20</version>
        </dependency>

        <!-- axis2 -->

        <dependency>
            <groupId>javax.xml</groupId>
            <artifactId>jaxrpc-api</artifactId>
            <version>1.1</version>
        </dependency>

        <dependency>
            <groupId>wsdl4j</groupId>
            <artifactId>wsdl4j</artifactId>
            <version>1.6.3</version>
        </dependency>

    </dependencies>
</project>
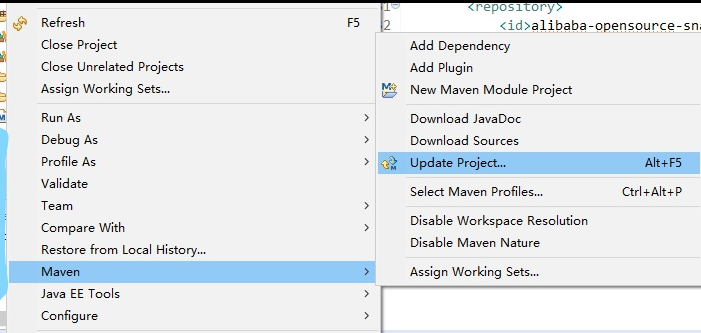
8.更新maven架包

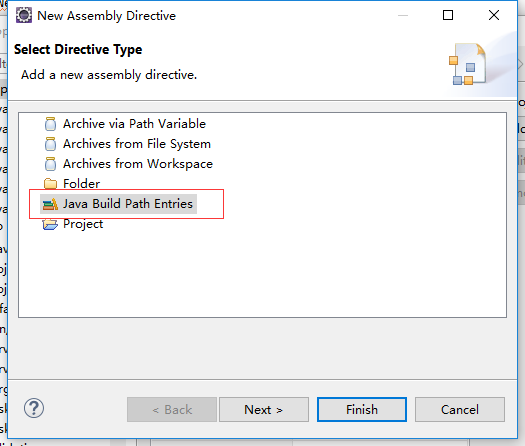
8.右键 properties => deployment assembly 添加

9.在 src/main/resources 添加配置文件
hibernate.dialect=org.hibernate.dialect.MySQLDialect
driverClassName=com.mysql.jdbc.Driver
validationQuery=SELECT 1
jdbc_url=jdbc:mysql://localhost:3306/test?useUnicode=true&characterEncoding=utf-8
jdbc_username=root
jdbc_password=root

hibernate.hbm2ddl.auto=none
hibernate.show_sql=true
hibernate.format_sql=ture

sessionInfoName=sessionInfo
<?xml version="1.0" encoding="UTF-8"?>
<beans xmlns="http://www.springframework.org/schema/beans" xmlns:xsi="http://www.w3.org/2001/XMLSchema-instance" xmlns:tx="http://www.springframework.org/schema/tx" xmlns:aop="http://www.springframework.org/schema/aop" xsi:schemaLocation="
http://www.springframework.org/schema/beans
http://www.springframework.org/schema/beans/spring-beans-3.0.xsd
http://www.springframework.org/schema/tx
http://www.springframework.org/schema/tx/spring-tx-3.0.xsd
http://www.springframework.org/schema/aop
http://www.springframework.org/schema/aop/spring-aop-3.0.xsd
">

    <!-- JNDI(通过Tomcat)方式配置数据源 -->
    <!-- <bean id="dataSource" class="org.springframework.jndi.JndiObjectFactoryBean"> <property name="jndiName" value="${jndiName}"></property> </bean> -->


    <!-- 配置数据源 -->
    <bean name="dataSource" class="com.alibaba.druid.pool.DruidDataSource" init-method="init" destroy-method="close">
        <property name="url" value="${jdbc_url}" />
        <property name="username" value="${jdbc_username}" />
        <property name="password" value="${jdbc_password}" />

        <!-- 初始化连接大小 -->
        <property name="initialSize" value="0" />
        <!-- 连接池最大使用连接数量 -->
        <property name="maxActive" value="20" />
        <!-- 连接池最大空闲 -->
        <property name="maxIdle" value="20" />
        <!-- 连接池最小空闲 -->
        <property name="minIdle" value="0" />
        <!-- 获取连接最大等待时间 -->
        <property name="maxWait" value="60000" />

        <!-- <property name="poolPreparedStatements" value="true" /> <property name="maxPoolPreparedStatementPerConnectionSize" value="33" /> -->

        <property name="validationQuery" value="${validationQuery}" />
        <property name="testOnBorrow" value="false" />
        <property name="testOnReturn" value="false" />
        <property name="testWhileIdle" value="true" />

        <!-- 配置间隔多久才进行一次检测,检测需要关闭的空闲连接,单位是毫秒 -->
        <property name="timeBetweenEvictionRunsMillis" value="60000" />
        <!-- 配置一个连接在池中最小生存的时间,单位是毫秒 -->
        <property name="minEvictableIdleTimeMillis" value="25200000" />

        <!-- 打开removeAbandoned功能 -->
        <property name="removeAbandoned" value="true" />
        <!-- 1800秒,也就是30分钟 -->
        <property name="removeAbandonedTimeout" value="1800" />
        <!-- 关闭abanded连接时输出错误日志 -->
        <property name="logAbandoned" value="true" />

        <!-- 监控数据库 -->
        <!-- <property name="filters" value="stat" /> -->
        <property name="filters" value="mergeStat" />
    </bean>

    <!-- 配置hibernate session工厂 -->
    <bean id="sessionFactory" class="org.springframework.orm.hibernate4.LocalSessionFactoryBean">
        <property name="dataSource" ref="dataSource" />
        <property name="hibernateProperties">
            <props>
                <prop key="hibernate.hbm2ddl.auto">${hibernate.hbm2ddl.auto}</prop>
                <prop key="hibernate.dialect">${hibernate.dialect}</prop>
                <prop key="hibernate.show_sql">${hibernate.show_sql}</prop>
                <prop key="hibernate.format_sql">${hibernate.format_sql}</prop>
            </props>
        </property>

        <!-- 自动扫描注解方式配置的hibernate类文件 -->
        <property name="packagesToScan">
            <list>
                <value>cn.com.test.model</value>
            </list>
        </property>
    </bean>


    <!-- 配置事务管理器 -->
    <bean name="transactionManager" class="org.springframework.orm.hibernate4.HibernateTransactionManager">
        <property name="sessionFactory" ref="sessionFactory"></property>
    </bean>

    <!-- 注解方式配置事物 -->
    <tx:annotation-driven transaction-manager="transactionManager" />

    <!-- 拦截器方式配置事物 -->
    <tx:advice id="transactionAdvice" transaction-manager="transactionManager">
        <tx:attributes>
            <tx:method name="add*" />
            <tx:method name="save*" />
            <tx:method name="update*" />
            <tx:method name="modify*" />
            <tx:method name="edit*" />
            <tx:method name="delete*" />
            <tx:method name="remove*" />
            <tx:method name="repair" />
            <tx:method name="deleteAndRepair" />

            <tx:method name="get*" propagation="SUPPORTS" />
            <tx:method name="find*" propagation="SUPPORTS" />
            <tx:method name="load*" propagation="SUPPORTS" />
            <tx:method name="search*" propagation="SUPPORTS" />
            <tx:method name="datagrid*" propagation="SUPPORTS" />

            <tx:method name="is*" />

            <tx:method name="*" propagation="SUPPORTS" />
        </tx:attributes>
    </tx:advice>
    <aop:config>
        <aop:pointcut id="transactionPointcut" expression="execution(* cn.com.test.service..*.*(..))" />
        <aop:advisor pointcut-ref="transactionPointcut" advice-ref="transactionAdvice" />
    </aop:config>


</beans>
<?xml version="1.0" encoding="UTF-8"?>
<beans xmlns="http://www.springframework.org/schema/beans"
    xmlns:context="http://www.springframework.org/schema/context" xmlns:p="http://www.springframework.org/schema/p"
    xmlns:mvc="http://www.springframework.org/schema/mvc" xmlns:xsi="http://www.w3.org/2001/XMLSchema-instance"
    xsi:schemaLocation="http://www.springframework.org/schema/beans
      http://www.springframework.org/schema/beans/spring-beans-3.0.xsd
      http://www.springframework.org/schema/context
      http://www.springframework.org/schema/context/spring-context-3.1.xsd
      http://www.springframework.org/schema/mvc
      http://www.springframework.org/schema/mvc/spring-mvc-3.0.xsd">

    <!-- 注解扫描包 -->
    <context:component-scan base-package="cn.com.test.controller" />

    <!-- <context:component-scan /> -->
    <!-- 扫描指定的包中的类上的注解,常用的注解有: -->
    <!-- @Controller 声明Action组件 -->
    <!-- @Service 声明Service组件 @Service("xxxService") -->
    <!-- @Repository 声明Dao组件 -->
    <!-- @Component 泛指组件, 当不好归类时. -->
    <!-- @RequestMapping("/menu") 请求映射 -->
    <!-- @Resource 用于注入,( j2ee提供的 ) 默认按名称装配,@Resource(name="beanName") -->
    <!-- @Autowired 用于注入,(spring提供的) 默认按类型装配 -->
    <!-- @Transactional( rollbackFor={Exception.class}) 事务管理 -->
    <!-- @ResponseBody将内容或对象作为 HTTP 响应正文返回,并调用适合HttpMessageConverter的Adapter转换对象,写入输出流 -->
    <!-- @Scope("prototype") 设定bean的作用域 -->


    <!-- 开启MVC注解,表示SpringMVC支持注解功能 做了很多事情,不包括添加自己定义的拦截器 -->
    <mvc:annotation-driven />

    <!-- 拦截器 -->
    <!-- <mvc:interceptors> <bean class="com.phn.inteceptor" /> </mvc:interceptors> -->

    <!-- 方案一 (二选一)表示不对静态资源如CSS、JS、HTML等进行拦截 -->
    <!-- 当在web.xml 中 DispatcherServlet使用 <url-pattern>/</url-pattern> 映射时,能映射静态资源,使用默认的servlet来响应请求 -->
    <!-- <mvc:default-servlet-handler /> -->

    <!-- 方案二 (二选一) 静态资源映射 -->
    <mvc:resources mapping="/images/**" location="/WEB-INF/images/" />
    <mvc:resources mapping="/css/**" location="/WEB-INF/css/" />
    <mvc:resources mapping="/js/**" location="/WEB-INF/js/" />

    <bean
        class="org.springframework.web.servlet.mvc.annotation.AnnotationMethodHandlerAdapter">
        <property name="messageConverters">
            <list>
                <bean
                    class="org.springframework.http.converter.StringHttpMessageConverter">
                    <property name="supportedMediaTypes">
                        <list>
                            <value>text/plain;charset=UTF-8</value>
                        </list>
                    </property>
                </bean>
                <bean
                    class="org.springframework.http.converter.StringHttpMessageConverter">
                    <property name="supportedMediaTypes">
                        <list>
                            <value>text/html;charset=UTF-8</value>
                        </list>
                    </property>
                </bean>
            </list>
        </property>
    </bean>


    <!-- 启动Spring MVC的注解功能,完成请求和注解POJO的映射 -->
    <bean
        class="org.springframework.web.servlet.mvc.annotation.AnnotationMethodHandlerAdapter">
        <property name="messageConverters">
            <list>
                <bean
                    class="org.springframework.http.converter.StringHttpMessageConverter">
                    <property name="supportedMediaTypes">
                        <list>
                            <value>text/plain;charset=UTF-8</value>
                        </list>
                    </property>
                </bean>
                <bean
                    class="org.springframework.http.converter.json.MappingJacksonHttpMessageConverter">
                    <property name="supportedMediaTypes">
                        <list>
                            <value>application/json;charset=UTF-8</value>
                        </list>
                    </property>
                </bean>
            </list>
        </property>
    </bean>

    <!-- 定义视图分解器 -->
    <bean id="viewResolver"
        class="org.springframework.web.servlet.view.InternalResourceViewResolver">
        <property name="viewClass">
            <value>org.springframework.web.servlet.view.InternalResourceView
            </value>
        </property>
        <!-- 设置前缀,即视图所在的路径 -->
        <property name="prefix" value="/WEB-INF/views/" />
        <!-- 设置后缀,即视图的扩展名 -->
        <property name="suffix" value=".jsp" />
    </bean>
    <bean name="/success.do" class="org.springframework.web.servlet.mvc.ParameterizableViewController">
        <property name="viewName" value="success" />
    </bean>
    <bean name="/error.do" class="org.springframework.web.servlet.mvc.ParameterizableViewController">
        <property name="viewName" value="error" />
    </bean>

    <bean name="/" class="org.springframework.web.servlet.mvc.ParameterizableViewController">
        <property name="viewName" value="login" />
    </bean>

</beans>
<?xml version="1.0" encoding="UTF-8"?>
<beans xmlns="http://www.springframework.org/schema/beans" xmlns:xsi="http://www.w3.org/2001/XMLSchema-instance" xmlns:context="http://www.springframework.org/schema/context" xsi:schemaLocation="
http://www.springframework.org/schema/beans
http://www.springframework.org/schema/beans/spring-beans-3.0.xsd
http://www.springframework.org/schema/context
http://www.springframework.org/schema/context/spring-context-3.0.xsd
">

    <!-- 引入属性文件 -->
    <context:property-placeholder location="classpath:config.properties" />

    <!-- 自动扫描dao和service包(自动注入) -->
    <context:component-scan base-package="cn.com.test.dao,cn.com.test.service" />

</beans>
10.修改web.xml
<?xml version="1.0" encoding="UTF-8"?>
<web-app xmlns:xsi="http://www.w3.org/2001/XMLSchema-instance"
    xmlns="http://java.sun.com/xml/ns/javaee"
    xsi:schemaLocation="http://java.sun.com/xml/ns/javaee http://java.sun.com/xml/ns/javaee/web-app_3_0.xsd"
    version="3.0">
    <display-name>hello</display-name>
    <!-- spring hibernate -->
    <context-param>
        <param-name>contextConfigLocation</param-name>
        <param-value>classpath:spring.xml,classpath:spring-hibernate.xml</param-value>
    </context-param>
    <!-- openSessionInView配置 -->
    <filter>
        <filter-name>openSessionInViewFilter</filter-name>
        <filter-class>org.springframework.orm.hibernate4.support.OpenSessionInViewFilter</filter-class>
        <init-param>
            <param-name>singleSession</param-name>
            <param-value>true</param-value>
        </init-param>
    </filter>
    <!--spring mvc 配置 -->
    <servlet>
        <servlet-name>springMVC</servlet-name>
        <servlet-class>org.springframework.web.servlet.DispatcherServlet</servlet-class>
        <init-param>
            <param-name>contextConfigLocation</param-name>
            <param-value>classpath:spring-mvc.xml</param-value>
        </init-param>
        <load-on-startup>1</load-on-startup> <!-- 是启动顺序,让这个Servlet随Servletp容器一起启动。 -->
    </servlet>

    <session-config>
        <session-timeout>30</session-timeout>
    </session-config>

    <servlet-mapping>
        <servlet-name>springMVC</servlet-name>
        <url-pattern>/</url-pattern> <!-- 会拦截/的请求。 -->
    </servlet-mapping>

    <!-- encodeing -->
    <filter>
        <filter-name>encodingFilter</filter-name>
        <filter-class>org.springframework.web.filter.CharacterEncodingFilter</filter-class>
        <init-param>
            <param-name>encoding</param-name>
            <param-value>UTF-8</param-value>
        </init-param>
        <init-param>
            <param-name>forceEncoding</param-name>
            <param-value>true</param-value>
        </init-param>
    </filter>
    <!-- encoding filter for jsp page -->
    <filter-mapping>
        <filter-name>encodingFilter</filter-name>
        <url-pattern>/*</url-pattern>
    </filter-mapping>


    <listener>
        <listener-class>org.springframework.web.context.ContextLoaderListener</listener-class>
    </listener>

    <welcome-file-list>
        <welcome-file>/WEB-INF/views/index.jsp</welcome-file>
        <welcome-file>index.jsp</welcome-file>
    </welcome-file-list>
</web-app>
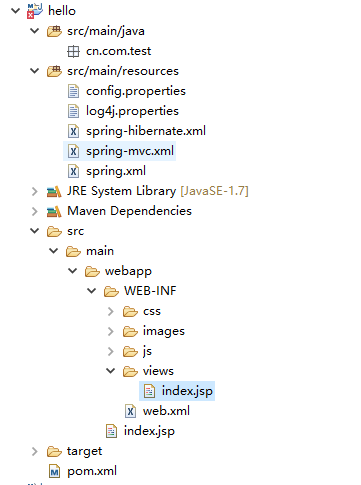
11.在 web-info 下新建views文件夹,在views文件夹下新建index.jsp
12.项目结构如下图
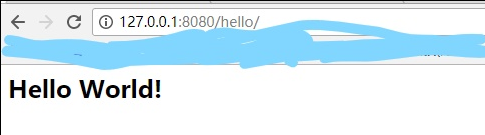
13.项目添加到tomcat下