css技巧篇
1.将一段文字置于容器的水平中点:
.demo{
      text-align:center;
     }
2.容器水平居中
.demo{
       margin:0 auto;
     }
3.文字的垂直居中
前提是:单行文字的水平居中,只要将行高与容器的高设置为相等就可以了;
如:<div id="container">010-123456789</div>
然后css:
div#container{
                height:35px;
                line-height:35px;
             }
4.容器的垂直居中
<div id="big">
<div id="small">
</div>
</div>
css:(思路:大容器relative,小容器absolute;坐上角下移动50%,最后将它的margin-top上移自身高度的50%,同理设置水平居中)
div#big{ position:relative;
         height:480px;
         border:1px solid red;
}
div#small{
    position:absolute;
    top:50%;
    left:50%;
    height:240px;
    width:400px;
    border:1px solid green;
    margin-top:-120px;
    margin-left:-200px;
}
5.图片的宽度自适应
如何使得较大的图片,能够自适应小容器呢?
ps:ie6中不支持max-width,所以在遇到ie6的时候,我们要使用ie条件注释;
将语句该为:img{width:100%}
div#demo1{
     height:100px;
     width:100px;
     border:1px solid red;
}
div#demo1 img{
    max-width:100%;
    max-height:100%;
}
6.3D按钮
ps:效果挺丑的(左上部边框设为浅色,右下部边框设为深色即可)
div input{
    background:#888;
    border:1px solid;
    border-color:#999 #777 #777 #999;
}
效果:
 (这里有一篇较好的文章:http://vanseodesign.com/css/css-navigation-buttons/)
7.font属性的快捷写法
div#info{
    font-family:Arial, Helvetica, sans-serif;
    font-size:24px;
    font-weight:normal;
    font-variant:small-caps; /* font-variant 只能对英文起作用 而且被修改的英文,字体全部大写出现*/
    font-style:italic;
    font-height:150%;
    /*
     对于font-style的解释:
     normal | italic | oblique
     从预览效果我们看不出有什么区别,其实从上表中的定义就可以看出了,italic是
     字体的一个属性,也就是说并非所有字体都有这个italic属性,对于没有italic属性的字体,
     可以使用oblique将该字体进行倾斜设置。
    */
}
/*下面这个是简写*/
div#info{
    font:Arial, Helvetica, sans-serif 24px normal small-caps italic 150%;
}
效果:

与之相似的还有:
.demo{
    margin:10px; /*上 右 下 左 都是 10px*/
    margin:10px 10px;/*上下10px 左右10px*/
    margin:10px 10px 10px; /* 上  左右  下 都是10px*/
    margin:10px 10px 10px 10px;/*上 右 下 左 的顺序来赋值滴呀*/
}
.demo1{
    background:#aaa url(images/border.png) no-repeat top left;
  /*backgournd:颜色  资源链接                 重复方式    位置  */
}
8.link状态的设置顺序
必须遵守这个顺序滴呀,要不然没有效果滴呀
a:link
a:visited
a:hover
a:active
9.IE条件注释
你可以利用条件注释,设置只对ie产生作用的css
<!--[if IE]>
<link rel="stylesheet" type="text/css" href="#" />
<![endif]-->
<!--[if IE 6]> - targets IE6 only -->
<!--[if gt IE 6]> - targets IE7 and above -->
<!--[if lt IE 6]> - targets IE5.5 and below -->
<!--[if gte IE 6]> - targets IE6 and above -->
<!--[if lte IE 6]> - targets IE6 and below -->
12 css 的优先性;
行内样式>id样式>class样式>标签名样式>
实例:<div id="ID" class="CLASS" style="color:black"></div>
div< .class <div .class <#id <div#id <#id .class <div#id .class
ps:div#id 这种选择器中,中间不能有空格,也就是说 (div #id)这样写是无效滴呀
13.!important 的使用滴呀
结果:字体颜色显示为红色了
(!important 用来强制使一个样式避免在之后的编码中被修改,遗憾的是IE不支持。)
/*
  这里补充一下 important 在css 中的使用滴啊
  在css中通过对某一个样式的声明!important
  可以更改默认的css样式优先级规则;
  使用该条语句的具有最高级别的优先权;

*/
div{
    color:red !important;
    /*默认级别中 div 设置样式级别最低;
     但是加了 !important之后 就变为最高了:
    */
}
.info{
    color:blue;
}
div #info{
    color:green;
}
div#info{
     color:red !important;
     color:green;
     color:black;
     /*结果显示黑色,不过加了!important 之后,结果就变了red*/

}
14.IE6的min-height
IE6 不支持 min-height
 .element {
    min-height: 500px;
    height: auto !important;
    height: 500px;
  }
共有三条CSS语句,
第一句是针对其他浏览器设置最小高度,
第三句是针对IE设置最小高度,
第二句则是让其他浏览器覆盖第三句的设置。
方式二:
.element {
    min-height: 500px;
    _height: 500px;/*_height IE6能读取*/
  }
15.font-size基准
浏览器的缺省字体大小是16px ,你可以先将基准字体大小设为10px;
  body{
       font-size:62.5%;
      }
后面同一采用em作为字体单位:2.4em就表示了24px;
如:
h1{
    font-size:2.4 em;
  }
16. Text-transform 和 Font-Varint

Font-Variant用于将字体变成小型的大写字母(即与小写字母等高的大写字母)
17.CSS重置
css重置用于取消浏览器的内置样式;
具体参考:http://meyerweb.com/eric/thoughts/2007/05/01/reset-reloaded/
http://yui.github.io/yui2/
18.用图片来充当列表标志
ps:这种方式,只是在设置我们的li的背景,关于它的具体应用,请看另外的一篇文章(关于ul的);
ul{
     list-style:none;
}
ul li{
    background-image:url(images/border.png);
    background-repeat:no-repeat;
    /*然后在根据实际情况 条件文字和图片之间的距离滴呀*/
}
19.透明度的改变
.ele{
    filter:alpha(opacity:50);/*ie*/
    -moz-opacity:0.5;
    -khtml-opacity:0.5;
    opacity:0.5;
}
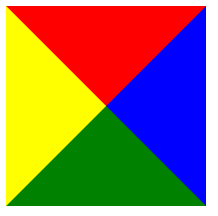
20.css绘制三角形
css:
.triangle{
    border-color:red blue green yellow;
    border-style:solid;
    border-width:100px 100px 100px 100px;
    height:0;
    width:0;
}
效果:
然后我们只显示其中的一条边框就ok了
.triangle{
    border-color:transparent transparent green transparent;
    border-style:solid;
    border-width:0px 100px 100px 100px;
    height:0;
    width:0;
}
效果:
 (这就是我们的额三角形了)
21.静止自动换行
当然,你可以首先将装文字的容器width设置大一些或者:
.demo{
    white-space:nowrap;
}
22.用图片替换文字
有时候,我们需要在标题栏中使用图片;但是又必须保证搜索引擎能够读到标题;
h1{
    text-indent:-99999px;/*用来控制文本的额缩进的呀;文字向左缩,直至看不到为止*/
    background:url(images/02.jpg);
    width:200px;
    height:50px;
}
23.获得焦点额表单元素
input:focus{
     /*outline:2px solid yellow; 内边框*/
    /*border:10px solid red; 一般不会这么设置*/
    background:yellow;
}
24.CSS提示框
a.toolTip{
     position:relative;
}
a.toolTip span{
     display:none;
     padding:5px;
     width:280px;
}
a:hover{
    background:#fff; /*background-color is a must for IE6*/
}
a.toolTip:hover span{
       display:inline;
       position:absolute;
}
25.border padding 向内
 div#container{
     width:200px;
     height:200px;
     margin:0 auto;
     padding:50px;
     border:10px solid #ccc;
    /*我们知道,当设置了border和pading的时候,content中的width和height;
      是200和200,多出来的border和padding是向外延伸的,
      某些情况下回影响到我们的布局滴呀!
      不过现在有了:
          box-sizing
        他们就是向内的滴呀
     */
     -webkit-box-sizing:border-box;
     -moz-box-sizing:border-box;
     box-sizing:border-box;
 }
效果:(ps:-webkit- 和-moz- 前缀。这可以启用特定浏览器实验中的特性。同时记住它是支持IE8+)

26清除浮动,
我这里是方式之一:
div#top{
     height:200px;
     width:200px;
     border:1px solid red;
 }
 div#top img{
     float:right;
 }
效果:

解决方式之一:加入overflow: auto; zoom: 1(关于清除浮动,这潭水很深,后面慢慢总结滴呀)