Springboot中的配置文件有application.yml,application.yaml,application.properties
1 相同点
1.1 位置问题
1.1.1 location proiroty
创建Spring Boot项目时,默认 resources 目录下就有一个application.properties 文件,可以在 application.properties 文件中进行项目配置,但是这个文件并非唯一的配置文件,在 Spring Boot 中,一共有 4 个地方可以存放该配置文件,并按照如下优先级依次降低,如下:
- 当前项目根目录的config目录下 (file指当前项目根目录 file:./config/ )
- 当前项目根目录下 (file:./ )
- resource目录的config目录下(classpath指类路径,等同于当前项目的resources目录 classpath:/config/)
- resource目录下(classpath:/)

springboot项目启动时,默认会从如上四个位置依次查找配置文件属性并加载。
1.1.2 manually set or add configuration paths
On the other hand, we can manually set configuration paths.
- specify it in ide:
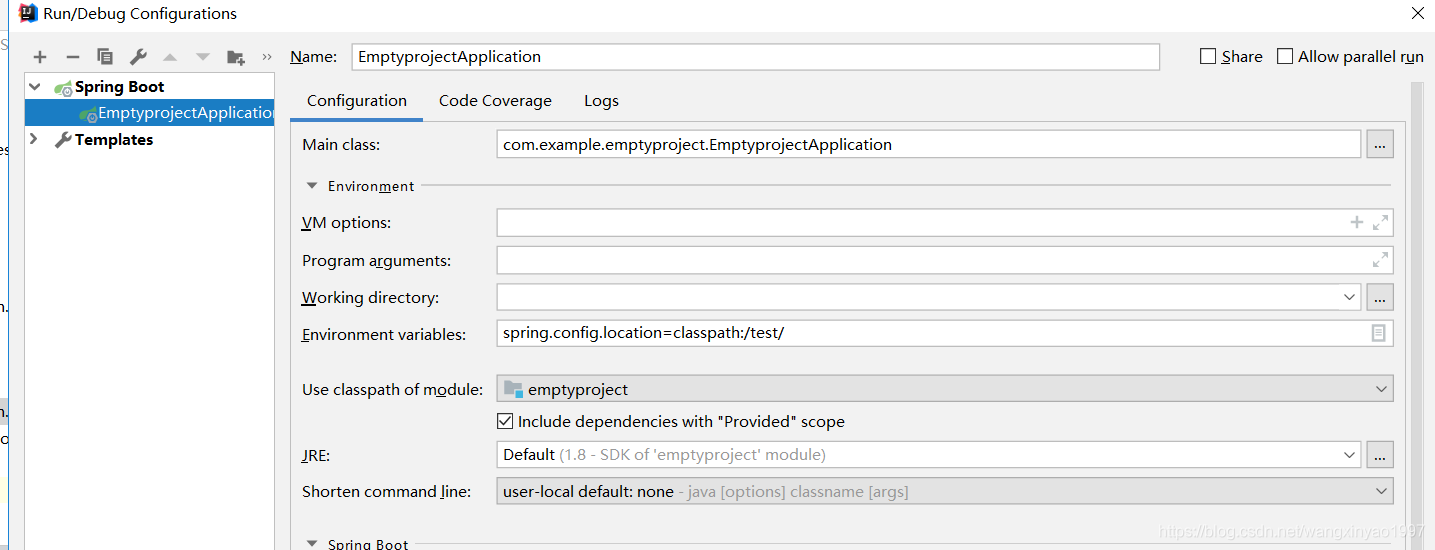
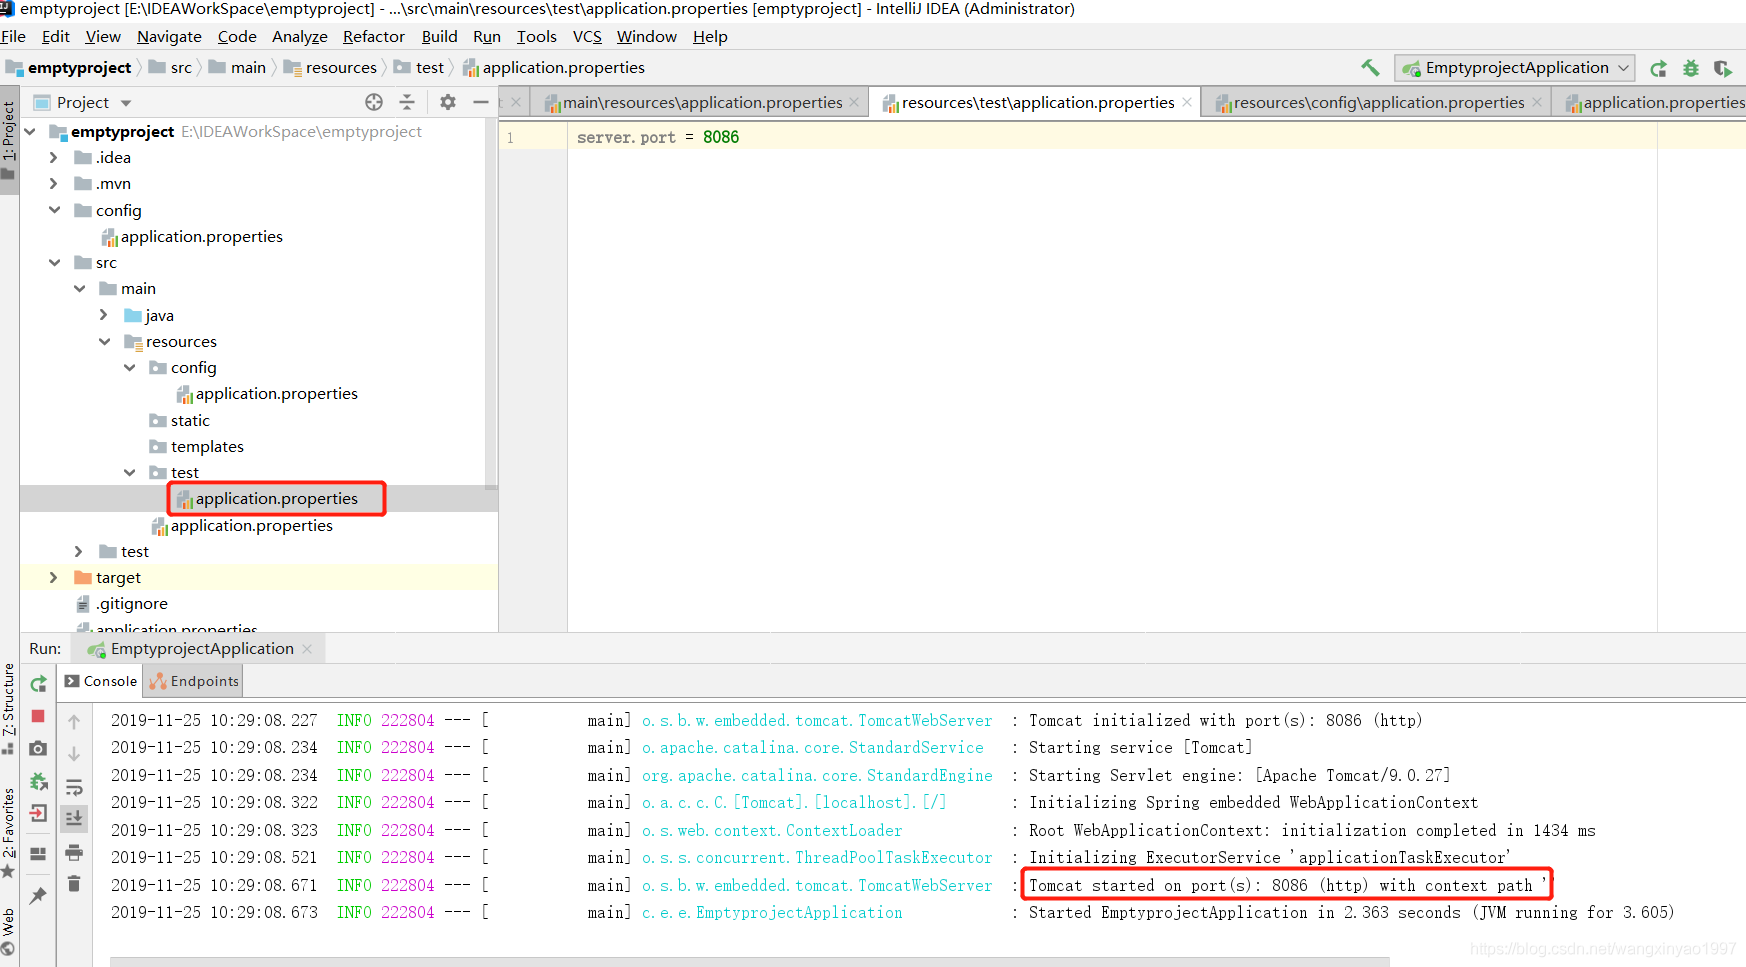
eg. 在resource目录下创建一个test目录,test目录下创建一个application.properties配置文件,但这个文件不会自动加载,这就需要我们通过spring.config.location去指定配置文件位置,此时启动项目,项目将以 classpath:/test/application.properties 配置文件启动如下:
启动springboot项目,运行结果如下:
- specify it in the command:
nohup java -jar java-test.jar --spring.config.location=./conf/ --spring.profiles.active=dev --server.port=8000 > spring.log 2>&1 &
- add locations in the java code:
@SpringBootApplication
@EnableJpaAuditing
@EnableScheduling
@EnableAsync
@EnableJpaRepositories(basePackages = "run.halo.app.repository", repositoryBaseClass = BaseRepositoryImpl.class)
public class Application extends SpringBootServletInitializer {

    public static void main(String[] args) {
        // Customize the spring config location
        System.setProperty("spring.config.additional-location", "file:${user.home}/.halo/,file:${user.home}/halo-dev/");

        // Run application
        SpringApplication.run(Application.class, args);
    }

    @Override
    protected SpringApplicationBuilder configure(SpringApplicationBuilder application) {
        System.setProperty("spring.config.additional-location", "file:${user.home}/.halo/,file:${user.home}/halo-dev/");
        return application.sources(Application.class);
    }
}
1.1.3 spring.config.location and spring.config.additional-location
- spring.config.location 直接使用该路径下的配置文件,不会再处理其他配置文件
源码如下:
private Set<String> getSearchLocations() {
    if (this.environment.containsProperty(CONFIG_LOCATION_PROPERTY)) {
        return getSearchLocations(CONFIG_LOCATION_PROPERTY);
    }
    Set<String> locations = getSearchLocations(CONFIG_ADDITIONAL_LOCATION_PROPERTY);
    locations.addAll(
            asResolvedSet(ConfigFileApplicationListener.this.searchLocations, DEFAULT_SEARCH_LOCATIONS));
    return locations;
}
- spring.config.additional-location 额外增加该路径下的配置文件,但还会使用默认的locations.
只不过spring.config.additional-location指定的路径优先级比默认的高。
例如,追加的目录为 classpath:/custom-config/,file:./custom-config/,其搜索的顺序如下:
file:./custom-config/
classpath:/custom-config/
file:./config/
file:./
classpath:/config/
classpath:/
referred link: https://blog.csdn.net/zzhongcy/article/details/107200796
1.2 文件名问题
1.2.1 springboot multi-environment configuration
通常应用都会被安装到几个不同的环境(比如开发、测试、生产等),每个环境都会有一些参数是不一样的。
Spring Boot对此也提供了支持,配置文件的名称只要满足application-{profile}.yaml格式即可,其中{profile}对应环境的标识:
application-dev.yaml: 开发环境
application-test.yaml: 测试环境
application-prod.yaml: 生产环境
之后,需要在application.yaml中设置配置属性spring.profiles.active,其值对应{profile}的值。
如:spring.profile.active: dev,此时就会加载application.yaml和application-dev.yaml这两个配置文件的内容,两个文件中如有相同属性,会使用application-dev.yaml中的值。
但是,如果不设置spring.profiles.active,则还是使用application.yaml中的配置!
referred link:https://www.jianshu.com/p/21f9541e17d9
1.2.2 change the config file name
到这里可能就会有人发出疑问了,配置文件一定要是application.properties吗?我们知道配置文件后缀名properties是必须的,其实application其实是可以换的,但是因为在springboot项目中默认加载名为application,所以我们默认都写application,那如何更换名字呢?配置spring.config.name属性。
如:我们在resource目录下创建一个叫loadme.properties文件,然后在IEDA配置中去指定:
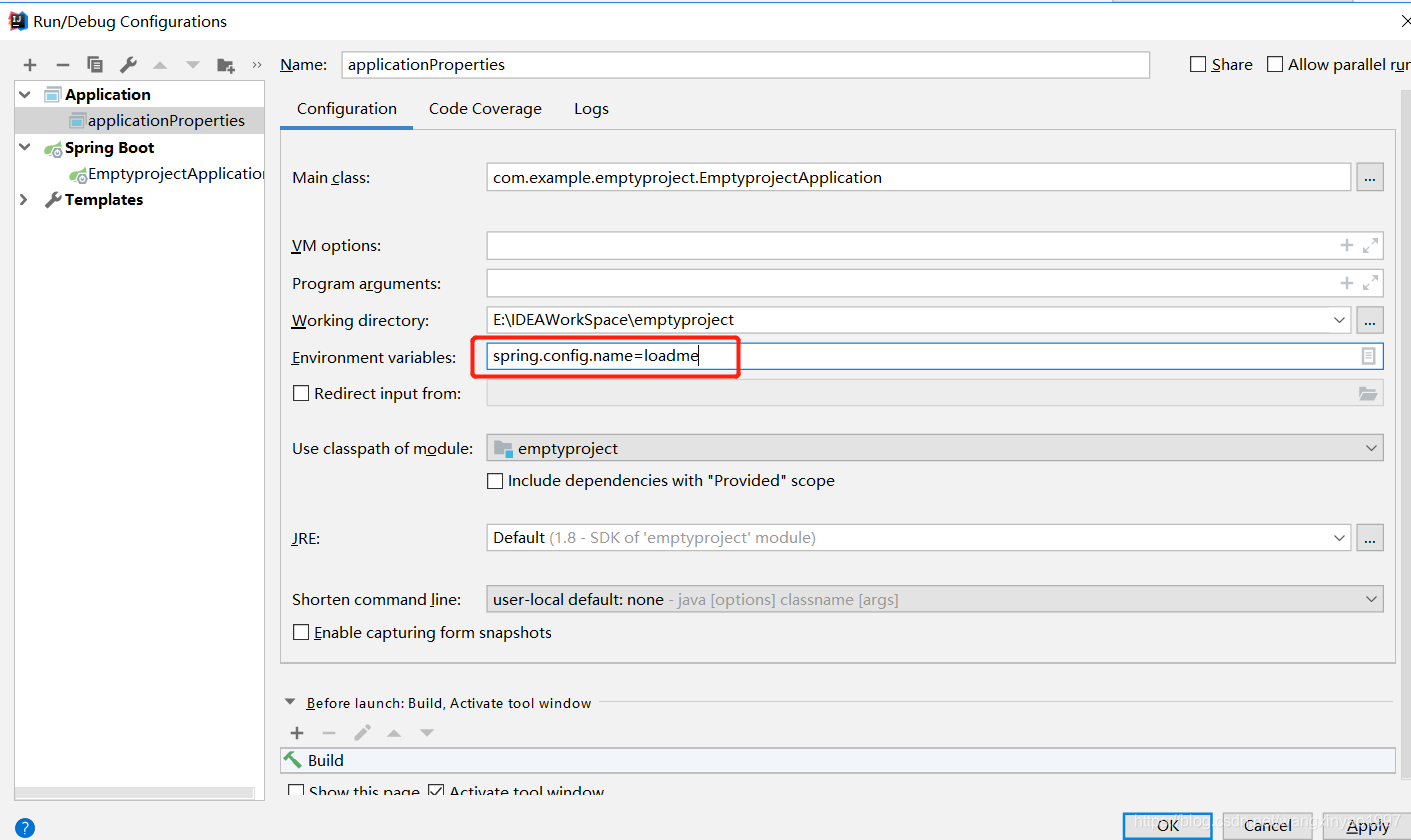
指定完成后,启动项目系统还是会从上面四个位置依次查找,不过是以loadme.properties名字进行查找,也就是配置文件可以自定义配置,只需要spring.config去指定配置
1.3 普通属性注入
springboot源于spring,所以在springboot项目中属性注入依然存在,springboot 项目中,默认会自动加载 application.properties 文件,所以简单的属性注入可以直接在这个配置文件中写
1.3.1 定义一个student类:
public class Student {

     private String userId;
     private String userName;
     private String sex;
}
1.3.2 在 application.properties 文件中定义属性
student.userId=9527
student.userName=王小帅
student.sex=男
1.3.3 直接通过 @Value 注解将这些属性注入到 Student对象中
@Component
public class Student {
    @Value("${student.userId}")
    private String userId;
    @Value("${student.userName}")
    private String userName;
    @Value("${student.sex}")
    private String sex;
}
1.3.4 对象本身也要交给 Spring 容器去管理,如果 Student 没有交给 Spring 容器,那么 Student 中的属性也无法从 Spring 容器中获取到值;配置完成后,可以选择在 Controller 中注入 Student 对象,启动项目,就可以看到属性已经注入到对象中,如:


etc: 一般来说们需要在resource目录下创建一个新的student.properties配置文件从而避免影响application.properties系统配置文件,student.properties和上面一样:
student.userId=9527
student.userName=王小帅
student.sex=男
此时,项目启动并不会自动的加载该配置文件,如果是在 XML 配置中,可以通过如下方式引用该 properties 文件:
<context:property-placeholder location="classpath:student.properties"/>
如果是在 Java 配置中,可以通过 @PropertySource 来引入配置:
@Component
@PropertySource("classpath:student.properties")
public class Student{
    @Value("${student.userId}")
    private String userId;
    @Value("${student.userName}")
    private String userName;
    @Value("${student.sex}")
    private String sex;
}
当然这是 Spring 中属性注入的一个简单用法,和 Spring Boot 没有任何关系.
1.4 类型安全 属性注入
Spring Boot 引入了类型安全的属性注入,如果采用 Spring 中的配置方式,当配置的属性非常多的时候,工作量大,容易出错,所以我们采用类型安全的属性注入来解决该问题,如下:
@Component
@PropertySource("classpath:student.properties")
@ConfigurationProperties(prefix = "student")

public class Student{
    private String userId;
    private String userName;
    private String sex;

    //省略getter/setter
}
引入 @ConfigurationProperties(prefix = “student”) 注解,配置了属性的前缀,此时会自动将 Spring 容器中对应的数据注入到对象对应的属性中,避免通过 @Value 注解依次注入了,减少工作量并且避免出错。
1.5 springboot也能使用 @Value注入application.yaml中的属性值
而且不用做任何配置,因为spingboot已经帮我们配置好了。
2 不同点
2.1 代码风格
properties语法:
server.port = 8080
server.address=127.0.0.1
server.servlet.context-path=/test
yml/yaml语法:
server:
  port: 8080
  servlet:
    context-path: /test
使用yml注意:
- 不同“等级” 用冒号隔开
- 次等级的前面是空格,不能使用制表符(tab)
- 冒号之后如果有值,那么冒号和值之间至少有一个空格,避免紧贴
- 要么用application.properties 要么用 application.yml,不要都用使自己混乱
- 总体来说,yaml不同于 properties 文件的无序,yaml 配置有序,这一点在有些配置中是非常有用的,例如在 Spring Cloud Zuul 的配置中,当我们配置代理规则6时,顺序就显得尤为重要 ; 当然 yaml 配置也不是万能的,例如,yaml 配置目前不支持 @PropertySource 注解等。
refrred link: https://blog.csdn.net/wangxinyao1997/article/details/103232944