说明:这里是Linux服务综合搭建文章的一部分,本文可以作为单独使用RedHat Enterprise Linux 7搭建软ISCSI的参考。
注意:这里所有的标题都是根据主要的文章(Linux基础服务搭建综合)的顺序来做的。
如果需要查看相关软件版本和主机配置要求,请根据目录自行查看。
Linux服务综合搭建的文章目录
====================================================
5、foundation通过Rsyslog搭建集中日志服务器
8、rhel7 JAVA web环境搭建(使用Tomcat8整合httpd)
10、foundation配置kerberos和NTP服务以及安全的NFS挂载
====================================================
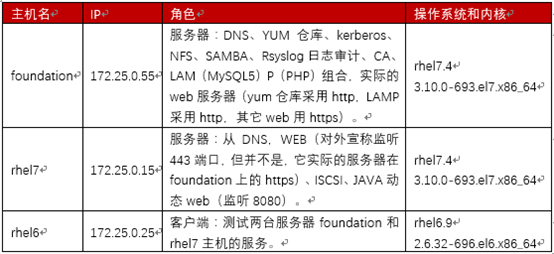
主机角色说明
12、rhel7 配置软ISCSI存储
12.1 服务端配置
12.1.1 服务端安装必要的软件并启动服务
1 [root@rhel7 /]# yum install targetcli
1 [root@rhel7 /]#yum install iscsi-initiator-utils #客户端必须装,服务端装不装不影响
防火墙开放ISCSI默认端口3260(如果要准备使用其他端口,记得一定要设置端口的SELinux上下文,
这个设置和httpd设置的方法是类似的,这里就不赘述了。)
1 [root@rhel7 /]# firewall-cmd --permanent --add-port=3260/tcp
2 success
3
4 [root@rhel7 /]# firewall-cmd --reload
5 success
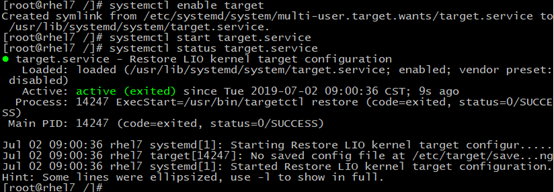
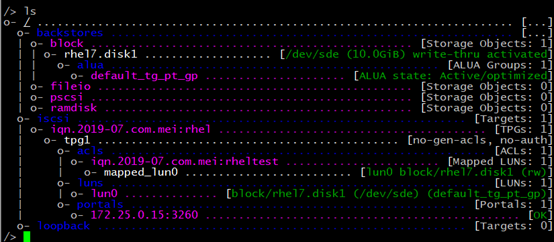
12.1.2 配置target
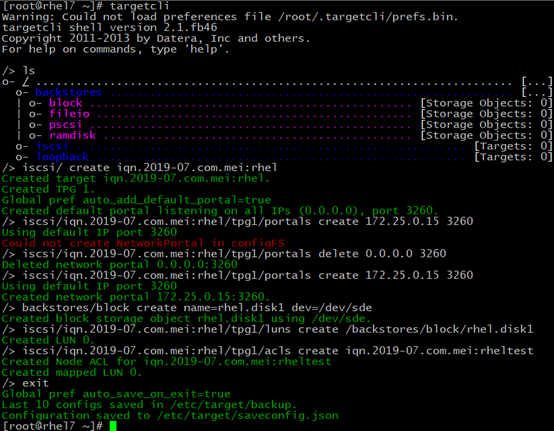
1 [root@rhel7 ~]# systemctl restart target
2
3 [root@rhel7 ~]# systemctl enable target.service
4 Created symlink from /etc/systemd/system/multi-user.target.wants/target.service to /usr/lib/systemd/system/target.service.
12.2 客户端配置
12.2.1 安装必要软件并启动服务
配置RHEL6.9的光盘镜像为YUM源,安装iscsi-initiator-utils
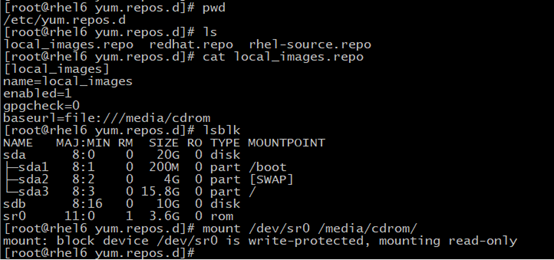
1 [root@rhel6 yum.repos.d]# yum install iscsi-initiator-utils
2
3 [root@rhel6 ~]# service iscsid restart

1 [root@rhel6 ~]# chkconfig iscsid on #开机自启动
12.2.2 配置TPG入口密码
1 InitiatorName=iqn.2019-07.com.mei:rhel6

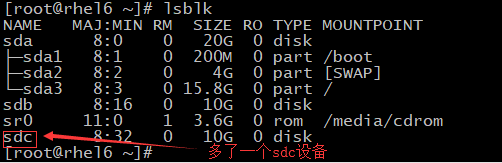
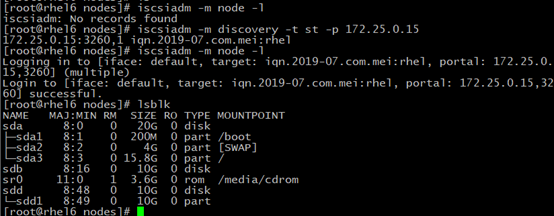
12.2.3 发现、登录和查看ISCSI
1 [root@rhel6 ~]# iscsiadm -m discovery -t st -p 172.25.0.15  #发现
2 [root@rhel6 ~]# iscsiadm -m node -l    #登录
3 [root@rhel6 ~]# iscsiadm -m session -P 1  #查看登录会话 数字越大查看的信息越详细


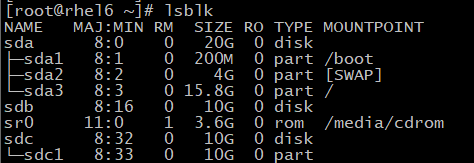
12.2.4 分区,使用
1 [root@rhel6 ~]# fdisk /dev/sdc
2 [root@rhel6 ~]# partprobe
3 [root@rhel6 ~]# mkfs.ext4 /dev/sdc1
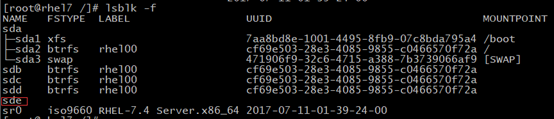
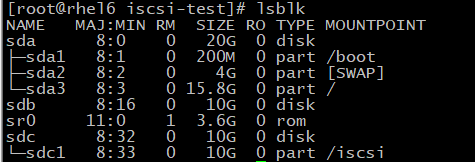
在RHEL6上分区,RHEL7上也能够看到分区情况

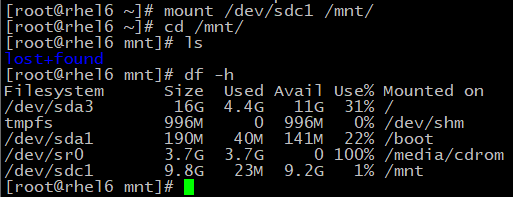
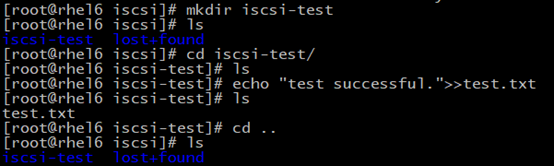
12.2.5 临时挂载使用测试
1 [root@rhel6 ~]# mount /dev/sdc1 /mnt/
1 [root@rhel6 ~]# iscsiadm -m node -u #退出登录

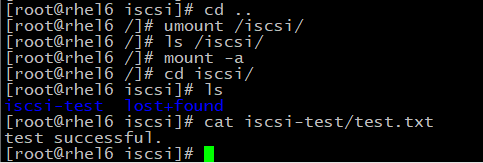
12.2.6 永久挂载(建议使用UUID挂载)

建议使用UUID挂载(以下是模拟路径改变,这种情况一般重启系统以后就好了):路径可能变,但是UUID是不会变的
1 [root@rhel6 ~]# blkid /dev/sdc1
2 /dev/sdc1: UUID="e0626e15-5aeb-43e6-8e7d-5ea80698673f" TYPE="ext4"

从上面我们发现之前挂载的时候设备路径还是/dev/sdc,现在变成了/dev/sdd,/dev/sdc直接消失了,所以我们最好使用UUID进行挂载。
下面我们使用UUID进行永久挂载:
[root@rhel6 nodes]# blkid /dev/sdd1
/dev/sdd1: UUID="e0626e15-5aeb-43e6-8e7d-5ea80698673f" TYPE="ext4"

vim /etc/fstab
UUID="e0626e15-5aeb-43e6-8e7d-5ea80698673f" /iscsi  xfs defaults,_netdev 0 0

1 [root@rhel6 ~]# mount -a
2
3 [root@rhel6 ~]# reboot

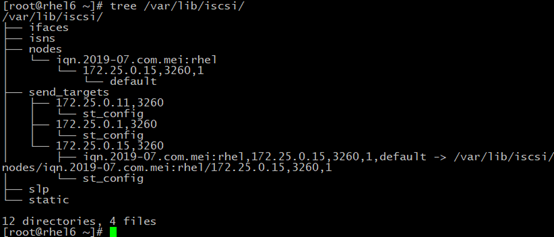
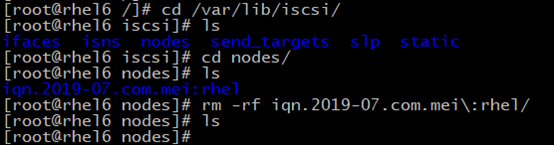
最后希望大家提意见、转发、评论和交流!!!