创建SpringBoot项目的两种方式
创建SpringBoot项目有两种方式,一个是通过Spring Initalizr脚手架来创建一个springboot工程,也可通过普通的maven工程来改造成一个springboot工程。
1.脚手架方式创建SpringBoot项目
IDEA开发工具为我们提供的一种快速创建springboot项目的一个功能(可视化界面),我们只需要点点鼠标就可以快速创建,缺点:必须在有网络的环境下才能创建,等下步骤会说到。
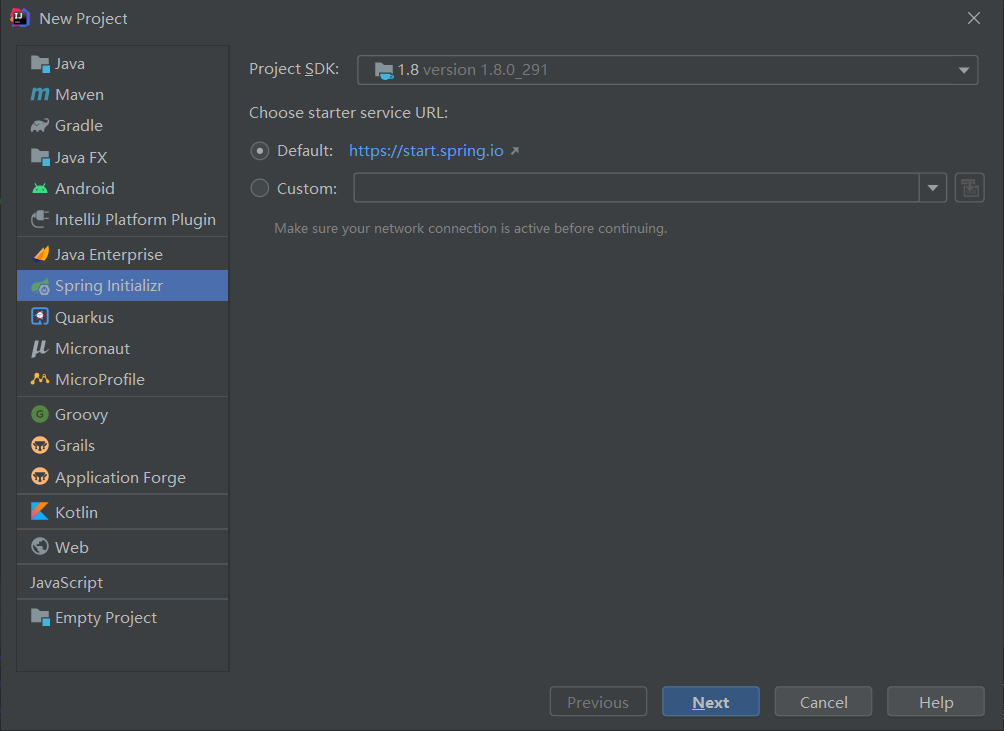
1).点击创建项目 file>new>project,选择Spring Initializr(脚手架),完成点击 next即可
- 选择好你的JDK版本环境(Project SDK)
https://start.spring.io/为脚手架的服务连接,是一个在线服务功能,需要联网才能使用,可以试着点进去看看。
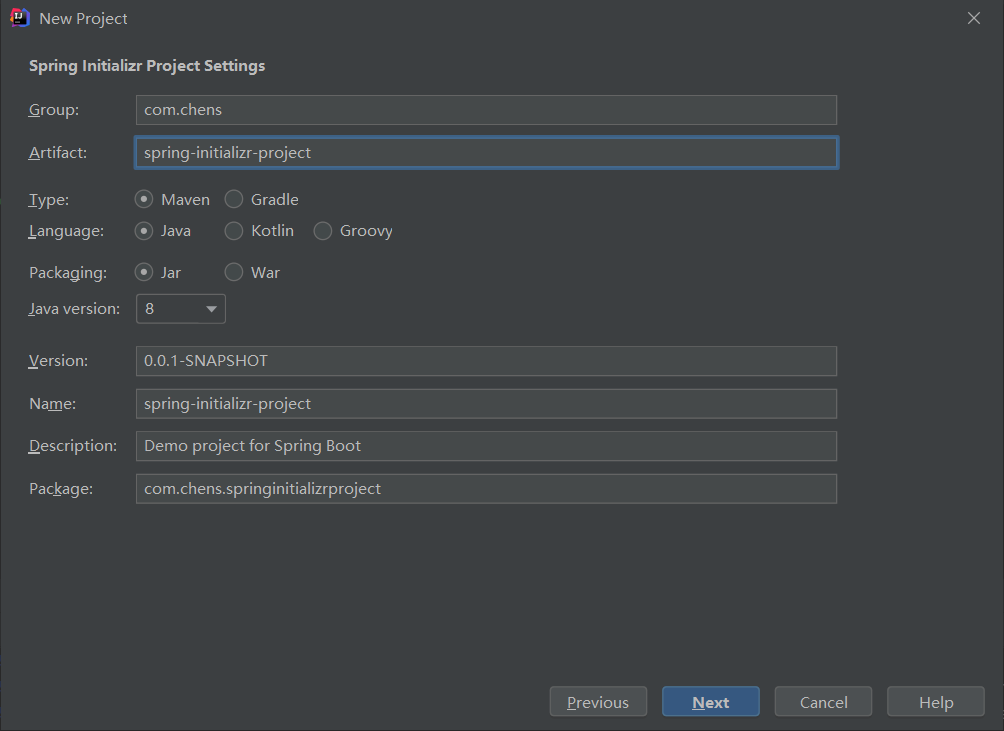
2)编辑项目的信息,编辑完成点击 next即可
- groupId:域名倒叙
- ArtifactId:项目名称
- 其他默认即可
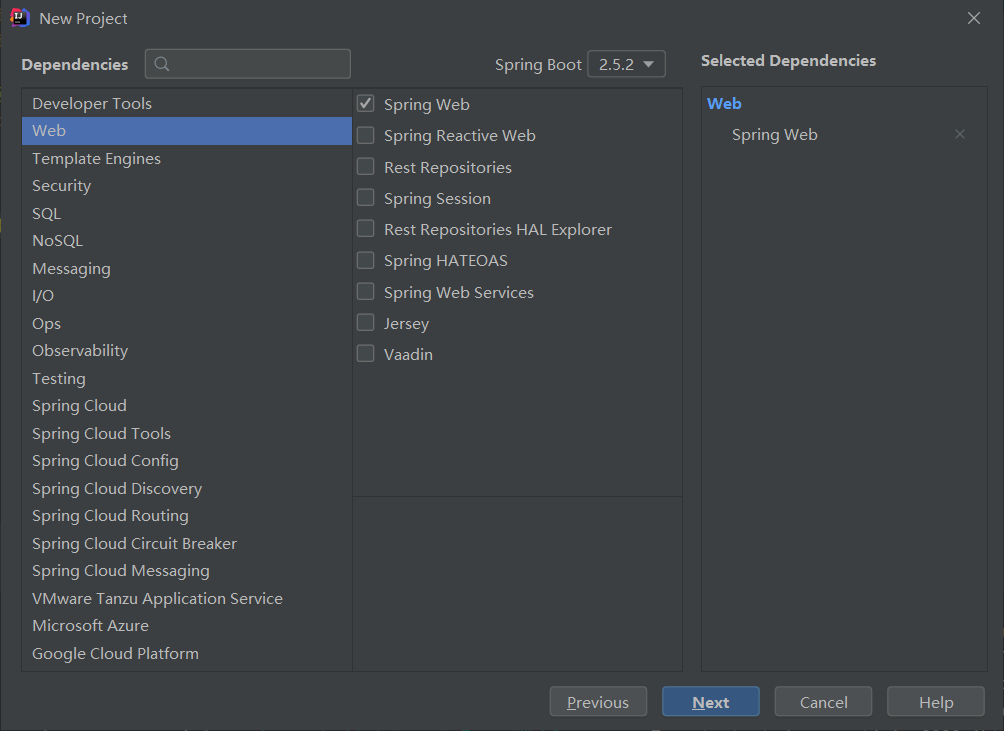
3)配置springboot项目的基础依赖,添加完成点击 next即可
- 选择项目需要添加的依赖勾选即可,已选择的依赖会在右侧显示处理
- 基础的springboot我们选择一个Spring Web依赖即可
4)确认项目的的信息以及路径,确认无误finish即可

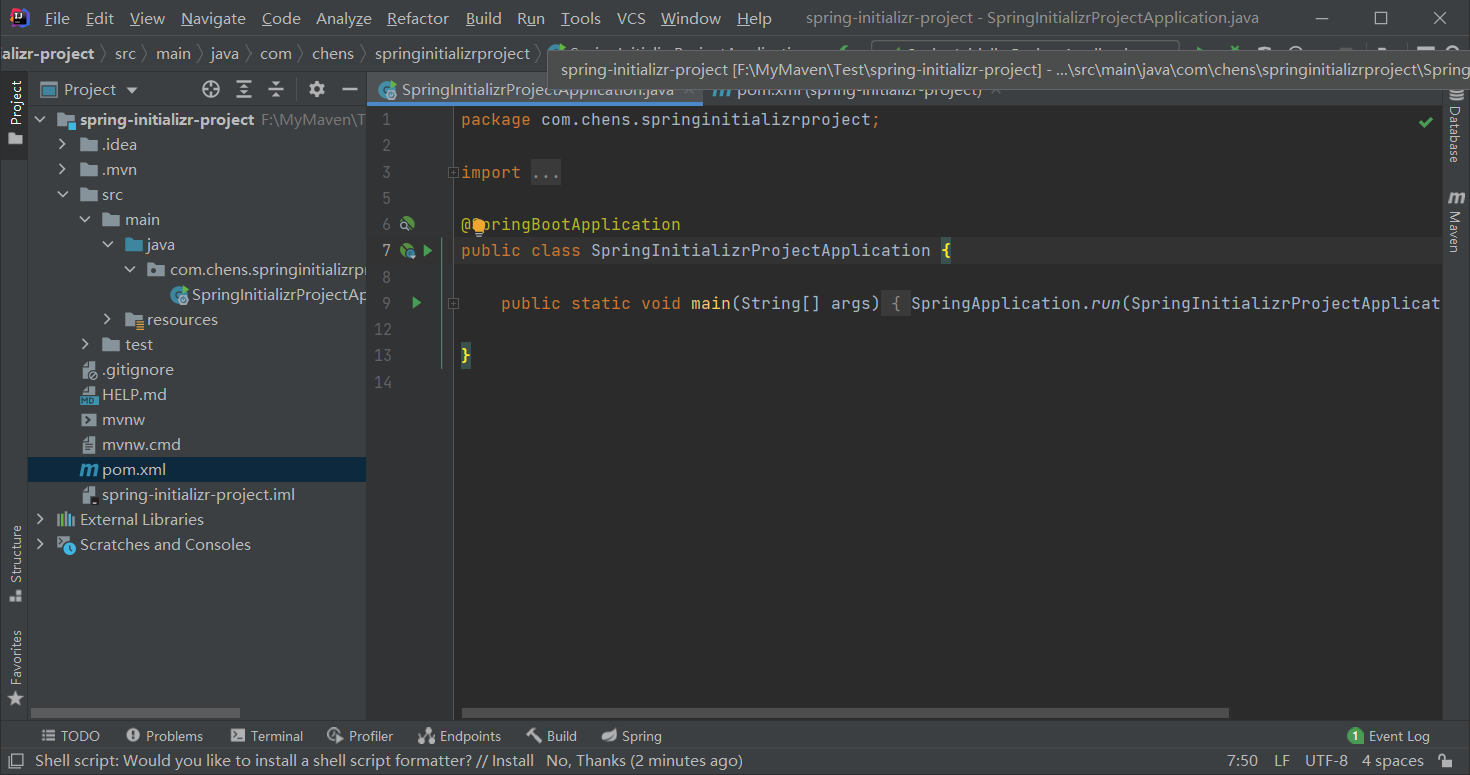
4)选择新窗口打开,项目界面如下,可以通过自动生成的启动类启动项目了
5)我们可以查看项目的pom.xml文件
<!--pom.xml-->
<?xml version="1.0" encoding="UTF-8"?>
<project xmlns="http://maven.apache.org/POM/4.0.0" xmlns:xsi="http://www.w3.org/2001/XMLSchema-instance"
         xsi:schemaLocation="http://maven.apache.org/POM/4.0.0 https://maven.apache.org/xsd/maven-4.0.0.xsd">
    <modelVersion>4.0.0</modelVersion>
    <!--父工程,有这个项目即为springboot项目-->
    <parent>
        <groupId>org.springframework.boot</groupId>
        <artifactId>spring-boot-starter-parent</artifactId>
        <version>2.5.2</version>
        <relativePath/> <!-- lookup parent from repository -->
    </parent>
    <!--本项目的详细信息-->
    <groupId>com.chens</groupId>
    <artifactId>spring-initializr-project</artifactId>
    <version>0.0.1-SNAPSHOT</version>
    <name>spring-initializr-project</name>
    <description>Demo project for Spring Boot</description>
    <properties>
        <java.version>1.8</java.version>
    </properties>
    <dependencies>
        <!--我们刚才选择的Spring Web依赖-->
        <dependency>
            <groupId>org.springframework.boot</groupId>
            <artifactId>spring-boot-starter-web</artifactId>
        </dependency>
		<!--脚手架自动添加的test测试依赖,如不需要可以删除-->
        <dependency>
            <groupId>org.springframework.boot</groupId>
            <artifactId>spring-boot-starter-test</artifactId>
            <scope>test</scope>
        </dependency>
    </dependencies>

    <build>
        <plugins>
            <!--springboot项目的maven打包插件-->
            <plugin>
                <groupId>org.springframework.boot</groupId>
                <artifactId>spring-boot-maven-plugin</artifactId>
            </plugin>
        </plugins>
    </build>
</project>
脚手架创建springboot工程步骤完毕。
总结:可以通过IDEA工具的脚手架(Spring Initializr)来配置springboot工程,初始化我们的项目信息,还能给我们的项目添加一些依赖,并且为我们生成了包路径,生成了启动类,可直接启动,缺点:需要网络。
2.Maven方式创建SpringBoot项目
通过更改pom.xml中的配置把项目变成springboot项目,优点:没有网络也可以创建springboot项目,只要我们mavne已经下载springboot项目的必要依赖。
- 步骤的核心就是修改我们maven文件中pom.xml文件,修改成上面的脚手架生成的pom.xml文件即可。
我们还是从创建maven项目实操开始吧。
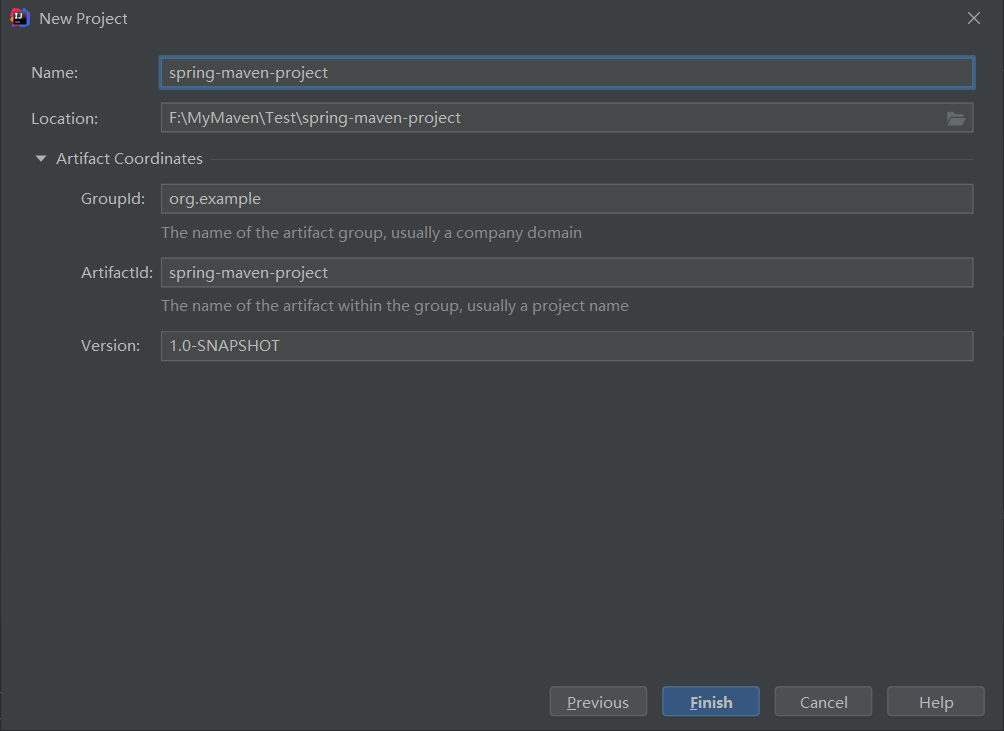
1)创建maven项目(file> new > project),点击下一步

2)编辑好项目的信息,点击finish完成,在新窗口打开
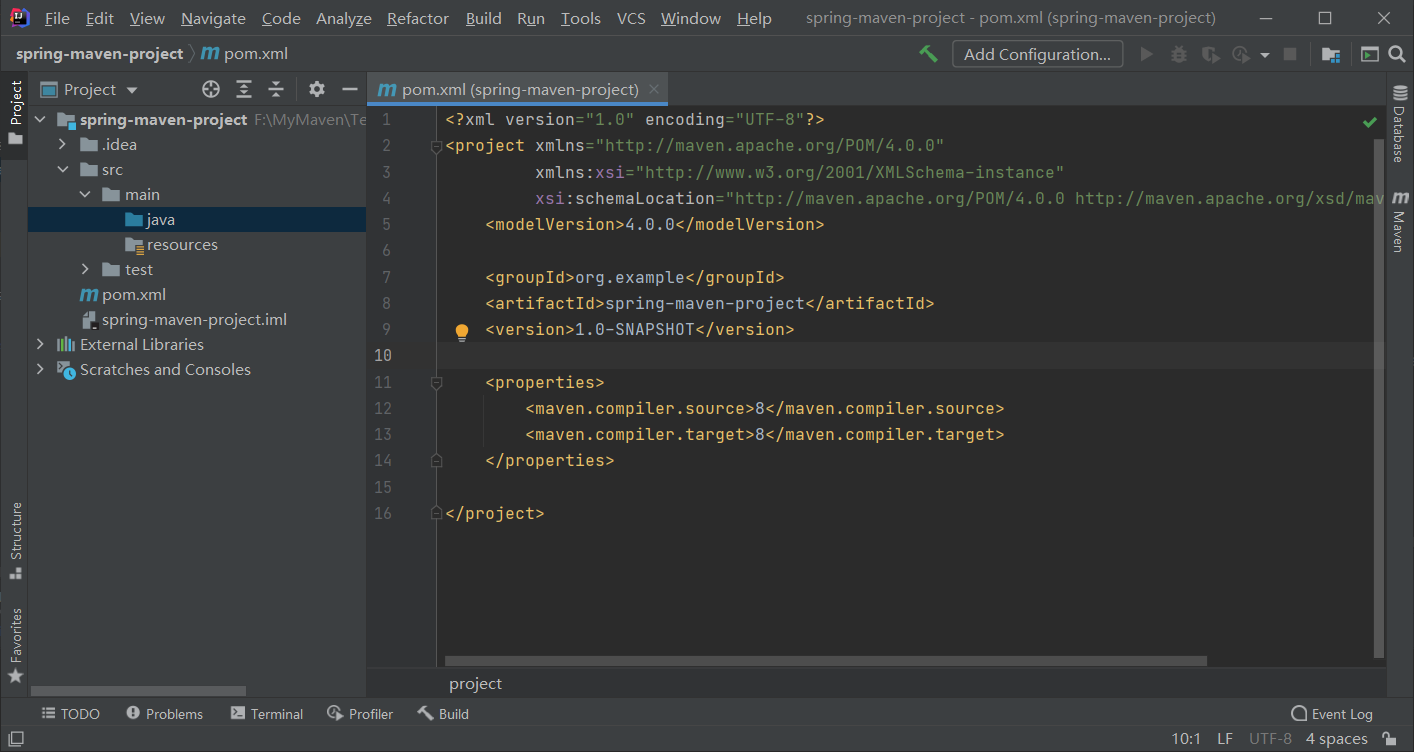
3)配置项目的pom.xm文件
这是刚创建好的maven空项目,我们可以给他配置成为一个springboot项目
- 父工程依赖
<!--父工程,有这个项目即为springboot项目-->
<parent>
    <groupId>org.springframework.boot</groupId>
    <artifactId>spring-boot-starter-parent</artifactId>
    <version>2.5.2</version>
    <relativePath/> <!-- lookup parent from repository -->
</parent>
- Spring Web依赖
<dependencies>
     <dependency>
           <groupId>org.springframework.boot</groupId>
           <artifactId>spring-boot-starter-web</artifactId>
      </dependency>
</dependencies>
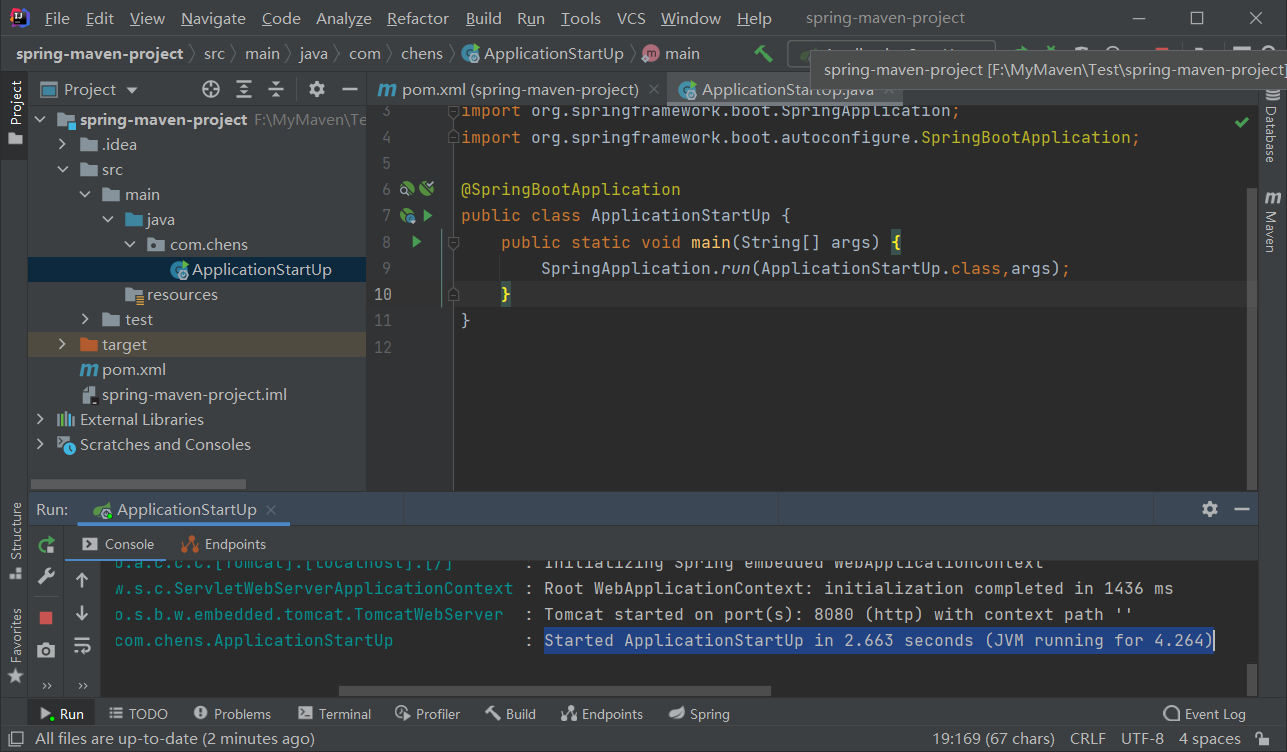
- 写项目的启动类
package com.chens;

import org.springframework.boot.SpringApplication;
import org.springframework.boot.autoconfigure.SpringBootApplication;

@SpringBootApplication
public class ApplicationStartUp {
    public static void main(String[] args) {
        SpringApplication.run(ApplicationStartUp.class,args);
    }
}
4)启动项目
5)我们可以查看项目的pom.xml文件
<?xml version="1.0" encoding="UTF-8"?>
<project xmlns="http://maven.apache.org/POM/4.0.0"
         xmlns:xsi="http://www.w3.org/2001/XMLSchema-instance"
         xsi:schemaLocation="http://maven.apache.org/POM/4.0.0 http://maven.apache.org/xsd/maven-4.0.0.xsd">
    <modelVersion>4.0.0</modelVersion>

    <!--父工程,有这个项目即为springboot项目-->
    <parent>
        <groupId>org.springframework.boot</groupId>
        <artifactId>spring-boot-starter-parent</artifactId>
        <version>2.5.2</version>
        <relativePath/> <!-- lookup parent from repository -->
    </parent>

    <groupId>org.example</groupId>
    <artifactId>spring-maven-project</artifactId>
    <version>1.0-SNAPSHOT</version>

    <properties>
        <maven.compiler.source>8</maven.compiler.source>
        <maven.compiler.target>8</maven.compiler.target>
    </properties>
    <dependencies>
        <dependency>
            <groupId>org.springframework.boot</groupId>
            <artifactId>spring-boot-starter-web</artifactId>
        </dependency>
    </dependencies>

</project>
maven方式创建springboot项目步骤完毕。
总结:通过修改maven 项目的pom.xml文件,添加父工程以及相关依赖我们就可手动创建springboot一个简单的工程了,当然它仅仅就是一个基础的springboot的工程而已,我们需要根据项目的实际需求,手动添加插件和依赖。