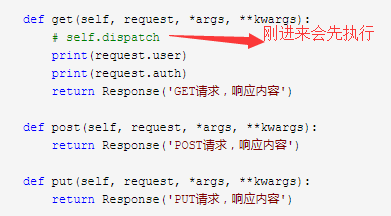
#!/usr/bin/env python
# -*- coding:utf-8 -*-
from rest_framework.views import APIView
from rest_framework.response import Response

class TestView(APIView):

    def get(self, request, *args, **kwargs):
        # self.dispatch
        print(request.user)
        print(request.auth)
        return Response('GET请求,响应内容')

    def post(self, request, *args, **kwargs):
        return Response('POST请求,响应内容')

    def put(self, request, *args, **kwargs):
        return Response('PUT请求,响应内容')
Django rest_Framework的基本流程:请求刚进来,会执行dispatch方法,大概的流程如下:第一步封装request,第二步:版本
第三步:认证->request.user,第三步:权限->self.check_permissions(request),第四步:节流self.check_throttles(request)
以前就是Django rest_Framework的基本流程。
认证的源码如下(只有认证源码流程):
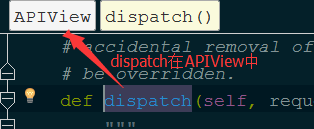
在上面刚开始请求进来,先不执行自己写的方法,如:(get、post、put),它会先执行dispatch方法,如果没有,就回去它的父类去找。
执行它父类的dispach
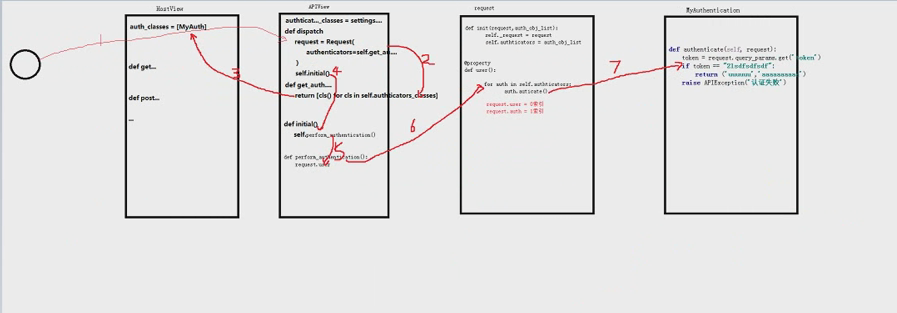
Django rest framework流程:
原来用CBV的时候它继承from django.views import View中的views方法,在写get,post方法 如:class HostView(view)
如果有Django rest Framework它就不用继承from django.views import View中的views方法,而是:
先导入:from rest_framework.views import APIView它就会继承APIView,不在继承django的views如:class AuthView(APIView):
from rest_framework.views import APIView 先导入APIView
from django.shortcuts import render,HttpResponse
class AuthView(APIView):                          继承APIView
    authentication_classes=[]
    def get(self,request):return Response('....’)
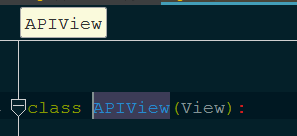
而在class AuthView(APIView)中它继承的APIView,而APIView它有继承了view,view它在rest_framework view 中如下图:
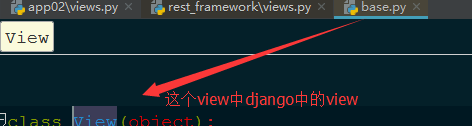
点击view它就会到django的view中,而这个view是以前CBV 中的那个view,如下图:
继承的这个类比原来django的这个类跟多了点功能,而它的本质还是和原来的一样先执行dispatch,自己有就执行自己的,没有就执行父类的,父类如果没有它就执行原来的dispatch 。
虽然以前它的本质一样但是现在却发生变化,现在它的request是rest_framework中的request,而原来的request是django中的request,如:
class HostView(APIView):

    def get(self,request,*args,**kwargs):
        # 原来request对象,django.core.handlers.wsgi.WSGIRequest
        # 现在的request对象,rest_framework.request.Request
        self.dispatch           请求进来先执行dispatch
        print(request.user)
        print(request.auth)
        return Response('主机列表')
1、请求进来先执行dispatch,而dispatch它在APIView中,dispatch在它里面有,先执行它自己,如果把它先删除它就会先执行默认的那个就是django提供,如下图:
请求进来它源码就是从现在开始如下:
源码的第一步:
    def dispatch(self, request, *args, **kwargs):    请求进来先执行dispatch
        """
        `.dispatch()` is pretty much the same as Django's regular dispatch,
        but with extra hooks for startup, finalize, and exception handling.
        """
        self.args = args                            dispatch先把参数获取到
        self.kwargs = kwargs
        #1、对request进行加工
        '''
源码进来的第一步 1、request对象中(它比原来的类中封装了好多):
         request,
         parsers=self.get_parsers(),
         authenticators=self.get_authenticators(),    这里面放的是两个列的对象
         negotiator=self.get_content_negotiator(),
         parser_context=parser_context
        '''
        request = self.initialize_request(request, *args, **kwargs)      在这执行了这个方法,它返回了request
        self.request = request
        self.headers = self.default_response_headers  # deprecate?

        try:
第二步:2
            self.initial(request, *args, **kwargs)

            # Get the appropriate handler method
            if request.method.lower() in self.http_method_names:
                 #在这执行反射
                handler = getattr(self, request.method.lower(),
                                  self.http_method_not_allowed)
            else:
                #反射后拿到结果
                handler = self.http_method_not_allowed
第三步:3.执行get/post/delete/put等函数
            response = handler(request, *args, **kwargs)        返回结果

        except Exception as exc:
            response = self.handle_exception(exc)
第四步:4、对返回结果再次加工
        self.response = self.finalize_response(request, response, *args, **kwargs)
        return self.response
在执行 request = self.initialize_request(request, *args, **kwargs)时,先去自己写的找,没有再去父类找,上面是自己没有就去父类找,如下图:

上面没有就去拿它的静态字段,如下图:

在这上面执行时request被加工,如下图:

源码执行的第二步:
    def initial(self, request, *args, **kwargs):
        """
        Runs anything that needs to occur prior to calling the method handler.
        """
        self.format_kwarg = self.get_format_suffix(**kwargs)

        # Perform content negotiation and store the accepted info on the request
        neg = self.perform_content_negotiation(request)
        request.accepted_renderer, request.accepted_media_type = neg

        # Determine the API version, if versioning is in use.
         2.1处理版本信息
        version, scheme = self.determine_version(request, *args, **kwargs)
        request.version, request.versioning_scheme = version, scheme

        # Ensure that the incoming request is permitted
          2.2认证授权
        self.perform_authentication(request)
          2.3权限验证
        self.check_permissions(request)
          2.4请求用户限制访问频率
        self.check_throttles(request)
执行源码第二步中的2.2认证授权:
 def initial(self, request, *args, **kwargs):
        """
        Runs anything that needs to occur prior to calling the method handler.
        """
        self.format_kwarg = self.get_format_suffix(**kwargs)

        # Perform content negotiation and store the accepted info on the request
        neg = self.perform_content_negotiation(request)
        request.accepted_renderer, request.accepted_media_type = neg

        # Determine the API version, if versioning is in use.
        version, scheme = self.determine_version(request, *args, **kwargs)
        request.version, request.versioning_scheme = version, scheme

        # Ensure that the incoming request is permitted
        self.perform_authentication(request)   执行这一步,点击就去如下图:
        self.check_permissions(request)
        self.check_throttles(request)
还是先找自己的,没有才执行以下的:
  def perform_authentication(self, request):
        """
        Perform authentication on the incoming request.

        Note that if you override this and simply 'pass', then authentication
        will instead be performed lazily, the first time either
        `request.user` or `request.auth` is accessed.
        """
        request.user    在这里request是传过来的request,不是原来的request
尽接着下一步它就会找user,如下图:
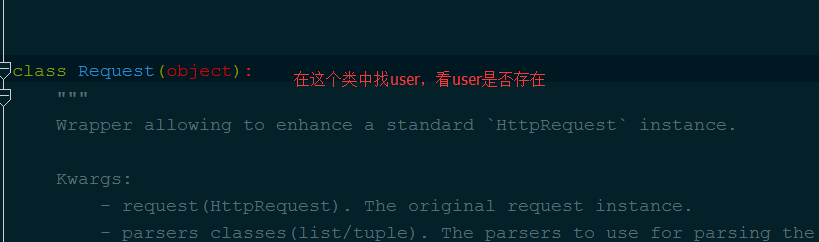
找到user :

def user(self):
        """
        Returns the user associated with the current request, as authenticated
        by the authentication classes provided to the request.
        """
        if not hasattr(self, '_user'):   如果没有user
            self._authenticate()        就会这行self._authenticate()这个方法,在找到这个方法
return self._user
    def _authenticate(self):
        """
        Attempt to authenticate the request using each authentication instance
        in turn.
        """
       循环对象列表
        for authenticator in self.authenticators:  在这里authenticators是那个对象列表,它循环这个对象列表
            try:
             执行每一个对象authenticate方法
                user_auth_tuple = authenticator.authenticate(self)     在这里它返回了两个值
            except exceptions.APIException:   没有验证成功就会报错
                self._not_authenticated()
                raise

            if user_auth_tuple is not None:
                self._authenticator = authenticator
                self.user, self.auth = user_auth_tuple      这里self.auth,self.user,就会有值,验证成功就会通过
                return

        self._not_authenticated()