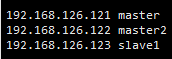
一、首先配置集群信息
1 vi /etc/hosts
二、安装zookeeper
1、解压至/usr/hadoop/下
1 tar -zxvf zookeeper-3.4.10.tar.gz -C /usr/hadoop/
2、进入/usr/hadoop/zookeeper-3.4.10/conf目录,将zoo_sample.cfg 复制为 zoo.cfg
cp /usr/hadoop/zookeeper-3.4.10/conf/zoo_sample.cfg /usr/hadoop/zookeeper-3.4.10/conf/zoo.cfg
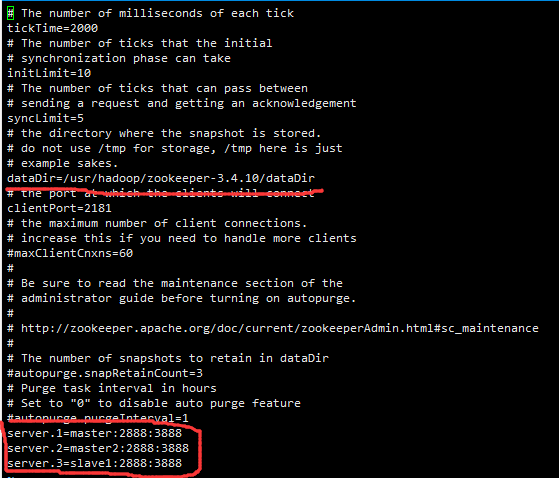
3、编辑zoo.cfg
4、新建dataDir目录
mkdir /usr/hadoop/zookeeper-3.4.10/dataDir/
5、向dataDir目录写入myid,mater为1,master2为2,slave1为3,对应着zoo.cfg的server.?
echo 1 > /usr/hadoop/zookeeper-3.4.10/dataDir/myid
6、将整个文件夹考入其他主机
1 scp -r /usr/hadoop/zookeeper-3.4.10/ master2:/usr/hadoop/
2 scp -r /usr/hadoop/zookeeper-3.4.10/ slave1:/usr/hadoop/
7、修改myid
1 echo 2> /usr/hadoop/zookeeper-3.4.10/dataDir/myid
2
3 echo 3> /usr/hadoop/zookeeper-3.4.10/dataDir/myid
三、安装hadoop
1、修改hadoo-env.sh yarn-env.sh mapred-env.sh

上面是我的java 路径,改为你自己的
2、修改core-site.xml


<?xml version="1.0" encoding="UTF-8"?>
<?xml-stylesheet type="text/xsl" href="configuration.xsl"?>
<!--
  Licensed under the Apache License, Version 2.0 (the "License");
  you may not use this file except in compliance with the License.
  You may obtain a copy of the License at

    http://www.apache.org/licenses/LICENSE-2.0

  Unless required by applicable law or agreed to in writing, software
  distributed under the License is distributed on an "AS IS" BASIS,
  WITHOUT WARRANTIES OR CONDITIONS OF ANY KIND, either express or implied.
  See the License for the specific language governing permissions and
  limitations under the License. See accompanying LICENSE file.
-->

<!-- Put site-specific property overrides in this file. -->

<configuration>

 <property><!--hdfs namenode集群访问地址-->
    <name>fs.defaultFS</name>
    <value>hdfs://ns1</value>
  </property>
    <property>
        <name>ha.zookeeper.quorum</name>
        <value>master:2181,master2:2181,slave1:2181</value>
    </property>
  <property><!--HA模式下 fsimage 存储位置、tmp数据-->
    <name>hadoop.tmp.dir</name>
    <value>file:/usr/hadoop/hadoop-2.8.5/haData</value>
  </property>

</configuration>
3、修改hdfs-site.xml
 1 <?xml version="1.0" encoding="UTF-8"?>
 2 <?xml-stylesheet type="text/xsl" href="configuration.xsl"?>
 3 <!--
 4   Licensed under the Apache License, Version 2.0 (the "License");
 5   you may not use this file except in compliance with the License.
 6   You may obtain a copy of the License at
 7
 8     http://www.apache.org/licenses/LICENSE-2.0
 9
10   Unless required by applicable law or agreed to in writing, software
11   distributed under the License is distributed on an "AS IS" BASIS,
12   WITHOUT WARRANTIES OR CONDITIONS OF ANY KIND, either express or implied.
13   See the License for the specific language governing permissions and
14   limitations under the License. See accompanying LICENSE file.
15 -->
16
17 <!-- Put site-specific property overrides in this file. -->
18
19
20 <configuration>
21
22         <!--HA-->
23         <property><!--hdfs namenode集群别名,与core-site.xml中一致 -->
24                 <name>dfs.nameservices</name>
25                 <value>ns1</value>
26         </property>
27         <property><!-- namenodes下面有两个NameNode,分别是nn1,nn2 -->
28                 <name>dfs.ha.namenodes.ns1</name>
29                 <value>master,master2</value>
30         </property>
31         <property><!-- nn1的RPC通信地址 -->
32                 <name>dfs.namenode.rpc-address.ns1.master</name>
33                 <value>master:9000</value>
34         </property>
35         <property><!-- nn1的http通信地址 -->
36                 <name>dfs.namenode.http-address.ns1.master</name>
37                 <value>master:50070</value>
38         </property>
39         <property><!-- nn2的RPC通信地址 -->
40                 <name>dfs.namenode.rpc-address.ns1.master2</name>
41                 <value>master2:9000</value>
42         </property>
43         <property><!-- nn2的http通信地址 -->
44                 <name>dfs.namenode.http-address.ns1.master2</name>
45                 <value>master2:50070</value>
46         </property>
47         <property><!-- 配置JournalNode组的访问地址,格式qjournal://host:port/journalId。 journalId需要与“nameserviceID”一致 -->
48                 <name>dfs.namenode.shared.edits.dir</name>
49                 <value>qjournal://master:8485;master2:8485;slave1:8485/ns1</value>
50         </property>
51         <property><!-- 指定JournalNode在本地磁盘存放数据的位置 -->
52                 <name>dfs.journalnode.edits.dir</name>
53                 <value>/usr/hadoop/hadoop-2.8.5/haData/journalData</value>
54         </property>
55         <property><!-- 启用ZKFC,NameNode自动切换功能 -->
56                 <name>dfs.ha.automatic-failover.enabled</name>
57                 <value>true</value>
58         </property>
59         <property><!-- NameNode自动切换配置失败后的解决方案 -->
60                 <name>dfs.client.failover.proxy.provider.ns1</name>
61                 <value>org.apache.hadoop.hdfs.server.namenode.ha.ConfiguredFailoverProxyProvider</value>
62         </property>
63         <property><!-- Fecing隔离机制指定,多个方案间换行分割 -->
64                 <name>dfs.ha.fencing.methods</name>
65                 <value>
66                         sshfence
67                         shell(/bin/true)
68                 </value>
69         </property>
70         <property><!-- sshfence隔离机制时需要ssh免登陆 -->
71                 <name>dfs.ha.fencing.ssh.private-key-files</name>
72                 <value>/root/.ssh/id_rsa</value>
73         </property>
74         <property><!-- 配置sshfence隔离机制超时时间 -->
75                 <name>dfs.ha.fencing.ssh.connect-timeout</name>
76                 <value>30000</value>
77         </property>
78
79         <property><!--指定 fsimage 元数据的存储位置-->
80         <name>dfs.namenode.name.dir</name>
81         <value>file:/usr/hadoop/hadoop-2.8.5/haData/dfs/name</value>
82         </property>
83
84         <property>
85         <name>dfs.datanode.data.dir</name>
86         <value>file:/usr/hadoop/hadoop-2.8.5/haData/dfs/data</value>
87         </property>
88
89
90 </configuration>
4、修改mapred-site.xml
 1 <?xml version="1.0"?>
 2 <?xml-stylesheet type="text/xsl" href="configuration.xsl"?>
 3 <!--
 4   Licensed under the Apache License, Version 2.0 (the "License");
 5   you may not use this file except in compliance with the License.
 6   You may obtain a copy of the License at
 7
 8     http://www.apache.org/licenses/LICENSE-2.0
 9
10   Unless required by applicable law or agreed to in writing, software
11   distributed under the License is distributed on an "AS IS" BASIS,
12   WITHOUT WARRANTIES OR CONDITIONS OF ANY KIND, either express or implied.
13   See the License for the specific language governing permissions and
14   limitations under the License. See accompanying LICENSE file.
15 -->
16
17 <!-- Put site-specific property overrides in this file. -->
18
19 <configuration>
20
21
22 <!-- 指定mr框架为yarn方式 -->
23     <property>
24         <name>mapreduce.framework.name</name>
25         <value>yarn</value>
26     </property>
27
28
29     <property>
30         <name>mapreduce.jobhistory.address</name>
31         <value>master:10020</value>
32     </property>
33     <property>
34         <name>mapreduce.jobhistory.webapp.address</name>
35         <value>master:19888</value>
36     </property>
37
38 </configuration>
5、修改yarn-site.xml
 1 <?xml version="1.0"?>
 2 <!--
 3   Licensed under the Apache License, Version 2.0 (the "License");
 4   you may not use this file except in compliance with the License.
 5   You may obtain a copy of the License at
 6
 7     http://www.apache.org/licenses/LICENSE-2.0
 8
 9   Unless required by applicable law or agreed to in writing, software
10   distributed under the License is distributed on an "AS IS" BASIS,
11   WITHOUT WARRANTIES OR CONDITIONS OF ANY KIND, either express or implied.
12   See the License for the specific language governing permissions and
13   limitations under the License. See accompanying LICENSE file.
14 -->
15 <configuration>
16
17 <property><!-- 启用YARN HA -->
18                 <name>yarn.resourcemanager.ha.enabled</name>
19                 <value>true</value>
20         </property>
21         <property><!-- 指定YARN cluster id -->
22                 <name>yarn.resourcemanager.cluster-id</name>
23                 <value>yrmc1</value>
24         </property>
25         <property><!-- 指定ResourceManager的名字 -->
26                 <name>yarn.resourcemanager.ha.rm-ids</name>
27                 <value>rm1,rm2</value>
28         </property>
29         <property><!-- 分别指定ResourceManager的地址 -->
30                 <name>yarn.resourcemanager.hostname.rm1</name>
31                 <value>master</value>
32         </property>
33         <property>
34                 <name>yarn.resourcemanager.hostname.rm2</name>
35                 <value>master2</value>
36         </property>
37         <property>
38                 <name>yarn.resourcemanager.zk-address</name>
39                 <value>master:2181,master2:2181,slave1:2181</value>
40         </property>
41         <property>
42                 <name>yarn.nodemanager.aux-services</name>
43                 <value>mapreduce_shuffle</value>
44         </property>
45         <property>
46                 <name>yarn.nodemanager.aux-services.mapreduce_shuffle.class</name>
47                 <value>org.apache.hadoop.mapred.ShuffleHandler</value>
48         </property>
49
50    <property>
51        <name>yarn.resourcemanager.recovery.enabled</name>
52        <value>true</value>
53     </property>
54
55     <!--指定resourcemanager的状态信息存储在zookeeper集群,默认是存放在FileSystem里面。-->
56     <property>
57        <name>yarn.resourcemanager.store.class</name>
58        <value>org.apache.hadoop.yarn.server.resourcemanager.recovery.ZKRMStateStore</value>
59     </property>
60
61 </configuration>
6、修改slaves
7、免密配置authorized_keys
(1)最好的免密配置就是在克隆之前免密自己 ,把自己的公钥放进authorized_keys里,这样以后克隆多台都不需要配置免密
(2)其次
ssh-keygen
一路回车
ssh-copy-id master2
ssh-copy-id slave1
8、拷贝hadoop到其他机器
scp -r /usr/hadoop/hadoop-2.8.5/ master2:/usr/hadoop/
scp -r /usr/hadoop/hadoop-2.8.5/ slave1:/usr/hadoop/
四、启动集群(第一次顺序必须严格执行)
1、为了方便起见将环境变量配置如下:
 1 export JAVA_HOME=/usr/java/jdk1.8.0_131
 2 export JRE_HOME=/usr/java/jdk1.8.0_131/jre
 3 export CLASSPATH=.:$JAVA_HOME/lib/dt.jar:$JAVA_HOME/lib/tools.jar:$JRE_HOME/lib
 4
 5 export HADOOP_HOME=/usr/hadoop/hadoop-2.8.5
 6 export HADOOP_PREFIX=$HADOOP_HOME
 7 export HADOOP_MAPRED_HOME=$HADOOP_HOME
 8 export HADOOP_COMMON_HOME=$HADOOP_HOME
 9 export HADOOP_HDFS_HOME=$HADOOP_HOME
10 export YARN_HOME=$HADOOP_HOME
11 export HADOOP_COMMON_LIB_NATIVE_DIR=$HADOOP_HOME/lib/native
12 export ZOOKEEPER_HOME=/usr/hadoop/zookeeper-3.4.10
13 export PATH=$PATH:$JAVA_HOME/bin:$HADOOP_HOME/sbin:$HADOOP_HOME/bin:$ZOOKEEPER_HOME/bin
14 export HADOOP_INSTALL=$HADOOP_HOME
2、启动zookeeper集群
在三台机器上全部启动
zkServer.sh start
查看三台机器选举情况
zkServer.sh status
一台loader,其余两天为flower ,其它情况为错,重新配置


3、在三台机器上启动 journalnode
hadoop-daemon.sh start journalnode
查看进程,如没有进程将不能格式化
4、在master上进行格式化,状态为0为成功
不是第一次装Hadoop的需要把name 、data 删除 ,否则将启动不了进程
hdfs namenode -format
5、在master上单独启动namenode
hadoop-daemon.sh start namenode
6、在master2上同步master,状态为0成功
hdfs namenode -bootstrapStandby
7、关闭master上namenode
hadoop-daemon.sh stop namenode
8、在master上格式化ZK,格式化成功标志为,在任意一台登陆zkCli 查看 ls / 会有 hadoop ha 目录
hdfs zkfc -formatZK
9、在master上启动集群
start-dfs.sh
10、启动yarn集群
start-yarn.sh
*以后启动顺序,先启动zookeeper集群,然后在master上执行 start-all.sh 即可
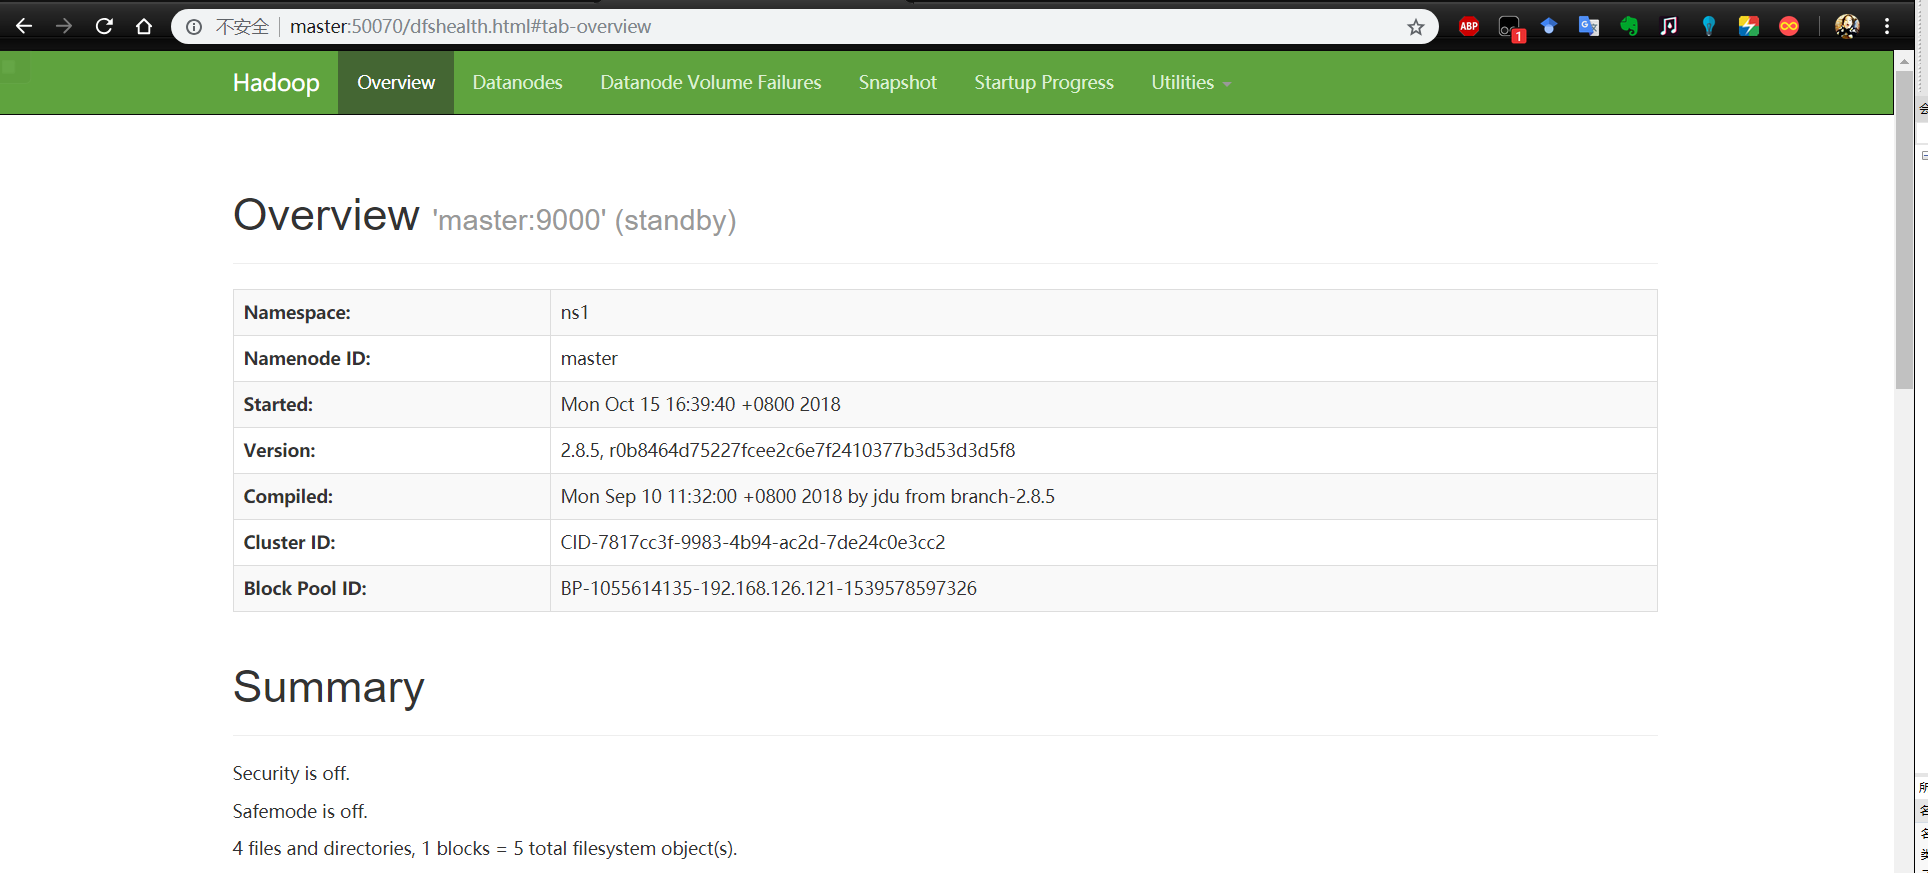
五、查看状态
在浏览器上访问