这里openmv必须插入sd卡
这里使用LBP特征分辨人脸
LBP是Local Binary Pattern(局部二值模式)的缩写,具有灰度不变性和旋转不变性等显著优点
http://blog.sina.com.cn/s/blog_4bdbec750101ekuh.html
https://1043693084-qq-com.iteye.com/blog/2245828
https://blog.csdn.net/heli200482128/article/details/79204008
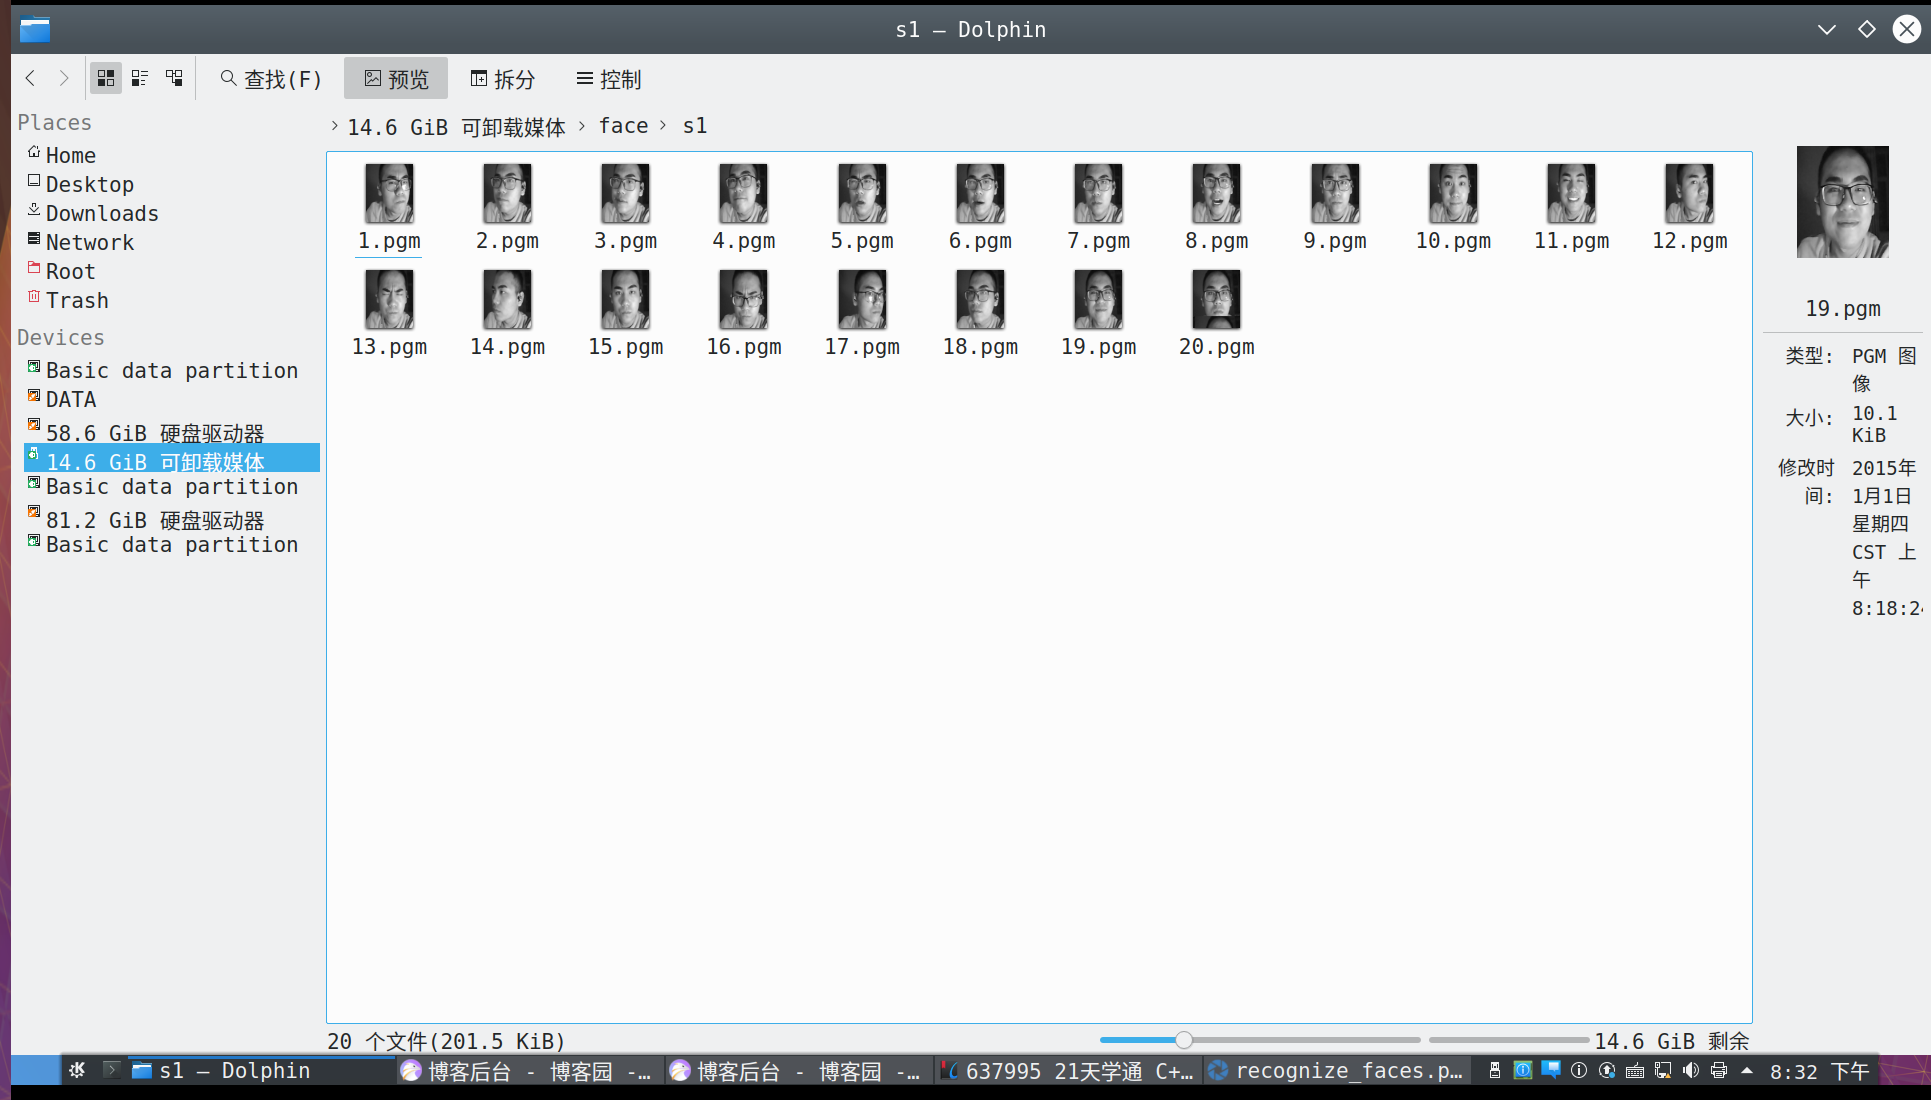
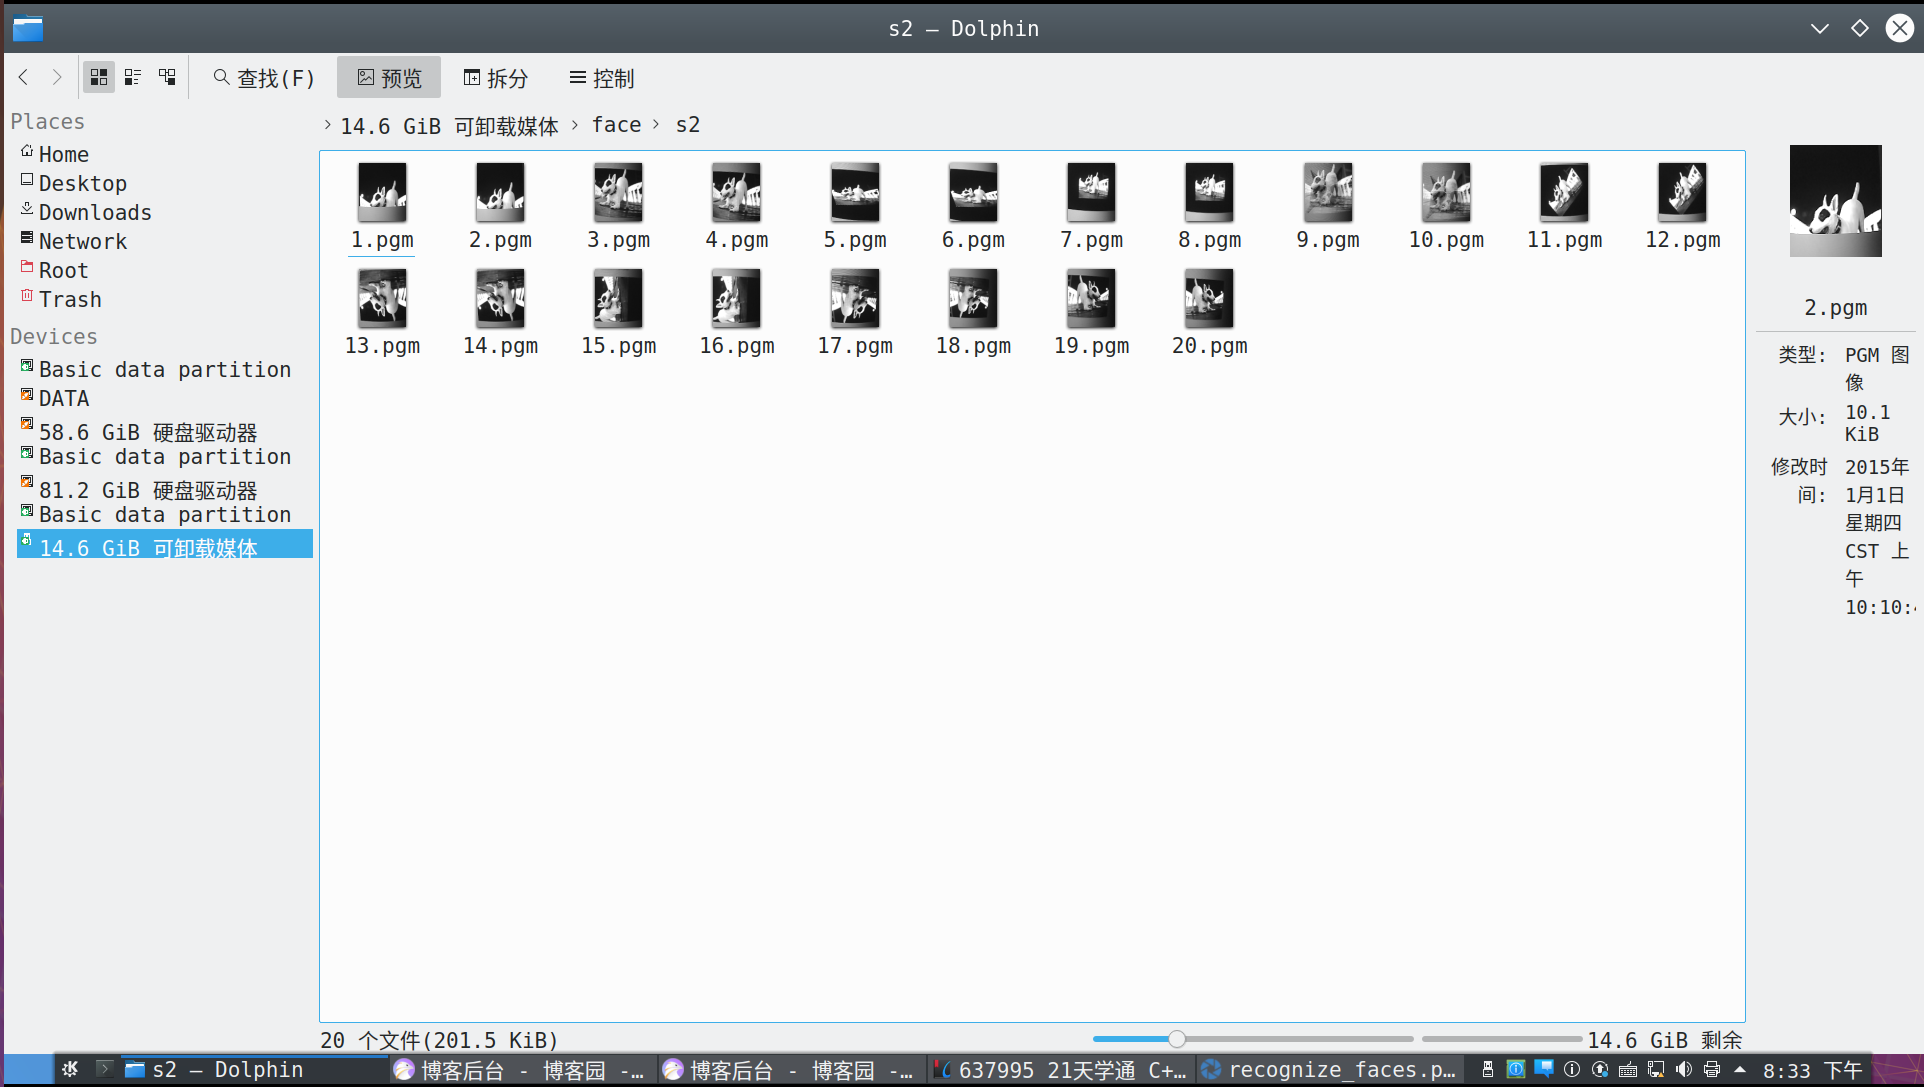
首先采集人脸数据,可以从不同角度,用不同的表情
 1 # Snapshot Example
 2 #
 3 # Note: You will need an SD card to run this example.
 4 #
 5 # You can use your OpenMV Cam to save image files.
 6
 7 import sensor, image, pyb
 8
 9 RED_LED_PIN = 1
10 BLUE_LED_PIN = 3
11
12 sensor.reset() # Initialize the camera sensor.
13 sensor.set_pixformat(sensor.GRAYSCALE) # or sensor.GRAYSCALE
14 sensor.set_framesize(sensor.B128X128) # or sensor.QQVGA (or others)
15 sensor.set_windowing((92,112))
16 sensor.skip_frames(10) # Let new settings take affect.
17 sensor.skip_frames(time = 2000)
18
19 num = 1 #设置被拍摄者序号,第一个人的图片保存到s1文件夹,第二个人的图片保存到s2文件夹,以此类推。每次更换拍摄者时,修改num值。
20
21 n = 20 #设置每个人拍摄图片数量。
22
23 #连续拍摄n张照片,每间隔3s拍摄一次。
24 while(n):
25     #红灯亮
26     pyb.LED(RED_LED_PIN).on()
27     sensor.skip_frames(time = 3000) # Give the user time to get ready.等待3s,准备一下表情。
28
29     #红灯灭,蓝灯亮
30     pyb.LED(RED_LED_PIN).off()
31     pyb.LED(BLUE_LED_PIN).on()a
32
33     #保存截取到的图片到SD卡
34     print(n)
35     sensor.snapshot().save("face/s%s/%s.pgm" % (num, n) ) # or "example.bmp" (or others)
36
37     n -= 1
38
39     pyb.LED(BLUE_LED_PIN).off()
40     print("Done! Reset the camera to see the saved image.")
41
42 print("finished!")
num代表要存储的第几个人, n代表多少张人脸图像
首先要在openmv插入的sd卡中创建文件夹
存储路径为例如:face/s1/1.pgm
采集完样本后,要在openmvIDE中工具栏->重置OpenMv Cam才能在文件中看到样本图像
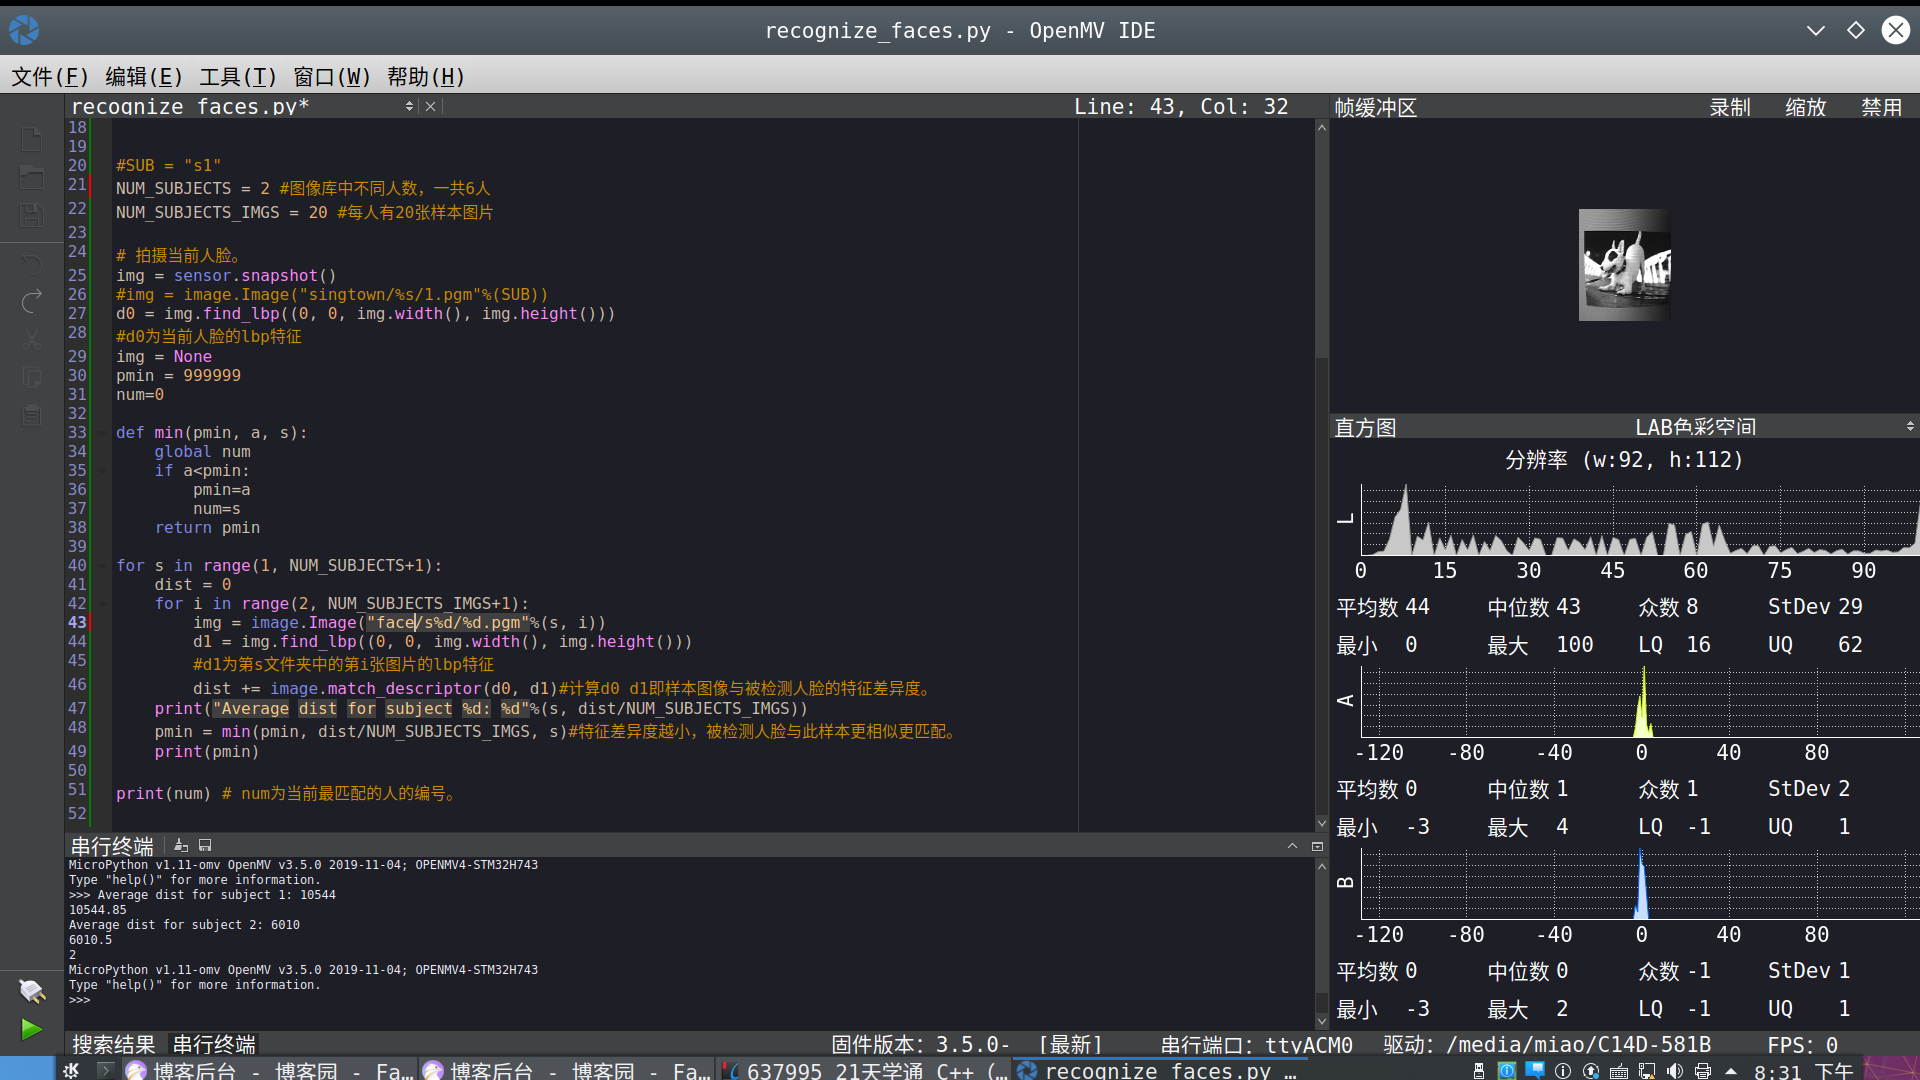
人脸识别代码:
 1 # Face recognition with LBP descriptors.
 2 # See Timo Ahonen's "Face Recognition with Local Binary Patterns".
 3 #
 4 # Before running the example:
 5 # 1) Download the AT&T faces database http://www.cl.cam.ac.uk/Research/DTG/attarchive/pub/data/att_faces.zip
 6 # 2) Exract and copy the orl_faces directory  to the SD card root.
 7
 8
 9 import sensor, time, image, pyb
10
11 sensor.reset() # Initialize the camera sensor.
12 sensor.set_pixformat(sensor.GRAYSCALE) # or  sensor.GRAYSCALE
13 sensor.set_framesize(sensor.B128X128) # or  sensor.QQVGA (or others)
14 sensor.set_windowing((92,112))
15 sensor.skip_frames(10) # Let new settings  take affect
16 sensor.skip_frames(time = 5000) #等待5s
17
18
19
20 #SUB = "s1"
21 NUM_SUBJECTS = 2   #图像库中不同人数,一共2人
22 NUM_SUBJECTS_IMGS = 20  #每人有20张样本图片
23
24 #  拍摄当前人脸。
25 img = sensor.snapshot()
26 #img = image.Image("singtown/%s/1.pgm"%(SUB))
27 d0 = img.find_lbp((0, 0, img.width(), img.height()))
28 # d0为当前人脸的lbp特征
29 img = None
30 pmin = 999999
31 num=0
32
33 def min(pmin, a, s):
34     global num
35     if a<pmin:
36         pmin=a
37         num=s
38     return pmin
39
40 for s in range(1, NUM_SUBJECTS+1):
41     dist = 0
42     for i in range(1, NUM_SUBJECTS_IMGS+1):
43         img = image.Image("face/s%d/%d.pgm"%(s, i))
44         d1 = img.find_lbp((0, 0, img.width(), img.height()))
45         # d1为第s文件夹中的第i张图片的lbp特征
46         dist += image.match_descriptor(d0, d1)# 计算d0 d1即样本图像与被检测人脸的特征差异度。
47     print("Average dist for subject %d: %d"%(s, dist/NUM_SUBJECTS_IMGS))
48     pmin = min(pmin, dist/NUM_SUBJECTS_IMGS, s)# 特征差异度越小,被检测人脸与此样本更相似更匹配。
49     print(pmin)
50
51 print(num) # num为当前最匹配的人的编号。
s为第几个库
i为第几张样本图像
image.find_lbp(roi)
从ROI元组(x, y, w, h)中提取LBP(局部二值模式)键点。您可以使用 image.match_descriptor函数来比较两组关键点,以获取匹配距离。
roi 是感兴趣区域的矩形元组(x,y,w,h)。如果未指定,ROI即整个图像的图像矩形。 操作范围仅限于 roi 区域内的像素。
仅支持灰度图像。
image.match_descriptor(descritor0, descriptor1[, threshold=70[, filter_outliers=False]])
对于LBP描述符来说,这个函数返回的是一个体现两个描述符之间区别的整数。这一距离测度尤为必要。这个距离是对相似度的一个度量。这个测度值越接近0,LBPF特征点匹配得就越好。
对于ORB描述符来说,这个函数返回的是kptmatch对象。见上。
threshold是用来为ORB键点过滤不明确匹配服务的。
一个较低的 threshold 值将紧扣关键点匹配算法。 threshold 值位于0-100 (int)。默认值为70。
filter_outliers 是用来为ORB键点过滤异常值服务的。 特征点允许用户提高 threshold 值。默认设置为False。
dist赋值为被检测人脸和20张样本图像的特征差异度和
自定义函数min()的作用是选择最小的 平均样本特征差异度和对应的图像库(每个样本图像库和被检测人脸 )
pmin设置为最大
下图可以看到在左下角的串行终端中打印出的最匹配的样本库和特征差异度