一、案例搭建
新建Profile组件
组件写好内容后配置路由
  {
    path : '/profile',
    component : () => import('../components/Profile')
  }
二、参数配置
App.vue配置profile
我们可以使用对象对to的url进行封装
path属性就是url
query属性就是我们的请求数据【给地址的请求参数】
<template>
  <div id="app">
    <router-link to="/home" tag="button" >去首页</router-link>
    <router-link to="/about" tag="button" >去关于</router-link>
    <router-link :to="/user/+username" tag="button" >用户管理</router-link>
    <router-link :to="ppp" tag="button" >profile</router-link>
<!--    <button @click="toHome">首页</button>-->
<!--    <button @click="toAbout">关于</button>-->
    <router-view></router-view>
  </div>
</template>

<script>
export default {
  name: 'App',
  data()  {
    return {
      username : 'aaa',
      ppp : {
        path : '/profile',
        query : {
          name : 'aaa',
          age : 22,
          gender : true
        }
      }
    }
  }
  // methods : {
  //   toHome () {
  //     this.$router.push('/home');
  //   },
  //   toAbout () {
  //     this.$router.push('/about');
  //   }
  // }
}
</script>

<style>
#app {
  font-family: 'Avenir', Helvetica, Arial, sans-serif;
  -webkit-font-smoothing: antialiased;
  -moz-osx-font-smoothing: grayscale;
  text-align: center;
  color: #2c3e50;
  margin-top: 60px;
}
</style>
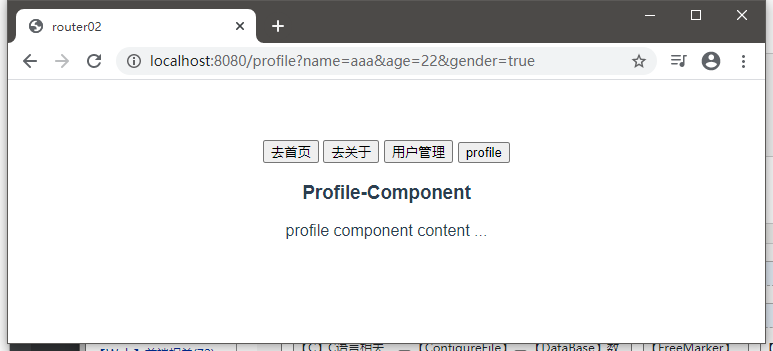
可以看到参数这样传递过来了
如果要取出请求参数,则可以这样:
写在方法里面获取,记得先从this对象引用
<template>
  <div>
    <h3>Profile-Component</h3>
    <p>
      profile component content ... <br>
      name -> {{$route.query.name}} <br>
      age -> {{$route.query.age}} <br>
      gender -> {{$route.query.gender}}
    </p>
  </div>
</template>

<script>
export default {
  name: "Profile"
}
</script>

<style scoped>

</style>
路由的代码写法:
<template>
  <div id="app">
    <router-link to="/home" tag="button" >去首页</router-link>
    <router-link to="/about" tag="button" >去关于</router-link>
    <router-link :to="/user/+username" tag="button" >用户管理</router-link>
<!--    <router-link :to="ppp" tag="button" >profile</router-link>-->
    <button @click="toProfile" >profile</button>
<!--    <button @click="toHome">首页</button>-->
<!--    <button @click="toAbout">关于</button>-->
    <router-view></router-view>
  </div>
</template>

<script>
export default {
  name: 'App',
  data()  {
    return {
      username : 'aaa',
      ppp : {
        path : '/profile',
        query : {
          name : 'aaa',
          age : 22,
          gender : true
        }
      }
    }
  },
  methods : {
    toHome () {
      this.$router.push('/home');
    },
    toAbout () {
      this.$router.push('/about');
    },
    toProfile() {
      this.$router.push(this.ppp);
    }
  }

}
</script>

<style>
#app {
  font-family: 'Avenir', Helvetica, Arial, sans-serif;
  -webkit-font-smoothing: antialiased;
  -moz-osx-font-smoothing: grayscale;
  text-align: center;
  color: #2c3e50;
  margin-top: 60px;
}
</style>
三、$route & $router的区别?
router是全局路由控制器对象
route是当前活跃的路由对象,是routes属性数组中的一个元素,也可以是router对象内部的一个属性对象
https://www.bilibili.com/video/BV15741177Eh?p=113
四、导航守卫方法
1、回顾Vue实例的生命周期
  created() {
    // todo ... Vue创建时调用此函数,
  },
  mounted() {
    // todo ... Vue实例开始挂载虚拟DOM时调用此函数
  },
  updated() {
    // todo ... ... 组件数据发生更新时调用
  },
点击不同的子组件,更换标签文本的需求:
每一次访问不同的组件都会调用created函数
所以可以:
created() {
  // todo ... Vue创建时调用此函数,
  document.title = '关于-About';
},
但是这样N个组件就要写N次了,都是路由跳转的方式进行的
那么只要在监听路由跳转,在那个时刻把title组件的某一个数据就行了
import Vue from 'vue';
import Router from 'vue-router';


Vue.use(Router);

/* 方式一 */
const Home = resolve => {
  require.ensure(
    ['../components/Home.vue'],
    () => resolve(require('../components/Home.vue'))
  )
}
/* 方式二 */
const About = resolve => {
  require(['../components/About.vue'],resolve);
}
/* 方式三 */
const User = () => import('../components/User.vue');

const News = () => import('../components/home/News');
const Messages = () => import('../components/home/Messages');

const routerList = [
  /* 重定向首页路由配置 */
  {
    path : '', /* 缺省值默认指向 '/' */
    redirect : '/home',
  },
  {
    path : '/home', /* 为什么这里是path不是url? 因为完整的url还包括 项目根url(协议头 + 域名(或者IP地址) + 端口号 + 项目根名称路径(可选))  */
    name : 'home', /* 名字可以不加 */
    component : Home, /* 使用懒加载后component这里高亮显示 */
    children : [ /* 设置子路由 */
      {
        path : '', /* 这个缺省默认/home */
        redirect : 'news',
      },
      {
        path : 'news', /* 等同于 /home + /news = /home/news 这里不需要再加斜杠了 */
        component : News,
        meta : {
          title : '新闻列表 - News'
        }
      },
      {
        path : 'messages',
        component : Messages,
        meta : {
          title : '消息列表 - Messages'
        }
      }
    ],
    meta : {
      title : '首页 - Home'
    }
  },
  {
    path : '/about',
    name : 'about',
    component : About,
    meta : {
      title : '关于 - About'
    }
  },
  {
    path : '/user/:username', /* 动态路径:冒号+字符 */
    name : 'user',
    component : User,
    meta : {
      title : '用户 - User'
    }
  },
  {
    path : '/profile',
    component : () => import('../components/Profile'),
    meta : {
      title : '档案 - Profile'
    }
  }
]
const router = new Router({
  routes : routerList,
  mode : 'history',
});

/* 在创建实例后调用 */
router.beforeEach((to, from, next) => {
  // 调用这个方法以为着重写,一定要调用 next方法, 否则路由无法跳转

  // from 来自于哪个路由对象
  // to 跳转到哪个路由对象

  // 按照案例的需求,就可以这样设置了 route就是一个个routes的元素对象
  // 可以设置一个meta属性对象,放入title属性和对应的值即可
  document.title = to.meta.title;

  // 但是子路由没有命名的话会早曾undefined显示,因为meta属性为空
  // 解决方案 document.title = to.matched[0].meta.title;

  // 跳转要放在最后,不然是跳完了再执行标签的文本更换
  next();
});
export default router;
afterEach守卫方法:
router.afterEach((to, from) => {
  // 因为是跳转之后调用,自然而然的不需要next函数了
  // TODO ... ...
});
上述的两个都是全局守卫方法,在路由配置中重写并调用
五、局部路由守卫
详细资料:
https://router.vuejs.org/guide/advanced/navigation-guards.html
You can define beforeEnter guards directly on a route's configuration object:
const router = new VueRouter({
  routes: [
    {
      path: '/foo',
      component: Foo,
      beforeEnter: (to, from, next) => {
        // ...
      }
    }
  ]
})
In-Component Guards
Finally, you can directly define route navigation guards inside route components (the ones passed to the router configuration) with the following options:
beforeRouteEnterbeforeRouteUpdatebeforeRouteLeave
const Foo = {
  template: `...`,
  beforeRouteEnter (to, from, next) {
    // called before the route that renders this component is confirmed.
    // does NOT have access to `this` component instance,
    // because it has not been created yet when this guard is called!
  },
  beforeRouteUpdate (to, from, next) {
    // called when the route that renders this component has changed.
    // This component being reused (by using an explicit `key`) in the new route or not doesn't change anything.
    // For example, for a route with dynamic params `/foo/:id`, when we
    // navigate between `/foo/1` and `/foo/2`, the same `Foo` component instance
    // will be reused (unless you provided a `key` to `<router-view>`), and this hook will be called when that happens.
    // has access to `this` component instance.
  },
  beforeRouteLeave (to, from, next) {
    // called when the route that renders this component is about to
    // be navigated away from.
    // has access to `this` component instance.
  }
}