实验内容
1.改写 bootsect.s
使得bootsect.s 能在屏幕上打印一段提示信息“XXX is booting...”,其中 XXX 是你给自己的操作系统起的名字,例如 LZJos、Sunix 等(可以上论坛上秀秀谁的 OS 名字最帅,也可以显示一个特色 logo,以表示自己操作系统的与众不同。)
2.改写 setup.s
- bootsect.s 能完成 setup.s 的载入,并跳转到 setup.s 开始地址执行。而 setup.s 向屏幕输出一行"Now we are in SETUP"。
- setup.s 能获取至少一个基本的硬件参数(如内存参数、显卡参数、硬盘参数等),将其存放在内存的特定地址,并输出到屏幕上。
- setup.s 不再加载 Linux 内核,保持上述信息显示在屏幕上即可。
3.回答问题
有时,继承传统意味着别手蹩脚。x86 计算机为了向下兼容,导致启动过程比较复杂。请找出 x86 计算机启动过程中,被硬件强制,软件必须遵守的两个“多此一举”的步骤(多找几个也无妨),说说它们为什么多此一举,并设计更简洁的替代方案。
实验过程
1.bootsect.s屏幕文字输出
! 文件:bootsect.s
entry _start
_start:
    mov ah,#0x03
    xor bh,bh
    int 0x10
    mov cx,#36
    mov bx,#0x0007
    mov bp,#msg1
    mov ax,#0x07c0
    mov es,ax
    mov ax,#0x1301
    int 0x10
inf_loop:
    jmp inf_loop
msg1:
    .byte   13,10
    .ascii "Hello,my name is MochiXu!"
    .byte   13,10,13,10
.org 510
boot_flag:
    .word   0xAA55
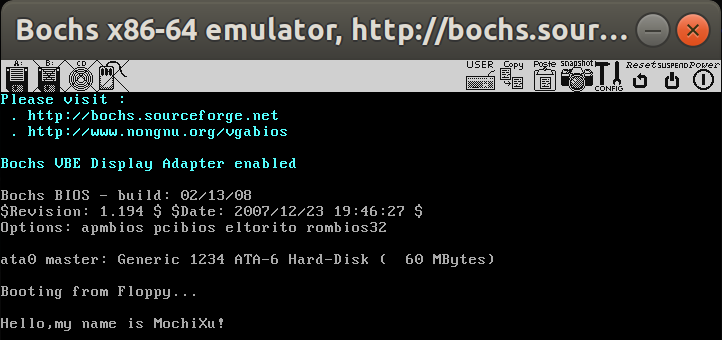
初步修改bootsect.s文件之后,需要编译此文件并将目标文件生成Image。
2.编译运行Image验证结果
编译运行步骤如下
- 编译并链接bootsect.s文件
as86 -0 -a -o bootsect.o bootsect.s
ld86 -0 -s -o bootsect bootsect.o
- 删除bootsect文件首部的32字节
dd bs=1 if=bootsect of=Image skip=32
- 运行
# 当前的工作路径为 ~/Desktop/oslab/linux-0.11/boot/
# 将刚刚生成的 Image 复制到 linux-0.11 目录下
$ cp Image ../
# 执行 oslab 目录中的 run 脚本
$ ../../run
在实验过程中有可能多次更改bootsect.s文件,更改之后仍需要编译运行,为了节省时间可以将上述编译运行操作写入一个bash脚本:
#!/bin/sh
as86 -0 -a -o bootsect.o bootsect.s
ld86 -0 -s -o bootsect bootsect.o
dd bs=1 if=bootsect of=Image skip=32
cp Image ../
../../run
在更改完bootsect.s文件之后,直接在对应目录利用终端运行此脚本即可,结果如下
3.改写setup.s
! 文件setup.s
INITSEG = 0x9000

entry _start
_start:
! 在显示字符串之前必须先获取当前光标的位置,这样就可以把字符串显示到当前光标处了
    mov    ah,#0x03
    xor    bh,bh
    int    0x10

! 利用10号中断的13号功能打印字符串"Now we are in SETUP."
    mov    cx,#26
    mov    bx,#0x0007
    mov    bp,#msg1
    mov     ax,cs
    mov    es,ax
    mov    ax,#0x1301
    int    0x10

! 下面开始读取一些硬件参数

    ! 读入光标位置信息,保存到0x90000处
    mov    ax,#INITSEG
    mov    ds,ax
    mov    ah,#0x03
    xor    bh,bh
    int    0x10
    mov    [0],ds

    ! 读入内存大小位置信息,保存到0x90002处
    mov    ah,#0x88
    int    0x15
    mov    [2],ax

    ! 从0x41处拷贝16个字节(磁盘参数表)到0x90004处
    mov    ax,#0x0000
    mov    ds,ax
    lds    si,[4*0x41]
    mov    ax,#INITSEG
    mov    es,ax
    mov    di,#0x0004
    mov    cx,#0x10
    rep       ! 重复16次
    movsb


! 先打印光标位置
    ! 打印字符串之前要先读取光标位置,将字符串打印到当前光标处
    mov    ah,#0x03
    xor    bh,bh
    int    0x10

    ! 打印字符串 "Cursor POS:"
    mov    cx,#11
    mov    bx,#0x0007
    mov    ax,cs
    mov    es,ax
    mov    bp,#msg2
    mov    ax,#0x1301
    int    0x10

    ! 调用打印函数,打印光标位置
    mov    ax,#0x9000
    mov    ds,ax
    mov    dx,0x0
    call    print_hex
    call    print_nl

! 打印内存大小
    ! 打印字符串"Memory SIZE:"
    mov    ah,#0x03
    xor    bh,bh
    int    0x10    ! 读取光标位置

    mov    cx,#12
    mov    bx,#0x0007
    mov    ax,cs
    mov    es,ax
    mov    bp,#msg3
    mov    ax,#0x1301
    int    0x10


    ! 调用打印函数,打印内存大小信息
    mov    ax,#0x9000
    mov    ds,ax
    mov    dx,0x2
    call     print_hex


    ! 打印字符串"KB"
    mov    ah,#0x03
    xor    bh,bh
    int    0x10    ! 读取光标位置

    mov    cx,#2
    mov    bx,#0x0007
    mov    ax,cs
    mov    es,ax
    mov    bp,#msg4
    mov    ax,#0x1301
    int    0x10
    call    print_nl

!打印柱面数
    ! 打印字符串"Cyls"
    mov    ah,#0x03
    xor    bh,bh
    int    0x10    ! 读取光标位置

    mov    cx,#5
    mov    bx,#0x0007
    mov    ax,cs
    mov    es,ax
    mov    bp,#msg5
    mov    ax,#0x1301
    int    0x10


    ! 调用打印函数打印磁盘柱面数
    mov    ax,#0x9000
    mov    ds,ax
    mov    dx,0x4
    call    print_hex
    call    print_nl

! 打印磁头数
    ! 打印字符串"Heads:"
    mov    ah,#0x03
    xor    bh,bh
    int    0x10    ! 读取光标位置

    mov    cx,#6
    mov    bx,#0x0007
    mov    ax,cs
    mov    es,ax
    mov    bp,#msg6
    mov    ax,#0x1301
    int    0x10


    ! 调用打印函数打印磁盘磁头数
    mov    ax,#0x9000
    mov    ds,ax
    mov    dx,0x6
    call    print_hex
    call    print_nl


! 打印每磁道扇区数
    ! 打印字符串"sectors"
    mov    ah,#0x03
    xor    bh,bh
    int    0x10    ! 读取光标位置

    mov    cx,#8
    mov    bx,#0x0007
    mov    ax,cs
    mov    es,ax
    mov    bp,#msg7
    mov    ax,#0x1301
    int    0x10

    ! 调用打印函数打印扇区数
    mov    ax,#0x9000
    mov    ds,ax
    mov    dx,0x12
    call    print_hex
    call    print_nl

Inf_loop:
    jmp Inf_loop    ! 无限循环


! print_hex函数:将一个数字转换为ascii码字符,并打印到屏幕上
! 参数值:dx
! 返回值:无
print_hex:
    mov    cx,#4            ! 要打印4个十六进制数字,故循环4次
print_digit:
    rol    dx,#4            ! 循环以使低4比特用上 !! 取dx的高4比特移到低4比特处
    mov    ax,#0xe0f        ! ah = 请求的功能值,al = 半字节(4个比特)掩码
    and    al,dl            ! 取dl的低4比特值
    add    al,#0x30        ! 给al数字加上十六进制0x30
    cmp    al,#0x3a
    jl    outp            ! 如果是一个不大于十的数字
    add    al,#0x07    ! 如果是a~f,要多加7
outp:
    int    0x10
    loop    print_digit    ! 用loop重复4次
    ret

! 打印回车换行
print_nl:
    mov    ax,#0xe0d
    int    0x10
    mov    al,#0xa
    int    0x10
    ret

msg1:
    .byte 13,10
    .ascii "Now we are in SETUP."
    .byte 13,10,13,10

msg2:
    .ascii "Cursor POS:"

msg3:
    .ascii "Memory SIZE:"

msg4:
    .ascii "KB"

msg5:
    .ascii "Cyls:"

msg6:
    .ascii "Heads:"

msg7:
    .ascii "Sectors:"


.org 510
boot_flag:
    .word 0xAA55
在修改完setup.s文件之后需要继续修改bootsect.s文件,bootsect.s正确加载setup.s之后屏幕才会输出“Now we are in setup!”
修改后的bootsect.s文件如下
! 文件:bootsect.s

SETUPLEN = 1
SETUPSEG = 0x07e0

entry _start
_start:
! 首先利用10号中断的3号功能来读取光标位置
    mov    ah,#0x03
    xor    bh,bh
    int    0x10

! 再利用10号中断的13号功能显示字符串
    mov    cx,#50            ! 加上回车和换行,字符串一共包含50个字符,所以设置cx为50
    mov    bx,#0x0007
    mov    bp,#msg1
    mov     ax,#0x07c0
    mov     es,ax            ! es:bp=显示字符串的地址
    mov    ax,#0x1301
    int    0x10

load_setup:
    mov    dx,#0x0000        ! 设置驱动器和磁头(drive 0, head 0): 软盘0磁头
    mov    cx,#0x0002        ! 设置扇区号和磁道(sector 2, track 0):0磁头、0磁道、2扇区
    mov    bx,#0x0200        ! 设置读入的内存地址:BOOTSEG+address = 512,偏移512字节
    mov    ax,#0x0200+SETUPLEN    ! 设置读入的扇区个数(service 2, nr of sectors),
                    ! SETUPLEN是读入的扇区个数,Linux 0.11设置的是4,
                    ! 我们不需要那么多,我们设置为1
    int    0x13            ! 应用0x13号BIOS中断读入1个setup.s扇区
    jnc    ok_load_setup        ! 读入成功,跳转到ok_load_setup: ok - continue
    mov    dx,#0x0000        ! 软驱、软盘有问题才会执行到这里
    mov    ax,#0x0000        ! 否则复位软驱
    int    0x13
    j    load_setup        ! 重新循环,再次尝试读取

ok_load_setup:
    jmpi    0,SETUPSEG

! msg1处放置要显示的字符串
msg1:
    .byte 13,10            ! 换行+回车
    .ascii "Hello,my name is MochiXu!"
    .byte 13,10,13,10        ! 两对换行+回车

! 下面是启动盘具有有效引导扇区的标志. 仅供BIOS中的程序加载扇区时识别使用。
! 它必须位于引导扇区的最后两个字节中.
.org 510
boot_flag:
    .word 0xAA55    ! 引导扇区的标记就是0XAA55
4.编译运行Image验证结果
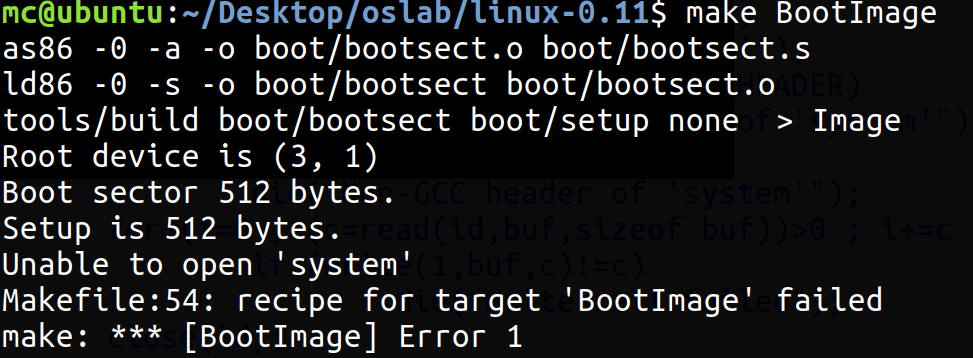
目前有两个文件需要编译,可以重用上述脚本实现不同文件的编译,也可以直接使用Makefile进行编译链接。但是oslab内make命令的作用是生成整个内核的镜像文件,这里只需要编译setup.s和bootsect.s这两个文件,在这里需要更改tools/build.c文件,若不更改则会出现下述错误。错误的原因是在make BootImage时并没有传递system参数,所以argv[3]是none,那么只能够将build.c文件内有关argv[3]的代码块注释掉。
将tools/build.c文件做出如下更改
/*
* linux/tools/build.c
*
* (C) 1991 Linus Torvalds
*/
/*
* This file builds a disk-image from three different files:
*
* - bootsect: max 510 bytes of 8086 machine code, loads the rest
* - setup: max 4 sectors of 8086 machine code, sets up system parm
* - system: 80386 code for actual system
*
* It does some checking that all files are of the correct type, and
* just writes the result to stdout, removing headers and padding to
* the right amount. It also writes some system data to stderr.
*/
/*
* Changes by tytso to allow root device specification
*/
#include <stdio.h> /* fprintf */
#include <string.h>
#include <stdlib.h> /* contains exit */
#include <sys/types.h> /* unistd.h needs this */
#include <sys/stat.h>
#include <linux/fs.h>
#include <unistd.h> /* contains read/write */
#include <fcntl.h>
/*
* Changes by falcon<zhangjinw@gmail.com> to define MAJOR and MINOR for they
* are not defined in current linux header file linux/fs.h,I copy it from
* include/linux/fs.h directly.
*/
#ifndef MAJOR
#define MAJOR(a) (((unsigned)(a))>>8)
#endif
#ifndef MINOR
#define MINOR(a) ((a)&0xff)
#endif
#define MINIX_HEADER 32
#define GCC_HEADER 1024
#define SYS_SIZE 0x3000
/*
* Changes by falcon<zhangjinw@gmail.com> to let this kernel Image file boot
* with a root image file on the first hardware device /dev/hd1, hence, you
* should prepare a root image file, and configure the bochs with
* the following lines(please set the ... as suitable info):
* ...
* floppya: 1_44="Image", status=inserted
* ata0-master: type=disk, path="/path/to/rootimage.img", mode=flat ...
* ...
*/
#define DEFAULT_MAJOR_ROOT 3
#define DEFAULT_MINOR_ROOT 1
/* max nr of sectors of setup: don't change unless you also change
* bootsect etc */
#define SETUP_SECTS 4
#define STRINGIFY(x) #x
void die(char * str)
{
fprintf(stderr,"%s
",str);
exit(1);
}
void usage(void)
{
die("Usage: build bootsect setup system [rootdev] [> image]");
}
int main(int argc, char ** argv)
{
int i,c,id;
char buf[1024];
char major_root, minor_root;
struct stat sb;
if ((argc != 4) && (argc != 5))
usage();
if (argc == 5) {
if (strcmp(argv[4], "FLOPPY")) {
if (stat(argv[4], &sb)) {
perror(argv[4]);
die("Couldn't stat root device.");
}
major_root = MAJOR(sb.st_rdev);
minor_root = MINOR(sb.st_rdev);
} else {
major_root = 0;
minor_root = 0;
}
} else {
major_root = DEFAULT_MAJOR_ROOT;
minor_root = DEFAULT_MINOR_ROOT;
}
fprintf(stderr, "Root device is (%d, %d)
", major_root, minor_root);
if ((major_root != 2) && (major_root != 3) &&
(major_root != 0)) {
fprintf(stderr, "Illegal root device (major = %d)
",
major_root);
die("Bad root device --- major #");
}
for (i=0;i<sizeof buf; i++) buf[i]=0;
if ((id=open(argv[1],O_RDONLY,0))<0)
die("Unable to open 'boot'");
if (read(id,buf,MINIX_HEADER) != MINIX_HEADER)
die("Unable to read header of 'boot'");
if (((long *) buf)[0]!=0x04100301)
die("Non-Minix header of 'boot'");
if (((long *) buf)[1]!=MINIX_HEADER)
die("Non-Minix header of 'boot'");
if (((long *) buf)[3]!=0)
die("Illegal data segment in 'boot'");
if (((long *) buf)[4]!=0)
die("Illegal bss in 'boot'");
if (((long *) buf)[5] != 0)
die("Non-Minix header of 'boot'");
if (((long *) buf)[7] != 0)
die("Illegal symbol table in 'boot'");
i=read(id,buf,sizeof buf);
fprintf(stderr,"Boot sector %d bytes.
",i);
if (i != 512)
die("Boot block must be exactly 512 bytes");
if ((*(unsigned short *)(buf+510)) != 0xAA55)
die("Boot block hasn't got boot flag (0xAA55)");
buf[508] = (char) minor_root;
buf[509] = (char) major_root;
i=write(1,buf,512);
if (i!=512)
die("Write call failed");
close (id);
if ((id=open(argv[2],O_RDONLY,0))<0)
die("Unable to open 'setup'");
if (read(id,buf,MINIX_HEADER) != MINIX_HEADER)
die("Unable to read header of 'setup'");
if (((long *) buf)[0]!=0x04100301)
die("Non-Minix header of 'setup'");
if (((long *) buf)[1]!=MINIX_HEADER)
die("Non-Minix header of 'setup'");
if (((long *) buf)[3]!=0)
die("Illegal data segment in 'setup'");
if (((long *) buf)[4]!=0)
die("Illegal bss in 'setup'");
if (((long *) buf)[5] != 0)
die("Non-Minix header of 'setup'");
if (((long *) buf)[7] != 0)
die("Illegal symbol table in 'setup'");
for (i=0 ; (c=read(id,buf,sizeof buf))>0 ; i+=c )
if (write(1,buf,c)!=c)
die("Write call failed");
close (id);
if (i > SETUP_SECTS*512)
die("Setup exceeds " STRINGIFY(SETUP_SECTS)
" sectors - rewrite build/boot/setup");
fprintf(stderr,"Setup is %d bytes.
",i);
for (c=0 ; c<sizeof(buf) ; c++)
buf[c] = '�';
while (i<SETUP_SECTS*512) {
c = SETUP_SECTS*512-i;
if (c > sizeof(buf))
c = sizeof(buf);
if (write(1,buf,c) != c)
die("Write call failed");
i += c;
}
// if ((id=open(argv[3],O_RDONLY,0))<0)
// die("Unable to open 'system'");
// if (read(id,buf,GCC_HEADER) != GCC_HEADER)
// die("Unable to read header of 'system'");
// if (((long *) buf)[5] != 0)
// die("Non-GCC header of 'system'");
// for (i=0 ; (c=read(id,buf,sizeof buf))>0 ; i+=c )
// if (write(1,buf,c)!=c)
// die("Write call failed");
// close(id);
// fprintf(stderr,"System is %d bytes.
",i);
// if (i > SYS_SIZE*16)
// die("System is too big");
return(0);
}
编译运行
make BootImage
../run
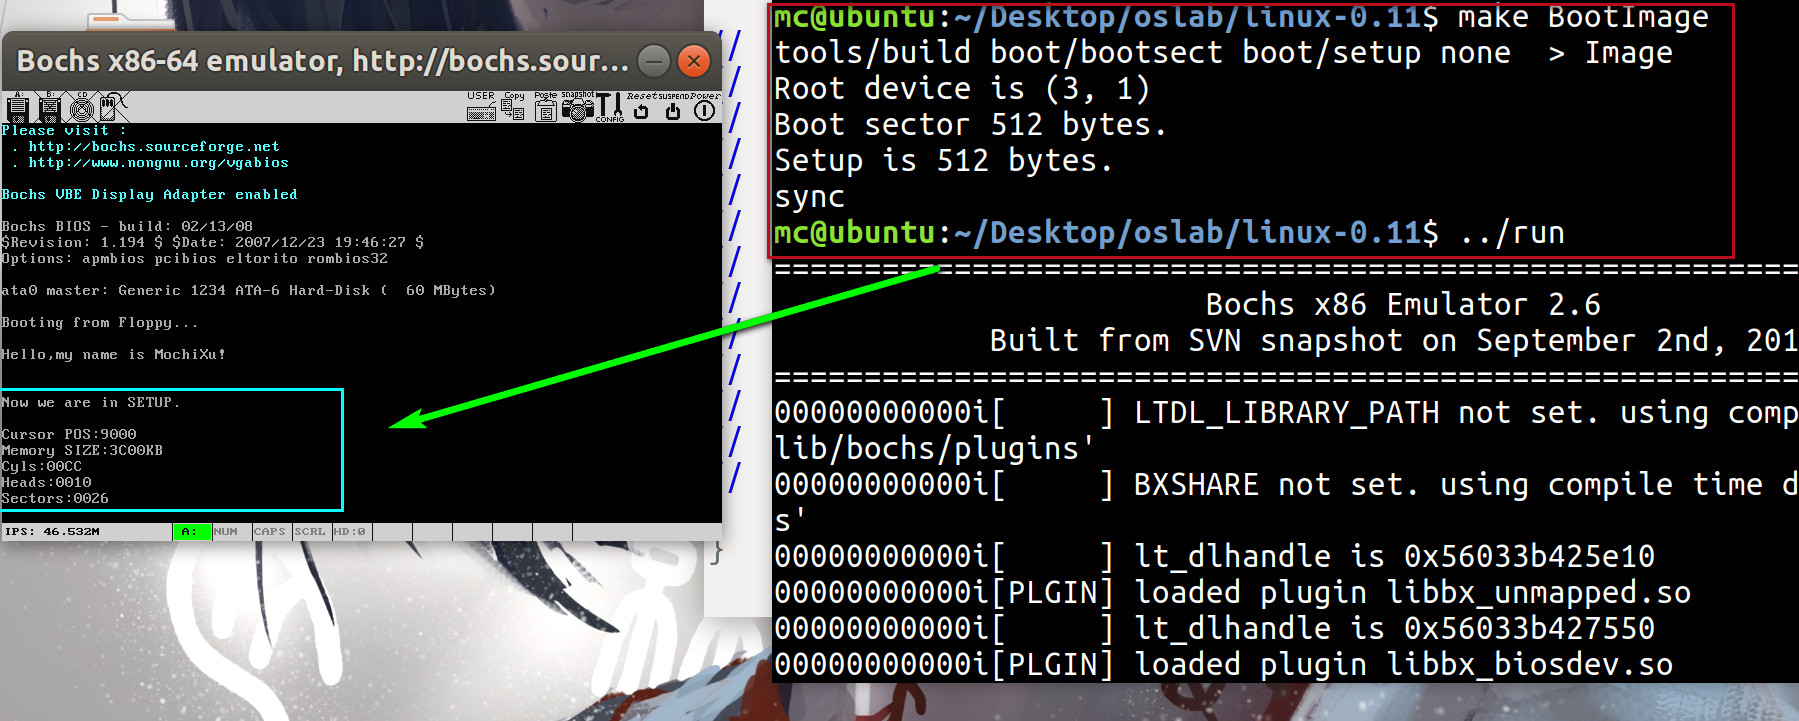
运行效果如下所示
问题回答
当PC的电源打开后,80x86结构的CPU将自动进入实模式,并从地址0xFFFF0开始自动执行程序代码,这个地址通常是ROM—BIOS中的地址。PC机的BIOS将执行某些系统的检测,并在物理地址0处开始初始化中断向量。此后将启动设备的第一个扇区512字节读入内存绝对地址0x7C00处。因为当时system模块的长度不会超过0x80000字节大小512KB,所以bootsect程序把system模块读入物理地址0x10000开始位置处时并不会覆盖在0x90000处开始的bootsect和setup模块,多此一举的是system模块移到内存中相对靠后的位置,以便加载系统主模块。解决方案是在保证操作系统启动引导成功的前提下尽量扩大ROM—BIOS的内存寻址范围。