一、前言
上一篇《Spring Boot 入门之 Web 篇(二)》介绍了 Spring Boot 的 Web 开发相关的内容,项目的开发离不开数据,因此本篇开始介绍持久层相关的知识。
二、整合 JdbcTemplate
2.1 添加依赖
<!-- jdbc -->
<dependency>
    <groupId>org.springframework.boot</groupId>
    <artifactId>spring-boot-starter-jdbc</artifactId>
</dependency>

<!-- mysql 驱动包 -->
<dependency>
	<groupId>mysql</groupId>
	<artifactId>mysql-connector-java</artifactId>
</dependency>
2.2 配置数据库连接
在 application.properties 中添加:
spring.datasource.driver-class-name=com.mysql.jdbc.Driver
spring.datasource.url=jdbc:mysql://localhost:3306/springboot?useUnicode=true&characterEncoding=utf8&serverTimezone=UTC
spring.datasource.username=root
spring.datasource.password=tiger
其中,可以不指定 driver-class-name,因为 spring boot 会自动识别 url。
2.3 测试
2.3.1 建表
在 MySQL 中创建名为 springboot 的数据库,在该库中创建 user 表:
CREATE TABLE `user` (
	`id` INT(11) NOT NULL AUTO_INCREMENT,
	`username` VARCHAR(50) NOT NULL,
	`password` VARCHAR(64) NOT NULL,
	`birthday` DATE NOT NULL,
	PRIMARY KEY (`id`)
)
COLLATE='utf8_general_ci'
ENGINE=InnoDB
AUTO_INCREMENT=3
;
2.3.2 建实体类
public class User implements Serializable{

	private static final long serialVersionUID = -6249397911566315813L;

	private Integer id;

	private String username;

	private String password;

	private Date birthday;

}
setter 和 getter 方法此处省略。
2.3.3 dao 接口
接口和实现类如下:
public interface UserDao {

	public int insert(User user);

	public int deleteById(Integer id);

	public int update(User user);

	public User getById(Integer id);
}

@Repository
public class UserDaoImpl implements UserDao {

	@Autowired
	private JdbcTemplate jdbcTemplate;

	@Override
	public int insert(User user) {
		String sql = "insert into user(id,username,password,birthday) values(?,?,?,?)";
		return this.jdbcTemplate.update(
		                  sql,
						  user.getId(),
						  user.getUsername(),
						  user.getPassword(),
						  user.getBirthday()
										);
	}

	@Override
	public int deleteById(Integer id) {
		String sql = "delete from user where id = ?";
		return this.jdbcTemplate.update(sql,id);
	}

	@Override
	public int update(User user) {
		String sql = "update user set password = ? where id = ?";
		return this.jdbcTemplate.update(
		                        sql,
								user.getPassword(),
								user.getId()
										);
	}

	@Override
	public User getById(Integer id) {
		String sql = "select * from user where id = ?";
		return this.jdbcTemplate.queryForObject(sql, new RowMapper<User>() {

			@Override
			public User mapRow(ResultSet rs, int rowNum) throws SQLException {
				User user = new User();
				user.setId(rs.getInt("id"));
				user.setUsername(rs.getString("username"));
				user.setPassword(rs.getString("password"));
				user.setBirthday(rs.getDate("birthday"));
				return user;
			}

		},id);
	}

}
2.3.4 测试类:
@RunWith(SpringRunner.class)
@SpringBootTest
public class UserDaoTest {

	@Autowired
	private UserDao userDao;


	@Test
	public void testInsert() {
		User user = new User();
		user.setId(1);
		user.setUsername("张三");
		user.setPassword("zhangsan");
		user.setBirthday(new Date());

		int result = this.userDao.insert(user);
		System.out.println(result);
	}

	@Test
	public void testGetById() {
		User user = this.userDao.getById(1);
		System.out.println(user.getUsername());
	}

	@Test
	public void testUpdate() {
		User user = new User();
		user.setId(1);
		user.setPassword("zhangsan123");
		this.userDao.update(user);
	}

	@Test
	public void testDeleteById() {
		int result = this.userDao.deleteById(1);
		System.out.println(result);
	}
}
测试结果省略...
如需打印日志,在日志配置文件中添加如下配置:
<logger name="org.springframework.jdbc.core.JdbcTemplate" level="debug"/>
三、整合 Spring-data-jpa
3.1 添加依赖
<!-- jdbc -->
<dependency>
    <groupId>org.springframework.boot</groupId>
    <artifactId>spring-boot-starter-jdbc</artifactId>
</dependency>

<!-- springboot,jpa 整合包-->
<dependency>
    <groupId>org.springframework.boot</groupId>
    <artifactId>spring-boot-starter-data-jpa</artifactId>
</dependency>

<!-- mysql 驱动包 -->
<dependency>
	<groupId>mysql</groupId>
	<artifactId>mysql-connector-java</artifactId>
</dependency>
3.2 配置数据库连接
在 application.properties 中添加:
# 数据库连接配置
spring.datasource.driver-class-name=com.mysql.jdbc.Driver
spring.datasource.url=jdbc:mysql://localhost:3306/springboot?useUnicode=true&characterEncoding=utf8&serverTimezone=UTC
spring.datasource.username=root
spring.datasource.password=tiger

# JPA 配置
spring.jpa.hibernate.ddl-auto=update
spring.jpa.show-sql=true
3.3 编码
3.3.1 建表
在 MySQL 中创建名为 springboot 的数据库,在该库中创建 role 表:
CREATE TABLE `role` (
	`id` INT(11) NOT NULL AUTO_INCREMENT,
	`name` VARCHAR(10) NOT NULL,
	`descr` VARCHAR(100) NULL DEFAULT NULL,
	PRIMARY KEY (`id`)
)
COLLATE='utf8_general_ci'
ENGINE=InnoDB
;
注意,主键 ID 为 AUTO_INCREMENT 自增。
3.3.2 建实体类
添加相应的注解
@Entity
public class Role implements Serializable{

	private static final long serialVersionUID = 3926276668667517847L;

	@Id
	@GeneratedValue
	private Integer id;

	@Column
	private String name;

	@Column
	private String descr;
}
setter 和 getter 方法此处省略。
3.3.3 Repository 接口
public interface RoleRepository extends JpaRepository<Role, Integer>{

}
3.3.4 测试类
@RunWith(SpringRunner.class)
@SpringBootTest
public class RoleRepositoryTest {

	@Autowired
	private RoleRepository roleRepository;

	@Test
	public void testInsert() {
		Role role = new Role();
		role.setName("管理员");
		role.setDescr("测试");
		Role result = this.roleRepository.save(role);
		System.out.println(result);
	}

	@Test
	public void testFindOne() {
		Role role = this.roleRepository.findOne(1);
		System.out.println(role);
	}

	@Test
	public void testUpdate() {
		Role role = new Role();
		role.setId(1);
		role.setName("管理员");
		role.setDescr("控制权限");
		Role result = this.roleRepository.save(role);
		System.out.println(result);
	}

	@Test
	public void testDelete() {
		this.roleRepository.delete(1);
	}
}
测试结果省略...
四、整合 Mybatis
整合 MyBatis 有两种方式:
-
使用 mybatis 官方提供的 Spring Boot 整合包实现。
-
使用 mybatis-spring 整合的方式,也就是传统的方式(推荐,此方式容易控制 MyBatis 的配置)。
4.1 配置依赖
方式一:使用官方整合包
1)添加依赖:
<!-- springboot,mybatis 整合包 -->
<dependency>
	<groupId>org.mybatis.spring.boot</groupId>
	<artifactId>mybatis-spring-boot-starter</artifactId>
	<version>1.3.0</version>
</dependency>

<!-- mysql 驱动包 -->
<dependency>
	<groupId>mysql</groupId>
	<artifactId>mysql-connector-java</artifactId>
</dependency>
2)配置数据库连接:
在 application.properties 中添加:
# 数据源配置
spring.datasource.driver-class-name=com.mysql.jdbc.Driver
spring.datasource.url=jdbc:mysql://localhost:3306/springboot?useUnicode=true&characterEncoding=utf8&serverTimezone=UTC
spring.datasource.username=root
spring.datasource.password=tiger

# mybatis 配置
mybatis.config-location=classpath:mybatis/mybatis-config.xml
mybatis.mapper-locations=classpath:mybatis/mapper/*.xml
方式二:原始 Jar 包 + 手动编程
1)添加依赖:
<!-- jdbc -->
<dependency>
	<groupId>org.springframework.boot</groupId>
	<artifactId>spring-boot-starter-jdbc</artifactId>
</dependency>

<!-- mybatis -->
<dependency>
	<groupId>org.mybatis</groupId>
	<artifactId>mybatis</artifactId>
	<version>3.4.4</version>
</dependency>

<!-- spring,mybatis整合包 -->
<dependency>
	<groupId>org.mybatis</groupId>
	<artifactId>mybatis-spring</artifactId>
  	<version>1.3.1</version>
</dependency>

<!-- mysql 驱动包 -->
<dependency>
	<groupId>mysql</groupId>
	<artifactId>mysql-connector-java</artifactId>
</dependency>
2)配置数据库连接:
在 application.properties 中添加:
# 数据源配置
spring.datasource.driver-class-name=com.mysql.jdbc.Driver
spring.datasource.url=jdbc:mysql://localhost:3306/springboot?useUnicode=true&characterEncoding=utf8&serverTimezone=UTC
spring.datasource.username=root
spring.datasource.password=tiger
3)创建配置类:
@Configuration
public class MyBatisConfiguration {

    @Bean
    @ConditionalOnMissingBean // 当容器里没有指定的 Bean 的情况下创建该对象
    public SqlSessionFactoryBean sqlSessionFactory(DataSource dataSource) {
        SqlSessionFactoryBean sqlSessionFactoryBean = new SqlSessionFactoryBean();
        // 设置数据源
        sqlSessionFactoryBean.setDataSource(dataSource);

        // 设置mybatis的主配置文件
        sqlSessionFactoryBean.setConfigLocation(new ClassPathResource("mybatis/mybatis-config.xml"));

        // 设置mapper映射文件
        PathMatchingResourcePatternResolver resolver = new PathMatchingResourcePatternResolver();
        Resource[] mapperXml;
        try {
            mapperXml = resolver.getResources("classpath:mybatis/mapper/*.xml");
            sqlSessionFactoryBean.setMapperLocations(mapperXml);
        } catch (IOException e) {
            e.printStackTrace();
        }

        // 设置别名包
        sqlSessionFactoryBean.setTypeAliasesPackage("com.light.springboot.domain");

        return sqlSessionFactoryBean;
    }

    @Bean
    @ConditionalOnBean(SqlSessionFactoryBean.class) // 当 SqlSessionFactoryBean 实例存在时创建对象
    public MapperScannerConfigurer mapperScannerConfigurer() {
        MapperScannerConfigurer mapperScannerConfigurer = new MapperScannerConfigurer();
        mapperScannerConfigurer.setBasePackage("com.light.springboot.mapper");
        return mapperScannerConfigurer;
    }
}
以上便是两种方式的配置的不同之处,不同之处就在于如何配置 mybatis 配置文件和 mapper 映射文件的路径。
在 src/main/resources 下创建 mybatis 文件夹,并在 mybatis 文件夹中创建 "mybatis-config.xml" 配置文件,内容如下:
<?xml version="1.0" encoding="UTF-8"?>
<!DOCTYPE configuration
        PUBLIC "-//mybatis.org//DTD Config 3.0//EN"
        "http://mybatis.org/dtd/mybatis-3-config.dtd">
<configuration>
    <settings>
		<!-- 获取数据库自增主键值 -->
		<setting name="useGeneratedKeys" value="true"/>
		<!-- 使用列别名替换列名,默认为 true -->
		<setting name="useColumnLabel" value="true"/>
		<!-- 开启驼峰命名转换:Table(create_time) => Entity(createTime) -->
		<setting name="mapUnderscoreToCamelCase" value="true"/>
	</settings>
</configuration>
mybatis 文件夹下再创建一个 "mapper" 文件夹,里边存放 Mpper 接口对应的 mapper 映射文件。
4.2 测试
4.2.1 建表
在 MySQL 中创建名为 springboot 的数据库,在该库中创建 role 表:
CREATE TABLE `department` (
	`id` INT(11) NOT NULL,
	`name` VARCHAR(10) NOT NULL,
	`descr` VARCHAR(50) NULL DEFAULT NULL,
	PRIMARY KEY (`id`)
)
ENGINE=InnoDB
;
4.2.2 实体类
public class Department implements Serializable{

	private static final long serialVersionUID = 6067283535977178571L;

	private Integer id;

	private String name;

	private String descr;
}
setet 和 getter 方法省略。
4.2.3 Mapper 接口
@Mapper
public interface DepartmentMapper {

	public void insert(Department department);

	public Department getById(Integer id);

	public void update(Department department);

	public void deleteById(Integer id);
}
mybatis/mapper/departmentMapper.xml :
<?xml version="1.0" encoding="UTF-8"?>
<!DOCTYPE mapper PUBLIC "-//mybatis.org//DTD Mapper 3.0//EN"
"http://mybatis.org/dtd/mybatis-3-mapper.dtd">
<mapper namespace="com.light.springboot.dao.DepartmentMapper">

	<insert id="insert" parameterType="com.light.springboot.domain.Department">
		insert into department(id,name,descr) values(#{id},#{name},#{descr})
	</insert>

	<select id="getById" parameterType="java.lang.Integer" resultType="com.light.springboot.domain.Department">
		select id,name,descr from department where id = #{id}
	</select>

	<update id="update" parameterType="com.light.springboot.domain.Department">
		update department set descr = #{descr} where id = #{id}
	</update>

	<delete id="deleteById" parameterType="java.lang.Integer">
		delete from department where id = #{id}
	</delete>
</mapper>
4.2.4 测试类
@RunWith(SpringRunner.class)
@SpringBootTest
public class DepartmentTest {

	@Autowired
	private DepartmentMapper departmentMapper;

	@Test
	public void testInsert() {
		Department department = new Department();
		department.setId(1);
		department.setName("研发部");
		department.setDescr("开发产品");
		this.departmentMapper.insert(department);
	}

	@Test
	public void testGetById() {
		Department department = this.departmentMapper.getById(1);
		System.out.println(department);
	}

	@Test
	public void testUpdate() {
		Department department = new Department();
		department.setId(1);
		department.setDescr("开发高级产品");
		this.departmentMapper.update(department);
	}

	@Test
	public void testDeleteById() {
		this.departmentMapper.deleteById(1);
	}
}
测试结果省略...
五、配置 Druid 数据源
同样地,有两种方式配置:
1)Spring boot,Druid 整合包
2)原始 jar 包 + 手动编程
5.1 Spring boot,Druid 整合包方式
5.1.1 添加依赖
<!-- springboot,druid 整合包 -->
<dependency>
   <groupId>com.alibaba</groupId>
   <artifactId>druid-spring-boot-starter</artifactId>
   <version>1.1.8</version>
</dependency>
5.1.2 添加配置
在 application.properties 中添加:
spring.datasource.driver-class-name=com.mysql.jdbc.Driver
spring.datasource.url=jdbc:mysql://localhost:3306/springboot?useUnicode=true&characterEncoding=utf8&serverTimezone=UTC
spring.datasource.username=root
spring.datasource.password=tiger

# 修改数据源
spring.datasource.type=com.alibaba.druid.pool.DruidDataSource
spring.datasource.druid.initial-size=5
spring.datasource.druid.min-idle=5
spring.datasource.druid.max-active=20
spring.datasource.druid.max-wait=60000
spring.datasource.druid.time-between-eviction-runs-millis=60000
spring.datasource.druid.min-evictable-idle-time-millis=300000
spring.datasource.druid.validation-query=SELECT 1 FROM DUAL
spring.datasource.druid.test-while-idle=true
spring.datasource.druid.test-on-borrow=false
spring.datasource.druid.test-on-return=false
spring.datasource.druid.pool-prepared-statements=true
spring.datasource.druid.max-pool-prepared-statement-per-connection-size=20
spring.datasource.druid.filters=stat,wall,log4j
5.2 原始 jar 包 + 手动编程方式
5.2.1 添加依赖
<dependency>
    <groupId>com.alibaba</groupId>
    <artifactId>druid</artifactId>
    <version>1.1.8</version>
</dependency>
5.2.2 添加配置
spring.datasource.druid.driverClassName=com.mysql.jdbc.Driver
spring.datasource.druid.url=jdbc:mysql://localhost:3306/springboot?useUnicode=true&characterEncoding=utf8&serverTimezone=UTC
spring.datasource.druid.username=root
spring.datasource.druid.password=tiger

spring.datasource.druid.initialSize=5
spring.datasource.druid.minIdle=5
spring.datasource.druid.maxActive=20
spring.datasource.druid.maxWait=60000
spring.datasource.druid.timeBetweenEvictionRunsMillis=60000
spring.datasource.druid.min-evictableIdleTimeMillis=300000
spring.datasource.druid.validationQuery=SELECT 1 FROM DUAL
spring.datasource.druid.testWhileIdle=true
spring.datasource.druid.testOnBorrow=false
spring.datasource.druid.testOnReturn=false
spring.datasource.druid.poolPreparedStatements=true
spring.datasource.druid.maxPoolPreparedStatementPerConnectionSize=20
spring.datasource.druid.filters=stat,wall
注意:配置中都是以 spring.datasource.druid 开头,使用驼峰命名
5.2.3 手动编程
@Configuration
public class DruidConfiguration {

    @ConfigurationProperties(prefix = "spring.datasource.druid")
    @Bean(initMethod = "init",destroyMethod = "close")
    public DruidDataSource dataSource() {
        DruidDataSource ds = new DruidDataSource();
        ds.setProxyFilters(Arrays.asList(statFilter()));
        return ds;
    }

    @Bean
    public Filter statFilter() {
        StatFilter filter = new StatFilter();
        filter.setSlowSqlMillis(5000);
        filter.setLogSlowSql(true);
        filter.setMergeSql(true);
        return filter;
    }
}
通过上文 MyBatis 的测试代码,运行结果如下:
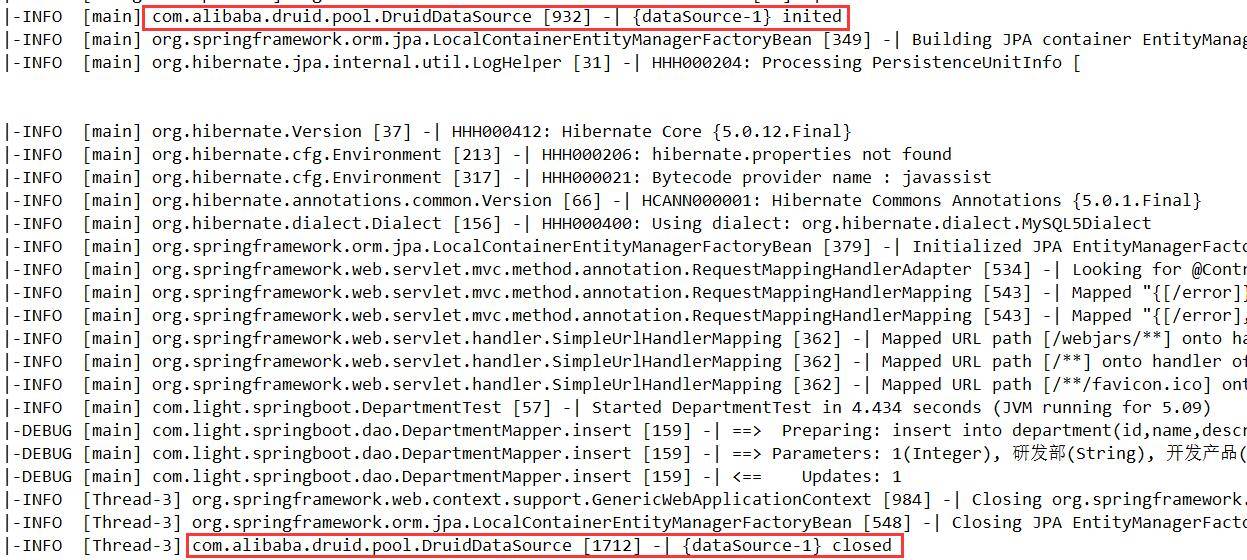
项目已经使用了 Druid 数据源了。
六、配置 Druid 监控
默认情况下,Druid 的监控统计功能和页面是开启的。
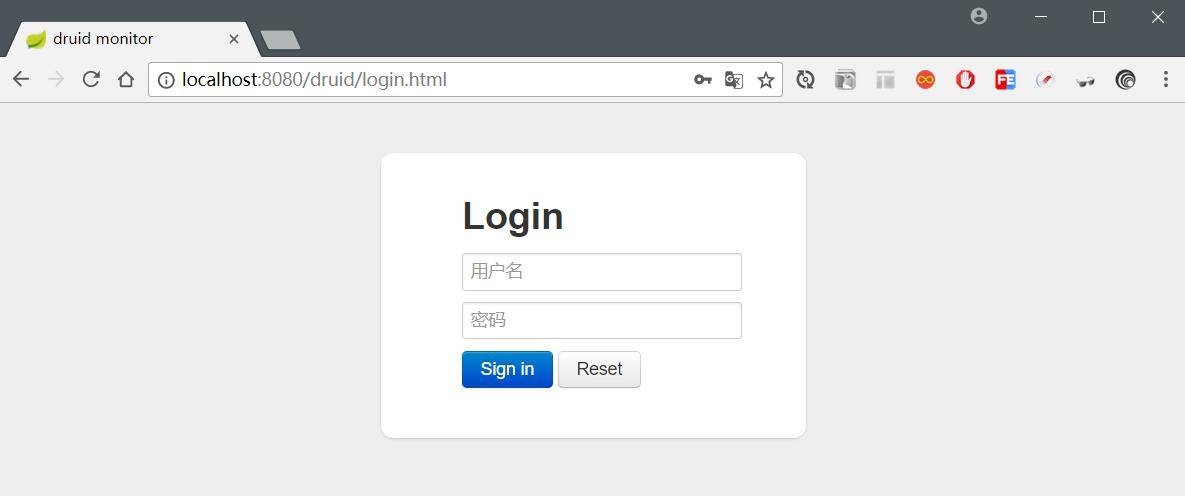
我们启动项目,访问 http://localhost:8080/druid/index.html,如下图:

为了保证访问的安全性,我们可以如下配置:
在 application.properties 中添加:
## druid 监控
spring.datasource.druid.web-stat-filter.enabled=true
spring.datasource.druid.web-stat-filter.url-pattern=/*
spring.datasource.druid.web-stat-filter.exclusions=*.js,*.gif,*.jpg,*.png,*.css,*.ico,/druid/*

## druid 监控页面
spring.datasource.druid.stat-view-servlet.enabled=true
spring.datasource.druid.stat-view-servlet.url-pattern=/druid/*
spring.datasource.druid.stat-view-servlet.login-username=druid
spring.datasource.druid.stat-view-servlet.login-password=druid123
重启项目,再次访问 http://localhost:8080/druid/index.html 地址时需要身份验证: