1.建立maven项目
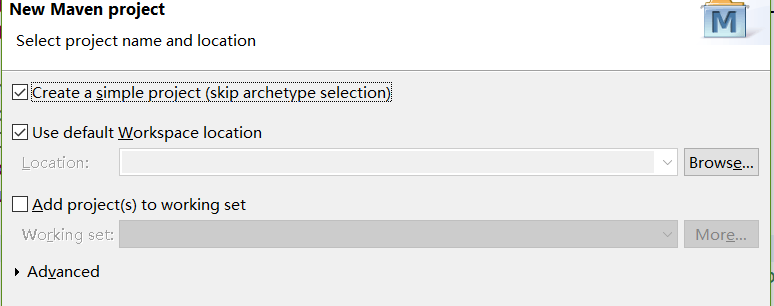
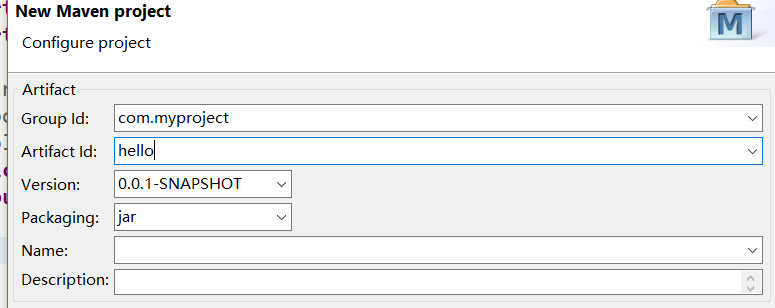
点击finish,完成创建maven项目
在pom.xml文件中添加如下代码:
 1   <parent>
 2     <groupId>org.springframework.boot</groupId>
 3     <artifactId>spring-boot-starter-parent</artifactId>
 4     <version>1.4.4.RELEASE</version>
 5   </parent>
 6     <dependencies>
 7         <dependency>
 8         <groupId>org.springframework.boot</groupId>
 9         <artifactId>spring-boot-starter-web</artifactId>
10         </dependency>
11     </dependencies>
其中,spring-boot-starter-parent的作用是继承一些springboot的默认配置,比如:
- 默认使用Java 8
- 使用UTF-8编码
- 一个引用管理的功能,在dependencies里的部分配置可以不用填写version信息,这些version信息会从spring-boot-dependencies里得到继承。
- 识别过来资源过滤(Sensible resource filtering.)
- 识别插件的配置(Sensible plugin configuration (exec plugin, surefire, Git commit ID, shade).)
- 能够识别application.properties和application.yml类型的文件,同时也能支持profile-specific类型的文件(如: application-foo.properties and application-foo.yml,这个功能可以更好的配置不同生产环境下的配置文件)。
如果不想用默认配置,可以使用自定义配置覆盖默认配置,比如更改默认使用的jdk版本为1.7
<properties>
    <java.version>1.7</java.version>
</properties>
建立Application.class类,该类作为springboot的启动器
 1 package main;
 2
 3 import org.springframework.boot.SpringApplication;
 4 import org.springframework.boot.autoconfigure.SpringBootApplication;
 5
 6 @SpringBootApplication(scanBasePackages={"com.myproject"})
 7 public class Application {
 8     public static void main(String[] args) {
 9         SpringApplication.run(Application.class, args);
10         //以下是是否禁用启动标识
11 //        SpringApplication application = new SpringApplication(Application.class);
12 //        application.setBannerMode(Mode.OFF);
13 //        application.run(args);
14     }
15 }
其中,@SpringBootApplication是一个组合注解,@SpringBootApplication = (默认属性)@Configuration + @EnableAutoConfiguration + @ComponentScan。
@Configuration
1、@Configuration:提到@Configuration就要提到他的搭档@Bean。使用这两个注解就可以创建一个简单的spring配置类,可以用来替代相应的xml配置文件。
1         <beans>
2             <bean id = "car" class="com.test.Car">
3                 <property name="wheel" ref = "wheel"></property>
4             </bean>
5             <bean id = "wheel" class="com.test.Wheel"></bean>
6         </beans>
相当于:
 1 @Configuration
 2 public class Conf {
 3     @Bean
 4     public Car car() {
 5         Car car = new Car();
 6         car.setWheel(wheel());
 7         return car;
 8     }
 9     @Bean
10     public Wheel wheel() {
11         return new Wheel();
12     }
13 }
@Configuration的注解类标识这个类可以使用Spring IoC容器作为bean定义的来源。@Bean注解告诉Spring,一个带有@Bean的注解方法将返回一个对象,该对象应该被注册为在Spring应用程序上下文中的bean。
2、@EnableAutoConfiguration:能够自动配置spring的上下文,试图猜测和配置你想要的bean类,通常会自动根据你的类路径和你的bean定义自动配置。
3、@ComponentScan:会自动扫描指定包下的全部标有@Component的类,并注册成bean,当然包括@Component下的子注解@Service,@Repository,@Controller。
这里注意:@SpringBootApplication后必须跟扫描包的位置,否则Controller类将不会被映射到地址上,则无法访问.
新建包,并建立Controller类

HelloWorld类为一个控制器类,代码如下:
 1 package com.myproject.controller;
 2
 3 import org.springframework.web.bind.annotation.RequestMapping;
 4 import org.springframework.web.bind.annotation.RestController;
 5
 6 @RestController
 7 public class HelloWorld {
 8
 9     @RequestMapping("/hello")
10     public String sayHello(){
11         System.out.println("HelloWorld");
12         return "HelloWorld";
13     }
14 }
@RestController注解,该注解表示当前类为一个Controller组件,该注解 = @Controller与@ResponseBody注解的结合.
@responseBody注解的作用是将controller的方法返回的对象通过适当的转换器转换为指定的格式之后,写入到response对象的body区,通常用来返回JSON数据或者是XML数据。
这个注解表示该方法的返回结果直接写入HTTP response body中,一般在异步获取数据时使用。
在使用@RequestMapping后,返回值通常解析为跳转路径。加上@responsebody后,返回结果直接写入HTTP response body中,不会被解析为跳转路径。比如异步请求,希望响应的结果是json数据,那么加上@responsebody后,就会直接返回json数据。
至此,一个简单的springboot项目就搭建好了,访问http://localhost:8080/hello,在页面上显示HelloWorld,并在控制台打印"HelloWorld".