Maven 本身
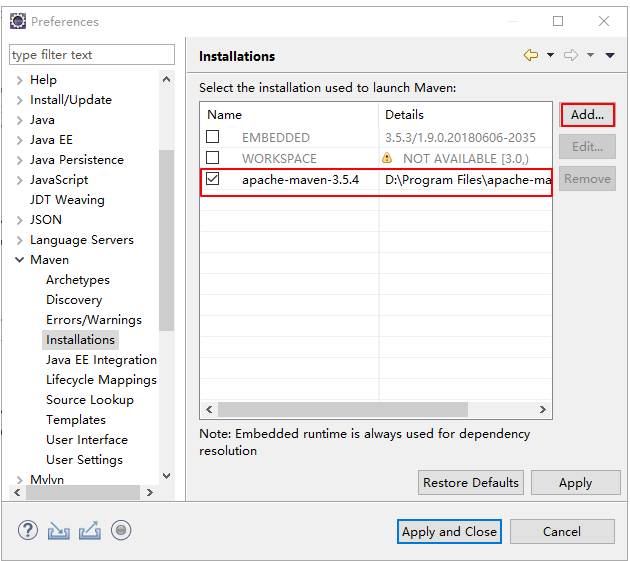
Maven 的安装步骤, 在别的blog里有, 这里主要是maven 成功安装以后, 需要做如下的 settings.xml 的配置.
<mirror>
        <id>alimaven</id>
        <mirrorOf>central</mirrorOf>
        <name>aliyun maven</name>
        <url>http://maven.aliyun.com/nexus/content/repositories/central/</url>
    </mirror>

    <!-- central repository 1 -->
    <mirror>
        <id>repo1</id>
        <mirrorOf>central</mirrorOf>
        <name>Human Readable Name for this Mirror.</name>
        <url>http://repo1.maven.org/maven2/</url>
    </mirror>

    <!-- central repository 2 -->
    <mirror>
        <id>repo2</id>
        <mirrorOf>central</mirrorOf>
        <name>Human Readable Name for this Mirror.</name>
        <url>http://repo2.maven.org/maven2/</url>
    </mirror>
profile 也要一个添加
<profile>
      <id>JDK-1.8</id>
      <activation>
          <activeByDefault>true</activeByDefault>
          <jdk>1.8</jdk>
      </activation>
      <properties>
          <maven.compiler.source>1.8</maven.compiler.source>
          <maven.compiler.target>1.8</maven.compiler.target>
          <maven.compiler.compilerVersion>1.8</maven.compiler.compilerVersion>
      </properties>
    </profile>
Eclipse 相关

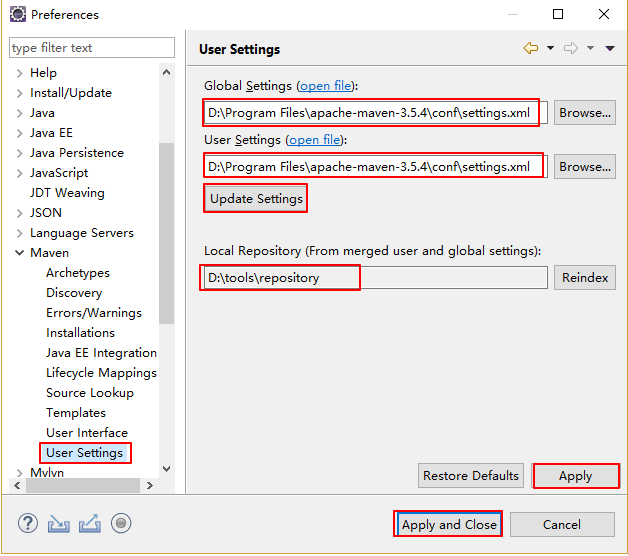
将所有的settings修改为自己Maven目录下的conf/settings.xml.点击Update Settings按钮,下面的Local Respository会自动识别出来。

依赖范围的 scope
compile: 默认范围, 用于编译
provided: 类似于编译,但支持jdk或者容器提供, 类似classpath
runtime: 在执行时使用
test: 用于 test 任务时使用
system: 需要外在提供相应的元素, 通过 systemPath来取得
systemPath: 仅用于 system
optional: 用于连续依赖时使用
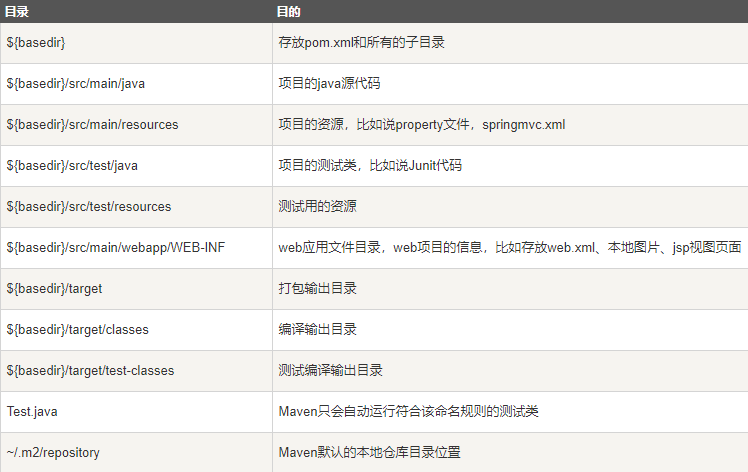
Maven 目录
