LinUI学习8 新监听器observers与自定义hot-list组件
1、定义一个hot-list组件
在component文件加下新建一个hot-list组件,
在对应的page的json中当前是在home.js中引入该组件
{
  "usingComponents": {
    "s-hot-list":"/components/hot-list/index"
  }
}
2、Http请求获取信息
在model文件夹下的banner.js中编写
const { Http } = require("../utils/http") //这是之前封装好的公共Http请求 详情见前面的笔记

class Banner{
  static locationG = 'b-2'
  static async getHomeLocationG(){
    return  await Http.request({
         url:`/banner/name/${Banner.locationG}`
       })
   }
}
export{
  Banner
}
在home.js调用该请求
 const bannerG = await Banner.getHomeLocationG()

 that.setData({
      BannerB:bannerB,
      BannerG:bannerG,
    })
调用该组件并将请求获得的数据传到组件中
<s-hot-list banner="{{BannerG}}"></s-hot-list>
3、编写组件hot-list
我们获取到的数据如下

将items展开
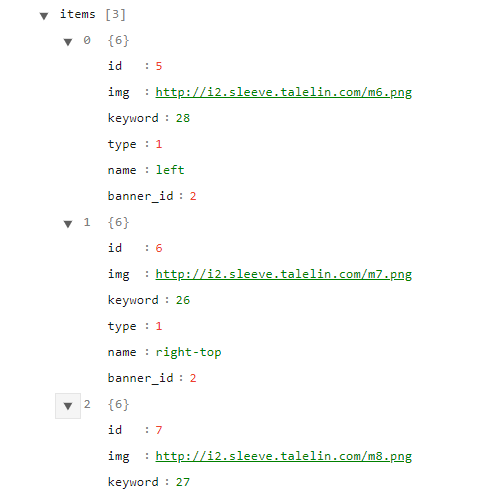
因此我们需要根据将items内的name来确定图片放置的位子,因此我们需要在js中使用到新版的监听器 observers
hot-list.js
// components/hot-list/index.js
Component({
  /**
   * 组件的属性列表
   */
  properties: {
    banner:Object //接收传入
  },
  observers:{       //监听器
    'banner':function(banner){
      if(!banner){
        return
      }
      if(banner.items.length === 0){
        return
      }
      const left = banner.items.find(i=>i.name==='left')
      const rightTop =banner.items.find(i=> i.name==='right-top')
      const rightBottom = banner.items.find(i=> i.name==='right-bottom')
      this.setData({
        left:left,
        rightTop:rightTop,
        rightBottom:rightBottom,
      })

    }
  },

  /**
   * 组件的初始数据
   */
  data: {
    left:'',
    rightTop:'',
    rightBottom:'',
  },
  /**
   * 组件的方法列表
   */
  methods: {

  }
})
hot-list.wxml
<view class="container">
  <image src="{{banner.img}}"></image>
  <view class="inner-container">
    <image src="{{left.img}}"></image>
    <image src="{{rightTop.img}}"></image>
    <image src="{{rightBottom.img}}"></image>
  </view>
</view>
完善一下css就可以实现该功能了。