首先感谢做这个视频的小哥:
https://www.youtube.com/watch?v=6eTVqYGIWx0&t=165s&ab_channel=PythonEngineer
写下文章备忘。
首先打开VS后,新建一个CMAKE项目,起名为“demoPytorch”。(小哥说因为CMAKE配置pyTorch比较简单)
在这个页面下载pyTorch:https://pytorch.org/get-started/locally/
选择Windows、LibTorch、C++、显卡对应的CUDA版本.。然后选择debug版本下载。
下载后解压。
然后打开项目文件夹中的CMakeLists.txt文件(注意不是out文件夹),并加入下面这一行:
find_package(Torch REQUIRED)
告诉CMake我们需要Torch这个包。此时Ctrl+S保存,出现错误,无法找到这个包。
点开下拉栏:
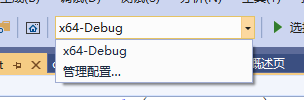
点击管理配置。
在CMake命令参数(CMake command argument)中写入:
-DCMAKE_PREFIX_PATH="C:\Users\Think\Documents\Visual Studio 2019\libtorch"
(填入解压后的pyTorch路径,注意换成双反斜\)
告诉CMake在哪里可以找到pyTorch。
输入后,Ctrl+S保存。如果你已经安装了CUDA,这时候应该显示CMake正常配置。如果没有安装CUDA,会报错,请下载安装CUDA后把CMake变量中的CUDA_SDK_ROOT_DIR设置为CUDA dev安装后的路径。
之后,在cpp文件中加入:
#include "torch/torch.h"
现在include下应该有红线,我们需要到CMakeLists.txt中进行库链接。
加入:
target_link_libraries(demoPytorch "${TORCH_LIBRARIES}")
Ctrl+S后,回到cpp文件,红线消失。
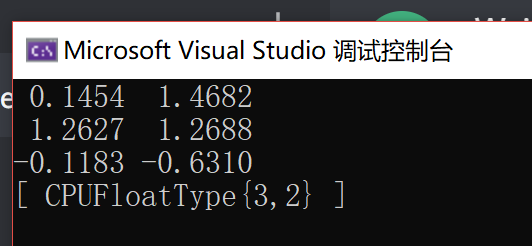
验证一下是否配置成功,在cpp中把cout那一行改成:
cout << torch::randn({3,2}) << endl;
运行出错,提示找不到c10.dll文件。
参考:https://pytorch.org/cppdocs/installing.html
复制以下代码到CMakeLists.txt文件:
# The following code block is suggested to be used on Windows.
# According to https://github.com/pytorch/pytorch/issues/25457,
# the DLLs need to be copied to avoid memory errors.
if (MSVC)
  file(GLOB TORCH_DLLS "${TORCH_INSTALL_PREFIX}/lib/*.dll")
  add_custom_command(TARGET example-app
                     POST_BUILD
                     COMMAND ${CMAKE_COMMAND} -E copy_if_different
                     ${TORCH_DLLS}
                     $<TARGET_FILE_DIR:example-app>)
endif (MSVC)
注意把example-app改为自己的项目名。
Ctrl+S后,等待CMake配置成功的提示,然后再次运行,成功:
附上CMakeLists.txt文件:
# CMakeList.txt: demoPytorch 的 CMake 项目,在此处包括源代码并定义
# 项目特定的逻辑。
#
cmake_minimum_required (VERSION 3.8)

find_package(Torch REQUIRED)

# 将源代码添加到此项目的可执行文件。
add_executable (demoPytorch "demoPytorch.cpp" "demoPytorch.h")
target_link_libraries(demoPytorch "${TORCH_LIBRARIES}")

if (MSVC)
  file(GLOB TORCH_DLLS "${TORCH_INSTALL_PREFIX}/lib/*.dll")
  add_custom_command(TARGET demoPytorch
                     POST_BUILD
                     COMMAND ${CMAKE_COMMAND} -E copy_if_different
                     ${TORCH_DLLS}
                     $<TARGET_FILE_DIR:demoPytorch>)
endif (MSVC)

# TODO: 如有需要,请添加测试并安装目标。
.cpp文件:
 1 // demoPytorch.cpp: 定义应用程序的入口点。
 2 //
 3
 4 #include "demoPytorch.h"
 5 #include "torch/torch.h"
 6
 7 using namespace std;
 8
 9 int main()
10 {
11     cout << torch::randn({3,2}) << endl;
12     return 0;
13 }