纹理一词来源于GPU图形世界,GPU通用并行计算“盗用”了纹理一词,定义了一个纹理内存的概念。纹理内存缓存在 设备上,在某些情况下能减少对内存的请求并降低内存带宽的使用,是专门为那些在内存访问模式中存在大量空间局部性的图形应用而设计,意味着一个线程读取的位置可能与邻近线程读取的位置“非常接近”。对于GPU内核而言,纹理内存是只读内存,并且只有通过特殊的纹理API才能对其访问。
纹理内存分为一维纹理内存和二维纹理内存,理解纹理内存最好的方式是丢掉“纹理”两个字,纹理内存本质上是一块内存,是GPU在特定应用中对一维、二维变量的特殊声明定义以及特殊使用,这种特殊使用能够减少内存流量,提升运算性能。
纹理变量(引用)必须声明为文件作用域内的全局变量,这里先探讨一下一维纹理内存的使用方法。一维纹理内存的关键操作如下:
- 1、用texture<类型>类型声明。
如声明一个unsigned char 型的一维纹理tex1,格式为:
texture<unsigned char,1,cudaReadmodeElementType> tex1;
- 2、通过cudaBindTexture()绑定到纹理内存中,并关联到对应的数据上。
如将unsigned char类型的dev_A绑定到一维纹理tex1上,格式为:
cudaBindTexture(0,tex1,dev_A);
注意一旦将数据绑定到一个纹理内存上,该数据就已经传输到了设备缓存上,在核函数中就可以直接访问,不再需要额外传入。
- 3、 通过tex1Dfetch()来读取纹理内存中的数据。
纹理内存是一种特殊的内存,需要使用特定的纹理API来访问其中的数据。如访问tex1数组的第3个元素,格式为:
tex1Dfetch(tex1,2);
- 4、 通过cudaUnbindTexture()取消绑定纹理内存。
纹理内存使用完之后需要取消绑定,释放空间,如解除纹理tex1的绑定,格式为:
cudaUnbindTexture(tex1);
考虑一个简单的应用,把一个长度是100的向量A中的数据拷贝到一个向量B中,使用普通CPU编程实现如下:
#include <iostream>
using namespace std;
#define _length 100
//CPU函数实现复制一个数组
void Copy_CPU(unsigned int * listSource, unsigned int * listTarget, int length)
{
for (int i = 0; i < length; i++)
{
listTarget[i] = listSource[i];
}
}
int main()
{
unsigned int * listSource = new unsigned int[_length];
unsigned int * listTarget = new unsigned int[_length];
//赋值
for (int i = 0; i < _length; i++)
{
listSource[i] = i;
}
//调用CPU复制函数
Copy_CPU(listSource, listTarget, _length);
cout << "原始数据: ";
for (int i = 0; i < _length; i++)
{
cout << listSource[i] << " ";
}
cout << endl << endl << "通过CPU拷贝的数据: ";
for (int i = 0; i < _length; i++)
{
cout << listTarget[i] << " ";
}
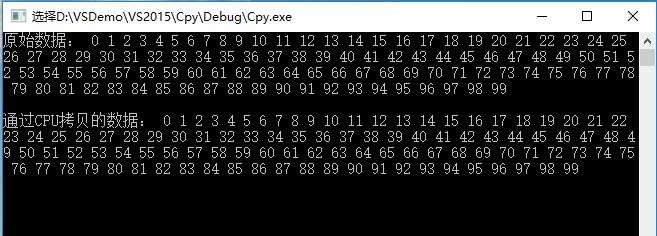
getchar();
}运行结果:
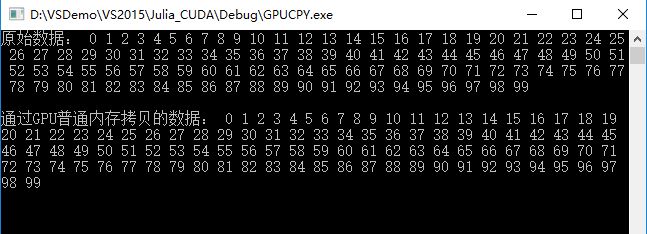
使用GPU编程,普通变量编程实现:
#include"cuda_runtime.h"
#include"device_launch_parameters.h"
#include<iostream>

#define _length 100

using namespace std;

//声明要调用的Copy_GPU函数
extern "C" void Copy_GPU(unsigned int* listSource, unsigned int* listTarget, int length);

void main(int argc, char** argv)
{
	unsigned int *listSource = new unsigned int[_length];
	unsigned int *listTarget = new unsigned int[_length];

	//赋值
	for (int i = 0; i < _length; i++)
	{
		listSource[i] = i;
	}

	// 调用Copy_GPU函数,Copy_GPU中会调用gpu端的kernel函数
	Copy_GPU(listSource, listTarget, _length);

	cout << "原始数据: ";
	for (int i = 0; i < _length; i++)
	{
		cout << listSource[i] << " ";
	}
	cout << endl << endl << "通过GPU普通内存拷贝的数据: ";
	for (int i = 0; i < _length; i++)
	{
		cout << listTarget[i] << " ";
	}
	getchar();
}

//核心代码,在gpu端执行的kernel,
__global__ void Blending_Texture(unsigned int* listSource, unsigned int* listTarget, int size)
{
	//通过线程ID得到数组下标
	int index = blockIdx.x * blockDim.x + threadIdx.x;

	if (index < size)
		listTarget[index] = listSource[index];
}

void Copy_GPU(unsigned int* listSource, unsigned int* listTarget, int length)
{
	int data_size = length * sizeof(unsigned int);

	unsigned int *dev_Source;
	unsigned int *dev_Target;

	//在设备上申请显存空间
	cudaMalloc((void**)&dev_Source, data_size);
	cudaMalloc((void**)&dev_Target, data_size);

	//将host端的数据拷贝到device端
	cudaMemcpy(dev_Source, listSource, data_size, cudaMemcpyHostToDevice);

	//调用kernel
	Blending_Texture << < ceil(_length / 10), 10 >> > (dev_Source, dev_Target, _length);

	//将结果拷贝到host端 ☆host就是CPU
	cudaMemcpy(listTarget, dev_Target, data_size, cudaMemcpyDeviceToHost);

	//释放内存空间
	cudaFree(dev_Source);
	cudaFree(dev_Target);
}
运行结果:
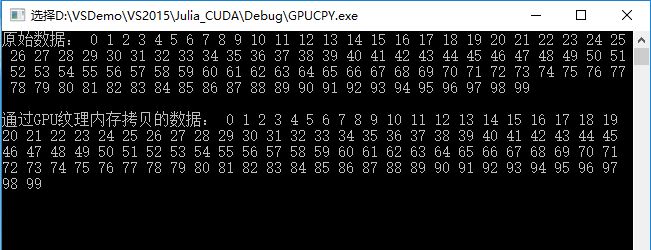
使用GPU编程,一维纹理变量编程实现:
#include"cuda_runtime.h"
#include"device_launch_parameters.h"
#include<iostream>

#define _length 100

using namespace std;

//声明纹理,用来绑定纹理,其实也就是个纹理标识
texture<unsigned int, 1, cudaReadModeElementType> rT1;

//声明要调用的Copy_GPU函数
extern "C" void Copy_GPU(unsigned int* listSource, unsigned int* listTarget, int length);

void main(int argc, char** argv)
{
	unsigned int *listSource = new unsigned int[_length];
	unsigned int *listTarget = new unsigned int[_length];

	//赋值
	for (int i = 0; i < _length; i++)
	{
		listSource[i] = i;
	}

	// 调用Copy_GPU函数,Copy_GPU中会调用gpu端的kernel函数
	Copy_GPU(listSource, listTarget, _length);

	cout << "原始数据: ";
	for (int i = 0; i < _length; i++)
	{
		cout << listSource[i] << " ";
	}
	cout << endl << endl << "通过GPU纹理内存拷贝的数据: ";
	for (int i = 0; i < _length; i++)
	{
		cout << listTarget[i] << " ";
	}
	getchar();
}

//核心代码,在gpu端执行的kernel,
__global__ void Blending_Texture(unsigned int* listTarget, int size)
{
	//通过线程ID得到数组下标
	int index = blockIdx.x * blockDim.x + threadIdx.x;

	//通过纹理获取函数得到数据再运算
	if (index < size)
		listTarget[index] = tex1Dfetch(rT1, index);
}

void Copy_GPU(unsigned int* listSource, unsigned int* listTarget, int length)
{
	int data_size = length * sizeof(unsigned int);

	unsigned int *dev_Source;
	unsigned int *dev_Target;

	//在设备上申请显存空间
	cudaMalloc((void**)&dev_Source, data_size);
	cudaMalloc((void**)&dev_Target, data_size);

	//将host端的数据拷贝到device端
	cudaMemcpy(dev_Source, listSource, data_size, cudaMemcpyHostToDevice);

	//绑定纹理,绑定的纹理标识对应的数据
	cudaBindTexture(0, rT1, dev_Source);

	//调用kernel
	Blending_Texture << < ceil(_length / 10), 10 >> > (dev_Target, _length);

	//将结果拷贝到host端 ☆host就是CPU
	cudaMemcpy(listTarget, dev_Target, data_size, cudaMemcpyDeviceToHost);

	//取消绑定
	cudaUnbindTexture(rT1);

	//释放内存空间
	cudaFree(dev_Source);
	cudaFree(dev_Target);
}
运行结果:
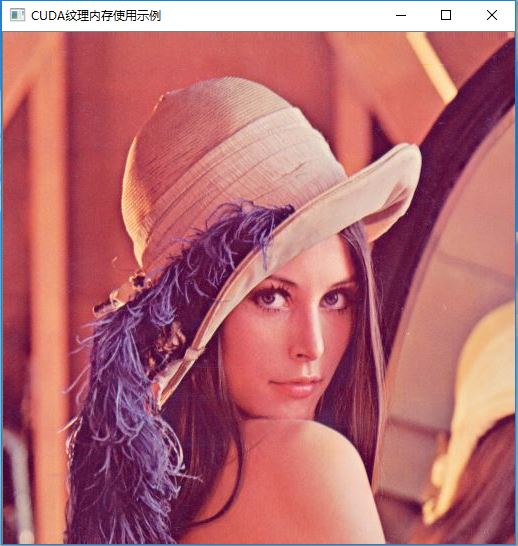
再举一个使用CUDA+OpenCv编程,实现复制一幅图像的例子:
#include"cuda_runtime.h"
#include<iostream>
#include<highgui/highgui.hpp>
#include<imgproc/imgproc.hpp>

#define DIM 512   //图像尺寸

using namespace std;
using namespace cv;

//一维纹理声明
texture<unsigned char, 1, cudaReadModeElementType> rT1;

__global__ void Kernel_Copy(unsigned char* imageTarget)
{
	int x = threadIdx.x + blockIdx.x*blockDim.x;
	int y = threadIdx.y + blockIdx.y*blockDim.y;
	int offset = x + y*blockDim.x*gridDim.x;

	//复制图像
	imageTarget[offset * 3 + 2] = tex1Dfetch(rT1, offset * 3 + 2);
	imageTarget[offset * 3 + 1] = tex1Dfetch(rT1, offset * 3 + 1);
	imageTarget[offset * 3 + 0] = tex1Dfetch(rT1, offset * 3 + 0);
}

void main(int argc, char** argv)
{
	Mat image = imread("D:\lena.jpg");
	Mat imageSource;
	resize(image, imageSource, Size(DIM, DIM)); //调整图像大小

	Mat imageTarget = Mat(Size(DIM, DIM), CV_8UC3, Scalar::all(0));

	//分配空间
	unsigned char *dev_imageSource;
	unsigned char *dev_imageTarget;
	cudaMalloc((void**)&dev_imageSource, 3 * imageSource.rows*imageSource.cols);
	cudaMalloc((void**)&dev_imageTarget, 3 * imageSource.rows*imageSource.cols);

	cudaMemcpy(dev_imageSource, imageSource.data, 3 * imageSource.cols*imageSource.rows, cudaMemcpyHostToDevice);
	cudaMemcpy(dev_imageTarget, imageTarget.data, 3 * imageSource.cols*imageSource.rows, cudaMemcpyHostToDevice);

	//绑定纹理
	cudaBindTexture(0, rT1, dev_imageSource);

	dim3 grids(DIM / 16, DIM / 16);
	dim3 threads(16, 16);
	//调用kernel
	Kernel_Copy << < grids, threads >> > (dev_imageTarget);

	//将结果拷贝到host端 ☆host就是CPU
	cudaMemcpy(imageTarget.data, dev_imageTarget, 3 * imageSource.cols*imageSource.rows, cudaMemcpyDeviceToHost);

	imshow("CUDA纹理内存使用示例", imageTarget);
	waitKey();

	//解除纹理绑定
	cudaUnbindTexture(rT1);

	cudaFree(dev_imageSource);
	cudaFree(dev_imageSource);
}
运行结果: