移动端訪问不佳,请訪问我的个人博客
近期撸了一个上拉刷新的小轮子。仅仅要遵循一个协议就能自己定义自己动效的上拉刷新和载入,我自己也写了几个动效进去,以下是一个比較好的动效的实现过程
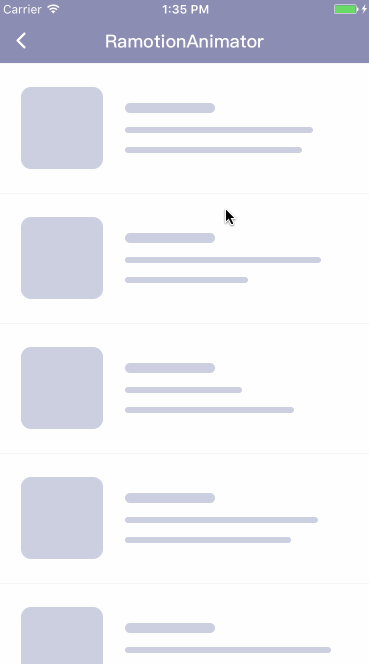
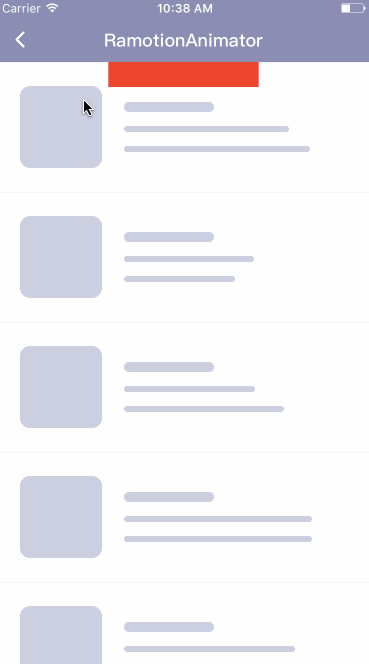
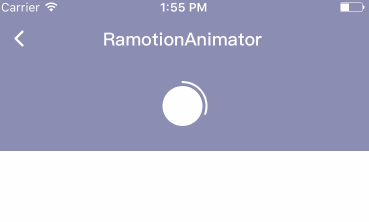
先上效果图和github地址,有其它好的动效大家也能够交流~
动效的原地址,在uimovement站点上看到这个动效时感觉特别6,就想自己实现一下,费了非常长时间。换了几种方案最终实现出来了,以下是实现的步骤:
分析动效
写一个动效的第一步就应该细致的去分析它,把它的每一帧展开来看,找一个最合适的方式来实现它,以下是我分析过程:
- 看到曲线,肯定会想到
CAShapeLayer和UIBezierPath这一对搭档,相对于CoreGraphics而言。它即简单有高效; - 曲线的拉拽效果能够用
CADisplayLink加上一个參考的view,以參考view为UIBezierPath的一个controlPoint。移动參考view来实现曲线拉拽的效果。 - 曲线的回弹效果考虑再三后决定使用
CAKeyframeAnimation配合CAShapeLayer来使用。本来打算使用CASpringanimation来实现,可是考虑它是iOS9出的,而我的轮子最低支持iOS8。就放弃用它了; - 小球是实现和弹出就相对简单了。使用
CAShapeLayer来实现小球,用CABasicAnimation来实现小球的移动。 - 小球外层圆环旋转的效果,首先也是用
CAShapeLayer来实现圆环,然后配合CABasicAnimation控制CAShapeLayer的strokeEnd和transform.rotation.z一直来实现外层圆环旋转的效果。 - 最后就是比較复杂的就是小球和曲线的连接处的处理,我的实现方式是通过
CADisplayLink在动画的过程中实时的去监听小球和曲线的位置,计算出UIBezierPath用一个CAShapeLayer来精确的连接小球和曲线部分。
好了,以上是大概过程,假设大家有另外的更好的实现方式,也能够一起来讨论。
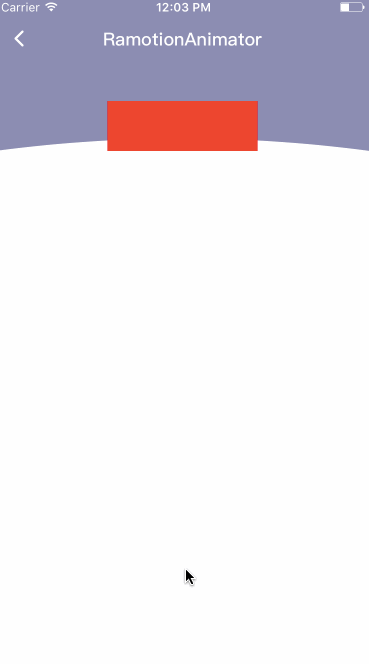
绘制曲线和曲线的拉拽
我们用CAShapeLayer和UIBezierPath这一对搭档来实现曲线的绘制。以下以一个參考view来给大家演示一下,以下是主要代码和效果图:
// 通过传递的y坐标来绘制曲线
func wave(_ y: CGFloat, execute: CGFloat) {
    self.execute = execute
    waveLayer.path = wavePath(x: 0, y: y)
    if !isAnimation {
        var trans = CGAffineTransform.identity
        trans = trans.translatedBy(x: 0, y: y)
        reference.transform = trans
    }
}

// 计算path
private func wavePath(x: CGFloat, y: CGFloat) -> CGPath {
    let w = frame.width
    let path = UIBezierPath()
    if y < execute {
        path.move(to: .zero)
        path.addLine(to: .init(x: w, y: 0))
        path.addLine(to: .init(x: w, y: y))
        path.addLine(to: .init(x: 0, y: y))
        path.addLine(to: .zero)
    }else {
        path.move(to: .zero)
        path.addLine(to: .init(x: w, y: 0))
        path.addLine(to: .init(x: w, y: execute))
        path.addQuadCurve(to: .init(x: 0, y: execute), controlPoint: .init(x: w/2, y: y))
        path.addLine(to: .zero)
    }
    return path.cgPath
}
曲线的回弹效果
曲线的回弹使用CAKeyframeAnimation加到參考的view上,然后用CADisplayLink监听參考view的坐标做为controlPoint来实现曲线的回弹效果,以下是主要代码和效果图:
// 開始动画
func startAnimation() {
isAnimation = true
addDisPlay()
boundAnimation(x: 0, y: execute)
}
// CAKeyframeAnimation动画
private func boundAnimation(x: CGFloat, y: CGFloat) {
let bounce = CAKeyframeAnimation(keyPath: "transform.translation.y")
bounce.timingFunction = CAMediaTimingFunction(name: kCAMediaTimingFunctionEaseIn)
bounce.duration = bounceDuration
bounce.values = [
reference.frame.origin.y,
y * 0.5,
y * 1.2,
y * 0.8,
y * 1.1,
y
]
bounce.isRemovedOnCompletion = true
bounce.fillMode = kCAFillModeForwards
bounce.delegate = self
reference.layer.add(bounce, forKey: "return")
}
// 加入和移除CADisplayLink
private func addDisPlay() {
displayLink = CADisplayLink(target: self, selector: #selector(displayAction))
displayLink?.add(to: .main, forMode: .commonModes)
}
private func removeDisPlay() {
displayLink?
.invalidate()
displayLink = nil
}
// CADisplayLink绑定的方法
@objc private func displayAction() {
if let frame = reference.layer.presentation()?
.frame {
DispatchQueue.global().async {
let path = self.displayWavePath(x: 0, y: frame.origin.y + referenceHeight/2)
DispatchQueue.main.async {
self.waveLayer.path = path
}
}
}
}
// 通过这种方法获取path
private func displayWavePath(x: CGFloat, y: CGFloat) -> CGPath {
let w = frame.width
let path = UIBezierPath()
path.move(to: .zero)
path.addLine(to: .init(x: w, y: 0))
path.addLine(to: .init(x: w, y: execute))
path.addQuadCurve(to: .init(x: 0, y: execute), controlPoint: .init(x: w/2, y: y))
path.addLine(to: .zero)
return path.cgPath
}
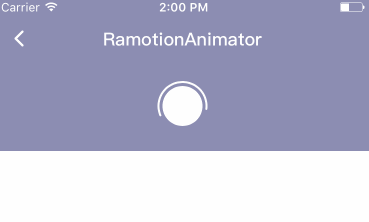
外层圆环的动画
小球和外层圆环我们用CAShapeLayer来绘制。这里主要讲的是动画的实现,动画主要由两个部分组成:
CABasicAnimation控制外层圆环的strokeEnd的动画;CABasicAnimation控制外层圆环的transform.rotation.z的旋转动画。
外层圆环的strokeEnd动画 |
外层圆环的transform.rotation.z的旋转动画 |
|---|---|
 |
 |
以下是关键代码:
func animation() {
    self.isHidden = false
    let rotate = CABasicAnimation(keyPath: "transform.rotation.z")
    rotate.fromValue = 0
    rotate.toValue = M_PI * 2
    rotate.duration = 1
    rotate.timingFunction = CAMediaTimingFunction(name: kCAMediaTimingFunctionLinear)
    rotate.repeatCount = HUGE
    rotate.fillMode = kCAFillModeForwards
    rotate.isRemovedOnCompletion = false
    self.add(rotate, forKey: rotate.keyPath)
    strokeEndAnimation()
}

func strokeEndAnimation() {
    let endPoint = CABasicAnimation(keyPath: "strokeEnd")
    endPoint.fromValue = 0
    endPoint.toValue = 1
    endPoint.duration = 1.8
    endPoint.timingFunction = CAMediaTimingFunction(name: kCAMediaTimingFunctionEaseOut)
    endPoint.repeatCount = HUGE
    endPoint.fillMode = kCAFillModeForwards
    endPoint.isRemovedOnCompletion = false
    endPoint.delegate = self
    add(endPoint, forKey: endPoint.keyPath)
}
小球上升和连接处的处理
小球上升动画非常easy,一个CABasicAnimation动画就实现了。主要麻烦的是连接处的动画实现,我的方案是在小球动画过程中通过CADisplayLink实时监听小球和參考view的位置,计算出贝斯尔曲线,然后通过一个名为linkLayer: CAShapeLayer的layer来连接它们。然后让它们在特定的地方断开,以下是主要代码和效果图:
@objc private func displayAction() {
    let offY = ballLayer.circleLayer.presentation()?.frame.origin.y
    let frame1 = ballLayer.frame
    let frame2 = wavelayer.reference.layer.presentation()?.frame
        if let offY = offY, let frame2 = frame2 {
            DispatchQueue.global().async {
                // 推断是球是向上还是下。false为上,速度快时,获取的位置不及时,向下时须要调整位置
                let isIncrement = (offY - self.previousOffY) > 0
                let path = UIBezierPath()
                let x1 = frame1.origin.x + (isIncrement ? 4 : 0)
                let y1 = frame1.origin.y + offY
                let w1 = frame1.size.width - (isIncrement ? 8 : 0)
                let h1 = frame1.size.height
                let x2 = frame2.origin.x
                let y2 = frame2.origin.y
                let w2 = frame2.size.width
                let h2 = frame2.size.height
                let subY = y2 - y1
                // y1和y2的间距
                let subScale = subY/self.execute/2
                // 断开的距离为10
                let executeSub = self.ballLayer.circleLayer.moveUpDist + offY
                if executeSub < 10 {
                    if !isIncrement {
                        let executeSubScale = executeSub/10
                        path.move(to: .init(x: x1 - 15, y: y2 + h2/2 + 15))
                        path.addLine(to: .init(x: x1 + w1 + 15, y: y2 + h2/2 + 15))
                        path.addQuadCurve(to: .init(x: x1 - 15, y: y2 + h2/2 + 15), controlPoint: .init(x: x1 + w1/2, y: y2 + h2/2 - self.execute/6 * executeSubScale))
                    }
                }else {
                    path.move(to: .init(x: x2 , y: y2 + h2))
                    path.addLine(to: .init(x: x2 + w2, y: y2 + h2))
                    path.addQuadCurve(to: .init(x: x1 + w1, y: y1 + h1/2), controlPoint: .init(x: x1 + w1 - w1*2*subScale, y: y1 + (y2 - y1)/2 + h1/2 + h2/2))
                    path.addLine(to: .init(x: x1, y: y1 + h1/2))
                    path.addQuadCurve(to: .init(x: x2 , y: y2 + h2), controlPoint: .init(x: x1 + w1*2*subScale, y: y1 + (y2 - y1)/2 + h1/2 + h2/2))
                    if y1 + h1 <= self.execute, isIncrement {
                        DispatchQueue.main.async {
                            self.wavelayer.startDownAnimation()
                        }
                    }
                }
                DispatchQueue.main.async {
                    self.linkLayer.path = path.cgPath
                }
                self.previousOffY = offY
            }
        }
}
我认为我这个地方的处理不是非常好,可是简单粗暴的攻克了问题,假设大家有更好的建议,能够提出来,大家一起交流学习~
完整的代码,大家能够去github地址去下载。欢迎大家star和发表意见和贡献代码,有好的动效的话也能够提供,最后谢谢大家的阅读