这里主要讲的是如何在手机端使用HTTP协议和服务器端进行网络交互,并对服务器返回的数据进行解析,这也是Android最常使用到的网络技术了。
1、WebView的用法
Android提供的WebView控件可以帮助我们在自己的应用程序中嵌入一个浏览器,从而非常轻松的展示各种各样的网页。下面是一个简单的示例:
 1 <?xml version="1.0" encoding="utf-8"?>
 2 <LinearLayout xmlns:android="http://schemas.android.com/apk/res/android"
 3     android:layout_width="match_parent"
 4     android:layout_height="match_parent"
 5     android:orientation="vertical" >
 6
 7     <WebView
 8         android:id="@+id/webView"
 9         android:layout_width="match_parent"
10         android:layout_height="match_parent" />
11
12 </LinearLayout>
 1 public class MainActivity extends Activity {
 2
 3     private WebView webView ;
 4
 5     @Override
 6     protected void onCreate(Bundle savedInstanceState) {
 7         super.onCreate(savedInstanceState);
 8         setContentView(R.layout.web_view);
 9
10         webView = (WebView) findViewById(R.layout.web_view) ;
11         //调用getSettings()方法可以去设置浏览器的属性,我们这里只是调用
12         //setJavaScriptEnabled(true)方法来设置WebView支持TavaScript脚本
13         webView.getSettings().setJavaScriptEnabled(true);
14         /*
15          * 调用setWebViewClient()时我们传入了一个WebViewClient对象
16          * 这样做的功能是当需要从一个网页跳转到另一个网页时,我们希望目标
17          * 网页仍然在当前网页上显示,而不是打开系统浏览器
18          */
19         webView.setWebViewClient(new WebViewClient());
20         webView.loadUrl("http://www.baidu.com");
21     }
22 }
2、使用HttpURLConnection访问网络
使用HttpURLConnection访问网络的方式很简单,具体按以下步骤执行就可以了:
- 获取HttpURLConnection对象,一般我们只需要new一个URL对象,并传入目标网络地址,然后调用一下openConnection()方法即可
1 URL url = new URL("http://www.baidu.com") ;
2 HttpURLConnection con = (HttpURLConnection) url.openConnection() ;
- 获取HttpURLConnection对象之后,设置HTTP请求所使用的方法。常用的方法有两种:GET或POST。GET表示希望从服务器那里获取数据,POST则表示希望提交数据给服务器。
1 con.setRequestMethod("GET"); - 接下来可以进行一些自由的设置,比如设置连接超时、读取超时的毫秒数,以及服务器希望得到的一些消息头等
1 con.setConnectTimeout(8000);
2 con.setReadTimeout(8000);
- 之后我们调用getInputStream()方法得到从服务器返回的输入流,然后从里面读取数据。注意,服务器返回给我们的HTML代码
1 InputStream in = con.getInputStream() ;
2 BufferedReader reader = new BufferedReader(new InputStreamReader(in)) ;
3 StringBuilder response = new StringBuilder() ;
4 String line ;
5 while((line = reader.readLine()) != null){
6     response.append(line) ;
7 }
- 最后,使用完之后,我们要记得关闭连接资源
1 con.disconnect();
- 获取HttpURLConnection对象,一般我们只需要new一个URL对象,并传入目标网络地址,然后调用一下openConnection()方法即可
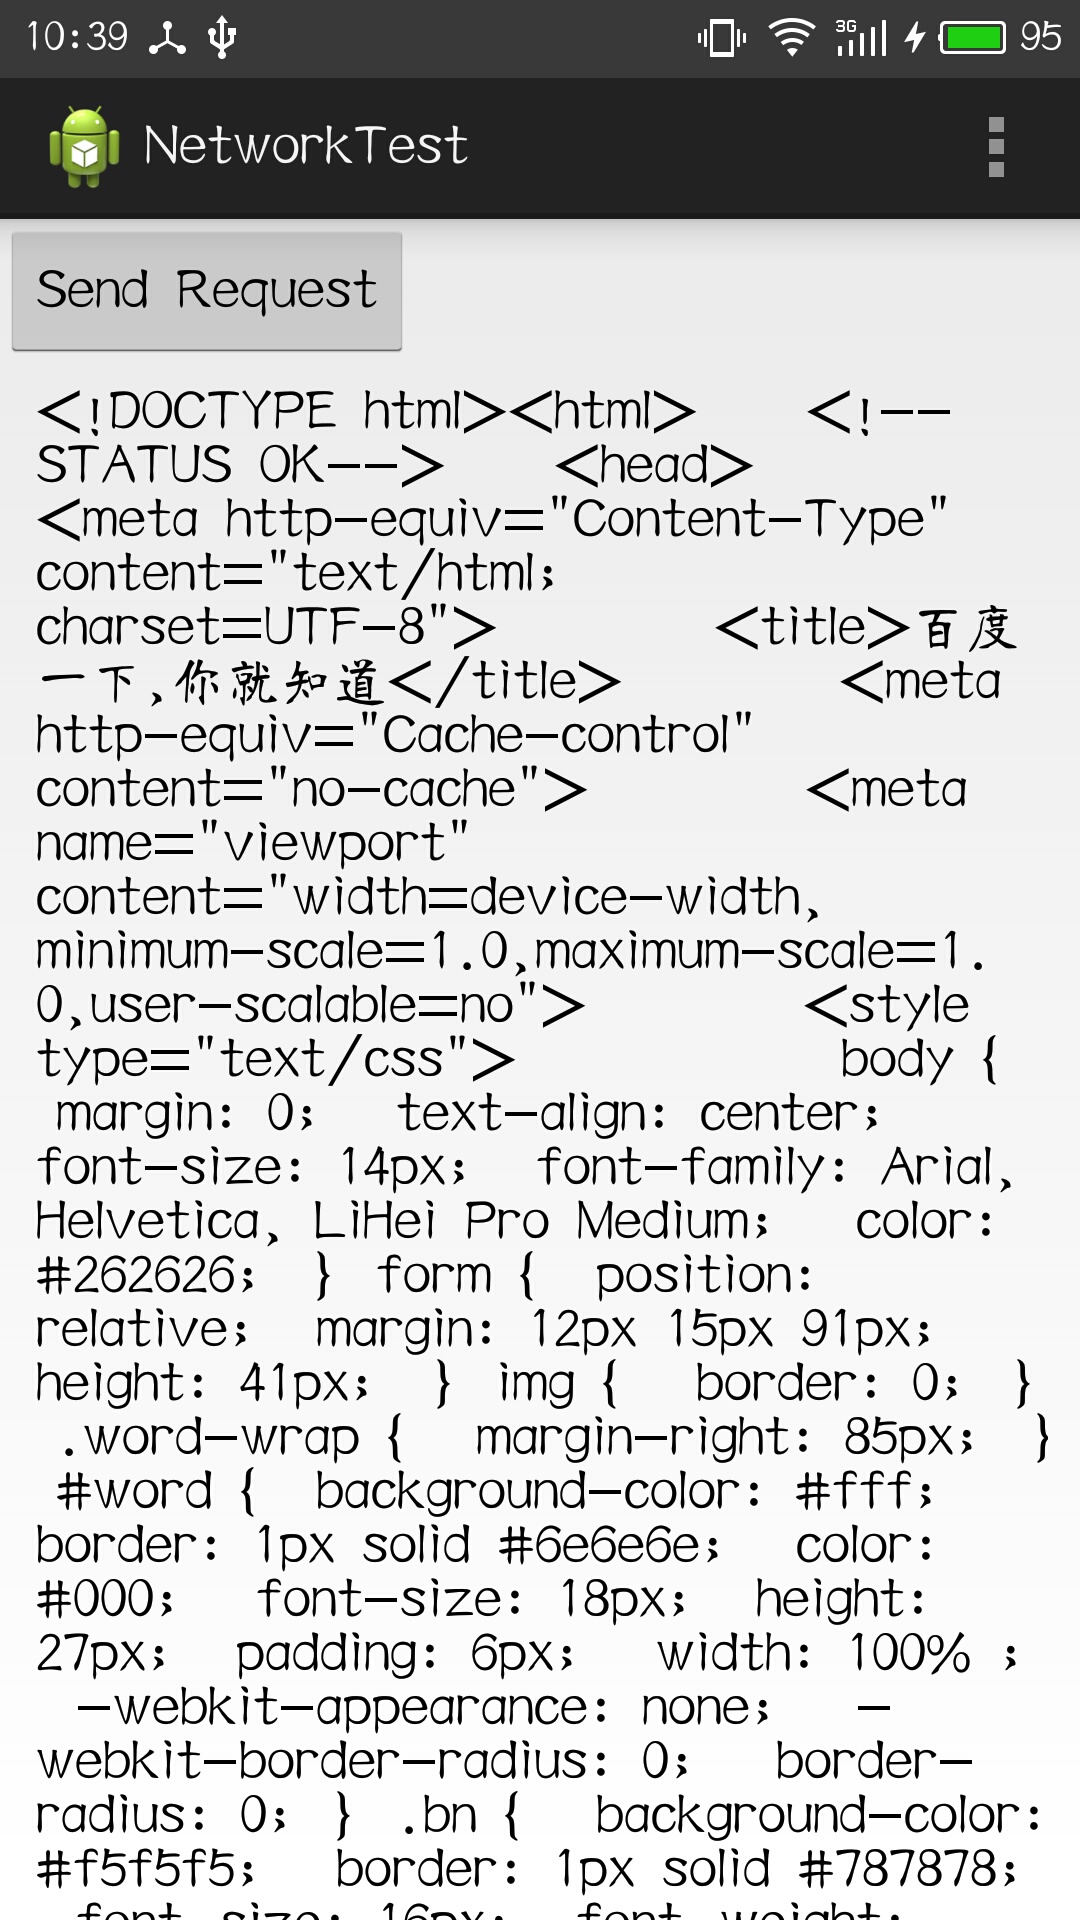
下面的代码是在界面上设置了一个按钮和一个编辑框,通过点击按钮,手机访问“http://www.baidu.com”网页,并将返回的数据显示在文本框中。布局代码如下:
 1 <?xml version="1.0" encoding="utf-8"?>
 2 <LinearLayout xmlns:android="http://schemas.android.com/apk/res/android"
 3     android:layout_width="match_parent"
 4     android:layout_height="match_parent"
 5     android:orientation="vertical" >
 6
 7     <Button
 8         android:id="@+id/button"
 9         android:layout_width="wrap_content"
10         android:layout_height="wrap_content"
11         android:text="Send Request" />
12
13     <ScrollView
14         android:id="@+id/scrollView"
15         android:layout_width="match_parent"
16         android:layout_height="match_parent"
17         android:layout_weight="0.61" >

19         <EditText
20             android:id="@+id/response_text"
21             android:layout_width="match_parent"
22             android:layout_height="wrap_content"
23             android:ems="10"
24             android:inputType="textMultiLine" >
27         </EditText>
28     </ScrollView>
29 </LinearLayout>
Activity代码如下:
 1 public class MainActivity extends Activity implements OnClickListener{
 2
 3     private static final int SHOW_RESPONSE = 0 ;
 4     private Button sendResquest ;
 5     private EditText responseText ;
 6
 7     private Handler handler = new Handler(){
 8         @Override
 9         public void handleMessage(Message msg) {
10             switch(msg.what){
11             case SHOW_RESPONSE :
12                 String response = (String)msg.obj ;
13                 //显示结果
14                 responseText.setText(response);
15             }
16         }
18     } ;
19
20     @Override
21     protected void onCreate(Bundle savedInstanceState) {
22         super.onCreate(savedInstanceState);
23         setContentView(R.layout.my_layout);
24
25         sendResquest = (Button) findViewById(R.id.button) ;
26         responseText = (EditText) findViewById(R.id.response_text) ;
27         sendResquest.setOnClickListener(this) ;
28     }
29
30     @Override
31     public void onClick(View v) {
32         if(v.getId() == R.id.button){
33             sendRequestWithHttpURLConnection() ;
34         }
35     }
36
37     private void sendRequestWithHttpURLConnection() {
38         //开启线程发起网络
39         new Thread(new Runnable(){
40
41             @Override
42             public void run() {
43                 HttpURLConnection con = null ;
44                 try {
45                     URL url = new URL("http://www.baidu.com") ;
46                     con = (HttpURLConnection) url.openConnection() ;
47                     con.setRequestMethod("GET");
48                     con.setConnectTimeout(8000);
49                     con.setReadTimeout(8000);
50                     InputStream in = con.getInputStream() ;
51                     BufferedReader reader = new BufferedReader(new InputStreamReader(in)) ;
52                     StringBuilder response = new StringBuilder() ;
53                     String line ;
54                     while((line = reader.readLine()) != null){
55                         response.append(line) ;
56                     }
57
58                     Message msg = new Message() ;
59                     msg.what = SHOW_RESPONSE ;
60                     msg.obj = response.toString() ;
61                     handler.sendMessage(msg) ;
62
63                 } catch (IOException e) {
64                     // TODO Auto-generated catch block
65                     e.printStackTrace();
66                 }finally{
67                     if(con != null){
68                         con.disconnect();
69                     }
70                 }
71             }
72         }).start();
73     }
75 }
3、使用HttpClient
访问网络,除了用上面的HttpURLConnection之外,我们还可以用HttpClient来访问http网页资源。HttpClient可以完成过和HttpURLConnection几乎一模一样的功能。具体用法如下:
- 获取HttpClient的实例,但是HttpClient是一个接口,我们通常是创建一个DefaultHttpClient对象
1 HttpClient httpClient = new DefaultHttpClient() ;
- 接下来如果要发起一条GET请求,则我们需要创建一个HttpGet对象,并传入目标网络的地址,然后调用HttpClient的execute()方法就可以获得服务器的响应HttpResponse 对象
1 HttpGet httpGet = new HttpGet("http://www.baidu.com") ;
2 HttpResponse httpResponse = httpClient.execute(httpGet) ;
如果是要发起一条POST请求,我们需要和创建一个HttpPost对象,并传入目标网络地址,然后通过一个NameValuePair集合来存放待提交的参数,并将这个参数集合传入UrlEncodedFormEntity中,然后调用HttpPost的setEntity()方法将构建好的UrlEncodedFormEntity传入,然后调用HttpClient的execute()方法就可以获得服务器的响应HttpResponse 对象
1 HttpPost httpPost = new HttpPost("http://www.baidu.com") ;
2 List<NameValuePair> params = new ArrayList<NameValuePair>() ;
3 params.add(new BasicNameValuePair("username","admin")) ;
4 params.add(new BasicNameValuePair("password","123456")) ;
5 UrlEncodedFormEntity entity = new UrlEncodedFormEntity(params,"utf-8");
6 httpPost.setEntity(entity);
HttpResponse httpResponse = httpClient.execute(httpPost) ; - 得到HttpResponse 对象之后,服务器所返回的信息就全部都包含在这里了。通常情况下我们都会先取出服务器返回的状态码,如果等于200就说明请求和相应都成功了,然后我们就提取HttpEntity实例,然后将这个实例转化为String即可
 1 if(httpResponse.getStatusLine().getStatusCode() == 200){
 2     //请求和相应都成功了
 3     HttpEntity entity = httpResponse.getEntity() ;
 4     String response = EntityUtils.toString(entity,"utf-8") ;
 5
 6     Message msg = new Message() ;
 7     msg.what = SHOW_RESPONSE ;
 8     msg.obj = response.toString() ;
 9     handler.sendMessage(msg) ;
10 }
- 获取HttpClient的实例,但是HttpClient是一个接口,我们通常是创建一个DefaultHttpClient对象