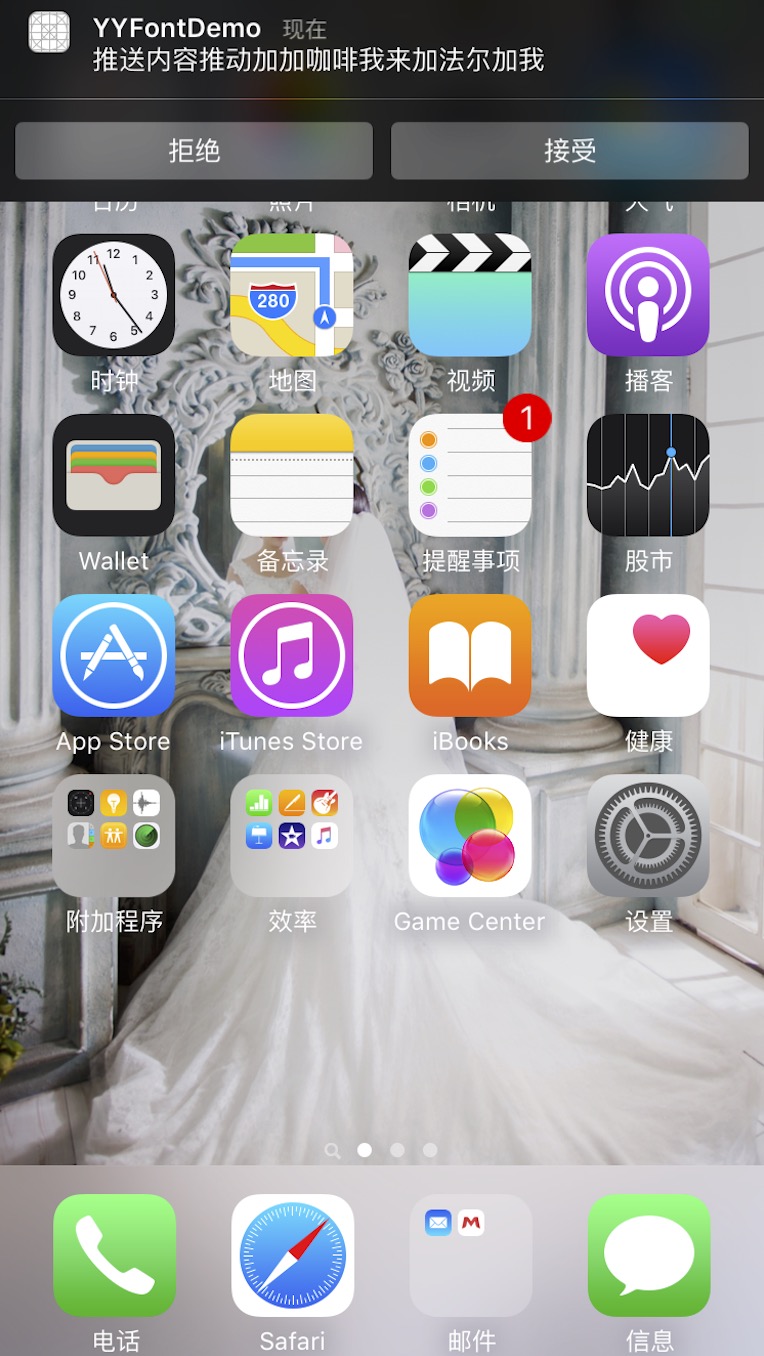
iOS 8拥有了全新的通知中心,有全新的通知机制。当屏幕顶部收到推送时只需要往下拉,就能看到快速操作界面,并不需要进入该应用才能操作。在锁屏界面,对于推送项目也可以快速处理。基本上就是让用户尽量在不离开当前页面的前提下处理推送信息,再次提高处理效率。
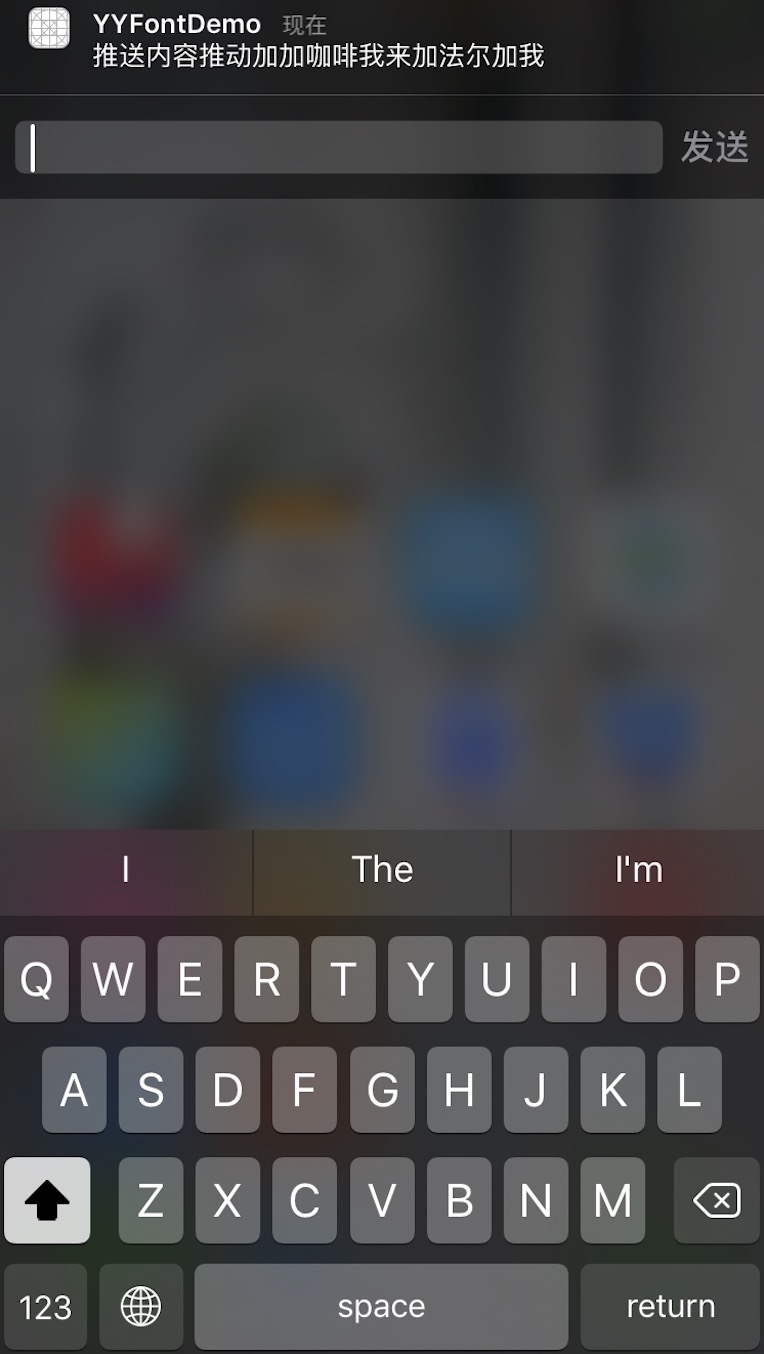
iOS8必须点击应用里才能回复,iOS9可以在通知栏里快速回复。
像以下三种情况:

1 在application:didFinishLaunchingWithOptions:中注册通知时:
 func application(application: UIApplication, didFinishLaunchingWithOptions launchOptions: [NSObject: AnyObject]?) -> Bool {

     //创建消息上添加的动作,以按钮的形式显示
        let acceptAction = UIMutableUserNotificationAction()
        acceptAction.title = "接受"
        acceptAction.identifier = "acceptIdentifier"
        acceptAction.activationMode = UIUserNotificationActivationMode.Foreground
//获取系统version
let t = UIDevice.currentDevice().systemVersion.componentsSeparatedByString(".")
let num : AnyObject! = t[0]
let Num:CInt = num.intValue
//如果大于9.0
     if Num >= 9 {
        //设置action行为为‘允许用户输入’,参考上图1
            acceptAction.behavior = UIUserNotificationActionBehavior.TextInput

        }
        let rejectAction = UIMutableUserNotificationAction()
        rejectAction.title = "拒绝"
        rejectAction.identifier = "rejectIdentifier"
        rejectAction.activationMode = UIUserNotificationActivationMode.Background
        //需要解锁才能处理,如果activationMode = UIUserNotificationActivationMode.Background,则这个属性忽略
        rejectAction.authenticationRequired = true
        rejectAction.destructive = true

        //创建动作按钮的类别集合
        let category = UIMutableUserNotificationCategory()
        category.identifier = "alert"
        category.setActions([acceptAction, rejectAction], forContext: UIUserNotificationActionContext.Minimal)
//创建UIUserNotificationSettings,并设置消息的显示类型
let notifSetting = UIUserNotificationSettings(forTypes: .Badge , categories: NSSet(object: category) as? Set<UIUserNotificationCategory>)
//注册本地通知
application.registerUserNotificationSettings(notifSetting)
     return true
 }
2 在使用Push的时候需要在数据包中加入特定的Category字段(字段内容需要前后端定义为一致),终端接收到到后,就能展示上述代码对应Category设置的按钮,和响应按钮事件。
那上一篇博客“iOS本地推送UILocalNotification”中的代码为例
let localNotif = UILocalNotification()
        //推送的时间
        localNotif.fireDate = NSDate(timeIntervalSinceNow: 5)
        //设置时区
        localNotif.timeZone = NSTimeZone.defaultTimeZone()//推送声音
        localNotif.soundName = UILocalNotificationDefaultSoundName
        //推送内容
        localNotif.alertBody = "推送内容推动加加咖啡我来加法尔加我"
        //显示在icon上的红色圈中的数子
        localNotif.applicationIconBadgeNumber = 1
        //设置userinfo 方便在之后需要撤销的时候使用
        localNotif.userInfo = ["key1": "name1"]
        //设置本地通知的category,与注册通知时UIMutableUserNotificationCategory中identifier属性对应
     localNotif.category = "alert"

    let app = UIApplication.sharedApplication()
    //添加到系统的本地推送列表
     app.scheduledLocalNotifications = [localNotif]
3 实现下面两个delegate
(1)成功注册registerUserNotificationSettings后回调的方法
    func application(application: UIApplication, didRegisterUserNotificationSettings notificationSettings: UIUserNotificationSettings) {

    }
(2)事件处理
func application(application: UIApplication, handleActionWithIdentifier identifier: String?, forLocalNotification notification: UILocalNotification, completionHandler: () -> Void) {
//在非本App界面时收到本地消息,下拉消息会有快捷回复的按钮,点击按钮后调用的方法,根据identifier来判断点击的哪个按钮,notification为消息内容NSLog(@"%@----%@",identifier,notification);
//处理完消息,最后一定要调用这个代码块
completionHandler(); }