ssm就是springmvc+springioc+mybatis
项目步骤:
具体步骤就简单的介绍一下,说一下要注意的地方,具体内容之前的博客已经说的很详细了。
1、新建一个maven项目
2、修改打包方式为war并自动生成webapp目录,创建WEB-INF和web.xml
3、导入需要的包(这里一次导完):
spring-mvc、servlet、jsp、jstl、数据库驱动、spring-orm、lombok
注解、mybatis、mybatis-spring(把mybatis配置到spring)、连接池druid和
common(比较好用,可以自动生成日志),注意版本统一管理
scope是作用范围,如果是test就是在test目录下能用,如果是provided就是
在idea中用,发布就不能用了,如果没有一直能用。
4、在web.xml中配置DispatcherServlet核心拦截器的节点(包的位置i最长的,注意路径和namespace,启动的时候加载)
5、给DispatcherServlet添加配置文件springmvc
<mvc:annotation-driven>
<mvc:message-converters register-defaults="false">
    <bean class="com.alibaba.fastjson.support.spring.FastJsonHttpMessageConverter">
        <property name="supportedMediaTypes">
            <list>
                <value>application/json;charset=utf-8</value>
            </list>
        </property>
    </bean>
</mvc:message-converters>
</mvc:annotation-driven>
    <!--可以访问图片等非jsp文件-->
    <mvc:default-servlet-handler></mvc:default-servlet-handler>
    <context:component-scan base-package="com.controller"></context:component-scan>
    <bean class="org.springframework.web.servlet.view.InternalResourceViewResolver">
        <property name="viewClass" value="org.springframework.web.servlet.view.JstlView"></property>
        <property name="prefix" value="/WEB-INF/pages/"></property>
        <property name="suffix" value=".jsp"></property>
    </bean>
6、下来开始配置springioc并配置监听器在启动的时候来读取配置文件(目的是用ioc容器来管理Bean对象和service、dao等),创建一个applicationContext.xml,在web.xml中用监听器来加载配置文件。配置mybatis
<context:component-scan base-package="com.service"></context:component-scan> <context:component-scan base-package="com.dao"></context:component-scan> <!--配置连接池数据源--> <bean id="datasource" class="com.alibaba.druid.pool.DruidDataSource"> <property name="driverClassName" value="com.mysql.jdbc.Driver"></property> <property name="url" value="jdbc:mysql://127.0.0.1:3306/user?useUnicode=true&characterEncoding=utf8"></property> <property name="username" value="root"></property> <property name="password" value="123456"></property> <property name="minIdle" value="8"></property> <property name="maxActive" value="20"></property> </bean> <!-- sqlSessionFactory 连接池引入--> <bean id="sqlSessionFactory" class="org.mybatis.spring.SqlSessionFactoryBean"> <property name="dataSource" ref="datasource"></property> <property name="typeAliasesPackage" value="com.pojo"></property> </bean> <!-- 将mapper代理对象放到ioc中--> <bean class="org.mybatis.spring.mapper.MapperScannerConfigurer"> <property name="basePackage" value="com.dao"/> </bean>
7、创建controller、dao、service、pojo文件并在resource下创建对应dao层接口的mapper.xml
创建几个jsp,index.jsp、user目录下的list.jsp和edit.jsp(对应controller的目录)
css等文件可以直接放到webapp目录下,不用放权限,运行的时候需要重新编译(点击clean后编译)
8、这里通过一个用户增删改查来举例
controller层的UserController
@Controller
@RequestMapping("/user")
public class UserController {
    @Resource
    UserService userService;

  //获取所有用户
    @RequestMapping("/list")
    String index(ModelMap modelMap, User user){
        if(StringUtils.isBlank(user.getUsername())){//判断用户名是否有效("","  ",null都为无效)
            user.setUsername(null);//赋值为null方便数据库处理
        }
        else{
            modelMap.addAttribute("username",user.getUsername());//数据回调
        }
        modelMap.addAttribute("users",userService.list(user));//放入作用域

        return "user/list";
    }
  //增加一个用户,先跳到添加界面
    @GetMapping("/add")
    String goAdd(){
        return "user/edit";//转发是通过视图解析器转发到webapp下的文件里
    }
    @PostMapping("add")
    String doAdd(User user){

        userService.add(user);
        return "redirect:list";//重定向是重定向到当前文件的地址
    }

  //更新用户,先通过id知道修改那个用户
    @GetMapping("update")
    String goUpdate(Integer id,ModelMap modelMap){
        modelMap.addAttribute("user",userService.getById(id));
        return "user/edit";
    }
    @PostMapping("update")
    String doUpdate(User user){
        userService.update(user);
        return "redirect:list";
    }

  //删除用户
    @GetMapping("del")
    String del(Integer id){
        userService.del(id);
        return "redirect:list";
    }

  //批量删除,参数为id数组
    @PostMapping("batchdel")
    String batchdel(Integer[] ids){
        userService.batchdel(ids);
        return "redirect:list";
    }

}
其他层就是简单的springmvc思想了。
下面看resource下的mapper.xml文件
<mapper namespace="com.dao.UserDao">
  <--!查询所有和模糊查询合并,所以wehere用标签,concat为拼接用的函数-->
    <select id="list" resultType="User" parameterType="User">
        select id,username,likes from user
        <where>
            <if test="username!=null">
                username like concat('%',#{username},'%')
            </if>
        </where>
    </select>
  <--!返回参数为int可不写-->
    <insert id="add" parameterType="User" >
        insert into user(username,likes) values(#{username},#{likes})
    </insert>

    <select id="getById" resultType="User" parameterType="java.lang.Integer">
        select id,username,likes from user where id = #{id}
    </select>

    <update id="update" parameterType="User">
        update user
            set
            username=#{username},
            likes=#{likes}
            where id = #{id}
    </update>
    <delete id="del" parameterType="java.lang.Integer">
        delete from user where id=#{id}
    </delete>
  <--!当参数为数组时要用这个模板,名字必须为array,后面三个分别为分割符,开始符和结束符-->
    <delete id="batchdel"  >
        delete from user where id in
        <foreach collection="array" item="item" separator="," open="(" close=")">
            #{item}
        </foreach>
    </delete>
</mapper>
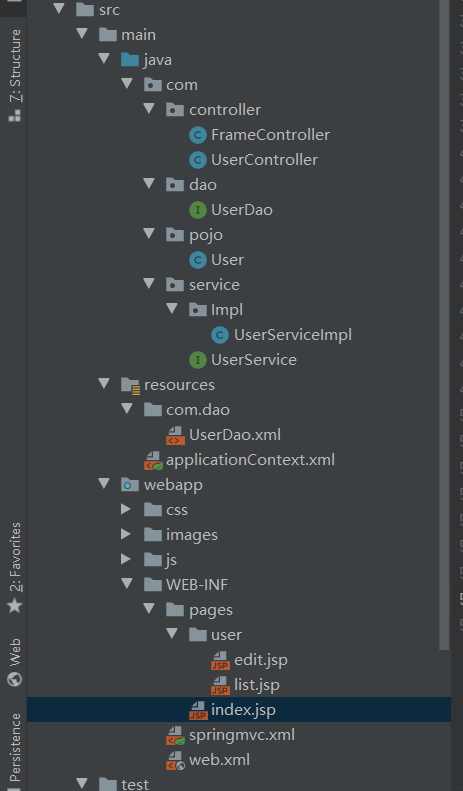
9、目录结构如下图:
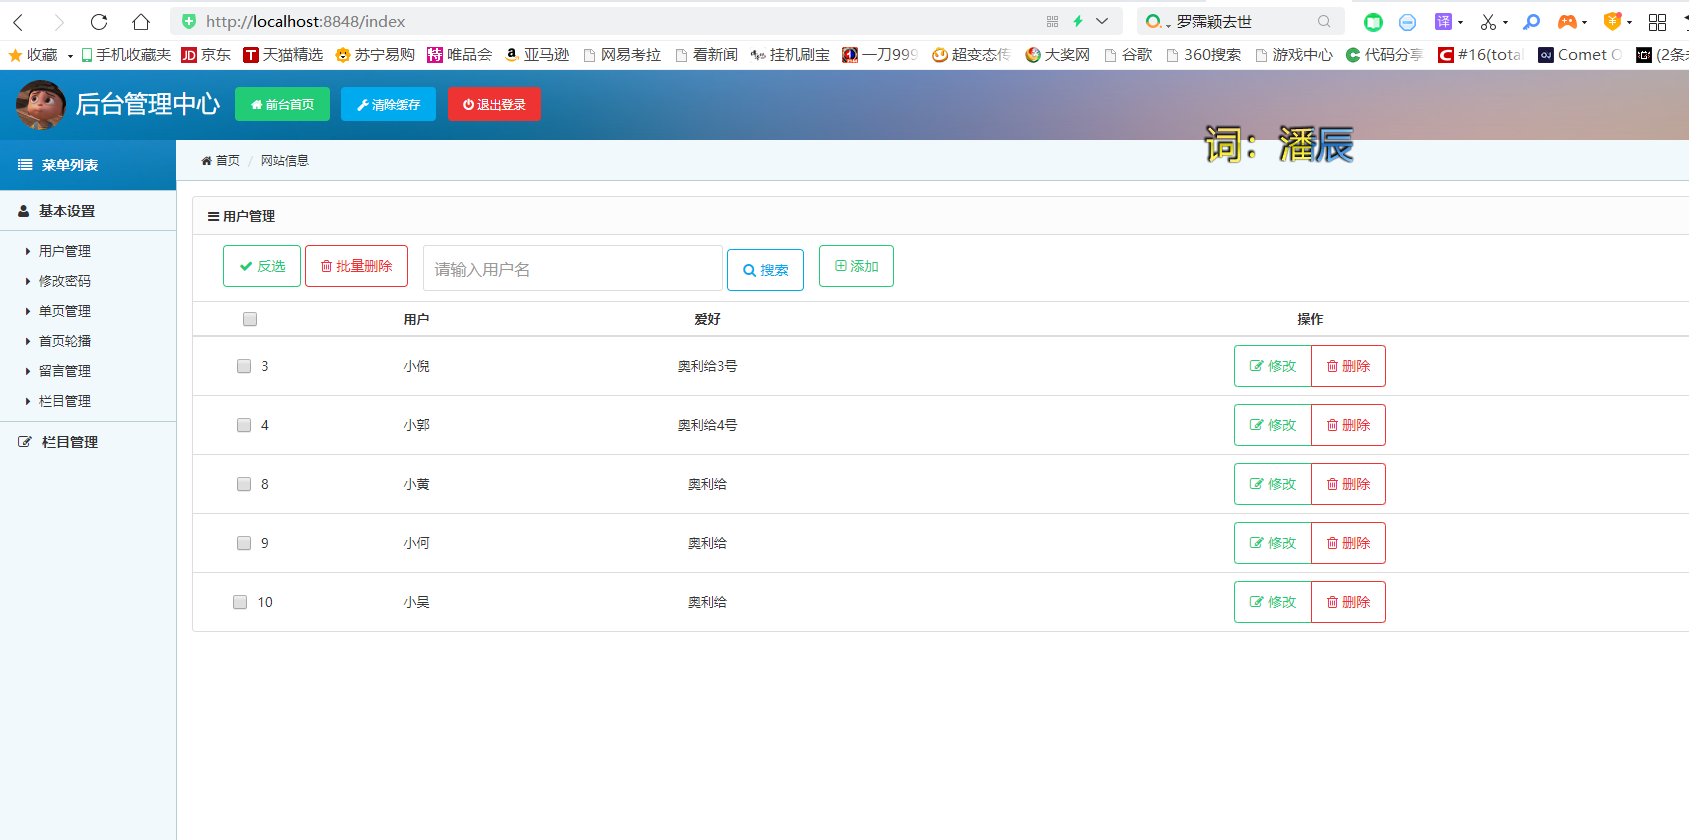
前端使用的pinture框架
index.jsp模板:
<%@ page contentType="text/html;charset=UTF-8" language="java" %> <!DOCTYPE html> <html lang="zh-cn"> <head> <meta http-equiv="Content-Type" content="text/html; charset=utf-8" /> <meta http-equiv="X-UA-Compatible" content="IE=edge"> <meta name="viewport" content="width=device-width, initial-scale=1.0, maximum-scale=1.0, user-scalable=no" /> <meta name="renderer" content="webkit"> <title>后台管理中心</title> <link rel="stylesheet" href="css/pintuer.css"> <link rel="stylesheet" href="css/admin.css"> <script src="js/jquery.js"></script> </head> <body style="background-color:#f2f9fd;"> <div class="header bg-main"> <div class="logo margin-big-left fadein-top"> <h1><img src="images/y.jpg" class="radius-circle rotate-hover" height="50" alt="" />后台管理中心</h1> </div> <div class="head-l"><a class="button button-little bg-green" href="" target="_blank"><span class="icon-home"></span> 前台首页</a> <a href="##" class="button button-little bg-blue"><span class="icon-wrench"></span> 清除缓存</a> <a class="button button-little bg-red" href="login.html"><span class="icon-power-off"></span> 退出登录</a> </div> </div> <div class="leftnav"> <div class="leftnav-title"><strong><span class="icon-list"></span>菜单列表</strong></div> <h2><span class="icon-user"></span>基本设置</h2> <ul style="display:block"> <li><a href="/user/list" target="right"><span class="icon-caret-right"></span>用户管理</a></li> <li><a href="pass.html" target="right"><span class="icon-caret-right"></span>修改密码</a></li> <li><a href="page.html" target="right"><span class="icon-caret-right"></span>单页管理</a></li> <li><a href="adv.html" target="right"><span class="icon-caret-right"></span>首页轮播</a></li> <li><a href="book.html" target="right"><span class="icon-caret-right"></span>留言管理</a></li> <li><a href="column.html" target="right"><span class="icon-caret-right"></span>栏目管理</a></li> </ul> <h2><span class="icon-pencil-square-o"></span>栏目管理</h2> <ul> <li><a href="list.html" target="right"><span class="icon-caret-right"></span>内容管理</a></li> <li><a href="add.html" target="right"><span class="icon-caret-right"></span>添加内容</a></li> <li><a href="cate.html" target="right"><span class="icon-caret-right"></span>分类管理</a></li> </ul> </div> <script type="text/javascript"> </script> <ul class="bread"> <li><a href="/index" target="right" class="icon-home"> 首页</a></li> <li><a href="javascript:void(0)" id="a_leader_txt">网站信息</a></li> </ul> <div class="admin"> <iframe scrolling="auto" rameborder="0" name="right" width="100%" height="100%"></iframe> </div> </body> </html>
list.jsp模板:
这里需要用js语法和jstl来循环判断
<%@ page contentType="text/html;charset=UTF-8" language="java" %>
<%@ taglib prefix="c" uri="http://java.sun.com/jsp/jstl/core" %>
<!DOCTYPE html>
<html lang="zh-cn">
<head>
    <meta http-equiv="Content-Type" content="text/html; charset=utf-8" />
    <meta http-equiv="X-UA-Compatible" content="IE=edge">
    <meta name="viewport" content="width=device-width, initial-scale=1.0, maximum-scale=1.0, user-scalable=no" />
    <meta name="renderer" content="webkit">
    <title></title>
    <link rel="stylesheet" href="/css/pintuer.css">
    <link rel="stylesheet" href="/css/admin.css">
    <script src="/js/jquery.js"></script>
    <script src="/js/pintuer.js"></script>
    <style>
        .searchtxt {
            display: inline-block;
            width: 300px;
        }
    </style>
</head>
<body>
    <div class="panel admin-panel">
        <div class="panel-head"><strong class="icon-reorder"> 用户管理</strong></div>
        <div class="padding border-bottom">
            <ul class="search">
                <li>
                    <button type="button"  class="button border-green" id="btn" ><span class="icon-check"></span> 反选</button>
                    <button type="submit" class="button border-red" id="batchdel"><span class="icon-trash-o"></span> 批量删除</button>
                </li>
                <li>
                    <form method="post">
                        <input type="text" class="input input-big searchtxt" name="username" size="20" placeholder="请输入用户名" value="${username}" />
                        <button type="submit"  class="button border-main"  ><span class="icon-search"></span> 搜索</button>
                    </form>
                </li>
                <li>
                    <a href="add" class="button border-sub"  ><span class="icon-plus-square-o"></span> 添加</a>
                </li>


            </ul>
        </div>
        <form id="fm" method="post" action="batchdel">
            <table class="table table-hover text-center">
                <thead>
                    <tr>
                        <th width="120"><input id="checkall" type="checkbox" /></th>
                        <th>用户</th>
                        <th>爱好</th>
                        <th>操作</th>
                    </tr>
                </thead>
                <tbody>
                    <c:forEach items="${users}" var="u">
                        <tr>
                            <td><input class="checkone" type="checkbox" name="ids" value="${u.id}" />
                                    ${u.id}</td>
                            <td>${u.username}</td>
                            <td>${u.likes}</td>
                            <td>
                                <div class="button-group">
                                    <a class="button border-sub" href="update?id=${u.id}" ><span class="icon-edit"></span> 修改</a>
                                    <a class="button border-red" href="javascript:void(0)" onclick="del(${u.id})"><span class="icon-trash-o"></span> 删除</a>
                                </div>
                            </td>
                        </tr>
                    </c:forEach>
                </tbody>
            </table>
        </form>
    </div>
<script type="text/javascript">
    function del(id) {
        if(confirm('确定要删除该数据吗?')) {
            window.location.href = 'del?id=' + id
        }
    }
    $(function() {
        $('#checkall').change(function(){
            const flag = $(this).prop('checked')
            $('.checkone').each(function(index,element){
                $(element).prop('checked',flag)
            })
        })
        $('#btn').click(function(){
            $('.checkone').each(function(index,element){
                const flag =  $(element).prop('checked')
                $(element).prop('checked',!flag)
            })
        })
        $('#batchdel').click(function(){
            if(confirm('确定要批量删除吗?')) {
                let flag = false
                for(let i = 0; i < $('.checkone').length; i++) {
                    if( $('.checkone').eq(i).prop('checked')) {
                        flag = true
                        break
                    }
                }
                if(flag) {
                    $('#fm').submit()
                }else {
                    alert('没有任何记录被选中')
                }
            }
        })
    })

</script>
</body></html>

</body>
</html>
edit.jsp模板:
<%@ page contentType="text/html;charset=UTF-8" language="java" %>
<!DOCTYPE html>
<html lang="zh-cn">
<head>
    <meta http-equiv="Content-Type" content="text/html; charset=utf-8" />
    <meta http-equiv="X-UA-Compatible" content="IE=edge">
    <meta name="viewport" content="width=device-width, initial-scale=1.0, maximum-scale=1.0, user-scalable=no" />
    <meta name="renderer" content="webkit">
    <title></title>
    <link rel="stylesheet" href="/css/pintuer.css">
    <link rel="stylesheet" href="/css/admin.css">
    <script src="/js/jquery.js"></script>
    <script src="/js/pintuer.js"></script>
</head>
<body>
<div class="panel admin-panel">
    <div class="panel-head" id="add"><strong><span class="icon-pencil-square-o"></span>编辑用户</strong></div>
    <div class="body-content">
        <form method="post" class="form-x" >
            <div class="form-group">
                <div class="label">
                    <label>用户名:</label>
                </div>
                <div class="field">
                    <input type="text" class="input w50" name="username" data-validate="required:请输入用户名" value="${user.username}" />
                    <div class="tips"></div>
                </div>
            </div>
            <div class="form-group">
                <div class="label">
                    <label>爱好:</label>
                </div>
                <div class="field">
                    <input type="text" class="input w50" name="likes" data-validate="required:请输入爱好" value="${user.likes}"/>
                    <div class="tips"></div>
                </div>
            </div>
            <div class="form-group">
                <div class="label">
                    <label></label>
                </div>
                <div class="field">
                    <button class="button bg-main icon-check-square-o" type="submit"> 提交</button>
                </div>
            </div>
        </form>
    </div>
</div>

</body></html>
10、最后的效果: