0 环境
- 操作系统:win10
- 编辑器:idea
- springcloud版本:H版
1 前言
Resilience4j 是受Netflix的Hysrix项目启发,专门为Java 8 和函数式编程设计的轻量级容错框架。
- 主要功能
- CircuitBreaker(熔断器)
- RateLimiter(限流)
- Retry(请求重试)
- 限时
- 缓存
- 信号量的隔离
2 初见
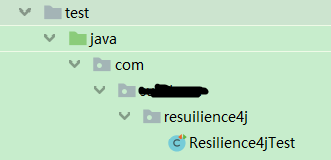
这是个maven项目 在test中 先体验一下断路器 限流 请求重试
2.1 maven项目的创建
- 新建maven子模块 ...下一步即可
2.2 导入pom.xml依赖
- 为了省事 我直接全cv过来了
<dependencies>
        <dependency>
            <groupId>junit</groupId>
            <artifactId>junit</artifactId>
            <version>4.12</version>
        </dependency>

        <dependency>
            <groupId>io.github.resilience4j</groupId>
            <artifactId>resilience4j-circuitbreaker</artifactId>
            <version>0.13.2</version>
        </dependency>

        <dependency>
            <groupId>io.github.resilience4j</groupId>
            <artifactId>resilience4j-ratelimiter</artifactId>
            <version>0.13.2</version>
        </dependency>

        <dependency>
            <groupId>io.github.resilience4j</groupId>
            <artifactId>resilience4j-retry</artifactId>
            <version>0.13.2</version>
        </dependency>
2.3 创建测试类
2.4 CircuitBreaker(熔断器)
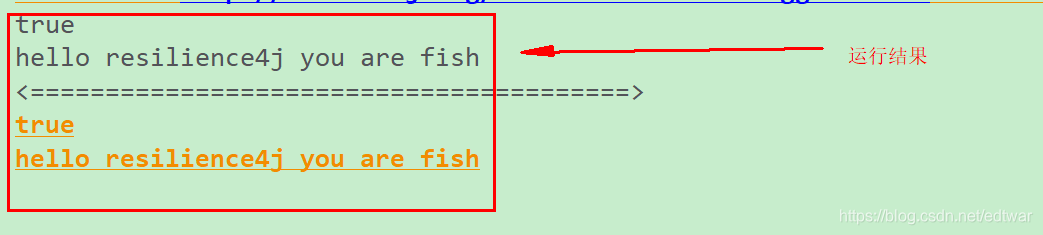
- 正常的断路器
// 正常断路器
    @Test
    public void test(){
        // 获取一个CircuitBreakerRegistry实例 可调用ofDefaults获取实例(可自定义属性)
        CircuitBreakerRegistry registry = CircuitBreakerRegistry.ofDefaults();
        CircuitBreakerConfig config = CircuitBreakerConfig.custom()
                // 默认50 故障率阀值百分比 超过这个阀值 断路器就会打开
                .failureRateThreshold(50)
                // 断路器保持打开时间 在到达设置时间后 断路器会进入到half open状态
                .waitDurationInOpenState(Duration.ofMillis(1000))
                // 当断路器处于half open状态时 环形缓冲区的大小
                .ringBufferSizeInOpenState(2)
                .ringBufferSizeInClosedState(2)
                .build();

        // 2种CircuitBreaker调用方式
        CircuitBreakerRegistry registry1 = CircuitBreakerRegistry.of(config);
        CircuitBreaker breaker = registry1.circuitBreaker("learn");

        CircuitBreaker breaker1 = registry.circuitBreaker("learn1", config);

        //
        CheckedFunction0<String> supplier = CircuitBreaker.decorateCheckedSupplier(breaker, () -> "hello resilience4j");
        Try<String> map = Try.of(supplier)
                .map(v -> v + " you are fish");
        System.out.println(map.isSuccess());
        System.out.println(map.get());

        System.out.println("<========================================>");

        CheckedFunction0<String> supplier1 = CircuitBreaker.decorateCheckedSupplier(breaker1, () -> "hello resilience4j");
        Try<String> map1 = Try.of(supplier)
                .map(v -> v + " you are fish");
        System.err.println(map1.isSuccess());
        System.err.println(map1.get());
    }
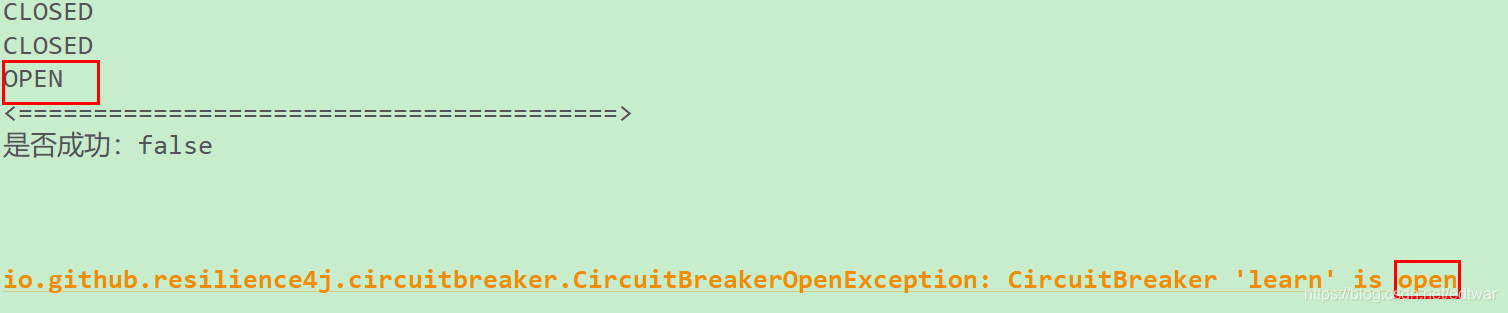
- 异常断路器
	// 一个异常的断路器
    // 需要手动调用2次onError --> ringBufferSizeInClosedState(2) --> 当有2条故障数据才会统计 --> 断路器才会开启
    @Test
    public void test1(){
        CircuitBreakerConfig config = CircuitBreakerConfig.custom()
                // 默认50 故障率阀值百分比 超过这个阀值 断路器就会打开
                .failureRateThreshold(50)
                // 断路器保持打开的时间 在到达设置的时间之后 断路器会进入到half open状态
                .waitDurationInOpenState(Duration.ofMillis(1000))
                // 当断路器处于half open状态时(环形缓冲区大小)
                .ringBufferSizeInClosedState(2)
                .build();

        CircuitBreakerRegistry registry = CircuitBreakerRegistry.of(config);
        CircuitBreaker breaker1 = registry.circuitBreaker("learn");
        // 获取断路器的状态
        System.out.println(breaker1.getState());
        breaker1.onError(0, new RuntimeException());
        System.out.println(breaker1.getState());
        breaker1.onError(0, new IllegalArgumentException());
        System.out.println(breaker1.getState());
        CheckedFunction0<String> supplier = CircuitBreaker.decorateCheckedSupplier(breaker1, () -> "hello resilience4j");
        Try<String> map = Try.of(supplier)
                .map(v -> v + " hello kitty");
        System.out.println("<========================================>");

        System.out.println("是否成功:" + map.isSuccess());
        System.out.println("获取值:" + map.get());

    }
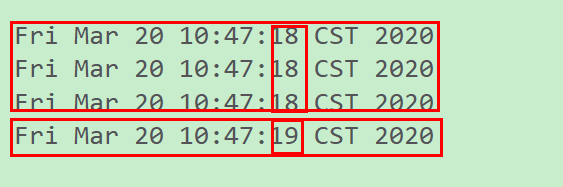
2.5 限流
 // 限流 和断路器类似
    @Test
    public void test2(){
        RateLimiterConfig build = RateLimiterConfig.custom()
                // 阈值刷新的时间
                .limitRefreshPeriod(Duration.ofMillis(1000))
                // 限制频次
                .limitForPeriod(3)
                // 冷却时间
                .timeoutDuration(Duration.ofMillis(1000))
                .build();
        RateLimiter limiter = RateLimiter.of("learning", build);

        CheckedRunnable runnable = RateLimiter.decorateCheckedRunnable(limiter, () -> {
            System.out.println(new Date());
        });

        // 执行4次
        Try.run(runnable)
                .andThenTry(runnable)
                .andThenTry(runnable)
                .andThenTry(runnable)
                .onFailure(t -> System.out.println(t.getMessage()));
    }
2.6 请求重试
// 请求重试
    @Test
    public void test3(){
        RetryConfig config = RetryConfig.custom()
                // 重试次数
                .maxAttempts(5)
                // 重试间隔
                .waitDuration(Duration.ofMillis(500))
                // 重试异常
                .retryExceptions(RuntimeException.class)
                .build();

        Retry retry = Retry.of("leaning1", config);
        Retry.decorateRunnable(retry, new Runnable() {

            int count = 0;

            // 重试功能开启后 执行run方法 若抛出异常 会自动触发重试功能
            @Override
            public void run() {
                if (count++ < 4){
                    System.out.println(count);
                    throw new RuntimeException();
                }
            }
        }).run();
    }

2.7 小结
- 方法调用很类似
- 断路器 --> 满足条件 开启断路器
- 限流 --> 类似限制每个人领多少个口罩
- 请求重试 --> 类似n顾茅庐
3 再见之请求重试
- 请求重试 微服务版
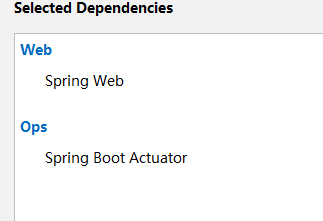
3.1 创建springboot项目

3.2 请求重试pom.xml配置
还需要添加resilience4j相关组件 需要排除未配置的组件 不然会报错呢
<dependency>
            <groupId>io.github.resilience4j</groupId>
            <artifactId>resilience4j-spring-boot2</artifactId>
            <version>1.3.1</version>
            <exclusions>
                <!-- 没有配置的 先排除 不然会报错 -->
                <exclusion>
                    <groupId>io.github.resilience4j</groupId>
                    <artifactId>resilience4j-circuitbreaker</artifactId>
                </exclusion>

                <exclusion>
                    <groupId>io.github.resilience4j</groupId>
                    <artifactId>resilience4j-ratelimiter</artifactId>
                </exclusion>
                <exclusion>
                    <groupId>io.github.resilience4j</groupId>
                    <artifactId>resilience4j-bulkhead</artifactId>
                </exclusion>
                <exclusion>
                    <groupId>io.github.resilience4j</groupId>
                    <artifactId>resilience4j-timelimiter</artifactId>
                </exclusion>
            </exclusions>
3.3 请求重试yml配置
// 为了避免写错 直接从这个RetryConfigurationProperties类里找到InstanceProperties类里的属性cv
public static class InstanceProperties {
        @Nullable
        private Duration waitDuration;
        @Nullable
        private Integer maxRetryAttempts;
        @Nullable
        private Class<? extends Predicate<Throwable>> retryExceptionPredicate;
        @Nullable
        private Class<? extends Predicate<Object>> resultPredicate;
        @Nullable
        private Class<? extends Throwable>[] retryExceptions;
        @Nullable
        private Class<? extends Throwable>[] ignoreExceptions;
        @Nullable
        private Integer eventConsumerBufferSize;
        @Nullable
        private Boolean enableExponentialBackoff;
        private Double exponentialBackoffMultiplier;
        @Nullable
        private Boolean enableRandomizedWait;
        private Double randomizedWaitFactor;
        @Nullable
        private String baseConfig;
resilience4j:
  retry:
    retry-aspect-order: 133 # 表示Retry优先级(级别高于比如ratelimiter bulkhead timelimiter) 值越小 -> 越大
    backends:
      # 设置组名
      retryA:
        # 对比之前的案例
        # 重试次数
        maxRetryAttempts: 4
        # 重试等待
        waitDuration: 400
        # 间隔乘数(场景: 正好每次间隔为1的时候卡顿 它就有用了 间隔就变了 例如 1 1.1 1.21....)
        exponentialBackoffMultiplier: 1.1
        retryExceptions:
          - java.lang.RuntimeException

spring:
  application:
    name: resilience4j

server:
  port: 7000

eureka:
  client:
    service-url:
      defaultZone: http://localhost:8761/eureka
3.4 请求重试application启动类里配置
	@Bean
	//    @LoadBalanced
    RestTemplate restTemplate(){
        return new RestTemplate();
    }
3.5 eureka provider的配置
** 声明一下 用的是eureka server(基本不变)和provider 和resilience4j的请求重试 **
@GetMapping("/hello3")
public String hello3(){
String result = "hello provider:" + port;
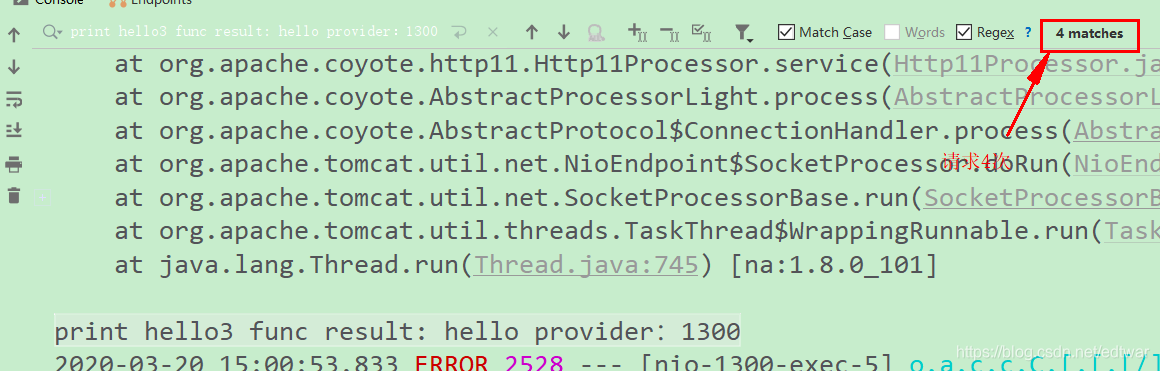
// 为了检测重试策略是否生效
System.out.println("print hello3 func result: " + result);
// 加一个错误 测试重试策略
int i = 1 / 0;
return result;
}
3.6 请求重试的配置
@RestController
public class HelloController {

    @Autowired
    HelloService helloService;

    @GetMapping("/hello")
    public String hello(){
        return helloService.hello();
    }
}


@Service
// 在这里使用重试策略 yml中backends下配置的
@Retry(name = "retryA")
public class HelloService {
    @Autowired
    RestTemplate restTemplate;

    public String hello(){
        return restTemplate.getForObject("http://127.0.0.1:1300/hello3", String.class);
    }
}
3.7 启动运行
启动eureka server和provider 和请求重试组件
- 访问http://localhost:7000/hello
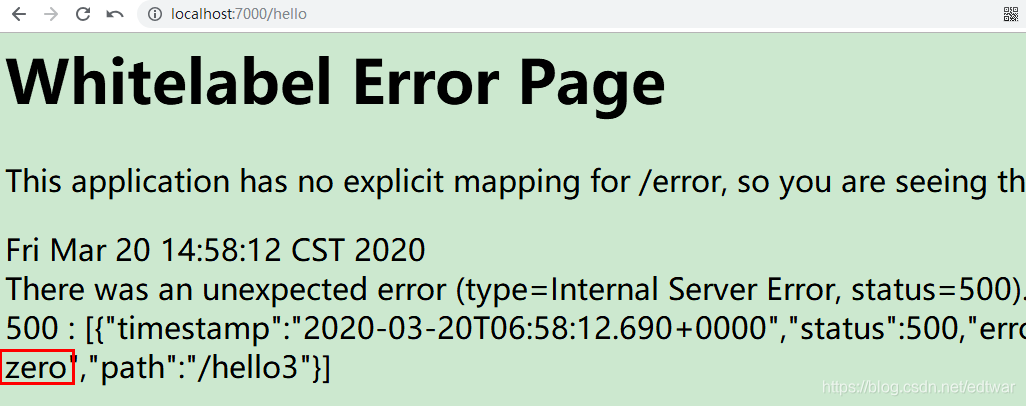
- 查看后台provider
3.8 小结
- 总结
- 通过provider提供一个异常 yml配置请求重试4次(重试等待时间 时间间隔 重试异常..) 启动验证是否成功
- pom.xml配置那个resilience4j组件 需要注意配置哪个组件 在里面移除哪个组件 若移除的组件未配置 会报错
4 再见之断路器
4.1 pom.xml配置
特别说明版本需要改为 1.2.0 不然会报错 虽然之前的请求重试没问题
<dependency>
            <groupId>io.github.resilience4j</groupId>
            <artifactId>resilience4j-spring-boot2</artifactId>
            <version>1.2.0</version>
            <exclusions>
                <!-- 没有配置的 先排除 不然会报错 -->
<!--                <exclusion>-->
<!--                    <groupId>io.github.resilience4j</groupId>-->
<!--                    <artifactId>resilience4j-circuitbreaker</artifactId>-->
<!--                </exclusion>-->

                <exclusion>
                    <groupId>io.github.resilience4j</groupId>
                    <artifactId>resilience4j-ratelimiter</artifactId>
                </exclusion>
                <exclusion>
                    <groupId>io.github.resilience4j</groupId>
                    <artifactId>resilience4j-bulkhead</artifactId>
                </exclusion>
                <exclusion>
                    <groupId>io.github.resilience4j</groupId>
                    <artifactId>resilience4j-timelimiter</artifactId>
                </exclusion>
            </exclusions>
        </dependency>
4.2 yml的配置
resilience4j:
  retry:
    retry-aspect-order: 133 # 表示Retry优先级(级别高于比如ratelimiter bulkhead timelimiter) 值越小 -> 越大
    backends:
      # 设置组名
      retryA:
        # 对比之前的案例
        # 重试次数
        maxRetryAttempts: 4
        # 重试等待
        waitDuration: 400
        # 间隔乘数(场景: 正好每次间隔为1的时候卡顿 它就有用了 间隔就变了 例如 1 1.1 1.21....)
        exponentialBackoffMultiplier: 1.1
        retryExceptions:
          - java.lang.RuntimeException
  # 和之前的maven类似
  circuitbreaker:
    instances:
      nba:
        ringBufferSizeInHalfOpenState: 4
        ringBufferSizeInClosedState:  4
        waitInterval: 4000
        recordExceptions:
          - org.springframework.web.client.HttpServerErrorException
    # 要比上面的值小(先执行当前断路器)
    circuit-breaker-aspect-order: 132

spring:
  application:
    name: resilience4j

server:
  port: 7000

eureka:
  client:
    service-url:
      defaultZone: http://localhost:8761/eureka
4.3 后端配置
之前application启动类中 已经配置好了RestTemplate controller层沿用之前 只是修改service层
@Service
// 在这里使用重试策略 yml中backends下配置的
//@Retry(name = "retryA")
// name属性指定CircuitBreaker中yml的配置 fallbackMethod属性指定服务降级方法
@CircuitBreaker(name = "nba", fallbackMethod = "error")
public class HelloService {
@Autowired
RestTemplate restTemplate;
public String hello(){
return restTemplate.getForObject("http://127.0.0.1:1300/hello3", String.class);
}
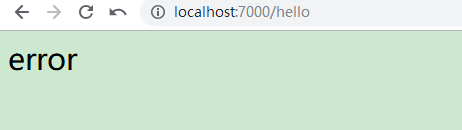
// 服务降级方法中 不加参数Throwable 会报错提示缺少Throwable 要添加异常参数
public String error(Throwable throwable){
return "error";
}
}
4.4 启动项目
和请求重试的启动方式是一样的(重启/启动) 访问网址
4.5 小结
- 和断路器类似 需要注意的项
- pom.xml中配置的版本号 不然会报错
- 优先级值的配置 决定谁先运行
- 在service层 配置断路器 降级方法 需要添加异常参数 否则启动会报错缺陷异常
5 再见之限流
5.1 provider
我们要限流 肯定是要从上层限制(比如从厂家那里限制货品发放量 类似在provider 提供者上进行限制)
- 在provider中添加限流依赖
<dependency>
            <groupId>io.github.resilience4j</groupId>
            <artifactId>resilience4j-spring-boot2</artifactId>
            <version>1.2.0</version>
            <exclusions>
                <!--  没有配置的 先排除 不然会报错 -->
                <exclusion>
                    <groupId>io.github.resilience4j</groupId>
                    <artifactId>resilience4j-circuitbreaker</artifactId>
                </exclusion>

                <!--ratelimiter依赖移除-->
<!--                <exclusion>-->
<!--                    <groupId>io.github.resilience4j</groupId>-->
<!--                    <artifactId>resilience4j-ratelimiter</artifactId>-->
<!--                </exclusion>-->
                <exclusion>
                    <groupId>io.github.resilience4j</groupId>
                    <artifactId>resilience4j-bulkhead</artifactId>
                </exclusion>
                <exclusion>
                    <groupId>io.github.resilience4j</groupId>
                    <artifactId>resilience4j-timelimiter</artifactId>
                </exclusion>
            </exclusions>
        </dependency>
- yml配置
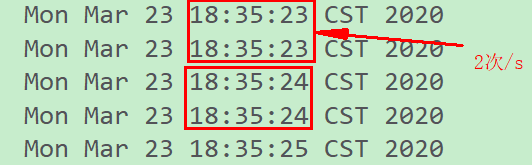
# 每秒钟处理2个请求
resilience4j:
  ratelimiter:
    limiters:
      rltA:
        limit-for-period: 2
        limit-refresh-period: 1s
        timeout-duration: 1s
- controller层配置
@RestController
public class HelloController {


    @Value("${server.port}")
    Integer port;

    @GetMapping("/hello")
    @RateLimiter(name = "rltA")
    public String hello(){
        System.out.println(new Date());
        return "hello provider:" + port;
    }
}
5.2 consumer(消费者)
@RestController
public class HelloController {
@Autowired
HelloService helloService;
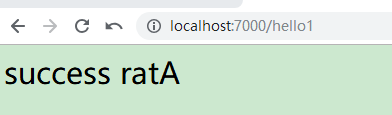
@GetMapping("/hello1")
public String hello1(){
return helloService.hello1();
}
}
@Service
public class HelloService {
@Autowired
RestTemplate restTemplate;
// 限流配置
public String hello1(){
for (int i = 0; i < 5; i++) {
restTemplate.getForObject("http://127.0.0.1:1300/hello", String.class);
}
return "success ratA";
}
}
5.3 运行