作者背景描述:
本人就职于外资IT企业,担任电商订单处理产品开发经理一职,领导过非常多次大小项目的开发工作,对电商平台订单处理流程非常熟悉。
公司专注鞋服行业相关软件开发和服务,公司规模100多人以上,在台北,广州,成都,上海,北京,国外等均有分公司。
为什么写此系列文章?
本人在学校至工作到现在十余年时间,使用.net C# 开发语言,结合在公司实际开发,和市场的需求中,NET.开发的商业企业级系统遇到的缺点有如下:
1.程序首次加载慢,因为虚拟机编译的原因。
2.WINFORM界面开发不够炫丽,精美。
3.WINFORM界面设计人员难找。
4.程序可以被反编译。
5.安装包过大,部署麻烦,framework.
6.跨平台不够好。
结论:
结合近年来前端设计的走向,最终选择了qt+vue+element UI+sqlite(数据库根据需要情况选择)
qt负责接口和硬件处理
sqlite做数据存储
vue+element UI 实现前端。
结果预览
qt 实现MVC Api控制器开发 web api接口-连载【5】-企业级系统开发实战连载系列 -技术栈(vue、element-ui、qt、c++、sqlite)
使用微软mvc 的同学都知道编写一个web api 是非常方便的,本文通过使用qt 实现 Controller 和action 开发web api。
MVC 结构图如下:
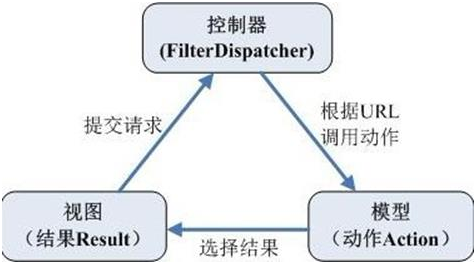
下载QtWebApp(本文最后有下载方式),集成到项目中,这个库主要是实现http 协议,和 QT Web Api库支持。
对于单机版本,不需要用户安装iis 或 tomcat,简化了部署的难度。
QtWebApp目录结构如下:
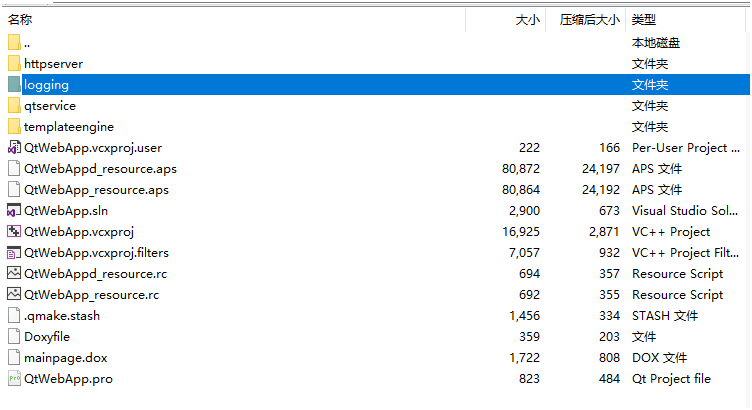
把QtWebApp解压放到BitPos(上一章节创建的项目)目录下。
效果如下:

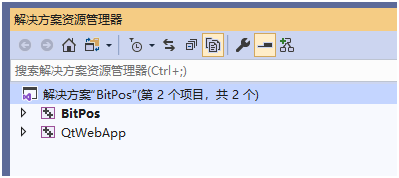
打开上一章节创建的解决方案:BitPos 。
在解决方案资源管理器,右键》添加》现有项目 ,如下:
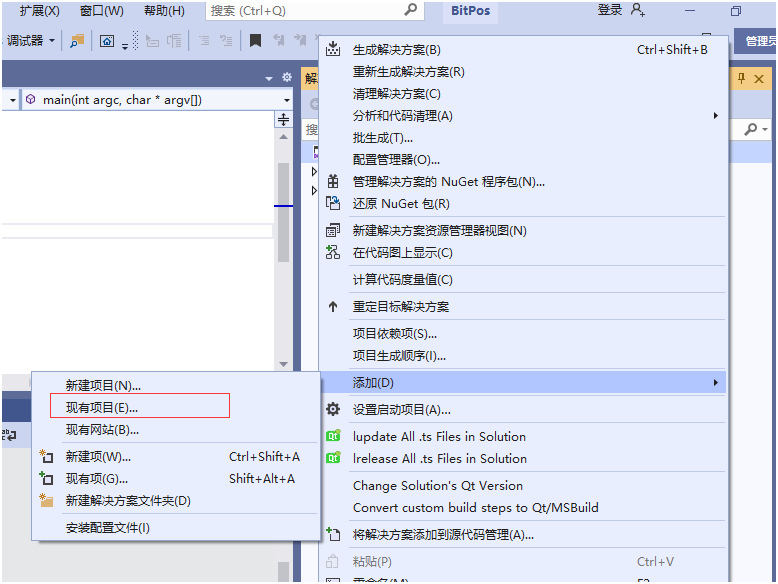
把BitPos.vcxproj 添加现在项目 。
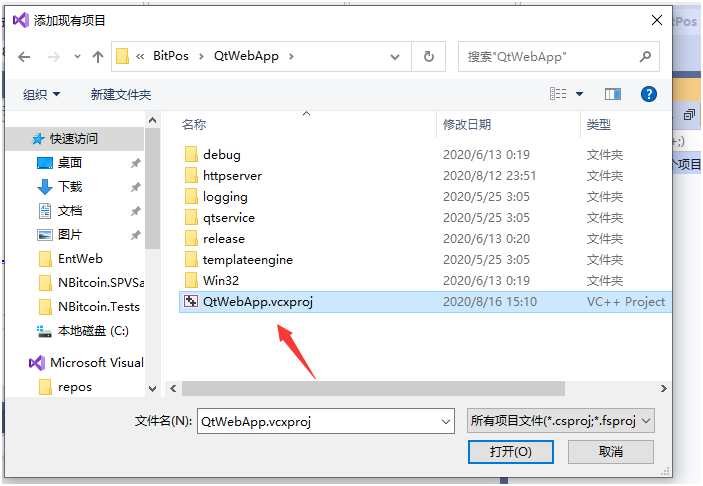
如下图:
选择QtWebApp ,右键》属性
在常规选项中修改sdk 版本,和平台工具集,配置类型,输出为静态库,如下:

在qt project settings 选项中,修改 qt installation 为我们上一节配置的qt版本,如下:

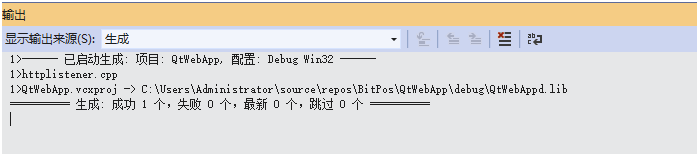
编译源码,这里能够一次编译成功,如下图:
点击BitPos项目,右键》添加》引用
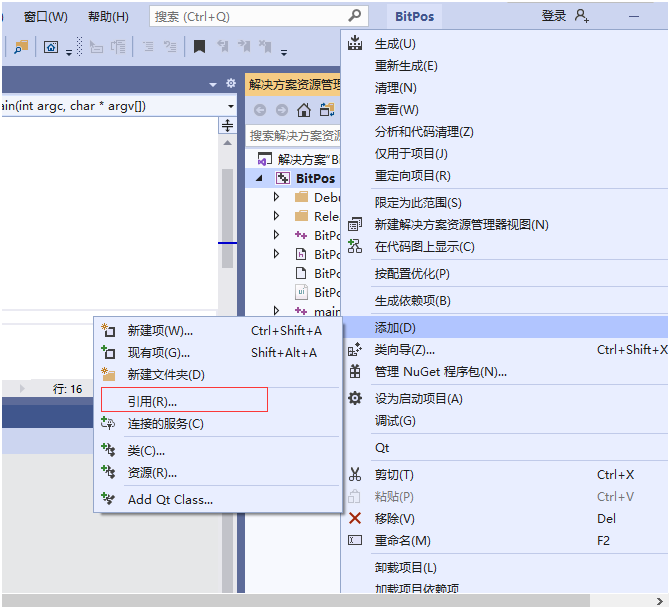

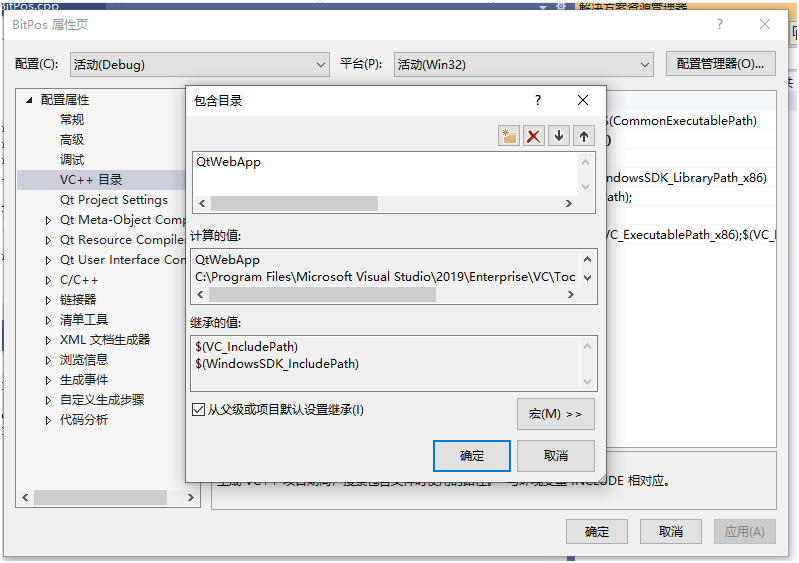
为BitPos添加 包含目录,因为后面会用QtWebApp的头文件。
选择BitPos 》属性》vc++目录》包含目录》输入QtWebApp 如下图:
修改BitPos运行库为静态链接。

按上面的步骤,修改这2个项目的配置为release 模式,重复一次操作。否则release编译会报错。
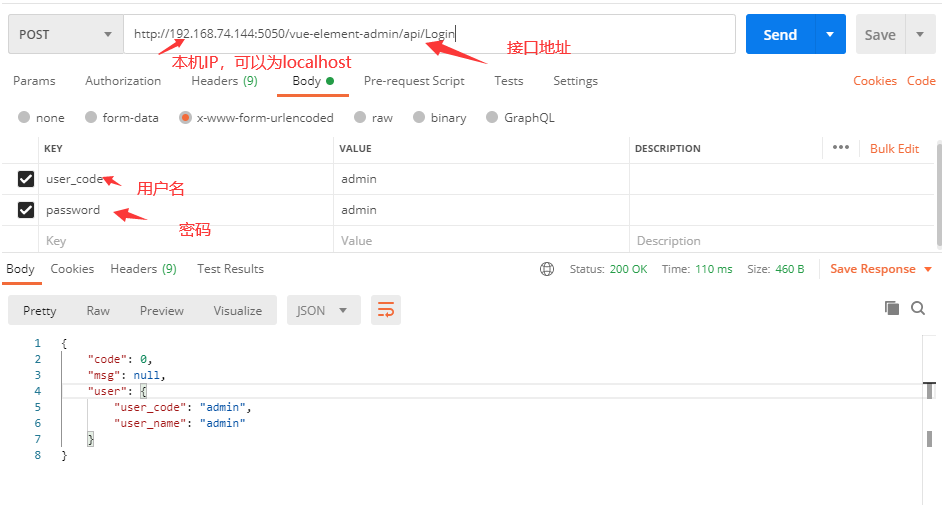
接下来演示如何添加一个用户登入时密码验证的接口。
这个接口有2个参数,分别是user_code ,password
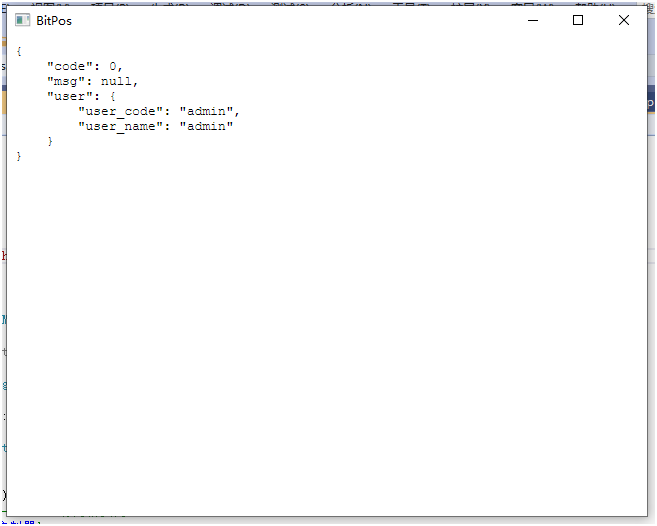
返回为json ,返回了用户代码和用户名称 ,分别是user_code,user_name
请求描述如下图:
接下来进行实操:添加API 控制器 和登入接口Login的方法
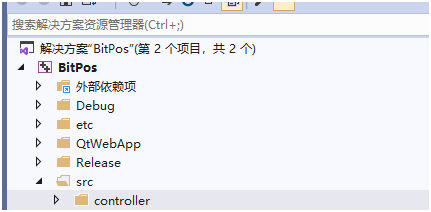
新增 src 目录,然后在目录下创建 controller
如下图:
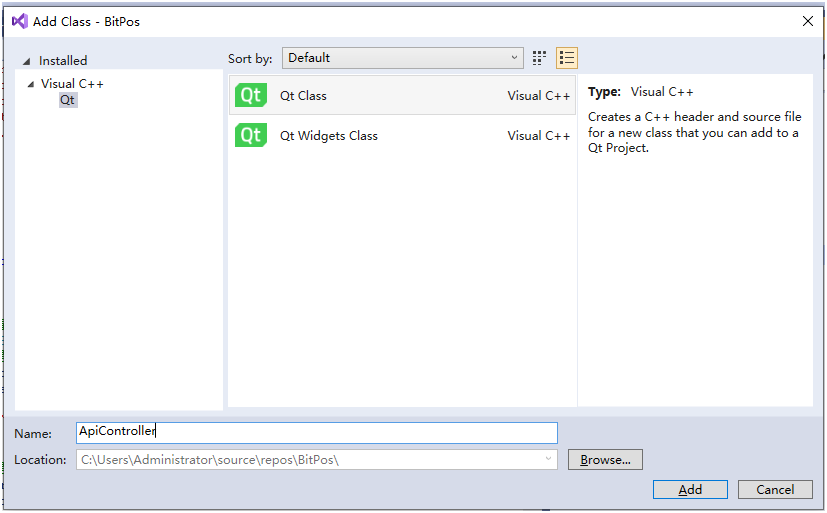
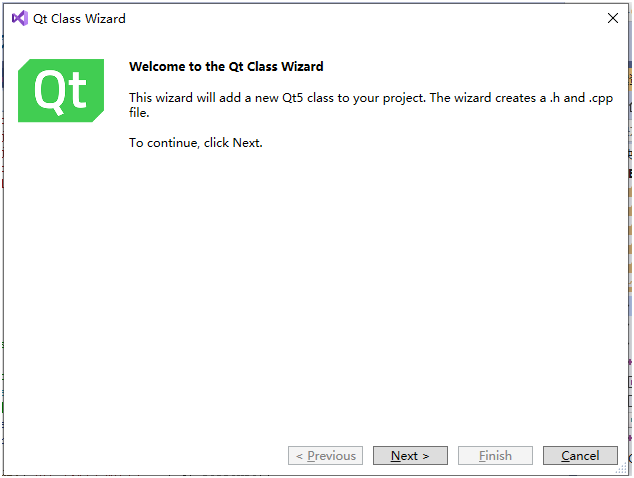
选中controller 右键》添加》Add qt class
输入类名:ApiController
如下图:
点add 如下图:
点击next:如下图
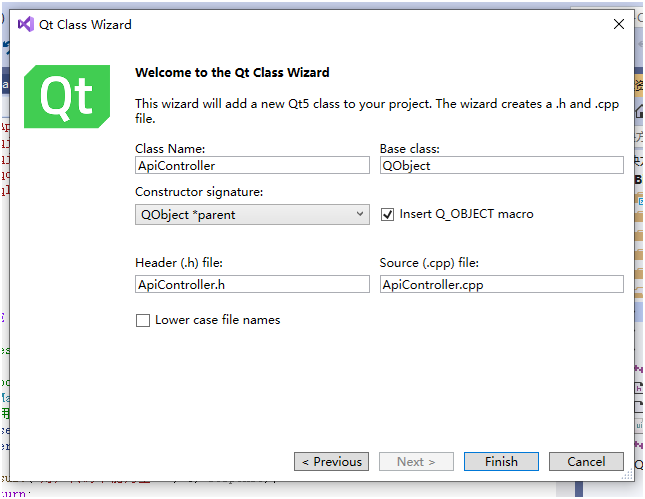
把Base class 修改为HttpRequestHandler
最后贴出这2个类的源码分别是:
ApiController.h的代码如下:


 1 #pragma once
 2 //解决中文乱码问题。
 3 #pragma execution_character_set("utf-8")
 4 #include <httpserver/httprequesthandler.h>
 5
 6 using namespace stefanfrings;
 7
 8 //控制器 http://localhost:5050/vue-element-admin/api
 9 class ApiController :
10     public HttpRequestHandler
11 {
12
13     Q_OBJECT
14 public:
15     Q_INVOKABLE ApiController(const ApiController & v)
16     {
17         *this = v;
18     }
19     Q_INVOKABLE ApiController &operator=(const ApiController &v)
20     {
21                 return *this;
22     }
23
24     Q_INVOKABLE ApiController()
25     {
26
27     }
28
29     //action 登入接口。http://localhost:5050/vue-element-admin/api/login
30     Q_INVOKABLE  void Login(HttpRequest & request, HttpResponse & response);
31
32     Q_INVOKABLE void  ApiResult(const QString& msg, int code,HttpRequest & request, HttpResponse & response);
33     /** Generates the response */
34     Q_INVOKABLE void service(HttpRequest& request, HttpResponse& response);
35
36     void Result(QString msg, int code, HttpResponse & response);
37
38     ~ApiController();
39 };
ApiController.cpp的代码如下:
 1 #include "ApiController.h"
 2 #include <qjsondocument.h>
 3 #include <qjsonobject.h>
 4 #include <qcryptographichash.h>
 5 #include <qlist.h>
 6
 7
 8
 9
10
11
12
13 Q_INVOKABLE void ApiController::Login(HttpRequest & request, HttpResponse & response)
14 {
15     //request.
16
17     //获取post请求的表单 。
18     QMultiMap<QByteArray, QByteArray> forms = request.getParameterMap();
19     //获取用户提交表单中的user_code
20     auto usercode = forms.value("user_code").trimmed();
21     if (usercode.isEmpty())
22     {
23         Result("用户代码不能为空!", 1, response);
24         return;
25     }
26     //获取用户提交表单中的password
27     auto password = forms.value("password").trimmed();
28     if (password.isEmpty())
29     {
30         Result("密码不能为空!", 1, response);
31         return;
32     }
33     //二次判断
34     QByteArray hash = QCryptographicHash::hash(password, QCryptographicHash::Algorithm::Sha256).toBase64();
35
36     //验证用户代码和密码。
37
38     QJsonObject object
39     {
40         {"code", 0},
41         {"msg", QJsonValue::Null}
42     };
43     QJsonObject user
44     {
45         {"user_code", "admin"},
46         {"user_name", "admin"}
47     };
48     object.insert("user", user);
49
50     QJsonDocument usermodel(object);
51
52     //返回用户信息。
53     QByteArray body = usermodel.toJson(QJsonDocument::JsonFormat::Indented);
54
55     response.write(body, true);
56 }
57
58
59 Q_INVOKABLE void ApiController::service(HttpRequest & request, HttpResponse & response)
60 {
61
62 }
63
64 void ApiController::Result(QString msg, int code, HttpResponse & response)
65 {
66     QJsonObject object
67     {
68         {"code", code},
69         {"msg", QJsonValue(msg)}
70     };
71
72
73     QJsonDocument usermodel(object);
74
75     QByteArray body = usermodel.toJson(QJsonDocument::JsonFormat::Indented);
76
77     response.write(body, true);
78 }
79
80 Q_INVOKABLE void ApiController::ApiResult(const QString& msg,int code,HttpRequest & request, HttpResponse & response)
81 {
82     Result(msg, code, response);
83 }
84
85
86
87 ApiController::~ApiController()
88 {
89 }
这2个文件的代码属于业务类的代码,都比较简单,实现了用户登入,用户名和密码的验证,上面已经有注释,这里就不进行重点讲解。
添加通用控制器处理类 requestmapper.cpp ,该类与业务无关。
主要实现接收请求,并查找控制器和接口方法,并进行转发请求,文件内容如下:
  1 /**
  2   @file
  3   @author Stefan Frings
  4 */
  5
  6 #include <QCoreApplication>
  7 #include "requestmapper.h"
  8 #include "controller/ApiController.h"
  9 #include <qmetaobject.h>
 10
 11 //静态变量
 12 QMultiMap<QString, QString> RequestMapper :: Area;
 13 template <typename T>
 14 int RegisterController(const char *typeName,const QString& area)
 15 {
 16     QByteArray tmp=typeName;
 17     tmp = tmp.toLower();
 18     auto type= tmp.constData();
 19
 20     int v=qRegisterMetaType<T>(type);
 21     if (!area.isEmpty())
 22     {
 23         RequestMapper::RegisterArea(area, type);
 24     }
 25     return v;
 26 }
 27 template <typename T>
 28 int RegisterController(const QString& area)
 29 {
 30     return RegisterController<T>(T::staticMetaObject.className(), area);
 31 }
 32 RequestMapper::RequestMapper(QObject* parent)
 33     :HttpRequestHandler(parent)
 34 {
 35     qDebug("RequestMapper: created");
 36     //注册Api控制器,域为vue-element-admin。访问格式为:
 37     //http://localhost:5050/{域}/{控制器}
 38     //例如 http://localhost:5050/vue-element-admin/api
 39     RegisterController<ApiController>("apicontroller", "vue-element-admin");
 40 }
 41
 42
 43 RequestMapper::~RequestMapper()
 44 {
 45     qDebug("RequestMapper: deleted");
 46 }
 47
 48  void RequestMapper::RegisterArea(const QString &area, const QString& classname)
 49 {
 50     Area.insertMulti(area, classname);
 51 }
 52
 53  //查找控制器,并调用接口方法。
 54 void RequestMapper::service(HttpRequest& request, HttpResponse& response)
 55 {
 56     QByteArray path=request.getPath().toLower();
 57     qDebug("RequestMapper: path=%s",path.data());
 58     fprintf(stderr, "request: %s
", path.data());
 59     //实现跨域访问,js 调用API 提供了支持。
 60     response.setHeader("Connection", "keep-alive");
 61     auto origin = request.getHeader("Origin");
 62     response.setHeader("Access-Control-Allow-Origin", origin);
 63     response.setHeader("Access-Control-Allow-Methods", "POST,GET,OPTIONS");
 64     response.setHeader("Access-Control-Allow-Headers", "X-PINGOTHER,Content-Type,x-token");
 65     response.setHeader("Access-Control-Max-Age", "86400");
 66     response.setHeader("Vary", "Accept-Encoding,Origin");
 67     response.setHeader("Keep-Alive", "timeout=2,max=99");
 68     //set api header
 69     response.setHeader("Content-Type", "application/json; charset=utf-8");
 70     //response.setHeader("Access-Control-Allow-Origin", "*");   // also important , if not set , the html application wont run.
 71     if (request.getMethod() == "OPTIONS")
 72     {
 73         response.setStatus(200,"OK");
 74         qDebug("RequestMapper: finished request");
 75         // Clear the log buffer
 76
 77         return;
 78     }
 79     else
 80     {
 81
 82     }
 83
 84     // For the following pathes, each request gets its own new instance of the related controller.
 85         QByteArrayList items = path.split('/');
 86         QByteArray areaname;
 87         QByteArray controlname;
 88         QByteArray actionname;
 89         QByteArray a, b, c;
 90
 91         for (int i = 0; i < items.length(); i++)
 92         {
 93             QByteArray first = items[i];
 94             if (first.isEmpty())
 95                 continue;
 96             else
 97             {
 98                 //get control and action of name.
 99                 a = first;
100                 if(i+1<items.length())
101                 b = items[i + 1].toLower();
102
103                 if (i + 2 < items.length())
104                     c = items[i + 2].toLower();
105                 break;
106             }
107         }
108         QList<QString> controls;
109         //判断是否是路由。
110         if (Area.contains(a))
111         {
112             areaname = a;
113             controlname = b;
114             actionname = c;
115             controls=Area.values(a);
116         }
117         else
118         {
119             controlname = a;
120             actionname = b;
121         }
122
123         QString className = (controlname + "Controller").toLower();
124
125         int id = QMetaType::type(className.toLatin1());
126         HttpRequestHandler* result = NULL;
127         //判断area
128         if (id != QMetaType::UnknownType)
129         {
130             if (controls.count() > 0 && !controls.contains(className))
131             {
132
133                 qDebug("RequestMapper: finished request");
134
135                 return;
136             }
137         }
138
139         if (id != QMetaType::UnknownType)
140         {
141             result = static_cast<HttpRequestHandler*>(QMetaType::create(id));
142             const QMetaObject * theMetaObject = result->metaObject();
143             int nMetathodCount = theMetaObject->methodCount();
144             QByteArray method;
145             //查找方法
146             for (int nMetathodIndex = 0; nMetathodIndex < nMetathodCount; nMetathodIndex++)
147             {
148                 QByteArray oneMethod = theMetaObject->method(nMetathodIndex).name();
149                 if (actionname.compare(oneMethod, Qt::CaseSensitivity::CaseInsensitive)==0)
150                 {
151                     method = oneMethod;
152                     break;
153                 }
154             }
155             if (!method.isEmpty())
156             {
157                 auto token=request.getHeader("X - Token");
158                 //判断token是否是可用。
159                 auto v = QMetaObject::invokeMethod(result, method.data(), Qt::DirectConnection,
160                     Q_ARG(HttpRequest &, request),
161                     Q_ARG(HttpResponse &, response));
162                 if (!v)
163                     qDebug() << method.data()<<" method  invokeMethod is error!";
164              }
165             else
166             {
167              //不存在的方法。
168                  auto v = QMetaObject::invokeMethod(result, "ApiResult", Qt::DirectConnection,
169                     Q_ARG(const QString&, actionname+" action not found !"),
170                     Q_ARG(int, 1),
171                     Q_ARG(HttpRequest &, request),
172                     Q_ARG(HttpResponse &, response));
173                 if (!v)
174                     qDebug() <<  " service method invokeMethod is error!";
175             }
176             delete result;
177         }
178         else
179         {
180             qDebug() << "UnknownType service method invokeMethod is error!";
181         }
182
183     qDebug("RequestMapper: finished request");
184
185 }
特别说明:当有新的控制器添加的时候,只需要在requestmapper.cpp
文件注册控制器即可。
在BitPos 项目 main.cpp 源码修改如下:
 1 #include "BitPos.h"
 2 #include <QtWidgets/QApplication>
 3 #include <QWebEngineView>
 4 #include <httpserver/httplistener.h>
 5 #include <logging/filelogger.h>
 6 #include <qdir.h>
 7 #include "src/requestmapper.h"
 8 using namespace stefanfrings;
 9
10 /** Search the configuration file */
11 QString searchConfigFile()
12 {
13     QString binDir = QCoreApplication::applicationDirPath();
14     QString appName = QCoreApplication::applicationName();
15     QString fileName(appName + ".ini");
16
17     QStringList searchList;
18     searchList.append(binDir);
19     searchList.append(binDir + "/etc");
20     searchList.append(binDir + "/../etc");
21     searchList.append(binDir + "/../../etc"); // for development without shadow build
22     searchList.append(binDir + "/../" + appName + "/etc"); // for development with shadow build
23     searchList.append(binDir + "/../../" + appName + "/etc"); // for development with shadow build
24     searchList.append(binDir + "/../../../" + appName + "/etc"); // for development with shadow build
25     searchList.append(binDir + "/../../../../" + appName + "/etc"); // for development with shadow build
26     searchList.append(binDir + "/../../../../../" + appName + "/etc"); // for development with shadow build
27     searchList.append(QDir::rootPath() + "etc/opt");
28     searchList.append(QDir::rootPath() + "etc");
29
30     foreach(QString dir, searchList)
31     {
32         QFile file(dir + "/" + fileName);
33         if (file.exists())
34         {
35             // found
36             fileName = QDir(file.fileName()).canonicalPath();
37             qDebug("Using config file %s", qPrintable(fileName));
38             return fileName;
39         }
40     }
41
42     // not found
43     foreach(QString dir, searchList)
44     {
45         qWarning("%s/%s not found", qPrintable(dir), qPrintable(fileName));
46     }
47     qFatal("Cannot find config file %s", qPrintable(fileName));
48 }
49
50 int main(int argc, char* argv[])
51 {
52     QApplication a(argc, argv);
53     // Find the configuration file
54     QString configFileName = searchConfigFile();
55
56     // Configure and start the TCP listener
57     QSettings* listenerSettings = new QSettings(configFileName, QSettings::IniFormat, &a);
58     listenerSettings->beginGroup("listener");
59     new HttpListener(listenerSettings, new RequestMapper(&a), &a);
60     //浏览器
61     QWebEngineView view;
62     //设置访问地址
63     view.setUrl(QUrl("http://localhost:5050/vue-element-admin/api/Login?user_code=333&password=3445"));
64     //显示浏览器窗口。
65     view.show();
66     return a.exec();
67 }
文件目录如下图:

按f5运行,即可看到接口返回(也可以用浏览器看接口返回),如下图:
如果后面添加更多的模块的接口,只需要按模板添加控制器,按操作在控制器内添加方法即可。
至此,qt 接口开发演示完毕,下一节讲解如何使用postman 进行接口调试。
后面的文章主要与技术有关,索取源码,技术沟通,编译报错,请加QQ群561506606 加群无需验证。
点击链接加入群聊【企业级系统实战-qt vue.j】:https://jq.qq.com/?_wv=1027&k=CCmkgYYu