一、微服务发现组件Eureka的使用
1.父工程中管理springcloud版本
    <dependencyManagement>
        <dependencies>
            <dependency>
                <groupId>org.springframework.cloud</groupId>
                <artifactId>spring-cloud-dependencies</artifactId>
                <version>Finchley.M9</version>
                <type>pom</type>
                <scope>import</scope>
            </dependency>
        </dependencies>
    </dependencyManagement>
2.搭建Eureka注册中心
1)创建Eureka注册中心模块tenpower-eureka,添加依赖
        <dependency>
            <groupId>org.springframework.cloud</groupId>
            <artifactId>spring-cloud-starter-netflix-eureka-server</artifactId>
        </dependency>
2)该模块application.yml配置
server:
  port: 6868
eureka:
  client:
    register-with-eureka: false  #是否注册到eureka服务
    fetch-registry: false     #是否从eureka中获取注册信息
    service-url:
      defaultZone: http://127.0.0.1:${server.port}/eureka/
3)编写启动类,注意加上注解@EnableEurekaServer
@SpringBootApplication
@EnableEurekaServer
public class EurekaApplication {
    public static void main(String[] args) {
        SpringApplication.run(EurekaApplication.class);
    }
}
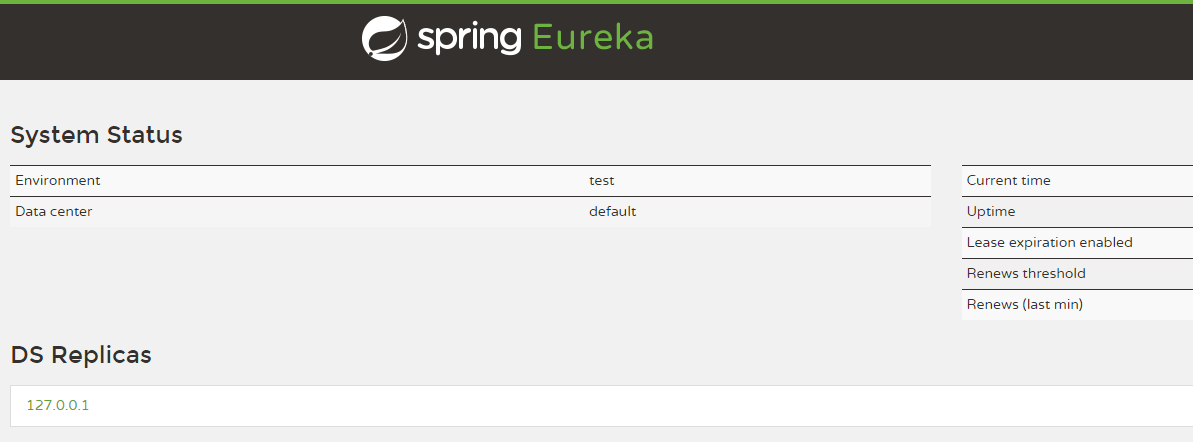
4)运行启动类,浏览器输入 http://localhost:6868/ 测试

3.注册微服务到Eureka注册中心
1)微服务模块添加依赖
        <dependency>
            <groupId>org.springframework.cloud</groupId>
            <artifactId>spring-cloud-starter-netflix-eureka-client</artifactId>
        </dependency>
2)微服务模块application.yml配置
eureka:
  client:
    service-url:
      defaultZone: http://127.0.0.1:6868/eureka/
  instance:
    prefer-ip-address: true #使该微服务在上线后能被跨域访问
3)修改每个服务类的启动类,添加注解@EnableEurekaClient将其注册
@EnableEurekaClient
4)将每个微服务启动起来,会发现eureka的注册列表中可以看到这些微服务了

二、微服务调用组件Feign的使用。注意被调用模块不需任何改动,以下都是在调用模块下的改动
1.在调用模块添加feign依赖
        <dependency>
            <groupId>org.springframework.cloud</groupId>
            <artifactId>spring-cloud-starter-openfeign</artifactId>
        </dependency>
        <dependency>
            <groupId>org.springframework.cloud</groupId>
            <artifactId>spring-cloud-starter-netflix-eureka-client</artifactId>
        </dependency>
2.在启动类额外加注解
@EnableEurekaClient        //如果要被其他微服务调用,要注册到eureka
@EnableDiscoveryClient    //使能发现注册在eureka的客户端
@EnableFeignClients        //以feign方式调用微服务
3.创建client包,包下创建接口
@FeignClient("tenpower-base")   //要调用的服务名
public interface LabelClient {
    @GetMapping("/label/{LabelId}")
    public Result findByLabelId(@PathVariable("LabelId") String id);
}
注意 因为这是接口,所以@PathVariable注解一定要指定参数名称,否则出错
4.修改ProblemController
    @Autowired
    private LabelClient labelClient;

    @GetMapping("/label/{labelId}")
    public Result findLabelById(@PathVariable String labelId) {
        return labelClient.findByLabelId(labelId);
    }
5.测试:http://localhost:9003/problem/label/1 能看到标签的信息
Feign使用注意:
● 用Feign调用微服务时会丢失请求头,很多时候如token需要转发到要调用的微服务。解决方案:
添加一个配置类:
import feign.RequestInterceptor;
import feign.RequestTemplate;
import org.springframework.context.annotation.Configuration;
import org.springframework.web.context.request.RequestContextHolder;
import org.springframework.web.context.request.ServletRequestAttributes;

import javax.servlet.http.HttpServletRequest;

/**
 * Feign配置
 * 使用FeignClient进行服务间调用,传递headers信息
 */
@Configuration
public class FeignConfig implements RequestInterceptor {
    @Override
    public void apply(RequestTemplate requestTemplate) {
        ServletRequestAttributes attributes = (ServletRequestAttributes)RequestContextHolder.getRequestAttributes();
        HttpServletRequest request = attributes.getRequest();
        //添加token
        requestTemplate.header("Authorization", request.getHeader("Authorization"));
    }
}
● Feign自带负载均衡:当调用多个同名微服务时,多次访问调用者会将访问量均匀分配
三、微服务熔断Hystrix使用。Feign 本身支持Hystrix,不需要额外引入依赖
1.修改微服务调用者的application.yml,开启Hystrix
feign:
  hystrix:
    enabled: true
2.在client包新建impl.LabelClientImpl类,需要实现LabelClient接口
@Component  //需要加入spring容器
public class LabelClientImpl implements LabelClient {
    @Override
    public Result findByLabelId(String id) {
        return new Result(false, StatusCode.ERROR, "熔断器启动了");
    }
}
3.修改LabelClient的注解
@FeignClient(value = "tenpower-base", fallback = LabelClientImpl.class)   //黄色部分为熔断器执行类
public interface LabelClient {
    @GetMapping("/label/{LabelId}")
    public Result findByLabelId(@PathVariable("LabelId") String id);
}
4.在被调用的微服务无法访问或出现异常时,测试熔断器是否执行
四、微服务网关Zuul的使用
1.创建子模块tenpower-manager,添加依赖
        <dependency>
            <groupId>org.springframework.cloud</groupId>
            <artifactId>spring-cloud-starter-netflix-eureka-client</artifactId>
        </dependency>
        <dependency>
            <groupId>org.springframework.cloud</groupId>
            <artifactId>spring-cloud-starter-netflix-zuul</artifactId>
        </dependency>
2.创建application.yml
server:
  port: 9011
spring:
  application:
    name: tenpower-manager #指定服务名
eureka:
  client:
    service-url:
      defaultZone: http://127.0.0.1:6868/eureka/
  instance:
    prefer-ip-address: true #使该微服务在上线后能被跨域访问
zuul:
  routes:
    tenpower-article:
      path: /article/**
      serviceId: tenpower-article #在eureka注册中心中的微服务名称
    tenpower-base:
      path: /base/**
      serviceId: tenpower-base
    tenpower-friend:
      path: /friend/**
      serviceId: tenpower-friend
    tenpower-gathering:
      path: /gathering/**
      serviceId: tenpower-gathering
    tenpower-qa:
      path: /qa/**
      serviceId: tenpower-qa
    tenpower-recruit:
      path: /recruit/**
      serviceId: tenpower-recruit
    tenpower-search:
      path: /search/**
      serviceId: tenpower-search
    tenpower-sms:
      path: /sms/**
      serviceId: tenpower-sms
    tenpower-spit:
      path: /spit/**
      serviceId: tenpower-spit
    tenpower-user:
      path: /user/**
      serviceId: tenpower-user
路由规则可简化:
zuul:
  routes:
    tenpower-article:
      path: /article/**
      serviceId: tenpower-article
#简化为
zuul:
  routes:
    tenpower-article: /article/**
配置忽略路由:
zuul.ignored-patterns: /upload/** 或 zuul.ignored-services: upload-servie
3.编写启动类
@SpringBootApplication
@EnableZuulProxy    //开启Zuul网关服务
public class ManagerApplication {
    public static void main(String[] args) {
        SpringApplication.run(ManagerApplication.class);
    }
}
4.测试网关,例如访问:http://localhost:9011/qa/problem
● 请求经过网关后会丢弃http头信息。要想保留头信息,需要编写Zuul过滤器
@Component  //需要加入spring容器
public class WebFilter extends ZuulFilter {
    @Override
    public String filterType() {
        return "pre";   //前置过滤器
    }

    @Override
    public int filterOrder() {
        return 0;   //优先级为0,最高
    }

    @Override
    public boolean shouldFilter() {
        return true;   //是否执行过滤器
    }

    @Override
    public Object run() throws ZuulException {
        System.out.println("经过前台Zuul过滤器");
        RequestContext requestContext = RequestContext.getCurrentContext();
        String header = requestContext.getRequest().getHeader("Authorization");
        if (StringUtils.isNotBlank(header)) {
            requestContext.addZuulRequestHeader("Authorization", header);
        }
        return null;
    }
}
其中filterType方法返回值可以为:pre :可以在请求被路由之前调用,route :在路由请求时候被调用,post :在route和error过滤器之后被调用,error :处理请求时发生错误时被调用
run方法为过滤器执行的操作,上方代码为在网关添加头信息,使其不被丢失
注:run方法return null表示放行,如果return之前写RequestContext.getCurrentContext().setSendZuulResponse(false)则表示不放行
五、SpringCloudConfig配置中心使用
1.新建一个github仓库tenpower-config,在仓库上传配置文件base-dev.yml
eureka:
  client:
    service-url:
      defaultZone: http://127.0.0.1:6868/eureka/
  instance:
    prefer-ip-address: true
server:
  port: 9001
spring:
  application:
    name: tenpower-base
  datasource:
    driver-class-name: com.mysql.jdbc.Driver
    password: 123456
    url: jdbc:mysql://192.168.25.129:3306/tensquare_base?characterEncoding=utf-8
    username: root
  jpa:
    database: mysql
    show-sql: true
配置文件命名规则: {application}-{profile}.yml或{application}-{profile}.properties。本例application对应base,profile对应dev
application为应用名称 profile指的开发环境(用于区分开发环境,测试环境、生产环境 等)
2.创建配置中心微服务
1)添加依赖
        <dependency>
            <groupId>org.springframework.cloud</groupId>
            <artifactId>spring-cloud-config-server</artifactId>
        </dependency>
2)新建启动类
@SpringBootApplication
@EnableConfigServer
public class ConfigApplication {
    public static void main(String[] args) {
        SpringApplication.run(ConfigApplication.class, args);
    }
}
3)编写配置文件application.yml
server:
  port: 12000
spring:
  application:
    name: tenpower-config
  cloud:
    config:
      server:
        git:
          uri: https://github.com/naixin023/tenpower-config.git
          username: xxx             #私有仓库需要
          password: xxx          #私有仓库需要
          skip-ssl-validation: true   #github是https连接,需要跳过ssl验证
4)浏览器测试:http://localhost:12000/base-dev.yml 可以看到配置内容
3.配置客户端(tenpower-base)
1)添加依赖
        <dependency>
            <groupId>org.springframework.cloud</groupId>
            <artifactId>spring-cloud-starter-config</artifactId>
        </dependency>
2)删除application.yml,新建bootstrap.yml。注意不要写错,不然不会提示错误信息,上次找了一天bug才知道是用了中文冒号
spring:
  cloud:
    config:
      name: base
      profile: dev
      label: master
      uri: http://127.0.0.1:12000
3)启动tenpower-base,测试接口能否访问
六、SpringCloudBus消息总线使用
1.修改配置中心服务端(tenpower-config)
1)添加依赖
        <dependency>
            <groupId>org.springframework.cloud</groupId>
            <artifactId>spring-cloud-bus</artifactId>
        </dependency>
        <dependency>
            <groupId>org.springframework.cloud</groupId>
            <artifactId>spring-cloud-stream-binder-rabbit</artifactId>
        </dependency>
2)application.yml添加配置
spring:
  rabbitmq:
    host: 192.168.25.129
management: #暴露出发消息总线的地址
  endpoints:
    web:
      exposure:
        include: bus-refresh
2.修改客户端(tenpower-base)
1)添加依赖
        <dependency>
            <groupId>org.springframework.cloud</groupId>
            <artifactId>spring-cloud-bus</artifactId>
        </dependency>
        <dependency>
            <groupId>org.springframework.cloud</groupId>
            <artifactId>spring-cloud-stream-binder-rabbit</artifactId>
        </dependency>
        <!-- 总线监听 -->
        <dependency>
            <groupId>org.springframework.boot</groupId>
            <artifactId>spring-boot-starter-actuator</artifactId>
        </dependency>
2)修改github上的配置文件,新增
spring:
  rabbitmq:
    host: 192.168.25.129
3.启动eureka、config、base。修改github上的官方配置,如把数据库密码改错,以post方式访问:http://127.0.0.1:12000/actuator/bus-refresh,再次测试controller的方法如findAll(),发现access denied报错
4.将github上的数据库密码改回来,再次以post方式访问:http://127.0.0.1:12000/actuator/bus-refresh,测试controller方法发现能正常访问
5.如果在github上的配置是自定义而不是官方的,还需要在测试类上加@RefreshScope注解
1)例如修改github配置文件,新增
my-test:
  domain: www.viuman.com
2)新建TestController
@RestController
@CrossOrigin
@RequestMapping("/test")
@RefreshScope
public class TestController {
    @Value("${my-test.domain}")
    private String domain;

    /**
     * 测试SpringCloudBus
     * @return
     */
    @GetMapping("/bus")
    public String testBus() {
        System.out.println("得到的域名是:" + domain);
        return domain;
    }
}
3)正常启动后访问http://localhost:9001/test/bus,发现控制台输出:

4)修改github配置
my-test:
  domain: mail.viuman.com
然后以post方式访问:http://127.0.0.1:12000/actuator/bus-refresh重载配置,访问http://localhost:9001/test/bus发现控制台输出

七、配置SpringCloudConfig和eureka成需要输入用户名密码才能访问
1.在这两个工程引入依赖
        <dependency>
            <groupId>org.springframework.boot</groupId>
            <artifactId>spring-boot-starter-security</artifactId>
        </dependency>
2.在这两个工程加入配置
spring:
  application:
    name: registry
  security:
    user:
      name: xxx
      password: xxx
3.更改客户端uri
spring:
  cloud:
    config:
      name: registry
      profile: dev
      label: master
      uri: http://user:password@127.0.0.1:12000
4.更改eureka服务端uri
eureka:
  client:
    fetch-registry: false
    register-with-eureka: false
    service-url:
      defaultZone: http://user:password@47.114.156.210:${server.port}/eureka
5.eureka服务端添加配置类
package com.lbh360.registry.config;

import org.springframework.security.config.annotation.web.builders.HttpSecurity;
import org.springframework.security.config.annotation.web.configuration.EnableWebSecurity;
import org.springframework.security.config.annotation.web.configuration.WebSecurityConfigurerAdapter;

/**
 * @Description 配置关闭csrf 不然其他服务连接不上注册中心 403
 * @Author bofeng
 * @Date 2020/6/23 23:21
 * @Version 1.0
 */
@EnableWebSecurity
public class WebSecurityConfig extends WebSecurityConfigurerAdapter {
    @Override
    protected void configure(HttpSecurity http) throws Exception {
        http.csrf().disable();
        super.configure(http);
    }
}