.ascx:Web窗体用户控件。用来存放独立的用户控件,可提供众多页面使用:
<%@ Control Language="C#" AutoEventWireup="true" CodeBehind="WebUserControl1.ascx.cs" Inherits="WebApplication1.WebUserControl1" %>
<asp:DropDownList ID="DropDownList1" runat="server">
    <asp:ListItem>---请选择---</asp:ListItem>
    <asp:ListItem Value="gx">广西</asp:ListItem>
    <asp:ListItem Value="sh">上海</asp:ListItem>
    <asp:ListItem Value="zz">镇江</asp:ListItem>
</asp:DropDownList>
控件的使用:直接将ascx文件拖过去即可。
Web用户自定义控件(公共控件的构建和引用):
City.ASCX:
<%@ Control Language="C#" AutoEventWireup="true" CodeBehind="City.ascx.cs" Inherits="WebApplication1.City" %>
<asp:DropDownList ID="DropDownList1" runat="server" AutoPostBack="True" OnSelectedIndexChanged="selectedChanged">
    <asp:ListItem>上海</asp:ListItem>
    <asp:ListItem>江苏</asp:ListItem>
    <asp:ListItem>南京</asp:ListItem>
    <asp:ListItem>镇江</asp:ListItem>
</asp:DropDownList>
////////////////////////////////////////////////////////////////////
City.ASCX.CS:
protected void Page_Load(object sender, EventArgs e)
        {
            //
        }
        public string CityID
        {
            get
            {
                return this.DropDownList1.SelectedValue;
            }
            set
            {
                this.DropDownList1.SelectedValue = value;
            }
        }
        public event EventHandler CitySelected = null;  // 第一步:声明事件
        // 第二步:激发事件
        protected void selectedChanged(object sender, EventArgs e)
        {
            if (this.CitySelected != null)
            {
                this.CitySelected(this, null);
            }
        }
////////////////////////////////////////////////////////////////////
WebForm1.ASPX:
<%@ Page Language="C#" AutoEventWireup="true" CodeBehind="WebForm1.aspx.cs" Inherits="WebApplication1.WebForm1" %>
<%@ Register Src="~/City.ascx" TagPrefix="uc1" TagName="City" %>
<!DOCTYPE html>
<html xmlns="http://www.w3.org/1999/xhtml">
<head runat="server">
<meta http-equiv="Content-Type" content="text/html; charset=utf-8"/>
    <title></title>
</head>
<body>
    <form id="form1" runat="server">
    <div>
        <!-- 处理时间之注册委托 -->
        <uc1:City runat="server" id="City" OnCitySelected="showCity" />
        <asp:Literal ID="Literal1" runat="server"></asp:Literal>
    </div>
    </form>
</body>
</html>
////////////////////////////////////////////////
WebForm1.ASPX.CS:
protected void Page_Load(object sender, EventArgs e)
        {
            //
        }
        // 处理事件之执行委托
        public void showCity(object sender,EventArgs e)
        {
            this.Literal1.Text = this.City.CityID;
        }
实现用户自定义的另一种方法:
ASCX:
<%@ Control Language="C#" AutoEventWireup="true" CodeBehind="City.ascx.cs" Inherits="WebApplication1.City" %>
<asp:DropDownList ID="DropDownList1" runat="server" AutoPostBack="True" OnSelectedIndexChanged="DropDS">
    <asp:ListItem>a</asp:ListItem>
    <asp:ListItem>b</asp:ListItem>
    <asp:ListItem>c</asp:ListItem>
    <asp:ListItem>d</asp:ListItem>
</asp:DropDownList>
////////////////////////////////////////////////////////////////////
ASCX.CS:
protected void Page_Load(object sender, EventArgs e)
        {
            //
        }
        public delegate void CitySelectedEventHadler(string CityID);  // 声明委托
        public event CitySelectedEventHadler CitySelected = null;  // 声明事件
        // 激发事件
        protected void DropDS(object sender, EventArgs e)
        {
            if (this.CitySelected != null)
            {
                string args = this.DropDownList1.SelectedValue;
                this.CitySelected(args);
            }
        }
/////////////////////////////////////////////////////////////
ASPX:
<%@ Page Language="C#" AutoEventWireup="true" CodeBehind="WebForm1.aspx.cs" Inherits="WebApplication1.WebForm1" %>
<%@ Register Src="~/City.ascx" TagPrefix="uc1" TagName="City" %>
<!DOCTYPE html>
<html xmlns="http://www.w3.org/1999/xhtml">
<head runat="server">
<meta http-equiv="Content-Type" content="text/html; charset=utf-8"/>
    <title></title>
</head>
<body>
    <form id="form1" runat="server">
    <div>
        <!-- 处理事件:委托注册 -->
        <uc1:City runat="server" id="City" OnCitySelected="showCity" />
        <asp:Literal ID="Literal1" runat="server"></asp:Literal>
    </div>
    </form>
</body>
</html>
//////////////////////////////////////////////////
ASPX.CS:
protected void Page_Load(object sender, EventArgs e)
        {
            //
        }
        // 处理事件:执行委托
        public void showCity(string id)
        {
            this.Literal1.Text = id;
        }
泛型方法(常用):
City.ASCX:
<%@ Control Language="C#" AutoEventWireup="true" CodeBehind="City.ascx.cs" Inherits="WebApplication1.City" %>
<asp:DropDownList ID="DropDownList1" runat="server" AutoPostBack="True" OnSelectedIndexChanged="DropDownSelected">
    <asp:ListItem>a</asp:ListItem>
    <asp:ListItem>b</asp:ListItem>
    <asp:ListItem>c</asp:ListItem>
</asp:DropDownList>
////////////////////////////////////////////////////////////
City.ascx.cs:
protected void Page_Load(object sender, EventArgs e)
        {
            //
        }
        public event EventHandler<CityEventArgs> CitySelected = null;

        protected void DropDownSelected(object sender, EventArgs e)
        {
            if (this.CitySelected != null)
            {
                CityEventArgs args = new CityEventArgs();
                args.CityID = this.DropDownList1.SelectedValue;
                this.CitySelected(this, args);  // 等价于 this.CitySelected(this, new CityEventArgs() { CityID = this.DropDownList1.SelectedValue });

            }
        }
/////////////////////////////////////////////////////////////////
class.cs:
using System;
using System.Collections.Generic;
using System.Linq;
using System.Web;

namespace WebApplication1.App_Code
{
    public class Class1
    {
    }
    public class CityEventArgs : EventArgs
    {
        public string CityID { get; set; }
    }
}
//////////////////////////////////////////////////////////
Webfrom1.aspx:
<%@ Page Language="C#" AutoEventWireup="true" CodeBehind="WebForm1.aspx.cs" Inherits="WebApplication1.WebForm1" %>
<%@ Register Src="~/City.ascx" TagPrefix="uc1" TagName="City" %>
<!DOCTYPE html>
<html xmlns="http://www.w3.org/1999/xhtml">
<head runat="server">
<meta http-equiv="Content-Type" content="text/html; charset=utf-8"/>
    <title></title>
</head>
<body>
    <form id="form1" runat="server">
    <div>
        <uc1:City runat="server" id="City"/>
        <asp:Literal ID="Literal1" runat="server"></asp:Literal>
    </div>
    </form>
</body>
</html>
////////////////////////////////////////////////////////////
Webfrom1.aspx.cs:
protected void Page_Load(object sender, EventArgs e)
        {
            this.City.CitySelected += City_CitySelected;
        }

        private void City_CitySelected(object sender, App_Code.CityEventArgs e)
        {
            this.Literal1.Text = e.CityID;
        }
用户编程加载控件使用LoadControl("city.ascx");
用户自定义控件前端样式/验证等:
City.ascx:
<%@ Control Language="C#" AutoEventWireup="true" CodeBehind="City.ascx.cs" Inherits="WebApplication1.City" %>
用户名:<asp:TextBox ID="TextBox1" runat="server"></asp:TextBox><asp:Button ID="Button1" runat="server" Text="Button" OnClientClick="return check();" />
<script type="text/javascript">
    function check() {
        var t1 = document.getElementById("<%= TextBox1.ClientID%>");  // 获取当前控件的ID
        if (!t1.value) {
            alert("用户名不为空");
            return false;
        }
    }
</script>
//////////////////////////////////////////////////////////////
WebForm1.aspx:
<%@ Page Language="C#" AutoEventWireup="true" CodeBehind="WebForm1.aspx.cs" Inherits="WebApplication1.WebForm1" %>
<%@ Register Src="~/City.ascx" TagPrefix="uc1" TagName="City" %>
<!DOCTYPE html>
<html xmlns="http://www.w3.org/1999/xhtml">
<head runat="server">
<meta http-equiv="Content-Type" content="text/html; charset=utf-8"/>
    <title></title>
</head>
<body>
    <form id="form1" runat="server">
    <div>
        <uc1:City runat="server" ID="City" />
    </div>
    </form>
</body>
</html>
后端验证:
主要分为下面这6种:
RequiredFieldValidator:必填认证。ControlToValidator属性可以设置他验证的ID。
CompareValidator:比较(常用语两个密码是否一致比较)。ControlToValidator是本身ID,ControlToCompare是参照的标本(样本可以不写,例如年龄只需要检测是否为整形,即operrator=DataTypeCheck和Type=Integer即可。又如果年龄只需要比较大小,那么,即operrator=GreaterThanEqual(大于等于)/GreaterThan(大于)/LessThanEqual(小于等于)/LessThan(小于)、Type=Integer和ValueToCompare=18(数值)即可)。operrator表示比较的方法(Equal表示相等)
RangeValidator:范围比较。MaximumValue最大值,MinimumValue最小值 。
RegularExpressionValidator:正则表达式验证。ValidationExpression写正则表达式(有常用的正则表达式)。
CustomValidator:编写代码来验证(上面的各种方法都不能实现的情况下适用)。编写代码验证有两种(server端和client端),server端方法是调用方法的属性是ServerValidate;client端调用script的方法的属性是ClientValidationFunction。
注:
1.上面的控件都有一个外观选项设置:display默认是static表示静态的,就是位置固定。改为Dynamic表示动态的,效果就是前一个控件不显示,后面一个控件会占用前一个控件的位置。
2.如果取消验证,不仅仅是单单的button按钮就可以进行取消,button按钮的属性CauseValidation=false才能进行取消验证。
3.(验证控件/button)控件的分组能够实现在同一个页面进行相同功能的分组操作(互不干扰),(验证控件/button)属性ValidationGroup。
案例:
WebForm1.aspx:
<%@ Page Language="C#" AutoEventWireup="true" CodeBehind="WebForm1.aspx.cs" Inherits="WebApplication1.WebForm1" %>
<!DOCTYPE html>
<html xmlns="http://www.w3.org/1999/xhtml">
<head runat="server">
<meta http-equiv="Content-Type" content="text/html; charset=utf-8"/>
    <title></title>
    <script type="text/javascript">
        // 使用CustomValidator验证方式的client端验证函数
        function CheckDate(sender, args) {
            // args.Value和args.IsValid并没有提示,但是方式仍然是这样写。不显示是因为js客户端没有这个属性
            var i = parseInt(args.Value);
            args.IsValid = i % 2 == 0;
        }
    </script>
</head>
<body>
    <form id="form1" runat="server">
    <div>

        用户名:<asp:TextBox ID="TextBox1" runat="server"></asp:TextBox>
        <asp:RequiredFieldValidator ID="RequiredFieldValidator1" runat="server" ControlToValidate="TextBox1" Display="Dynamic" ErrorMessage="用户名不能为空"></asp:RequiredFieldValidator>
        <br />
        密码:<asp:TextBox ID="TextBox2" runat="server"></asp:TextBox>
        <asp:RequiredFieldValidator ID="RequiredFieldValidator2" runat="server" ControlToValidate="TextBox2" Display="Dynamic" ErrorMessage="密码不能为空"></asp:RequiredFieldValidator>
        <br />
        确认密码:<asp:TextBox ID="TextBox3" runat="server"></asp:TextBox>
        <asp:RequiredFieldValidator ID="RequiredFieldValidator3" runat="server" ControlToValidate="TextBox3" Display="Dynamic" ErrorMessage="确认密码不能为空"></asp:RequiredFieldValidator>
        <asp:CompareValidator ID="CompareValidator1" runat="server" ControlToCompare="TextBox2" ControlToValidate="TextBox3" Display="Dynamic" ErrorMessage="密码不一致"></asp:CompareValidator>
        <br />
        Email:<asp:TextBox ID="TextBox4" runat="server"></asp:TextBox>
        <asp:RegularExpressionValidator ID="RegularExpressionValidator1" runat="server" ControlToValidate="TextBox4" ErrorMessage="Email格式不正确" ValidationExpression="w+([-+.']w+)*@w+([-.]w+)*.w+([-.]w+)*"></asp:RegularExpressionValidator>
        <br />
        需要后台C#代码验证(判断偶数):<asp:TextBox ID="TextBox5" runat="server"></asp:TextBox>
        <asp:CustomValidator ID="CustomValidator1" runat="server" ControlToValidate="TextBox5" ErrorMessage="一定要是偶数" OnServerValidate="ServerValidation"></asp:CustomValidator>
        <br />
        <asp:Button ID="Button1" runat="server" Text="Button" />

        <asp:Button ID="Button2" runat="server" CausesValidation="False" Text="取消" />

    </div>
    </form>
</body>
</html>
////////////////////////////////////////////////////////////
WebForm1.aspx.cs:
using System;
using System.Collections.Generic;
using System.Linq;
using System.Web;
using System.Web.UI;
using System.Web.UI.WebControls;

namespace WebApplication1
{
    public partial class WebForm1 : System.Web.UI.Page
    {
        protected void Page_Load(object sender, EventArgs e)
        {

        }
        // 使用CustomValidator验证方式的server端验证函数
        protected void ServerValidation(object source, ServerValidateEventArgs args)
        {
            if (string.IsNullOrEmpty(args.Value))
            {
                // 判断是否为空
                args.IsValid = false;  // 如果为空,那么返回false
            }
            else
            {
                int i = int.Parse(args.Value);
                args.IsValid = i % 2 == 0;  // 判断是否为偶数
            }
        }
    }
}
系统控件:
Button:点击按钮
ProgressBar:滚动条
ComboBox:下拉列表。
  该下拉列表默认是可以改变的。DropDownStyle=DropDownList表示不可修改,表示下拉列表。
  空间含有SelectedIndexChanged用来设置响应函数。
  SelectIndex:用来获取选择下标索引。
  SelectItem:用来获取选中的项。
  Items.Insert(索引, "插入内容")
  Item.Clear():清空数据。
ToolStrip:菜单列表
Label:标题
Timer:定时器。
  Enabled:用来显示定时器是否是开启状态。
  Interval:表示设计的时间单位,默认为100毫秒。
WebBrowser:浏览器控件
SerialPort:串口控件
  DataBits:数据位
  PortName:端口名称
  ReadBufferSize:读取缓冲区的大小
Panel:控件的容器。作用:例如将四个单选按钮区分成两组
GroupBox:组框
StatusStrip:状态栏
pktruebox:图片框
  image:选择好导入图片
TextBox
  textbox.Text:获取字符串
  textbox.Lines:按行读取字符串
相关内容具体可看:https://www.cnblogs.com/namejr/p/10560604.html
pictureBox:画图控件
  point:描绘,可以添加函数。
Literal:显示文本的控件
  Mode:可以进行设置属性,当属性是Encode的时候,就会对传递进去的输入进行编码
ImageButton:图片button(和img标签相似)
  click:绑定点击事件。例如:可以获取点击的坐标(e.X,e.Y)
LinkButton:链接button(和a标签相似)
DROPDOWNLIST:下拉选项,相当于html中的select
  SelectedIndexChanged:改变选择条件出发该属性。下面案例使用button按钮进行选择变化,其实使用该属性也可以满足必要的需求。
  AppendDataBoundItems:保留原来的属性,进行添加
ASPX:
<div>
        <asp:DropDownList ID="DropDownList1" runat="server">
            <asp:ListItem Value="beijing">北京</asp:ListItem>
            <asp:ListItem Value="shanghai">上海</asp:ListItem>
            <asp:ListItem Value="nanjing">南京</asp:ListItem>
        </asp:DropDownList><asp:Button ID="Button1" runat="server" Text="Button" OnClick="Button1_Click" /><asp:Label ID="Label1" runat="server" Text="Label"></asp:Label>
    </div>
//////////////////////////////////////
CS:
protected void Page_Load(object sender, EventArgs e)
        {
            if (!Page.IsPostBack)
            {
                // 添加方法
                ListItem item = new ListItem("天津", "tianjin");
                this.DropDownList1.Items.Add(item);
                //
                this.DropDownList1.Items.Add(new ListItem() { Text = "合肥", Value="hefei" });
                //
                this.DropDownList1.Items.AddRange(new ListItem[]{
                    new ListItem(){Text="广西",Value="guangxi"},
                    new ListItem(){Text="玉林",Value="yulin"},
                    new ListItem(){Text="广东",Value="guangdong"},
                    new ListItem(){Text="中山",Value="zhongshan"}
                });
            }
        }

        protected void Button1_Click(object sender, EventArgs e)
        {
            this.Label1.Text = this.DropDownList1.SelectedItem.Text;  // 选择选中的属性
        }
ListBox/DropDownList/RadioButtonList/CheckBoxList的简单使用
ASPX:
<div>
        <!-- list选择列表,固定size=4的select -->
        <asp:ListBox ID="ListBox1" runat="server"></asp:ListBox>
        <!-- list选择列表,固定size=1的select -->
        <asp:DropDownList ID="DropDownList1" runat="server"></asp:DropDownList>
        <!-- 单选按钮 -->
        <asp:RadioButtonList ID="RadioButtonList1" runat="server"></asp:RadioButtonList>
        <!-- 多选按钮 -->
        <asp:CheckBoxList ID="CheckBoxList1" runat="server"></asp:CheckBoxList>
    </div>
///////////////////////////////////////////////////////////////////
CS:
protected void Page_Load(object sender, EventArgs e)
        {
            ListItem[] citys = new ListItem[]{
                new ListItem(){Text="广西",Value="guangxi"},
                new ListItem(){Text="江苏",Value="jiangsu"},
                new ListItem(){Text="上海",Value="shanghai"},
                new ListItem(){Text="广东",Value="guangdong"}
            };
            /*
            // 单个添加
            this.ListBox1.DataSource = citys;
            this.ListBox1.DataBind();
            this.DropDownList1.DataSource = citys;
            this.DropDownList1.DataBind();
            this.RadioButtonList1.DataSource = citys;
            this.RadioButtonList1.DataBind();
            this.CheckBoxList1.DataSource = citys;
            this.CheckBoxList1.DataBind();
            */
            //
            // 代码循环添加
            List<ListControl> listCtrls = new List<ListControl>();
            this.FindControls(this,listCtrls);
            foreach (ListControl item in listCtrls)
            {
                item.DataSource = citys;
                item.DataBind();
            }
        }
        // 用来查找到需要的对应的control控件(ListControl)
        public void FindControls(Control contr, List<ListControl> listcontrol)
        {
            foreach (Control item in contr.Controls)
            {
                if (item is ListControl)
                {
                    listcontrol.Add(item as ListControl);
                }
                else if (item.Controls.Count > 0)
                {
                    FindControls(item, listcontrol);
                }
            }
        }
        /*
         * 泛型版本
        public void FindControls<T>(Control contr, List<T> listcontrol) where T:Control
        {
            foreach (Control item in contr.Controls)
            {
                if (item is T)
                {
                    listcontrol.Add(item as T);
                }
                else if (item.Controls.Count > 0)
                {
                    FindControls<T>(item, listcontrol);
                }
            }
        }*/
HyperLink:超链接
  navigateURL:导航
  target:打开页面的方式
Calendar:日历
  selectedchanged:修改日期触发
  selectionMode:默认单选日期
  DayRender:当每次服务器像用户输出某一天的时候会触发的事件(可以说是每点击触发的时候)
案例:
ASPX:
<div>
        <asp:Calendar ID="Calendar1" runat="server" BackColor="White" BorderColor="#3366CC" BorderWidth="1px" CellPadding="1" DayNameFormat="Shortest" Font-Names="Verdana" Font-Size="8pt" ForeColor="#003399" Height="200px" OnDayRender="Calendar_DayRender" OnSelectionChanged="Calendar_selected" SelectionMode="DayWeekMonth" Width="220px">
            <DayHeaderStyle BackColor="#99CCCC" ForeColor="#336666" Height="1px" />
            <NextPrevStyle Font-Size="8pt" ForeColor="#CCCCFF" />
            <OtherMonthDayStyle ForeColor="#999999" />
            <SelectedDayStyle BackColor="#009999" Font-Bold="True" ForeColor="#CCFF99" />
            <SelectorStyle BackColor="#99CCCC" ForeColor="#336666" />
            <TitleStyle BackColor="#003399" BorderColor="#3366CC" BorderWidth="1px" Font-Bold="True" Font-Size="10pt" ForeColor="#CCCCFF" Height="25px" />
            <TodayDayStyle BackColor="#99CCCC" ForeColor="White" />
            <WeekendDayStyle BackColor="#CCCCFF" />
        </asp:Calendar>
    </div>
        <asp:Label ID="Label1" runat="server" Text="Label"></asp:Label>
CS:
protected void Calendar_selected(object sender, EventArgs e)
        {
            this.Label1.Text = this.Calendar1.SelectedDate.ToString();
        }
        //
        protected void Calendar_DayRender(object sender, DayRenderEventArgs e)
        {
            DateTime day1 = new DateTime(2019, 3, 24);
            DateTime day2 = new DateTime(2019, 4, 5);
            if (e.Day.Date > day1 && e.Day.Date < day2)
            {
                e.Day.IsSelectable = true;  // 可选日期
                e.Cell.Attributes.Add("onmouseover", "this.style.backgroundColor='yellow'");  // 添加属性
                e.Cell.Attributes.Add("onclick", string.Format("showDate('{0}')", e.Day.Date.ToString("yyyy-MM-dd")));  // 绑定script事件
                e.Cell.Controls.Add(new Literal() { Text = "可用来添加当天备注" });
            }
            else
            {
                e.Day.IsSelectable = false;  // 日期不可选
            }
        }
AdRotator:可用来添加广告位。
  advertisementFile:指定文件。
创建xml和添加AdRotator环境,示例地址:https://www.cnblogs.com/namejr/p/10630730.html
ASPX:
<div>
        <asp:AdRotator ID="AdRotator1" runat="server" AdvertisementFile="~/ad.xml" />
    </div>

as.xml:
<?xml version="1.0" encoding="utf-8" ?>
<Advertisements xmlns="http://schemas.microsoft.com/AspNet/AdRotator-Advertisement-File-1.2">
  <!-- 广告1 -->
  <Ad xmlns="">
    <Width>500</Width>
    <Height>800</Height>
    <!-- 广告内容 -->
    <AlternateText>广告1</AlternateText>
    <!-- 图片地址 -->
    <ImageUrl>~/image/01.JPG</ImageUrl>
    <!-- 显示概率 -->
    <Impressions>60</Impressions>
    <!-- 内联文件 -->
    <NavigateUrl>~/WebForm2.aspx</NavigateUrl>
  </Ad>
</Advertisements>
XML控件,可以用来糅合文件和样式。(注:xml有两种方式,一种是xml文件(用来存放数据),一种是样式(用xslt转换为xml样式))
  DocumentSource:绑定数据源(xml文件)。
  TransformSource:转换形式(XSLT文件)。
  注:只有DocumentSource会原封不动输出里面的内容,使用配合TransformSource才能输出想要的效果。
Substitution:网页加载动态执行绑定函数,可用来做获取缓存信息。
  MethodName:绑定函数(绑定的函数接收HttpContext类型,返回string,而且函数必须为可访问的静态函数)
ASPX:
<div>
        <!-- Substitution动态获取页面信息 -->
        <asp:Substitution ID="Substitution1" runat="server" MethodName="MNFunc" /><br />
        <!-- 方法二 -->
        <%=this.F1() %><br />
        <!-- 方法三 -->
        <% this.F2(1, 2); %>
    </div>
////////////////////////////
CS:
protected void Page_Load(object sender, EventArgs e)
        {
            //
        }
        // 动态获取缓存信息
        // 方法一:Substitution
        public static string MNFunc(HttpContext context)
        {
            return "hello";
        }
        // 方法二
        public string F1()
        {
            return "hi";
        }
        // 方法三
        public void F2(int a, int b)
        {
            Response.Write(a + b);
        }
BulletedList:列表(ul下的li/ol)
  BulletStyle:设置显示的样式。
  BulletImageURL:设置小图标。
  displayMode:这个有点重要,当设置为text的时候,只是显示文本。当设置为Linkbutton的时候可以当做按钮来使用。当设置为hyperLink为超级链接(当设置为超级链接时,text表示显示文本,value表示链接地址)。
  click:点击事件(当displaymode设置为linkbutton的情况下才能使用)。
string.Format("下标:{0},内容:{1},值:{2}", e.Index, this.BulletedList1.Items[e.Index].Text, this.BulletedList1.Items[e.Index].Value)
HiddenField:隐藏文本内容甚至是源代码(等同于control.Visible)
MultiView:这个控件和Panel有点类似,因为都是容器控件。MultiView和View进行配合使用,每个MultiView只能显示多个中的一个View。
  ActiveViewIndex:选中显示View控件的下标。
  ActiveViewChanged:更改事件。
ASPX:
<div>
        <asp:MultiView ID="MultiView1" runat="server" ActiveViewIndex="0" OnActiveViewChanged="AVChanged">
            <asp:View ID="View1" runat="server">
                第一步:<asp:Button ID="Button1" runat="server" Text="下一步" OnClick="Button1_Click" />
            </asp:View>
            <asp:View ID="View2" runat="server">
                第二步:<asp:Button ID="Button2" runat="server" Text="下一步" OnClick="Button2_Click" />
            </asp:View>
            <asp:View ID="View3" runat="server">
                返回第一步:<asp:Button ID="Button3" runat="server" Text="完成" OnClick="Button3_Click" />
            </asp:View>
        </asp:MultiView>
        <asp:Literal ID="Literal1" runat="server"></asp:Literal>
    </div>
///////////////////////////////////////////////////////////////
CS:
protected void Page_Load(object sender, EventArgs e)
        {
            //
        }

        protected void Button1_Click(object sender, EventArgs e)
        {
            this.MultiView1.ActiveViewIndex = 1;  // 选中1的下标显示
        }

        protected void Button2_Click(object sender, EventArgs e)
        {
            this.MultiView1.ActiveViewIndex = 2;
        }

        protected void Button3_Click(object sender, EventArgs e)
        {
            this.MultiView1.ActiveViewIndex = 0;
        }

        protected void AVChanged(object sender, EventArgs e)
        {
            this.Literal1.Text = this.MultiView1.GetActiveView().ID;  // 获取当前选中的View控件的ID
            //this.MultiView1.GetActiveView().Controls.Add();  // 可以动态添加控件
        }
Wizard:向导控件。
  StepType:设置显示的属性。auto:自动;Complete:结束了;Finish:完成了;Start:开始;Step:中间,有上一步和下一步。
  allowReturn:是否允许返回上一步。
  ActiveStepChanged:当前事件改变触发该事件。
  CancelButtonClick:取消按钮事件。
  FinishButtonClick:完成按钮。
  NextButtonClick:下一步按钮
  SideBarButtonClick:完成按钮
  PreviousButtonClick:上一步按钮
ImageMap:图像事件,用户可以点击图像区域触发事件。
  imageURL:图片链接地址。
  HotSpots:热点区域。CircleHotSpot:圆形热点区域。RectangleHotSpot:矩形热点区域()。PolygonHotSpot:多边形(不规则)热点区域。
  Click:点击触发该事件。
  HotSpotMode:热点模式。PostBack回放。Navigate导航(如果使用导航,那么在每块热点区域应该设置对用的navigateUrl)。Inactive禁用。
ASPX:
<div>
        <asp:ImageMap ID="ImageMap1" runat="server" HotSpotMode="PostBack" ImageUrl="~/files/27a0ae74-4dc8-4bf6-95b2-38bca7eb99a5.JPG" OnClick="ImageClick">
            <asp:RectangleHotSpot Bottom="100" PostBackValue="top" Right="630" />
            <asp:RectangleHotSpot Bottom="916" PostBackValue="buttom" Right="630" Top="100" />
        </asp:ImageMap><asp:Label ID="Label1" runat="server" Text="Label"></asp:Label>
    </div>
///////////////////////////////////////////////////////////
CS:
protected void ImageClick(object sender, ImageMapEventArgs e)
        {
            this.Label1.Text = e.PostBackValue;  // 获取回调值
        }
splitContainer:菜单,左右两边结构。
SqlDataSource:数据库控件查询。可以进行数据库的配置,便于关联数据库。
  Filtering:数据库过滤。
  Deleted:删除事件。可以终止事件,以免显示到前台。
  Deleting:删除前响应的事件。
  inserted:插入事件。可以终止事件,以免显示到前台。
  inserting:插入前响应的事件。
  seleted:查询事件。可以终止事件,以免显示到前台。
  selecting:查询前响应的事件。
  updated:更新事件。可以终止事件,以免显示到前台。
  updating:更新前响应的事件。
  databinding:数据绑定。
案例:
基本的插入、删除、更新(只使用insert,不使用inserting):
WebForm.aspx:
<%@ Page Language="C#" AutoEventWireup="true" CodeBehind="WebForm1.aspx.cs" Inherits="WebApplication3.WebForm1" %>

<!DOCTYPE html>

<html xmlns="http://www.w3.org/1999/xhtml">
<head runat="server">
<meta http-equiv="Content-Type" content="text/html; charset=utf-8"/>
    <title></title>
</head>
<body>
    <form id="form1" runat="server">
    <div>
        <!-- 在进行“设计”SqlDataSource之前,应当先进行connectionStrings配置 -->
        <asp:SqlDataSource ID="SqlDataSource1" runat="server" ConnectionString="<%$ ConnectionStrings:pc_testConnectionString %>" DeleteCommand="DELETE FROM [Category] WHERE [CategoryID] = @CategoryID" InsertCommand="INSERT INTO [Category] ([CategoryID], [CategoryName]) VALUES (@CategoryID, @CategoryName)" SelectCommand="SELECT * FROM [Category]" UpdateCommand="UPDATE [Category] SET [CategoryName] = @CategoryName WHERE [CategoryID] = @CategoryID">
            <DeleteParameters>
                <asp:Parameter Name="CategoryID" Type="Int32" />
            </DeleteParameters>
            <InsertParameters>
                <asp:Parameter Name="CategoryID" Type="Int32" />
                <asp:Parameter Name="CategoryName" Type="String" />
            </InsertParameters>
            <UpdateParameters>
                <asp:Parameter Name="CategoryName" Type="String" />
                <asp:Parameter Name="CategoryID" Type="Int32" />
            </UpdateParameters>
        </asp:SqlDataSource>
        <asp:GridView ID="GridView1" runat="server" AutoGenerateColumns="False" DataKeyNames="CategoryID" DataSourceID="SqlDataSource1">
            <Columns>
                <asp:BoundField DataField="CategoryID" HeaderText="CategoryID" ReadOnly="True" SortExpression="CategoryID" />
                <asp:BoundField DataField="CategoryName" HeaderText="CategoryName" SortExpression="CategoryName" />
            </Columns>
        </asp:GridView>
        ID:<asp:TextBox ID="TextBoxID" runat="server"></asp:TextBox>
        NAME:<asp:TextBox ID="TextBoxName" runat="server"></asp:TextBox>
        <br />
        <asp:Button ID="Button1" runat="server" Text="INSERT" OnClick="Button1_Click" />
        <asp:Button ID="Button2" runat="server" Text="DELETE" OnClick="Button2_Click" />
        <asp:Button ID="Button3" runat="server" Text="UPDATE" OnClick="Button3_Click" style="height: 21px" />
     <asp:Literal ID="Literal1" runat="server"></asp:Literal>
    </div>
    </form>
</body>
</html>
、、、、、、、、、、、、、、、、、、、、、、、、、、、、、、、、、、、、、、、、、、、、、、、、、、、、、、、、、、、、、
WebForm.aspx.CS:
using System;
using System.Collections.Generic;
using System.Linq;
using System.Web;
using System.Web.UI;
using System.Web.UI.WebControls;

namespace WebApplication3
{
    public partial class WebForm1 : System.Web.UI.Page
    {
        protected void Page_Load(object sender, EventArgs e)
        {

        }
        protected void Button1_Click(object sender, EventArgs e)
        {
            // 插入数据
            this.SqlDataSource1.InsertParameters["CategoryID"].DefaultValue = this.TextBoxID.Text;
            this.SqlDataSource1.InsertParameters["CategoryName"].DefaultValue = this.TextBoxName.Text;
            this.SqlDataSource1.Insert();
        }
        protected void Button2_Click(object sender, EventArgs e)
        {
            // 删除操作
            this.SqlDataSource1.DeleteParameters["CategoryID"].DefaultValue = this.TextBoxID.Text;
            this.SqlDataSource1.Delete();
        }
        protected void Button3_Click(object sender, EventArgs e)
        {
            // 更新
            this.SqlDataSource1.UpdateParameters["CategoryID"].DefaultValue = this.TextBoxID.Text;
            this.SqlDataSource1.UpdateParameters["CategoryName"].DefaultValue = this.TextBoxName.Text;
            this.SqlDataSource1.Update();
        }
    }
}
/////////////////////////////////////////////////////////////////////////////////////////////////////////////
使用inserting:
WebForm.aspx.CS:
using System;
using System.Collections.Generic;
using System.Linq;
using System.Web;
using System.Web.UI;
using System.Web.UI.WebControls;

namespace WebApplication3
{
    public partial class WebForm1 : System.Web.UI.Page
    {
        protected void Page_Load(object sender, EventArgs e)
        {

        }
        protected void Button1_Click(object sender, EventArgs e)
        {
            // 插入数据
            this.SqlDataSource1.Insert();
        }
        protected void Button2_Click(object sender, EventArgs e)
        {
            // 删除操作
            this.SqlDataSource1.Delete();
        }
        protected void Button3_Click(object sender, EventArgs e)
        {
            // 更新
            this.SqlDataSource1.Update();
        }

        protected void SqlDataSource1_inserting(object sender, SqlDataSourceCommandEventArgs e)
        {
            // 执行inserting操作,insert不需要再进行绑定参数
            e.Command.Parameters["@CategoryID"].Value = this.TextBoxID.Text;
            e.Command.Parameters["@CategoryName"].Value = this.TextBoxName.Text;
       // inserting的好处:可以在插入之前进行取消操作
        if (e.Command.Parameters["@CategoryName"].Value.ToString().Length < 2)
{
this.Literal1.Text = "NAME不能小于2个字符。";
e.Cancel = true; // 取消插入
}
}
     protected void SqlDataSource1_updateing(object sender, SqlDataSourceCommandEventArgs e)
        {
            // 更新
            e.Command.Parameters["@CategoryID"].Value = this.TextBoxID.Text;
            e.Command.Parameters["@CategoryName"].Value = this.TextBoxName.Text;
        }

        protected void SqlDataSource1_deleteing(object sender, SqlDataSourceCommandEventArgs e)
        {
            // 删除
            e.Command.Parameters["@CategoryID"].Value = this.TextBoxID.Text;
        }
     protected void SqlDataSource1_inserted(object sender, SqlDataSourceStatusEventArgs e)
    {
      // 使用inserted可以终止事件,不会显示到前台去
      if (e.Exception != null)
      {
        // 如果错误事件不为空,执行下面操作
        this.Literal1.Text = string.Format("{0}出错了.", e.Exception.Message);  // 如果有错误信息,将会进行显示
        e.ExceptionHandled = true;  // 处理错误事件,到此为止。
      }else
      {
        this.Literal1.Text = string.Format("成功,影响了{0}行.", e.AffectedRows);  // 查看影响了几行
      }
    }
    }
}
contextMenuStrip:鼠标右键菜单属性,用来添加右键菜单/列表。
  可以绑定到任何控件的contextMenuStrip属性上。
主题:
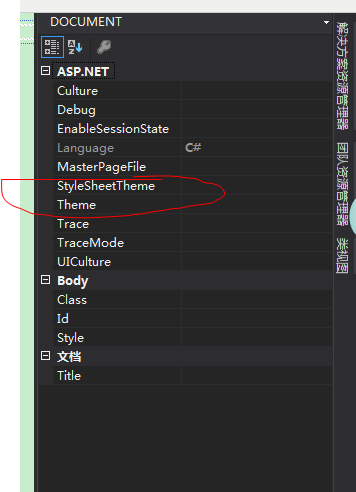
在项目根目录可以设置主题,主要用来改变整个网站的样式布局:
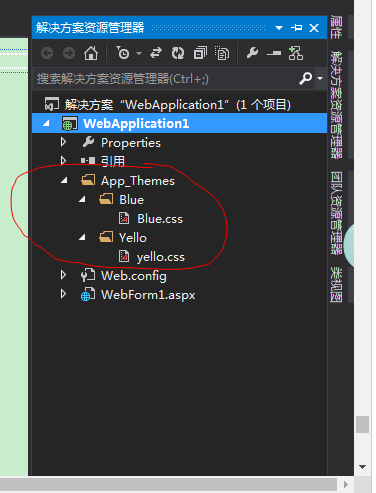
主体的使用
皮肤skin的使用:

对于同一种控件如何使用两种皮肤:
Skin1.skin:
<!-- Calendar:这种当做默认皮肤 -->
<asp:Calendar runat="server" BackColor="White" BorderColor="#999999" CellPadding="4" DayNameFormat="Shortest" Font-Names="Verdana" Font-Size="8pt" ForeColor="Black" Height="180px" Width="200px">
    <DayHeaderStyle BackColor="#CCCCCC" Font-Bold="True" Font-Size="7pt" />
    <NextPrevStyle VerticalAlign="Bottom" />
    <OtherMonthDayStyle ForeColor="#808080" />
    <SelectedDayStyle BackColor="#666666" Font-Bold="True" ForeColor="White" />
    <SelectorStyle BackColor="#CCCCCC" />
    <TitleStyle BackColor="#999999" BorderColor="Black" Font-Bold="True" />
    <TodayDayStyle BackColor="#CCCCCC" ForeColor="Black" />
    <WeekendDayStyle BackColor="#FFFFCC" />
</asp:Calendar>
<!-- Calendar:因为同一种控件不能使用两种皮肤,所以可以起一个别名SkinID -->
<asp:Calendar SkinId="C1" runat="server" BackColor="#FFFFCC" BorderColor="#FFCC66" BorderWidth="1px" DayNameFormat="Shortest" Font-Names="Verdana" Font-Size="8pt" ForeColor="#663399" Height="200px" ShowGridLines="True" Width="220px">
    <DayHeaderStyle BackColor="#FFCC66" Font-Bold="True" Height="1px" />
    <NextPrevStyle Font-Size="9pt" ForeColor="#FFFFCC" />
    <OtherMonthDayStyle ForeColor="#CC9966" />
    <SelectedDayStyle BackColor="#CCCCFF" Font-Bold="True" />
    <SelectorStyle BackColor="#FFCC66" />
    <TitleStyle BackColor="#990000" Font-Bold="True" Font-Size="9pt" ForeColor="#FFFFCC" />
    <TodayDayStyle BackColor="#FFCC66" ForeColor="White" />
</asp:Calendar>
////////////////////////////////////////////////////////////////////////////////////
WebForm1.aspx:
<!-- 主题也是需要的 -->
<%@ Page Language="C#" AutoEventWireup="true" CodeBehind="WebForm1.aspx.cs" Inherits="WebApplication1.WebForm1" StyleSheetTheme="" Theme="Blue" %>
<!DOCTYPE html>
<html xmlns="http://www.w3.org/1999/xhtml">
<head runat="server">
<meta http-equiv="Content-Type" content="text/html; charset=utf-8"/>
    <title></title>
</head>
<body>
    <form id="form1" runat="server">
    <div>
        <!-- 使用默认皮肤 -->
        <asp:Calendar ID="Calendar1" runat="server"></asp:Calendar>
        <asp:Calendar ID="Calendar2" runat="server"></asp:Calendar>
        <!-- 使用SkinID="C1"皮肤 -->
        <asp:Calendar ID="Calendar3" runat="server" SkinID="C1"></asp:Calendar>
    </div>
    </form>
</body>
</html>
控件中的冷知识:
1.每个control中的enableViewState都是用来保存状态的,想要优化可将其设置为false。如果只是为了缓存信息可以做下面操作:
protected void Page_Load(object sender, EventArgs e)
        {
            this.ViewState["key"] = "004";
            this.ViewState.Add("key1", 3);
        }