一、先上传所需要的文件

通过SecureCRT连接服务器,使用sftp功能上传,文件上传后位于 /~目录下。


二、先安装libvent工具包
yum -y install libevent
三、安装libfastcommonV1.0.7工具包。
切换到~目录 ,然后解压缩
tar zxf libfastcommonV1.0.7.tar.gz

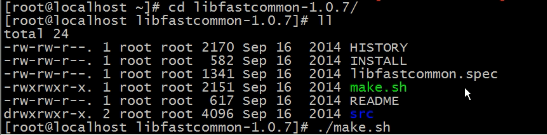
进入libfastcommonV1.0.7目录中,安装
cd libfastcommonV1.0.7
./make.sh
./make.sh install
然后
cp /usr/lib64/libfastcommon.so /usr/lib

四、安装Tracker服务
先切换工作目录,然后解压缩

进入解压后的文件

./make.sh (等待机器完成后再进行下一步)
./mkae.sh install
配置文件都放到/etc/fdfs文件夹
cd /
cd ~
cd FastDFS/conf
赋值所有文件到/etc/fdfs下

配置tracker服务。修改/etc/fdfs/tracker.conf文件。

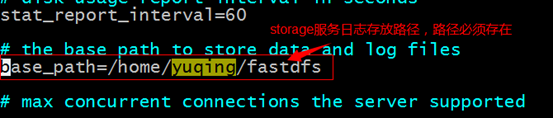
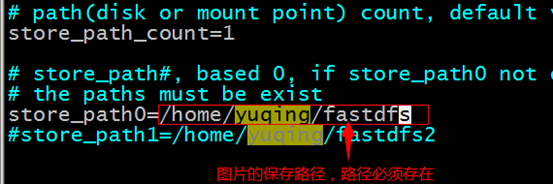
路径没有的话,自己创建好路径
配置完成
启动tracker。/usr/bin/fdfs_trackerd /etc/fdfs/tracker.conf
(重启的话使用命令:/usr/bin/fdfs_trackerd /etc/fdfs/tracker.conf restart)

第五步:安装storage服务
如果是在不同的服务器安装,1~4需要重新执行。
配置storage服务。修改etc/fdfs/storage.conf文件
启动服务:
/usr/bin/fdfs_storaged /etc/fdfs/storage.conf

六、搭建nginx提供http服务,用来访问
fastdfs-nginx-module_v1.16.tar.gz
1、解压插件压缩包tar zxf fastdfs-nginx-module_v1.16.tar.gz
2、修改/root/fastdfs-nginx-module/src/config文件,把其中的local去掉。

3.将libfdfsclient.so拷贝至/usr/lib下
cp /usr/lib64/libfdfsclient.so /usr/lib/
4.安装nginx,
对nginx重新config
./configure
--prefix=/usr/local/nginx
--pid-path=/var/run/nginx/nginx.pid
--lock-path=/var/lock/nginx.lock
--error-log-path=/var/log/nginx/error.log
--http-log-path=/var/log/nginx/access.log
--with-http_gzip_static_module
--http-client-body-temp-path=/var/temp/nginx/client
--http-proxy-temp-path=/var/temp/nginx/proxy
--http-fastcgi-temp-path=/var/temp/nginx/fastcgi
--http-uwsgi-temp-path=/var/temp/nginx/uwsgi
--http-scgi-temp-path=/var/temp/nginx/scgi
--add-module=/root/fastdfs-nginx-module/src
make
make install
把/root/fastdfs-nginx-module/src/mod_fastdfs.conf文件复制到/etc/fdfs目录下。编辑:


1、nginx的配置
在nginx的配置文件中添加一个Server:
server {
listen 80;
server_name 192.168.101.3;(IP地址)
location /group1/M00/{
#root /home/FastDFS/fdfs_storage/data;
ngx_fastdfs_module;
}
}
3、启动nginx
配置完成,java端使用fastdfs_client.jar提供的方法可以上传文件。
添加资源文件client.properties
内容:tracker_server=192.168.25.133:22122
public void testFastDfsClient() throws Exception {
        FastDFSClient client = new FastDFSClient("classpath:client.properties");
        String uploadFile = client.uploadFile("D:\Documents\Pictures\images\200811281555127886.jpg", "jpg");
        System.out.println(uploadFile);
    }
在网页中http://ip地址/控制台输出的路径
就可以访问上传的图片。