最近回家,学习许久未用的linux,之前也是在培训的时候用的是 ubuntu ,这次回家查了下 fedora 最适合开发人员使用,所以就装了个试试。刚开始只能拨号上网,经过三天时间的各种搜索查找终于解决了无线上网问题,感觉挺开心!现在大致写出来分享以下,希望可以帮助对fedora有兴趣的同学们!
- 设备 笔记本(硬件型号最好是主流的,兼容性问题很难解决) + 有根可以上网的网线
- 步骤
- 在 fedora 官网 https://getfedora.org/ 上下载 最新版 live 镜像,选择 WORKSTATION (版本选择里面很详细,个人就选这个),电脑内存 >=4G 的装 64 位的系统;
- 搜索下载 Poweriso 软件,按照步骤去制作 U 盘启动盘,然后开机按 F12 进入 bios 选择 USB 启动……具体系统安装比较简单,就不说了,注意下选择手动分区;
- 安装好系统后查好网线设置拨号上网和无线上网:
-
首先设置拨号上网帐号,密码和服务器等。之后使用pppoe-start即可上网,具体步骤如下:
[root@localhost ~]# pppoe-setup ---------------这里开始安装PPPOE
Welcome to the PPPoE client setup. First, I will run some checks on
your system to make sure the PPPoE client is installed properly...
LOGIN NAME
Enter your Login Name (default root): 081842162@ahut ---------------这里是上网的帐号
INTERFACE
Enter the Ethernet interface connected to the PPPoE modem
For Solaris, this is likely to be something like /dev/hme0.
For Linux, it will be ethX, where 'X' is a number.
(default eth0): ---------------这里按回车键(我这里的是enp4s0)

Do you want the link to come up on demand, or stay up continuously?
If you want it to come up on demand, enter the idle time in seconds
after which the link should be dropped. If you want the link to
stay up permanently, enter 'no' (two letters, lower-case.)
NOTE: Demand-activated links do not interact well with dynamic IP
addresses. You may have some problems with demand-activated links.
Enter the demand value (default no): ---------------这里按回车键
DNS
Please enter the IP address of your ISP's primary DNS server.
If your ISP claims that 'the server will provide dynamic DNS addresses',
enter 'server' (all lower-case) here.
If you just press enter, I will assume you know what you are
doing and not modify your DNS setup.
Enter the DNS information here: ---------------这里键入 server 也就是自动获得DNS
PASSWORD
Please enter your Password: ---------------这里键入上网拨号密码
Please re-enter your Password: ---------------这里键入上网拨号密码
USERCTRL
Please enter 'yes' (three letters, lower-case.) if you want to allow
normal user to start or stop DSL connection (default yes): ---------------这里键入 yes
FIREWALLING
Please choose the firewall rules to use. Note that these rules are
very basic. You are strongly encouraged to use a more sophisticated
firewall setup; however, these will provide basic security. If you
are running any servers on your machine, you must choose 'NONE' and
set up firewalling yourself. Otherwise, the firewall rules will deny
access to all standard servers like Web, e-mail, ftp, etc. If you
are using SSH, the rules will block outgoing SSH connections which
allocate a privileged source port.
The firewall choices are:
0 - NONE: This script will not set any firewall rules. You are responsible
for ensuring the security of your machine. You are STRONGLY
recommended to use some kind of firewall rules.
1 - STANDALONE: Appropriate for a basic stand-alone web-surfing workstation
2 - MASQUERADE: Appropriate for a machine acting as an Internet gateway
for a LAN
Choose a type of firewall (0-2): 0 ---------------这里键入 0
Start this connection at boot time
Do you want to start this connection at boot time?
Please enter no or yes (default no):y ---------------这里键入 y
** Summary of what you entered **
Ethernet Interface: eth0
User name: xy170638010214
Activate-on-demand: No
DNS addresses: Supplied by ISP's server
Firewalling: NONE
User Control: yes
Accept these settings and adjust configuration files (y/n)? y ---------------这里键入 y
Adjusting /etc/sysconfig/network-scripts/ifcfg-ppp0
Adjusting /etc/ppp/chap-secrets and /etc/ppp/pap-secrets
(But first backing it up to /etc/ppp/chap-secrets.bak)
(But first backing it up to /etc/ppp/pap-secrets.bak)
Congratulations, it should be all set up!
Type '/sbin/ifup ppp0' to bring up your xDSL link and '/sbin/ifdown ppp0'
to bring it down.
Type '/sbin/pppoe-status /etc/sysconfig/network-scripts/ifcfg-ppp0'
to see the link status.
[root@localhost ~]# pppoe-start ---------------激活PPPOE设备,成功后会自动返回
[root@localhost ~]# pppoe-status ---------------查看PPPOE状态
2.设置无线上网
设置好包好连接后,可以先 sudo yum update 更新系统,查看无线网卡型号,在终端输入 lspci |grep -i network
[lsf@lsf ~]$ lspci |grep -i network
03:00.0 Network controller: Broadcom Corporation BCM43142 802.11b/g/n (rev 01)
这个型号的网卡我找了好多帖子,但是未果,后来搜索该网卡兼容性的时候发现了一个帖子完美解决了这个问题,方法如下:
用root直接
yum
localinstall --nogpgcheck
http://download1.rpmfusion.org/free/fedora/rpmfusion-free-release-stable.noarch.rpm
http://download1.rpmfusion.org/nonfree/fedora/rpmfusion-nonfree-release-stable.noarch.rpm
之后直接yum install kmod-wl
最后reboot。
之后可爱的NetworkManager里出现了wifi...

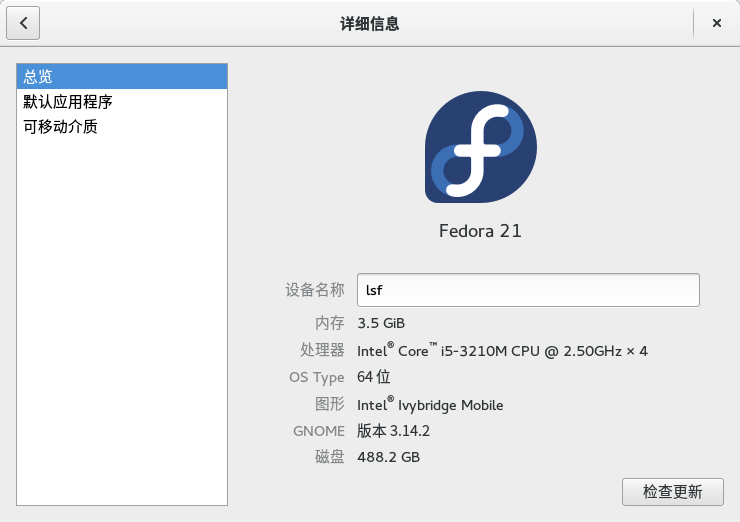
好了大致就这样咯!最后看看我的桌面吧!


