关于界面切换以及底栏的实现可参考之前写的一篇文章:
Flutter实 ViewPager、bottomNavigationBar界面切换
1、新建4个基本dart文件
在pages目录下,我们新建下面四个dart文件。
- home_page.dart :商城首页UI页面,首页相关的UI我们都会放到这个文件里。
- category_page.dart: 商城分类UI页面,这个页面会有复杂的动态组件切换。
- cart_page.dart:商城购物车UI页面,这个页面会包括购物车的全套功能。
- member_page.dart:商城会员中心页面,这个页面我们会制作会员中心的全部UI效果。
其实这一部就是建立了底部导航栏需要的四个基本页面,有了这四个基本页面就可以制作底部tab的切换功能了。
这里我只给一个页面(home_page.dart)的基础代码(后期这些代码都要更换,这里只是为了看到效果使用),然后你可以暗装一个的代码,复制到其它页面,进行修改。
import 'package:flutter/material.dart';

class HomePage extends StatelessWidget {
  @override
  Widget build(BuildContext context) {
    return Scaffold(
      body:Center(
        child: Text('商城首页'),
      )
    );
  }
}
记得其他三个页面都进行复制,并修改类名和Text文本属性。
2、引入页面并建立List
页面创建好以后,要使用import引入到index_page.dart中,引入后才可以使用,如果不引入,VScode会很智能的报错。代码如下。
import 'home_page.dart';
import 'category_page.dart';
import 'cart_page.dart';
import 'member_page.dart';
引入后声明一个List型变量,这个变量主要用于切换的,我们把页面里的类,放到了这个List中。
 List tabBarList = [
    HomePage(),
    CategoryPage(),
    CartPage(),
    MemberPage()
  ];
声明两个变量,并进行initState初始化:
- currentIndex:int类型,负责tabBodies的List索引,改变索引就相当于改变了页面。
- currentPage:利用currentIndex得到当前选择的页面,并进行呈现出来。
代码如下:
  int currentIndex = 0;
  var currentPage;
  @override
  void initState() {
    currentPage = tabBarList[currentIndex];
    super.initState();
  }
3、build方法的编写
build方法我们会返回一个Scaffold部件,在部件里我们会添加底部导航栏,并利用onTap事件(单击事件),来改变导航栏的状态和切换页面。因为有界面变化,所以这也是要使用动态组件的原因。
  @override
  Widget build(BuildContext context) {
    return Scaffold(
      backgroundColor: Color.fromRGBO(244, 245, 245, 1.0),
      bottomNavigationBar: BottomNavigationBar(
        type:BottomNavigationBarType.fixed,
        currentIndex: currentIndex,
        items:bottomTabs,
        onTap: (index){
          setState(() {
           currentIndex = index;
           currentPage = tabBodies[currentIndex];
          });
        },
      ),
      body:currentPage
    );
  }
这里有句代码type:BottomNavigationBarType.fixed,这个是设置底部tab的样式,它有两种样式fixed和shifting,只有超过3个才会有区别,国人的习惯一般是使用fixed的。感兴趣的小伙伴可以自行折腾shifting模式。
这时候就可以启动虚拟机,进行预览了。为了更好的让小伙伴们学习,在这里给出index_page.dart文件的源码。
index_page.dart文件:
import 'package:flutter/material.dart';
import 'package:flutter/cupertino.dart';
import 'home_page.dart';
import 'category_page.dart';
import 'cart_page.dart';
import 'member_page.dart';

class IndexPage extends StatefulWidget {
  @override
  _IndexPageState createState() => _IndexPageState();
}

class _IndexPageState extends State<IndexPage> {

  /** tab分组 **/
  List tabBarList = [
    HomePage(),
    CategoryPage(),
    CartPage(),
    MemberPage()
  ];

  final List<BottomNavigationBarItem> bottomTabs = [
    BottomNavigationBarItem(
        icon:Icon(CupertinoIcons.home),
        title:Text('首页')
    ),
    BottomNavigationBarItem(
        icon:Icon(CupertinoIcons.search),
        title:Text('分类')
    ),
    BottomNavigationBarItem(
        icon:Icon(CupertinoIcons.shopping_cart),
        title:Text('购物车')
    ),
    BottomNavigationBarItem(
        icon:Icon(CupertinoIcons.profile_circled),
        title:Text('会员中心')
    ),
  ];

  int currentIndex = 0;
  var currentPage;
  @override
  void initState() {
    currentPage = tabBarList[currentIndex];
    super.initState();
  }

  @override
  Widget build(BuildContext context) {
    return Scaffold(
        backgroundColor: Color.fromRGBO(244, 245, 245, 1.0),
        bottomNavigationBar: BottomNavigationBar(
          type:BottomNavigationBarType.fixed,
          currentIndex: currentIndex,
          items:bottomTabs,
          onTap: (index){
            setState(() {
              currentIndex = index;
              currentPage = tabBarList[currentIndex];
            });
          },
        ),
        body:currentPage
    );
  }
}
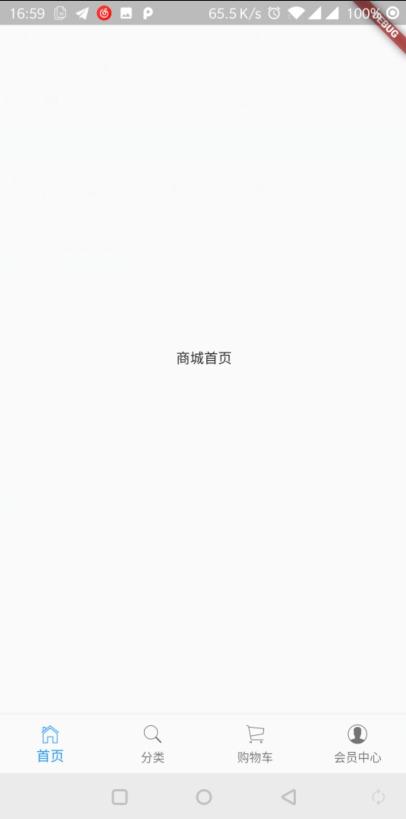
效果图:
4、总结
通过这节课的学习,应该掌握如下知识点:
- 页面切换的技巧和变量如何定义。
- BottomNavigationBar部件的使用,最终作成底部切换效果。