使用 nginx 搭建一个 http2 的站点,准备所需:
1,域名 .com .net 均可(国内域名需要 icp 备案)
2,云主机一个,可以自由的安装配置软件的服务器
3,https 证书
http2 基于 https ,所以先配置好 https 访问
本文以 CentOS 6.5 (以下教程针对有 linux 使用基础的人,本文不会介绍 ,安装 编译环境,yum 软件包,这种基础的东西)
购买 https 证书,淘宝上就可以买,价格几十到几千不等。
使用源码编译安装 nginx http://nginx.org/en/download.html
使用目前的最新版 nginx-1.14.2.tar.gz
nginx http2 模块支持,需要用到 >= openssl 1.0.2 http://nginx.org/en/docs/http/ngx_http_v2_module.html
先下载一个 openssl-1.0.2j.tar.gz 解压
开始编译 nginx 并启用 ssl http2 模块
./configure --with-debug --with-http_ssl_module --with-http_v2_module --prefix=/usr/local/nginx/ --with-openssl=/home/openssl-1.0.2j
make && make install
运行 nginx -V 查看版本及支持
/usr/local/nginx/sbin/nginx -V
nginx version: nginx/1.14.2
built by gcc 4.4.7 20120313 (Red Hat 4.4.7-4) (GCC)
built with OpenSSL 1.0.2j 26 Sep 2016
TLS SNI support enabled
配置 ssl http2
/usr/local/nginx/conf/ssl
将购买的证书放到这里
xxx.com.key xxx.com.pem
nginx.conf
listen 443 ssl http2; # 1.1版本后这样写
server_name www.xxx.com; #填写绑定证书的域名
ssl_certificate /usr/local/nginx/conf/ssl/xxx.com.pem; # 指定证书的位置,绝对路径
ssl_certificate_key /usr/local/nginx/conf/ssl/xxx.com.key; # 绝对路径,同上
ssl_session_timeout 5m;
ssl_protocols TLSv1 TLSv1.1 TLSv1.2; #按照这个协议配置
ssl_ciphers ECDHE-RSA-AES128-GCM-SHA256:HIGH:!aNULL:!MD5:!RC4:!DHE;#按照这个套件配置
ssl_prefer_server_ciphers on;
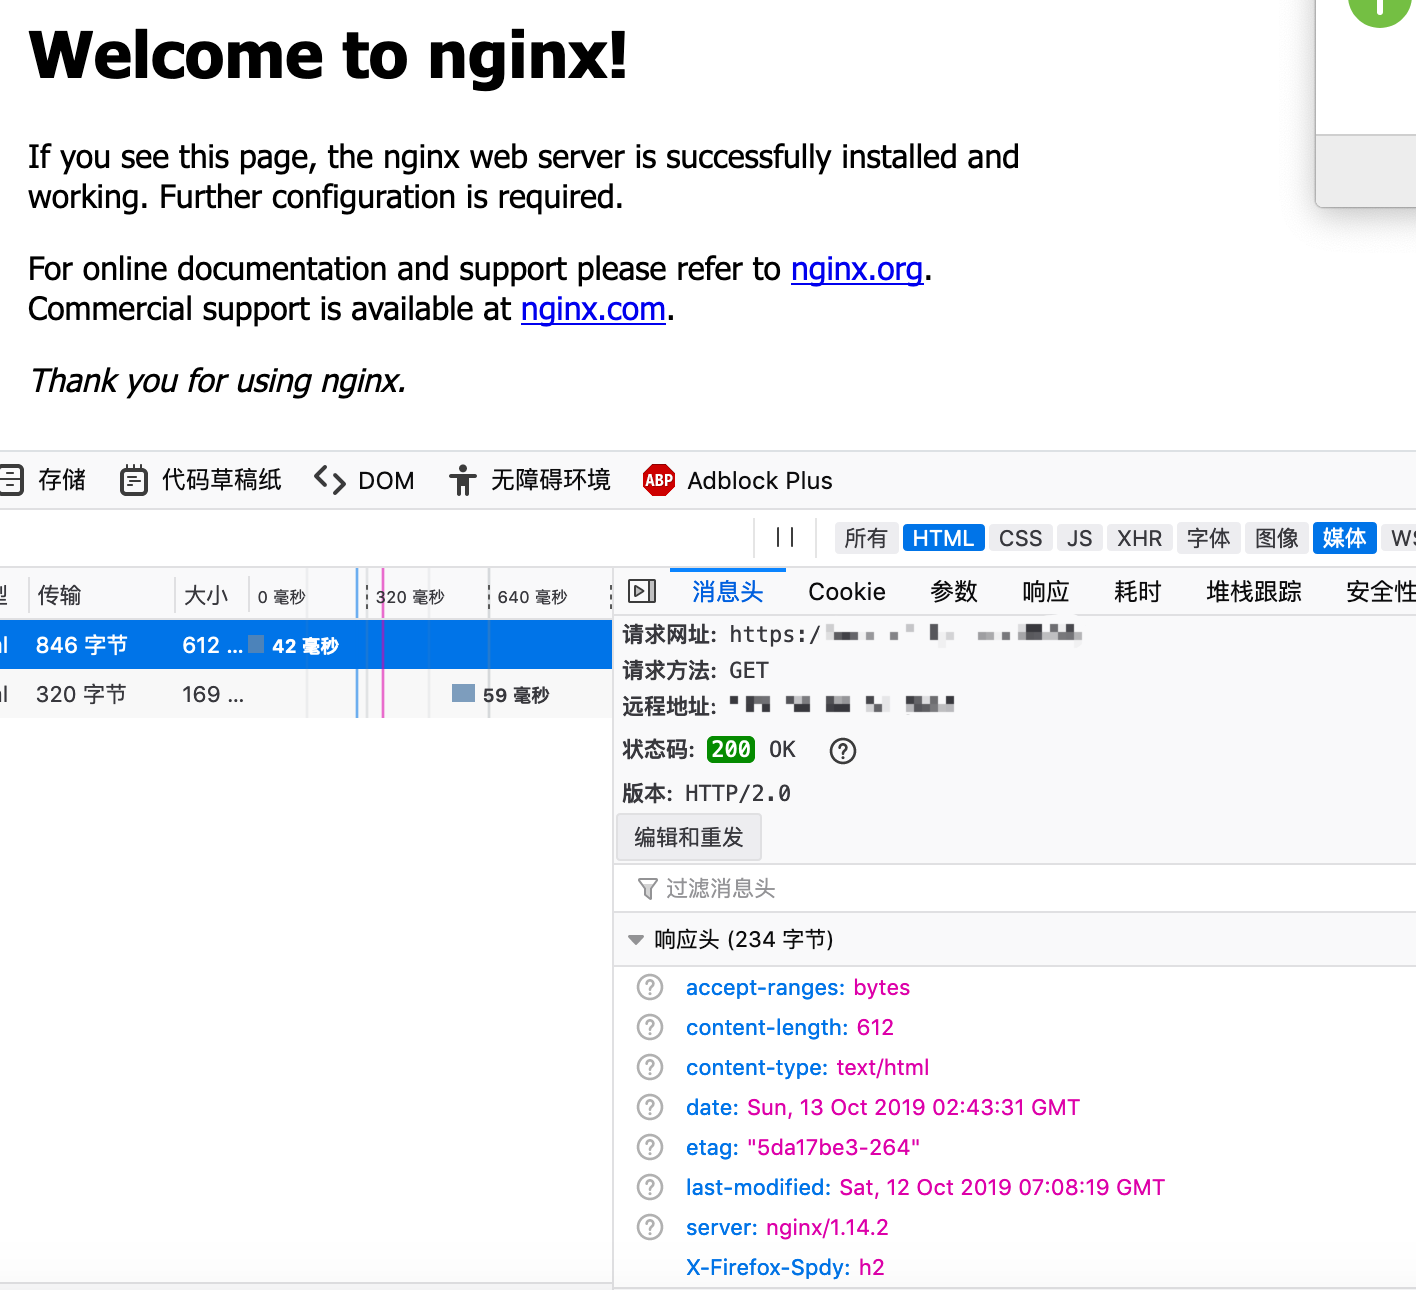
使用 火狐浏览器访问(火狐可以更好的显示出来头信息)
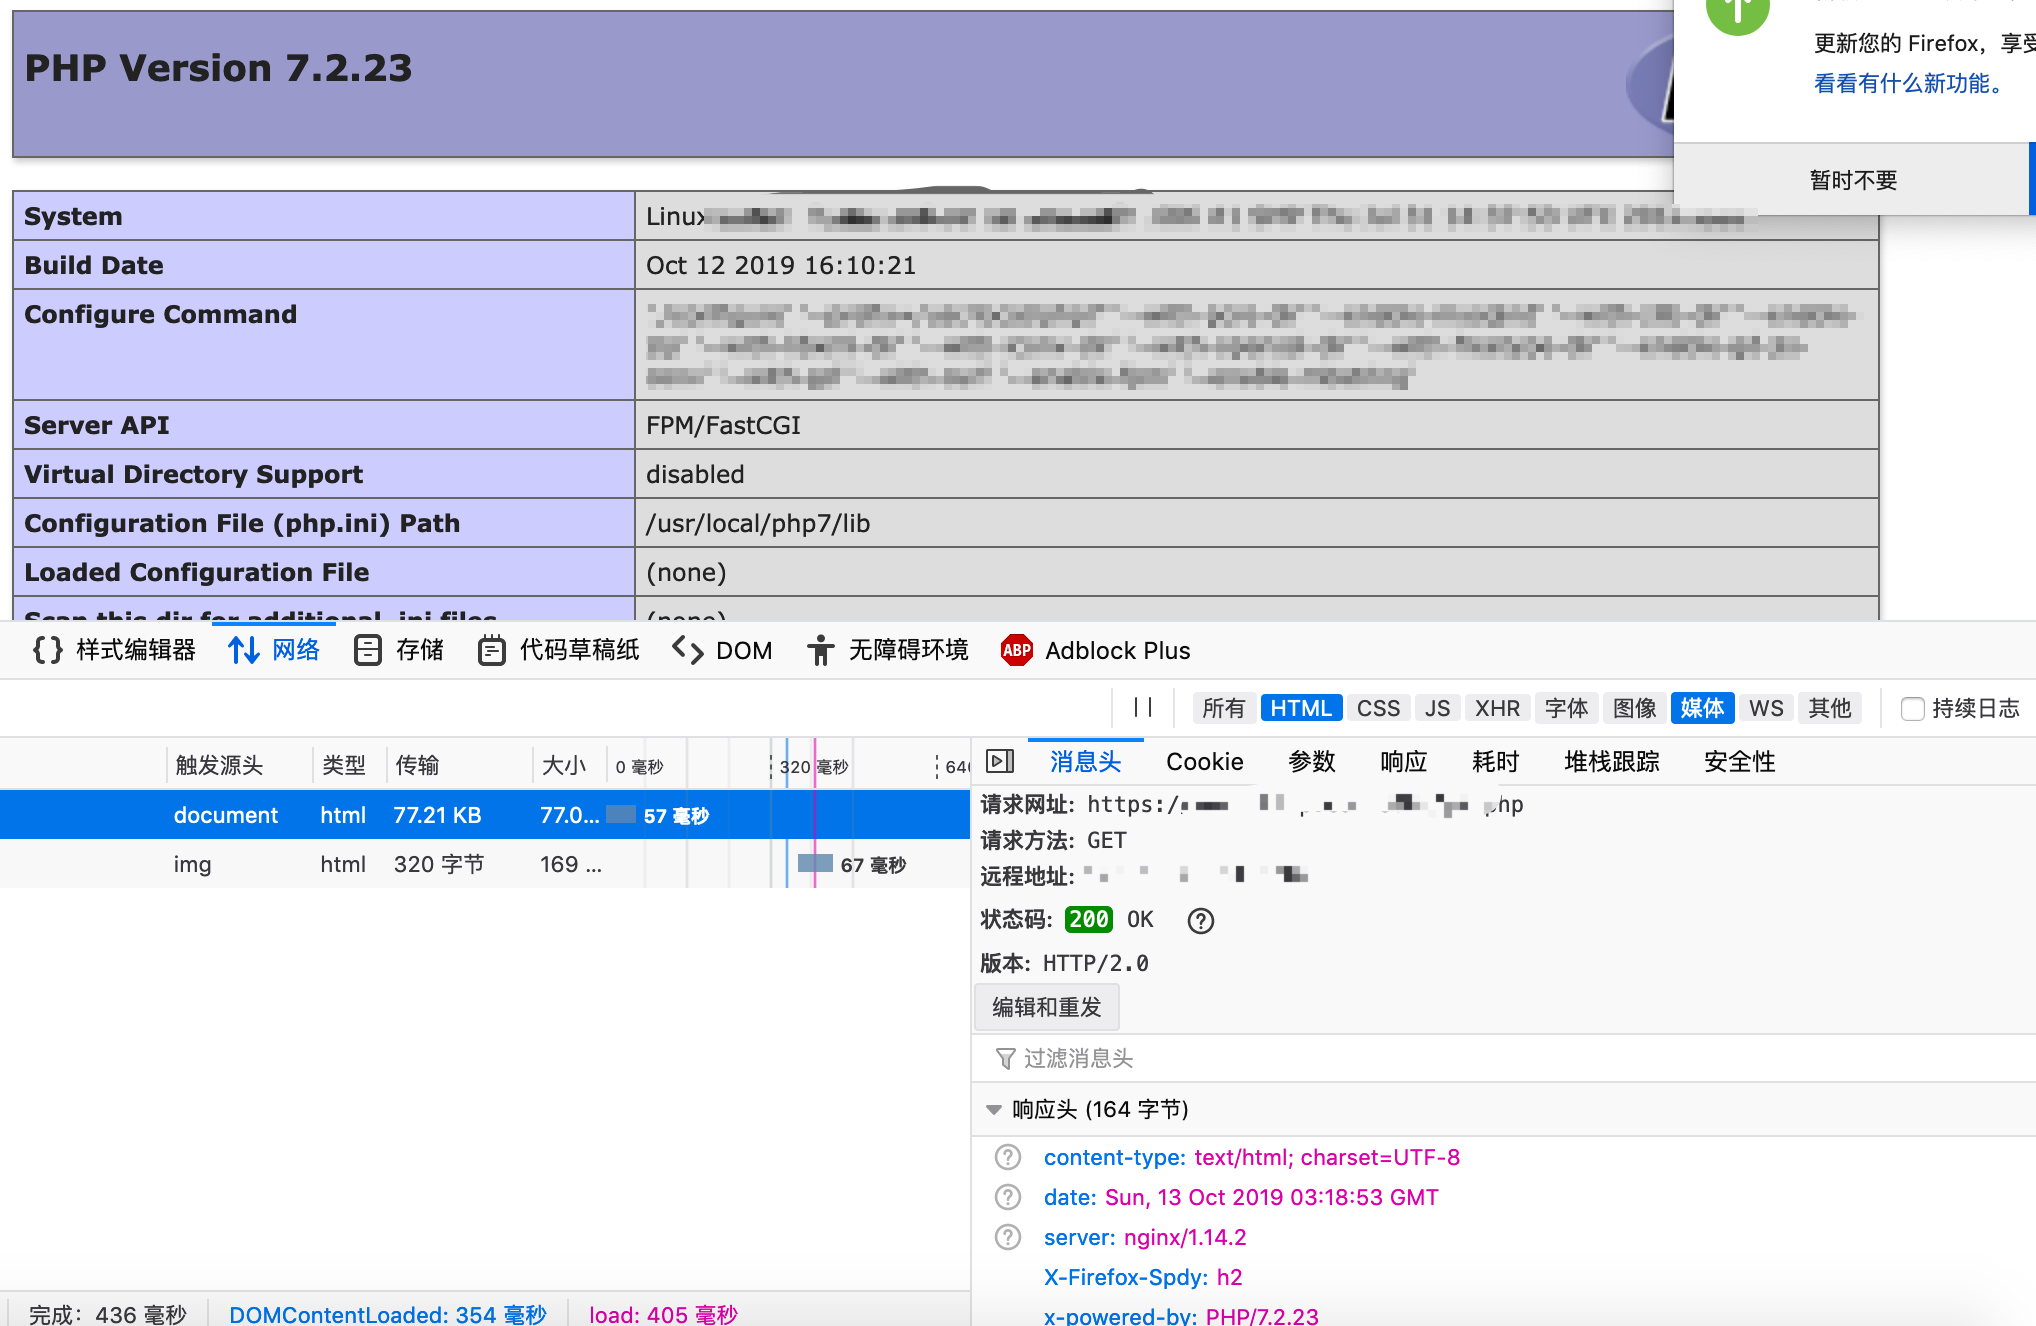
添加 php7 fpm 支持
apache2.4 http2 支持
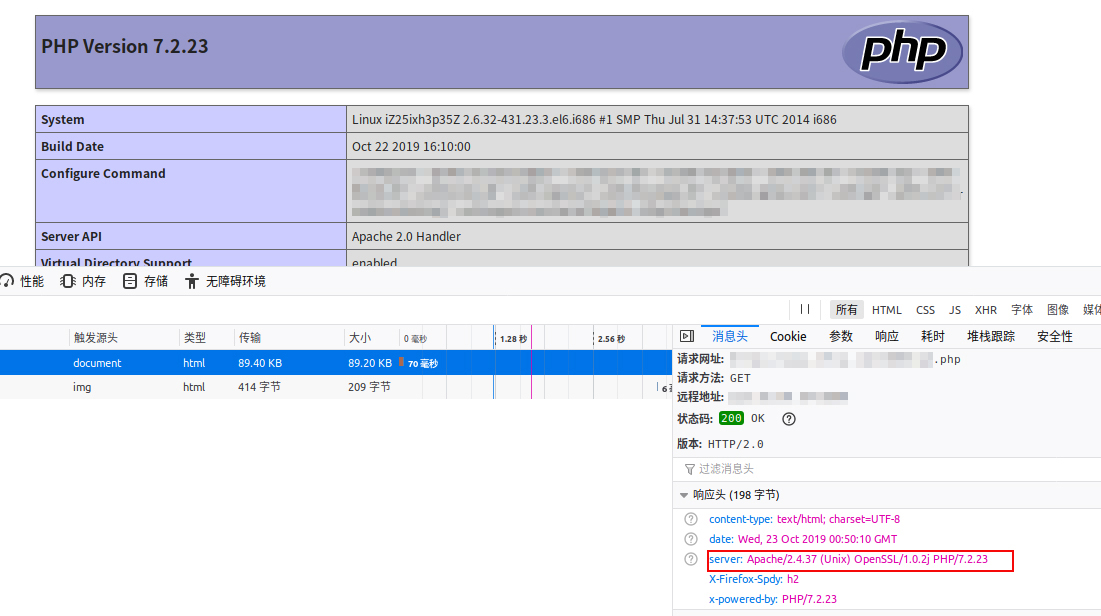
./configure 时添加参数 --enable-http2 --with-ssl=/usr/local/openssl1.0.2
修改 httpd.conf
LoadModule http2_module modules/mod_http2.so
在已经配置好 https 的基础上添加
<VirtualHost _default_:443>
Protocols h2 http/1.1
使用 wireshark 抓包分析
有2种方法
1,使用 浏览器导出 TLS 信息,即可解码,比较简单不做介绍
2,使用服务器私钥解密,优点是不依赖浏览器,普通程序也可以解密,如使用 libcurl okhttp 加密TLS流量

先配置 RSA keys list ,添加上服务器私钥。
IIS .pfx 格式证书需要填写密码
Nginx Apache .key 格式证书不需要密码
Tomcat .jks 格式证书不支持,需要转换为 .key
然后打开浏览器访问站点,查看分析数据包,已解密
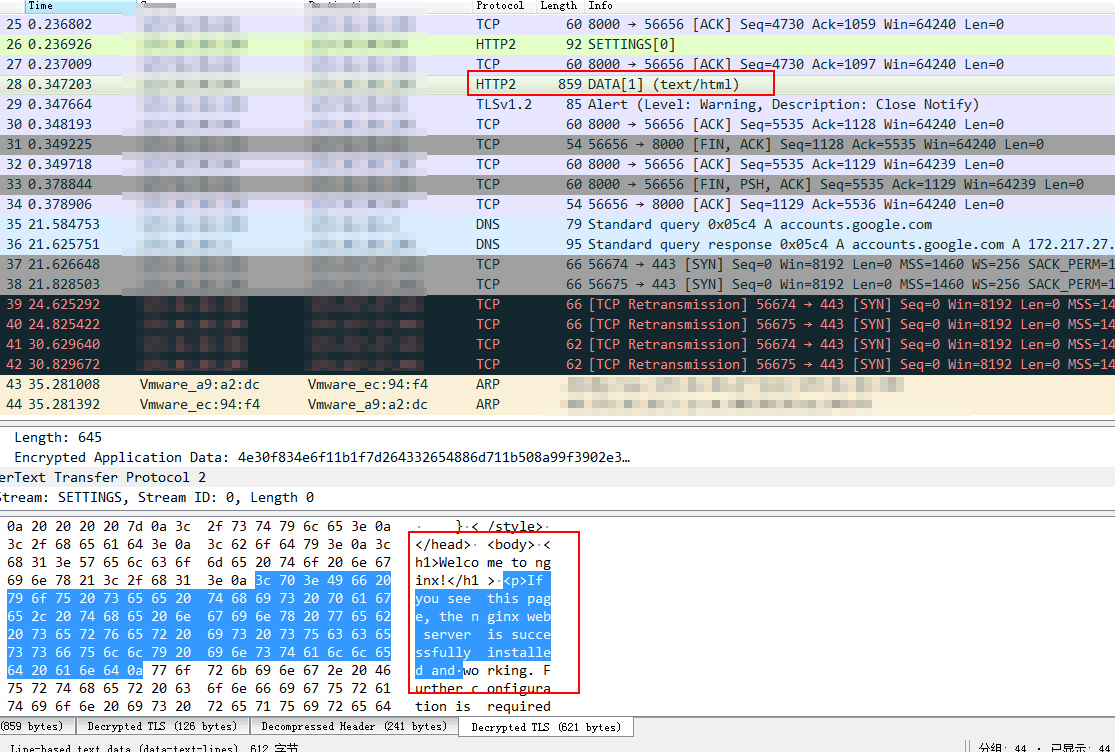
使用 tcpdump 抓包 tcp 并保存为文件
tcpdump tcp -s 0 -c 1000 -w http2.cap
运行 curl 测试程序 后使用 wireshark 进行分析
linux 上面的 curl 不支持 http2 ,ubuntu 18 已经支持了。如果不支持,需要先编译安装 ngnttp2 这个库以后,在编译安装新版的 curl 即可支持。
win 方便的 curl 测试工具非常方便,其实就是大名鼎鼎的 git windows 客户端 https://git-scm.com/download/win 安装后,打开 Git Bash 输入 curl -V
$ curl -V
curl 7.61.1 (i686-w64-mingw32) libcurl/7.61.1 OpenSSL/1.0.2p (WinSSL) zlib/1.2.11 libidn2/2.0.5 nghttp2/1.33.0
Release-Date: 2018-09-05
Protocols: dict file ftp ftps gopher http https imap imaps ldap ldaps pop3 pop3s rtsp smtp smtps telnet tftp
Features: AsynchDNS IDN IPv6 Largefile SSPI Kerberos SPNEGO NTLM SSL libz TLS-SRP HTTP2 HTTPS-proxy MultiSSL Metalink
curl 发送 post :
curl https://www.xxx.com/test_post.php -X POST -d "title=comewords&content=articleContent"
curl 发送 json post:
https://www.xxx.com/test_post.php -H "Content-Type:application/json" -X POST -d '{"title":"comewords","content":"articleContent"}'
curl 上传文件:
curl http://www.xxx.com/test_post.php -F "file1=@1.txt" -F "file2=@2.txt"
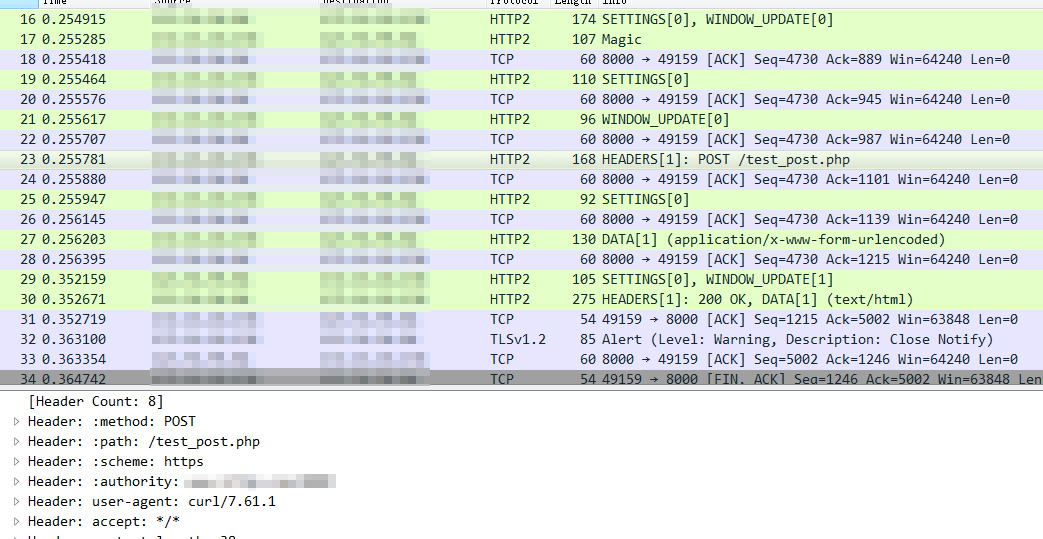
HTTP2 协议详解
使用 window git bash 中的 curl 进行测试 使用不同的 --http1.1 --http2 协议
头信息
Header: :method: GET
Header: :path: /
Header: :scheme: https
Header: :authority: www.xxx.com
Header: user-agent: curl/7.61.1
Header: accept: */*
头信息多了几个,同时也少了一些东西,对比 HTTP1.1
GET / HTTP/1.1

Host: www.xxx.com

User-Agent: curl/7.61.1

Accept: */*
服务器推送 server push
使用 nginx 配置服务器推送
#server push
location /push/index.html {
    http2_push /push/1.css
    http2_push /push/2.css
 }
当访问 /push/index.html 时推送2个 css 。
使用 chrome 访问。
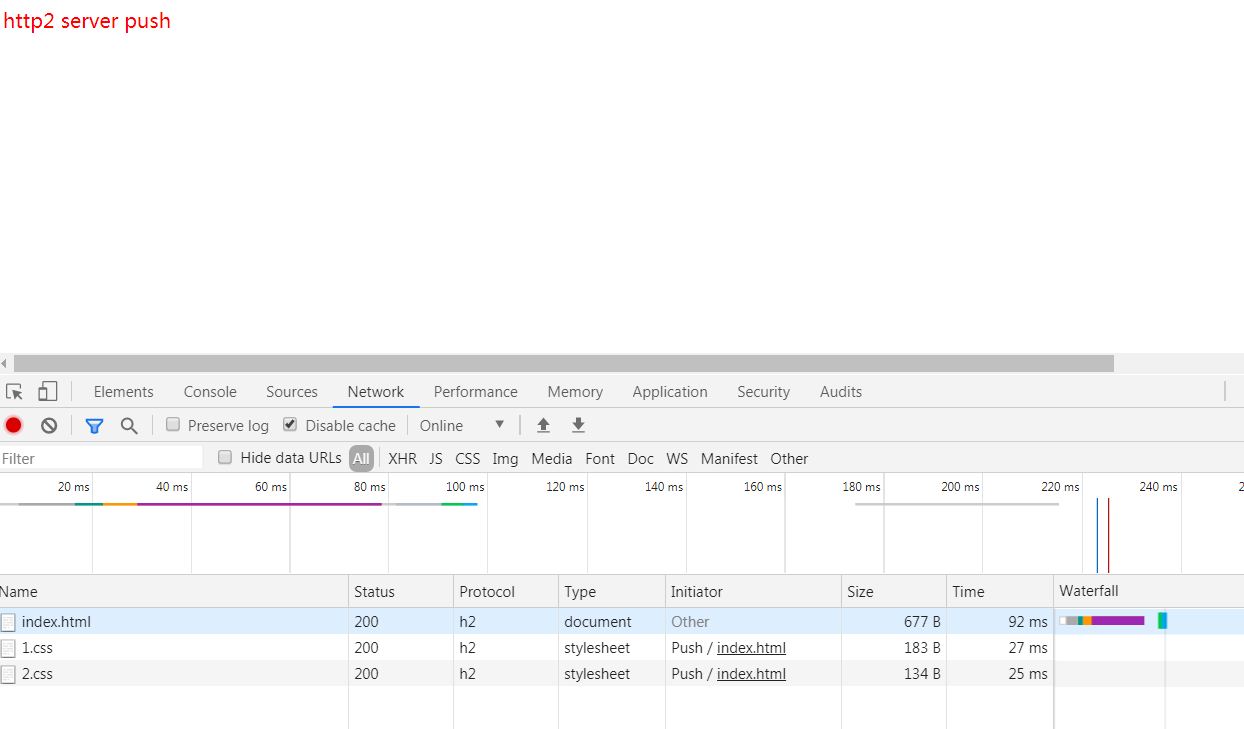
使用 nghttp 进行测试
先安装 sudo apt-get install nghttp2-client
nghttp -ans https://www.xxx.com/push/index.html
id  responseEnd requestStart  process code size request path
 13     +6.17ms       +166us   6.00ms  200  251 /push/index.html
  2     +6.53ms *    +5.58ms    946us  200   60 /push/1.css
  4     +6.63ms *    +5.79ms    840us  200   12 /push/2.css

重点 http2 连接复用
利用 http2 连接可以复用的支持,可以实现 HTTP 长连接,类似于 HTML5 WebSocket ,服务端可以向客户端推送消息,不必每次建立连接。
服务端如何实现:
和PHP实现文件限速下载,比较类似,每次只读一定的长度,在做 sleep ,就实现了限速下载,下载一个文件可能要一天时间。
实现好了,效果如下,每3秒钟,输出当前时间

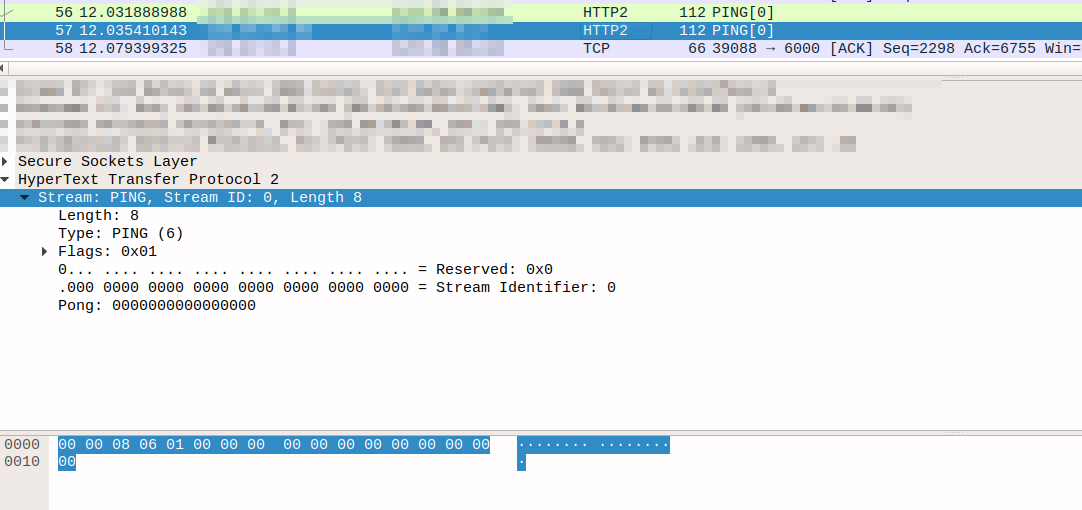
http2 ping
ALPN 在 SSL hello 时发送
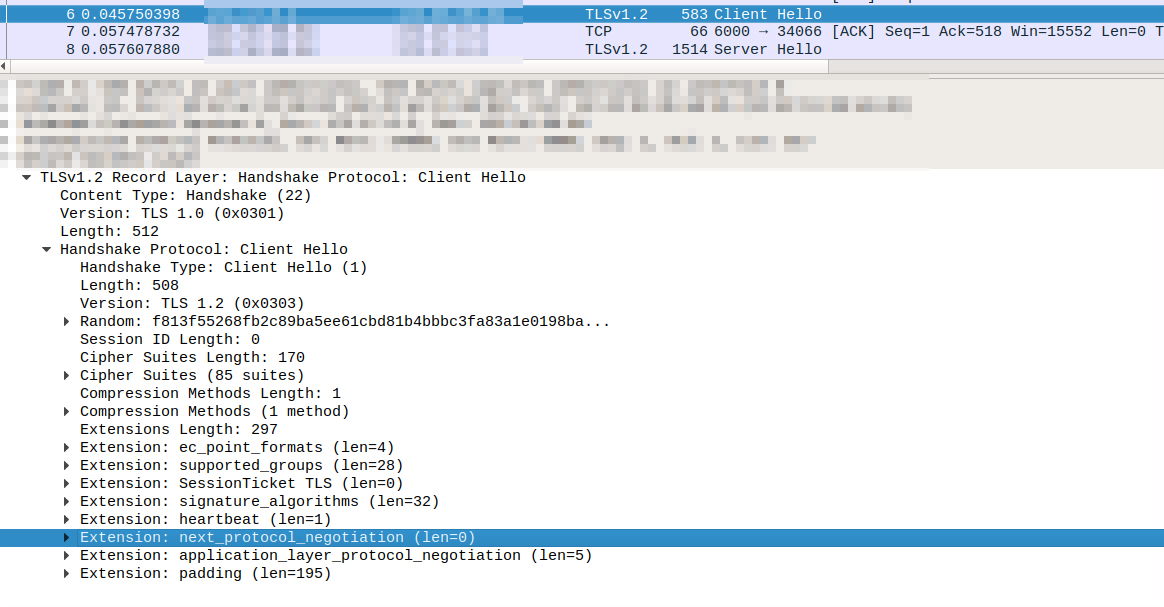
Server Hello

openssl 支持 ALPN 的方法,较简单,版本要求 >= 1.0.2
const unsigned char *alpn = NULL;
unsigned int alpnlen = 0;
SSL_get0_next_proto_negotiated(ssl, &alpn, &alpnlen);
SSL_get0_alpn_selected(ssl, &alpn, &alpnlen);
http2 流量控制
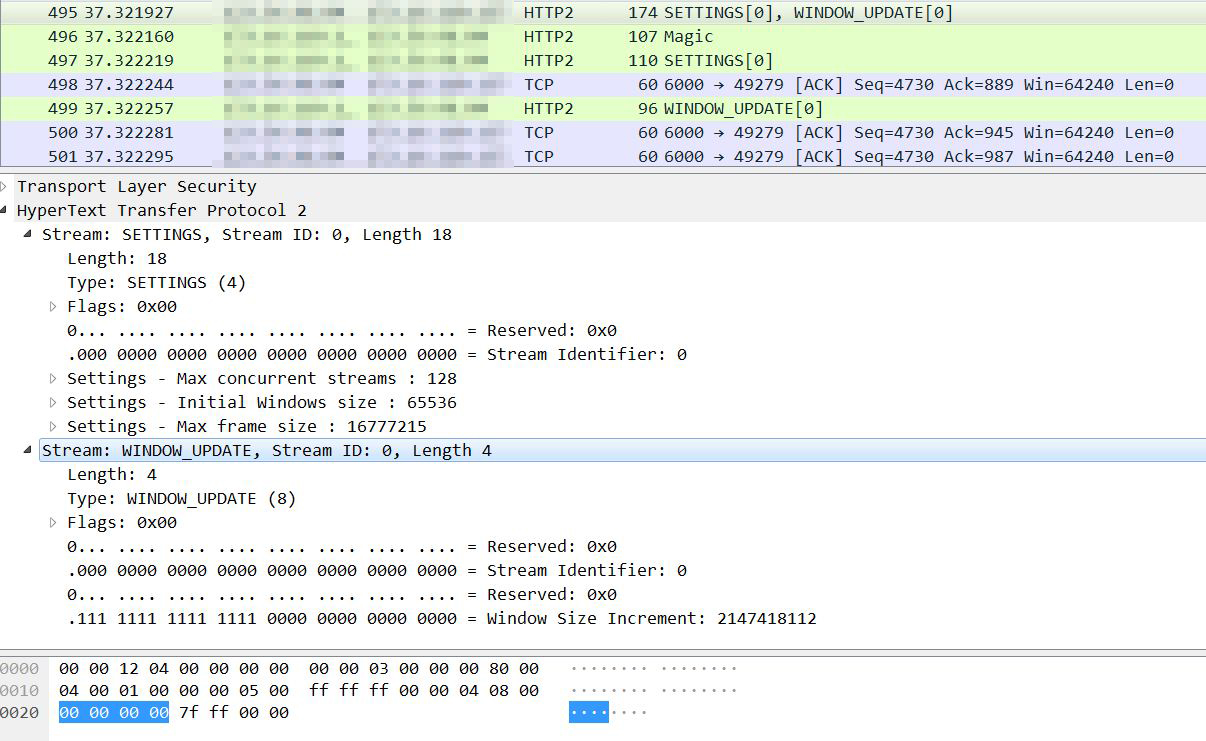
首次服务器发送 window_update 有几个设置。
frame size 16k / windows size 64k
当客户端从服务器接收一个流时,服务器会检查协商的 window 大小,当大小不足时,就不在发送数据,这时客户端需要更新 window 大小。如上图所示,初始值是 64K 当客户端接收的数据达到这个值时,则需要更新 window 。
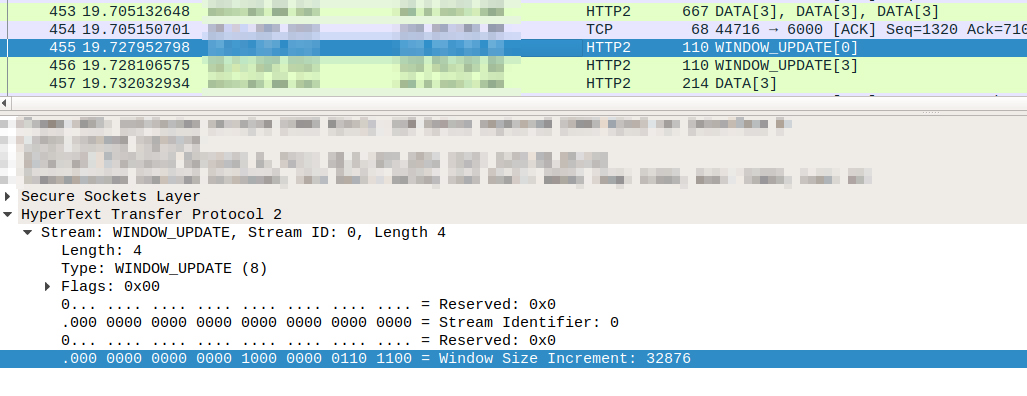
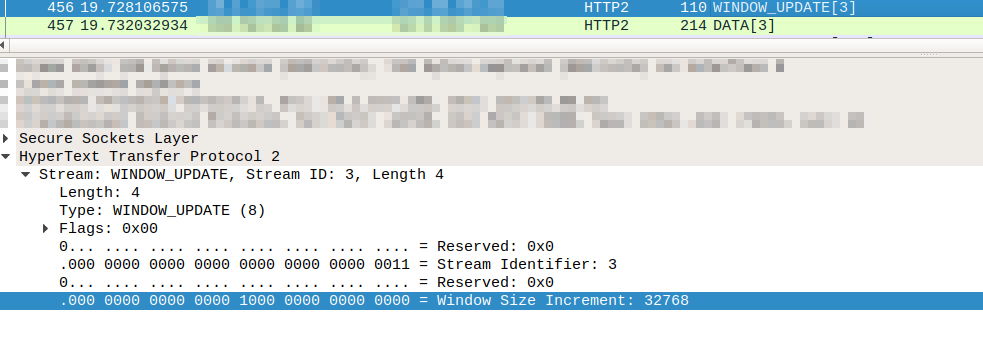
window 更新为 32768 则 32k 。服务器收到后,更新 window 大小,又可以继续下发流了。这里有2次更新,对应2个 stream id 。