五邑隐侠,本名关健昌,10年游戏生涯,现隐居五邑。本系列文章以C#为介绍语言,基于Unity2017.4.x。
一、环境搭建
我使用的是Unity+VSCode,用的是mac系统,windows的自己搜资料,步骤差不多。
1.安装Unity:下载Unity,我下载的是Unity2017.4.21f1。下载下来是一个下载助手UnityDownloadAssistant-2017.4.21f1.dmg,双击打开安装。选择安装内容Unity2017.4.21f1、MonoDevelop/Unity Debugger、Documentation、Standard Assets。
2.安装VSCode:个人喜好,VSCode比较轻量,写代码流畅一点。下载最新版本就可以。
3.下载dotnet:我下载的是dotnet-dev-osx-x64.1.1.11.pkg,双击打开安装。
4.安装VSCode插件:插件可以选择unity3d-pack,由于我安装失败,所以把unity3d-pack里面的插件都安装了一遍:
C#
C# FixFormat
C# Snippets
Debugger for Unity
eppz! (C# theme for Unity)
MonoBehaviour Snippets
ShaderlabVSCode(Free)
Unity Code Snippets
Unity Tools
5.建立Unity项目:打开Unity,我新建的是2D项目
6.建立C#项目,目的是让VSCode对C#代码有提示。终端命令行cd到Unity项目根目录,运行命令dotnet new console创建dotnet命令行工程。Unity项目根目录下会生成 xx.csproj文件、obj目录、bin目录
7.添加unity库引用,目的是让VSCode能识别Unity的命名空间(UnityEngine、UnityEngine.UI等)。打开obj/project.assets.json文件,在compile节添加unity库路径,包括(有用到其他库自己添加):
"/Applications/Unity/Unity.app/Contents/Managed/UnityEngine.dll": {},
"/Applications/Unity/Unity.app/Contents/UnityExtensions/Unity/GUISystem/UnityEngine.UI.dll": {},
这样,Unity+VSCode的环境就搭建好,可以用VSCode写脚本了。
二、编辑器简介
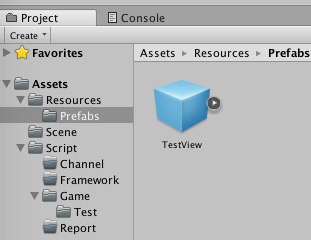
1.工程结构管理器
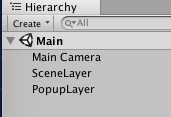
2.场景层级管理器
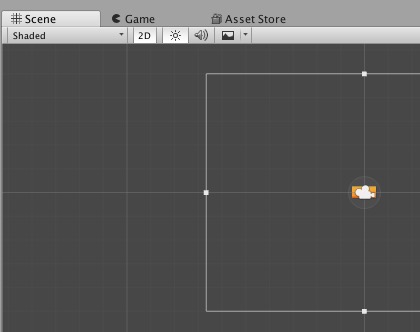
3.场景编辑器
4.属性编辑器
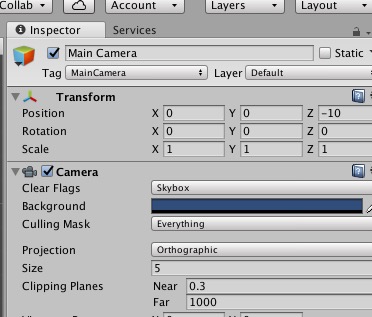
新建工程时,工程结构管理器中,Assets目录下为空,可以在下面创建场景,双击场景在场景层级管理器看到它的结构,在场景编辑器里可视化编辑,右边的属性编辑器可以对相应对GameObject设置属性、添加组件(包括脚本)。有使用过cocos creator经验会很熟悉,不详述。
三、熟悉开发流程
首先必须了解一些基本概念,
1.在Unity里,游戏由GameObject组成(可以理解成cocos里的cc.Node),GameObject可以添加组件
2.组件基类为Component,但用户自定义的脚本都继承自MonoBehaviour(Component的子类,如同cocos creator里的cc.Component)
3.每个GameObject有基本的Transform,设置GameObject的坐标
Assets目录是游戏开发所有资源存放的地方,包括图片、声音、脚本资源。我开发游戏,一般只做一个scene,Assets目录下新建一个目录Scene,在下面新建场景Main(在文件系统中可以看到它的全称是Main.unity)。
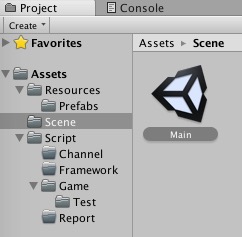
双击,在场景层级管理器中可以看到它的层级结构,默认只有一个Main Camera。为了支持屏幕适配,编写一个C#脚本,在Assets目录下新建一个目录Script,用于存放C#脚本。新建C#脚本MainCamera(文件系统中MainCamera.cs),用VSCode打开(VSCode直接打开整个项目的根目录),添加以下代码
using System.Collections;
using System.Collections.Generic;
using UnityEngine;

public class MainCamera : MonoBehaviour {

	public float designWidth = 6.4f;
	public float designHeight = 9.6f;

	// Use this for initialization
	void Start () {
		float screenHeight = Screen.height;
		float orthographicSize = this.GetComponent<Camera>().orthographicSize;
		float aspectRatio = Screen.width * 1.0f / Screen.height;
		// fix the litte side
		if (aspectRatio < designWidth / designHeight) { // fix width
			orthographicSize = designWidth / (2 * aspectRatio);
			this.GetComponent<Camera>().orthographicSize = orthographicSize;
			Debug.Log("FIX_WIDTH, orthographicSize is " + orthographicSize);
		} else { // fix height
			orthographicSize = designHeight / 2;
			this.GetComponent<Camera>().orthographicSize = orthographicSize;
			Debug.Log("FIX_HEIGHT, orthographicSize is " + orthographicSize);
		}
	}

	// Update is called once per frame
	void Update () {

	}
}
在Unity编辑器的场景层级管理器选择Main Camera,在属性编辑器中给它添加组件(Add Component -> Scripts -> Main Camera),现在可以设置游戏的设计分辨率了。

游戏启动后,会根据GameObject“Main Camera”的生命周期触发Main Camera脚本的Start方法,根据游戏尺寸对照相机调整显示高度(不适用于UGUI,UGUI待会介绍)。该适配方案要注意几个概念,Unity默认单元大小为100个像素,所以宽高是实际像素数除以100,照相机的orthographicSize等于照相机显示高度的一半。如设置为6.4x9.6,那么美术出资源时一屏的大小就是640x960。不同的手机屏幕自动做等比例缩放,具体缩放倍数,当实际屏幕宽高比小于设计分辨率时宽缩放到跟实际屏幕一样,否则高缩放到跟实际屏幕一样。另外一边相应等比例缩放,小的一边铺满全屏可以避免出现黑边,但也导致被裁剪,这种方式主要针对全屏的场景。
给主场景添加两个GameObject:SceneLayer和PopupLayer,分别作为场景和弹窗的根节点。
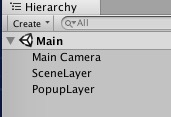
默认组件Transform只有位置没有大小,换成组件RectTransform,设置其大小为设计分辨率

using System.Collections;
using System.Collections.Generic;
using UnityEngine;

public class StartCtrl : MonoBehaviour {

	public GameObject sceneLayer = null;
	public GameObject popupLayer = null;

	// Use this for initialization
	void Start () {

	}

	// Update is called once per frame
	void Update () {

	}
}
在Unity编辑器的场景层级管理器选择Main Camera,在属性编辑器中给它添加组件(Add Component -> Scripts -> Start Ctrl),把场景层级管理器的sceneLayer、popupLayer拖到对应的属性完成关联。启动游戏后,GameObject“Main Camera”的生命周期就会触发StartCtrl里对应的方法,StartCtrl里的sceneLayer和popupLayer属性已被赋值为Main场景对应的子节点。后面我们会继续讲解如何使用这两个属性对界面进行分层管理。

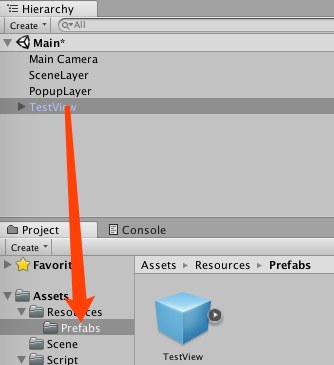
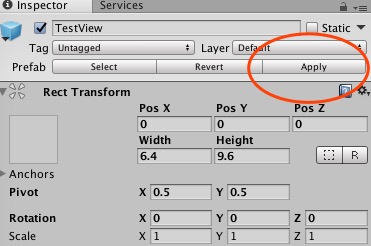
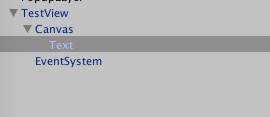
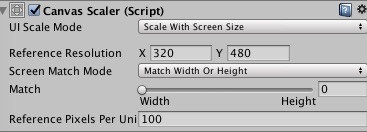
using System.Collections;
using System.Collections.Generic;
using UnityEngine;
using UnityEngine.UI;

public class TestViewCtrl : MonoBehaviour {

	public Text txtHello = null;

	// Use this for initialization
	void Start () {
		txtHello.text = "你好";
	}

	// Update is called once per frame
	void Update () {

	}
}
打开回刚才那个预制体,选择根GameObject,在属性面板选择添加组件TestViewCtrl,并将对应ui组件拖到脚本组件的属性上进行关联,这样我们就可以通过TestViewCtrl控制这个界面了。

using System.Collections;
using System.Collections.Generic;
using UnityEngine;

public class StartCtrl : MonoBehaviour {

	public GameObject sceneLayer = null;
	public GameObject popupLayer = null;

	// Use this for initialization
	void Start () {
		Object prefab = Resources.Load("Prefabs/TestView", typeof(GameObject));
		if (!prefab) {
			Debug.Log("Prefab is null");
			return;
		}

		GameObject gameObj = Instantiate(prefab) as GameObject;
		gameObj.transform.SetParent(popupLayer.transform);
	}

	// Update is called once per frame
	void Update () {

	}
}