
1. Springboot mybatis 介绍
MyBatis 是一款优秀的持久层框架,它支持定制化 SQL、存储过程以及高级映射。MyBatis 避免了几乎所有的 JDBC 代码和手动设置参数获取结果集的过程。MyBatis 可以使用简单的 XML 或注解来配置和映射原生信息,将接口和 Java 的 POJOs(Plain Old Java Objects,普通的 Java对象)映射成数据库中的记录。
关于 Mybatis 的基础知识可以查询官方文档,十分的详细。mybatis 官方文档.
2. Springboot mybatis 依赖
本系列 Springboot 文章主要是 Springboot 的学习与分析,也因此只会试验 Mybatis 在 Springboot 中的一些用法,关于 Mybatis 的基础知识,还是需要自行学习的。
创建 Springboot 项目不提,引入 maven 依赖,主要是 mybastis 核心依赖以及一个 mybatis xml 自动生成插件。依赖中的 druid 数据源部分,可以参考系列文章第九篇。
 <dependencies>
        <!-- Spring Boot web 开发整合 -->
        <dependency>
            <groupId>org.springframework.boot</groupId>
            <artifactId>spring-boot-starter-web</artifactId>
            <exclusions>
                <exclusion>
                    <artifactId>spring-boot-starter-json</artifactId>
                    <groupId>org.springframework.boot</groupId>
                </exclusion>
            </exclusions>
        </dependency>

        <dependency>
            <groupId>org.springframework.boot</groupId>
            <artifactId>spring-boot-starter-test</artifactId>
            <scope>test</scope>
        </dependency>

        <!-- 阿里 fastjson -->
        <dependency>
            <groupId>com.alibaba</groupId>
            <artifactId>fastjson</artifactId>
            <version>1.2.47</version>
        </dependency>

        <!-- Lombok 工具 -->
        <dependency>
            <groupId>org.projectlombok</groupId>
            <artifactId>lombok</artifactId>
            <optional>true</optional>
        </dependency>

        <!-- 导入配置文件处理器,在配置springboot相关文件时候会有提示 -->
        <dependency>
            <groupId>org.springframework.boot</groupId>
            <artifactId>spring-boot-configuration-processor</artifactId>
            <optional>true</optional>
        </dependency>

        <!-- 单元测试 -->
        <dependency>
            <groupId>org.junit.jupiter</groupId>
            <artifactId>junit-jupiter-api</artifactId>
            <version>RELEASE</version>
            <scope>compile</scope>
        </dependency>

        <!-- Druid 数据源 -->
        <dependency>
            <groupId>com.alibaba</groupId>
            <artifactId>druid-spring-boot-starter</artifactId>
            <version>1.1.10</version>
        </dependency>

        <!-- mybatis -->
        <dependency>
            <groupId>org.mybatis.spring.boot</groupId>
            <artifactId>mybatis-spring-boot-starter</artifactId>
            <version>1.3.2</version>
        </dependency>
        <!-- mybatis mapper自动生成插件 -->
        <dependency>
            <groupId>org.mybatis.generator</groupId>
            <artifactId>mybatis-generator-core</artifactId>
            <version>1.3.7</version>
            <scope>compile</scope>
            <optional>true</optional>
        </dependency>

        <!--添加数据库链接 -->
        <dependency>
            <groupId>mysql</groupId>
            <artifactId>mysql-connector-java</artifactId>
        </dependency>
    </dependencies>
3. Springboot mybatis 配置
关于 Druid 数据源的配置不再说明,可以参考系列文章第九篇。配置中主要配置了项目编码、数据源信息、durid 数据源和 mybatis 的 mapper 位置以及 mybatis 映射别名的包路径。
############################################################
# 服务启动端口号
server.port=8080
spring.profiles.active=dev

# 编码
server.tomcat.uri-encoding=utf-8
spring.http.encoding.force=true
spring.http.encoding.charset=UTF-8
spring.http.encoding.enabled=true
############################################################
spring.datasource.url=jdbc:mysql://127.0.0.1:3306/springboot?characterEncoding=utf-8&serverTimezone=GMT%2B8
spring.datasource.driver-class-name= com.mysql.jdbc.Driver
spring.datasource.username=root
spring.datasource.password=123

# 使用 druid 数据源
spring.datasource.type: com.alibaba.druid.pool.DruidDataSource
spring.datasource.initialSize: 5
spring.datasource.minIdle: 5
spring.datasource.maxActive: 20
spring.datasource.maxWait: 60000
spring.datasource.timeBetweenEvictionRunsMillis: 60000
spring.datasource.minEvictableIdleTimeMillis: 300000
spring.datasource.validationQuery: SELECT 1 FROM DUAL
spring.datasource.testWhileIdle: true
spring.datasource.testOnBorrow: false
spring.datasource.testOnReturn: false
spring.datasource.poolPreparedStatements: true
spring.datasource.filters: stat
spring.datasource.maxPoolPreparedStatementPerConnectionSize: 20
spring.datasource.useGlobalDataSourceStat: true
spring.datasource.connectionProperties: druid.stat.mergeSql=true;druid.stat.slowSqlMillis=500

# mybatis
mybatis.mapper-locations=classpath:mapper/*.xml
mybatis.type-aliases-package=net.codingme.boot.domain
4. Springboot mybatis 编码
mybatis 是半 ORM 框架,它通过 XML 描述符或者注解把 POJO 对象与 SQL 信息关联起来,也因为是和 SQL 关联起来,使用 mybatis 可以充分的利用数据的各种功能以及强大的 SQL 语句。也可以发发现使用 mybatis 至少应该建立 POJO 对象和 SQL 关联信息以及编写相关操作代码。
4.1. 数据库准备
既然是持久层框架,先准备一个用户实验操作的数据表。上一个步骤中有配置数据库信息为 springboot。
spring.datasource.url=jdbc:mysql://127.0.0.1:3306/springboot
因此在 mysql 数据库的 springboot 库中创建表 book 用于演示。
CREATE TABLE `book` (
  `id` int(11) NOT NULL AUTO_INCREMENT,
  `author` varchar(255) DEFAULT NULL COMMENT '书籍作者',
  `name` varchar(255) DEFAULT NULL COMMENT '书籍名称',
  `price` float NOT NULL COMMENT '书籍价格',
  `create_time` datetime NOT NULL COMMENT '创建时间',
  `description` varchar(255) DEFAULT NULL COMMENT '书籍描述',
  PRIMARY KEY (`id`)
) ENGINE=InnoDB AUTO_INCREMENT=15 DEFAULT CHARSET=utf8;
增加测试数据。
INSERT INTO `springboot`.`book`(`id`, `author`, `name`, `price`, `create_time`, `description`) VALUES (2, '金庸', '笑傲江湖', 12, '2018-09-01 10:10:12', '是作家金庸创作的一部长篇武侠小说');
INSERT INTO `springboot`.`book`(`id`, `author`, `name`, `price`, `create_time`, `description`) VALUES (3, '罗贯中', '三国演义', 22, '2018-09-01 10:10:16', '是作家罗贯中创作的一部长篇历史小说');
INSERT INTO `springboot`.`book`(`id`, `author`, `name`, `price`, `create_time`, `description`) VALUES (4, '吴承恩', '西游记', 17, '2018-09-01 10:10:19', '是作家吴承恩创作的一部长篇小说');
INSERT INTO `springboot`.`book`(`id`, `author`, `name`, `price`, `create_time`, `description`) VALUES (5, '金庸1535767819284', '笑傲江湖1535767819284', 43, '2018-09-01 10:10:19', '是作家金庸创作的一部长篇武侠小说1535767819284');
INSERT INTO `springboot`.`book`(`id`, `author`, `name`, `price`, `create_time`, `description`) VALUES (6, '金庸1535767819679', '笑傲江湖1535767819679', 24, '2018-09-01 10:10:20', '是作家金庸创作的一部长篇武侠小说1535767819679');
INSERT INTO `springboot`.`book`(`id`, `author`, `name`, `price`, `create_time`, `description`) VALUES (7, '罗贯中1535769035138', '三国演义1535769035138', 20, '2018-09-01 10:30:35', '是罗贯中创作的一部小说1535769035138');
INSERT INTO `springboot`.`book`(`id`, `author`, `name`, `price`, `create_time`, `description`) VALUES (8, '金庸1535783611785', '笑傲江湖1535783611785', 30, '2018-09-01 14:33:32', '是作家金庸创作的一部长篇武侠小说1535783611785');
4.2. 自动生成插件
传统的 mybatis 开发过程需要依照数据表新建大量的 POJO 类,然后在编写响应的增删改查接口,继而编写增删改查对应的 XML 文件。过程无趣且有重复劳动,因此产生了一个自动生成工具,可以通过 JDBC 连接到数据库,自动的创建 POJO、操作接口、XML 文件。
在引入依赖的时候已经引入了自动生成插件,也就是 mybatis-generator-core。
接着在项目根目录下创建自动生成配置文件,主要配置数据库信息和要生成的表已经生成的代码存放位置。
在之前作者也介绍过,可以参考博客文章使用MyBatis Generator自动生成Model、Dao、Mapper相关代码。
<?xml version="1.0" encoding="UTF-8"?>
<!DOCTYPE generatorConfiguration
PUBLIC "-//mybatis.org//DTD MyBatis Generator Configuration 1.0//EN"
"http://mybatis.org/dtd/mybatis-generator-config_1_0.dtd">
<generatorConfiguration>
<context id="MysqlContext" targetRuntime="MyBatis3Simple" defaultModelType="flat">
<property name="beginningDelimiter" value="`"/>
<property name="endingDelimiter" value="`"/>
<jdbcConnection driverClass="com.mysql.cj.jdbc.Driver"
connectionURL="jdbc:mysql://127.0.0.1:3306/springboot?characterEncoding=utf-8&serverTimezone=GMT%2B8&nullCatalogMeansCurrent=true"
userId="root"
password="123">
</jdbcConnection>
<!-- 对于生成的pojo所在包 -->
<javaModelGenerator targetPackage="net.codingme.boot.domain" targetProject="src/main/java"/>
<!-- 对于生成的mapper所在目录 -->
<sqlMapGenerator targetPackage="mapper" targetProject="src/main/resources"/>
<!-- 配置mapper对应的java映射 -->
<javaClientGenerator targetPackage="net.codingme.boot.domain.mapper" targetProject="src/main/java"
type="XMLMAPPER"/>
<!-- 要生成那些表(更改tableName和domainObjectName就可以) -->
<table tableName="book" domainObjectName="Book" enableCountByExample="true"
enableUpdateByExample="true" enableUpdateByPrimaryKey="true"
selectByExampleQueryId="true" enableDeleteByPrimaryKey="true"
enableSelectByPrimaryKey="true" enableSelectByExample="true"
></table>
</context>
</generatorConfiguration>
写好配置文件之后,还需要写一个启动程序,用于加载配置文件,运行就可以生成相关配置。
import org.mybatis.generator.api.MyBatisGenerator;
import org.mybatis.generator.config.Configuration;
import org.mybatis.generator.config.xml.ConfigurationParser;
import org.mybatis.generator.internal.DefaultShellCallback;

import java.io.File;
import java.util.ArrayList;

/**
 * <p>
 * Mybatis generator的逆向生成工具类
 *
 * @Author niujinpeng
 * @Date 2018/8/30 22:57
 */
public class MybatisGenerator {

    public void generator() throws Exception {
        ArrayList<String> warnings = new ArrayList<>();
        boolean overwrite = true;
        // 指定你想工程配置文件
        File configFile = new File("generatorConfig.xml");
        System.out.println(configFile.getAbsolutePath());
        ConfigurationParser cp = new ConfigurationParser(warnings);
        Configuration config = cp.parseConfiguration(configFile);
        DefaultShellCallback callback = new DefaultShellCallback(overwrite);
        MyBatisGenerator myBatisGenerator = new MyBatisGenerator(config, callback, warnings);
        myBatisGenerator.generate(null);
    }

    public static void main(String[] args) throws Exception {
        MybatisGenerator mybatisGenerator = new MybatisGenerator();
        mybatisGenerator.generator();
    }
}
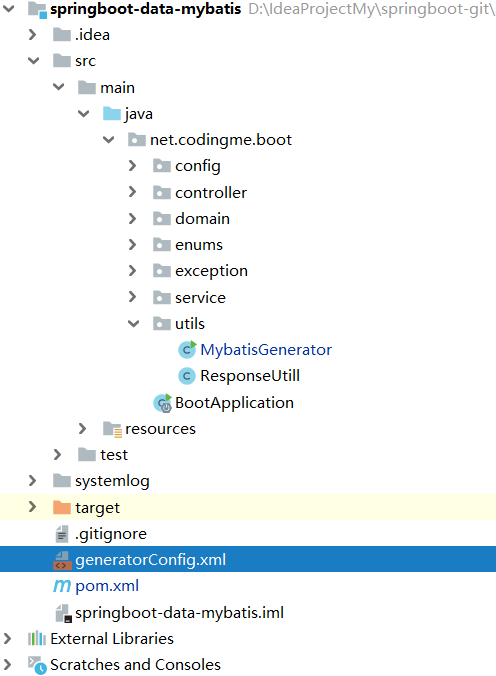
生成的文件如下图。

查看生成的接口以及 XML 映射文件可以发现已经自动生成了常用的几个方法。
- deleteByPrimaryKey
- insert
- updateByPrimaryKey
- selectByPrimaryKey
- selectAll
生成完成之后要在 Springboot 启动器上添加 MapperScan 注解指定要扫描的 mapper 位置。
@SpringBootApplication
@MapperScan("net.codingme.boot.domain.mapper")
public class BootApplication {

    public static void main(String[] args) {
        SpringApplication.run(BootApplication.class, args);
    }
}
4.3. 注解配置方式
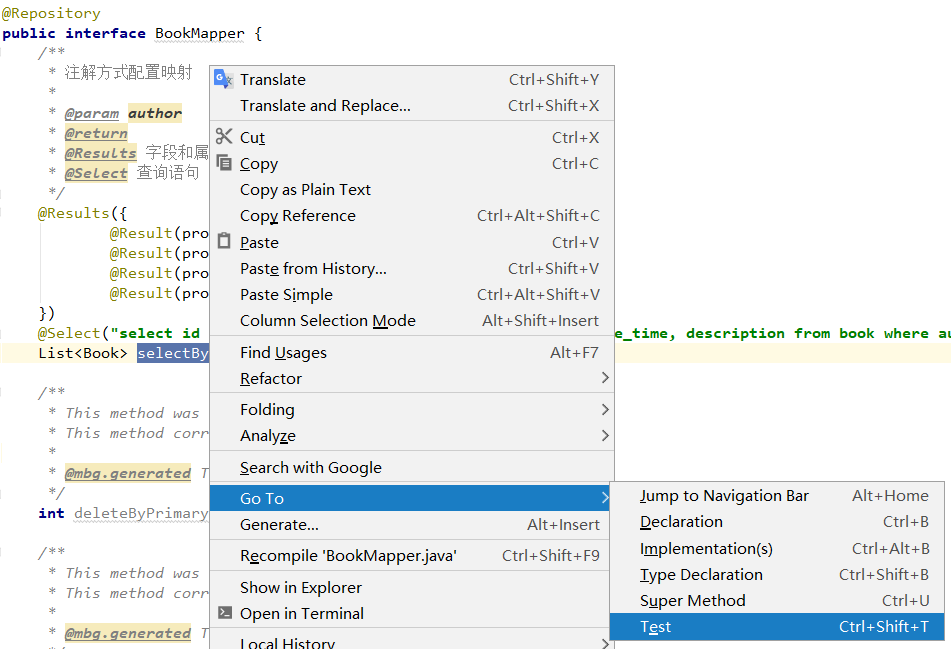
Mybatis 同样支持注解的方式配置映射关系,使用注解可以替代 XML 的配置,写一个简单的注解例子。在刚才生成的 BookMapper.java 中增加一个根据作者名称查询的方法,并映射字段对应的属性。
// 添加 @Repository 注解,这样在使用 @Autowired 引入的时候不会报横线
@Repository
public interface BookMapper {
     /**
     * 注解方式配置映射
     *
     * @param author
     * @return
     * @Results 字段和属性映射关系
     * @Select 查询语句
     */
    @Results({
            @Result(property = "id", column = "ids"),
            @Result(property = "name", column = "name"),
            @Result(property = "author", column = "authors"),
            @Result(property = "createTime", column = "create_time")
    })
    @Select("select id as ids, author as authors, name, price, create_time, description from book where author = #{author}")
    List<Book> selectByAuthor(@Param("author") String author);
    // 省略下面自动生成代码
5. Springboot mybatis 测试
正常情况下会在项目中的业务层 service 包下创建接口和类然后通过注解引入使用。
@Autowired
private BookMapper bookMapper;
我们只是实验,没有这样写一套的必要,只要能确保 BookMapper 可以正常注入使用就好了。因此创建测试类进行测试。
在生成的(也可以完全手写测试方法)测试类中添加测试方法进行测试。
@RunWith(SpringRunner.class)
@SpringBootTest
public class BookMapperTest {

    @Autowired
    private BookMapper bookMapper;

    @Test
    public void testSelectAll() {
        List<Book> bookList = bookMapper.selectAll();
        Assert.assertNotNull(bookList);
        bookList.forEach((book) -> System.out.println(book));
    }


    @Test
    public void testSelectByAuthro() {
        List<Book> bookList = bookMapper.selectByAuthor("金庸");
        Assert.assertNotNull(bookList);
        bookList.forEach((book) -> System.out.println(book));
    }

    @Test
    public void testSelectByPrimaryKey() {
        Book book = bookMapper.selectByPrimaryKey(2);
        Assert.assertNotNull(book);
        System.out.println(book);
    }

    public void testDeleteByPrimaryKey() {
        int primaryKey = bookMapper.deleteByPrimaryKey(8);
        Assert.assertNotEquals(0, primaryKey);
        System.out.println(primaryKey);
    }

}
为了观察查询接口 book 的信息输出,重写 Book 类的 toString 方法,然后运行单元测试。

可以发现测试全部通过。结果正常。
文章代码已经上传到 Github Spring Boot 连接数据库 - Mybatis。
我的微信:wn8398
原文出处:www.codingme.net