安装和配置
系统Win10,VS2013,下载Emgu安装包libemgucv-windesktop-3.4.3.3016
安装到了E:\OpenCV\emgucv-windesktop 3.4.3.3016
打开官方的例子,试着运行HelloWorld,会在E:\OpenCV\emgucv-windesktop 3.4.3.3016\bin下面生成 X64 X86两个文件夹,里面是
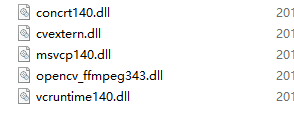
新建一个Console工程,添加引用,主要是上面目录下的这四个dll文件

因为我们自己的第一个程序使用到了System.Drawing.Point,所以添加引用

HelloWorld项目1
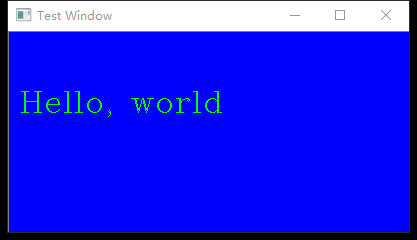
using Emgu.CV;
using Emgu.CV.CvEnum;
using Emgu.CV.Structure;
using System;
using System.Collections.Generic;
using System.Linq;
using System.Text;
using System.Threading.Tasks;

namespace CVHelloWorld
{
    class Program
    {
        static void Main(string[] args)
        {

            String win1 = "Test Window"; //The name of the window
            CvInvoke.NamedWindow(win1); //Create the window using the specific name

            Mat img = new Mat(200, 400, DepthType.Cv8U, 3); //Create a 3 channel image of 400x200
            img.SetTo(new Bgr(255, 0, 0).MCvScalar); // set it to Blue color

            //Draw "Hello, world." on the image using the specific font
            CvInvoke.PutText(
               img,
               "Hello, world",
               new System.Drawing.Point(10, 80),
               FontFace.HersheyComplex,
               1.0,
               new Bgr(0, 255, 0).MCvScalar);


            CvInvoke.Imshow(win1, img); //Show the image
            CvInvoke.WaitKey(0);  //Wait for the key pressing event
            CvInvoke.DestroyWindow(win1); //Destroy the window if key is pressed
        }
    }
}
然后根据平台,将X85或者X64文件夹复制到程序目录
效果如下
其他配置
工具,选择项,浏览到Emgu.CV.UI.dll,可以添加控件
还可以将E:\OpenCV\emgucv-windesktop 3.4.3.3016\bin添加到环境变量Path中去。
HelloWorld 项目2
代码
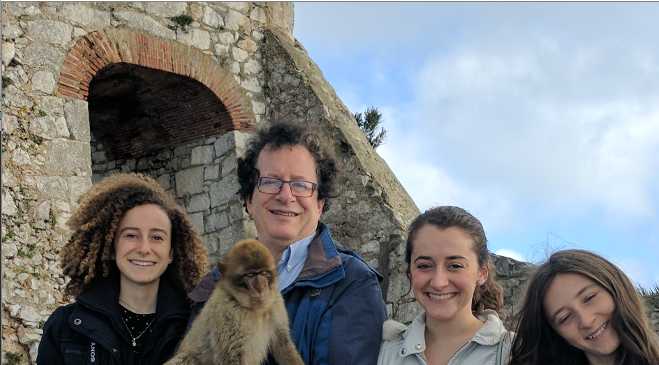
        static void Main(string[] args)
        {
            Mat img=CvInvoke.Imread("faces.png");
            CvInvoke.NamedWindow("读取图像", NamedWindowType.AutoSize);
            CvInvoke.Imshow("读取图像", img);
            CvInvoke.WaitKey(0);  //Wait for the key pressing event
            CvInvoke.DestroyWindow("读取图像"); //Destroy the window if key is pressed
        }
显示图像
将上面的图片高斯模糊
代码
        static void Main(String[] args)
        {
            Mat image = CvInvoke.Imread("faces.png");
            CvInvoke.NamedWindow("TEST_IN", Emgu.CV.CvEnum.NamedWindowType.AutoSize);
            CvInvoke.NamedWindow("TEST_OUT", Emgu.CV.CvEnum.NamedWindowType.AutoSize);
            CvInvoke.Imshow("TEST_IN", image);

            Mat output=new Mat();
            CvInvoke.GaussianBlur(image, output, new Size(5, 5), 3, 3);
            //CvInvoke.GaussianBlur(output, output, new Size(5, 5), 3, 3);
            CvInvoke.Imshow("TEST_OUT", output);
            CvInvoke.WaitKey(0);

        }
结果显示2个窗口,原图片和模糊的图片

DownSampling
        static void Main(String[] args)
        {
            Mat image = CvInvoke.Imread("faces.png");
            CvInvoke.NamedWindow("TEST_IN", Emgu.CV.CvEnum.NamedWindowType.AutoSize);
            CvInvoke.NamedWindow("TEST_OUT", Emgu.CV.CvEnum.NamedWindowType.AutoSize);
            CvInvoke.Imshow("TEST_IN", image);
            Mat output=new Mat();
            CvInvoke.PyrDown(image, output);
            CvInvoke.Imshow("TEST_OUT", output);
            CvInvoke.WaitKey(0);
        }
显示灰度图和Canny边缘检测
static void Main(String[] args)
        {
            Mat image = CvInvoke.Imread("faces.png");
            CvInvoke.NamedWindow("TEST_GRAY", Emgu.CV.CvEnum.NamedWindowType.AutoSize);
            CvInvoke.NamedWindow("TEST_CANNY", Emgu.CV.CvEnum.NamedWindowType.AutoSize);
            CvInvoke.Imshow("TEST_IN", image);
            Mat imgGray=new Mat();
            Mat imgCny = new Mat();
            CvInvoke.CvtColor(image, imgGray, Emgu.CV.CvEnum.ColorConversion.Bgr2Gray);
            CvInvoke.Imshow("TEST_GRAY", imgGray);

            CvInvoke.Canny(imgGray, imgCny, 10, 100, 3, true);
            CvInvoke.Imshow("TEST_CANNY",imgCny);
            CvInvoke.WaitKey(0);
        }
