本示例的过程是:
1. 音频转文本
2. 利用文本获取情感倾向分析结果
3. 利用文本获取关键词提取
首先是讯飞的语音识别模块。在这里可以找到非实时语音转写的相关文档以及 Python 示例。我略作了改动,让它可以对不同人说话作区分,并且作了一些封装。
语音识别功能
weblfasr_python3_demo.py 文件:
  1 #!/usr/bin/env python
  2 # -*- coding: utf-8 -*-
  3 """
  4 讯飞非实时转写调用demo(语音识别)
  5 """
  6 import base64
  7 import hashlib
  8 import hmac
  9 import json
 10 import os
 11 import time
 12
 13 import requests
 14
 15 lfasr_host = 'http://raasr.xfyun.cn/api'
 16
 17 # 请求的接口名
 18 api_prepare = '/prepare'
 19 api_upload = '/upload'
 20 api_merge = '/merge'
 21 api_get_progress = '/getProgress'
 22 api_get_result = '/getResult'
 23 # 文件分片大下52k
 24 file_piece_sice = 10485760
 25
 26 # ——————————————————转写可配置参数————————————————
 27 # 参数可在官网界面(https://doc.xfyun.cn/rest_api/%E8%AF%AD%E9%9F%B3%E8%BD%AC%E5%86%99.html)查看,根据需求可自行在gene_params方法里添加修改
 28 # 转写类型
 29 lfasr_type = 0
 30 # 是否开启分词
 31 has_participle = 'false'
 32 has_seperate = 'true'
 33 # 多候选词个数
 34 max_alternatives = 0
 35 # 子用户标识
 36 suid = ''
 37
 38
 39 class SliceIdGenerator:
 40     """slice id生成器"""
 41
 42     def __init__(self):
 43         self.__ch = 'aaaaaaaaa`'
 44
 45     def getNextSliceId(self):
 46         ch = self.__ch
 47         j = len(ch) - 1
 48         while j >= 0:
 49             cj = ch[j]
 50             if cj != 'z':
 51                 ch = ch[:j] + chr(ord(cj) + 1) + ch[j + 1:]
 52                 break
 53             else:
 54                 ch = ch[:j] + 'a' + ch[j + 1:]
 55                 j = j - 1
 56         self.__ch = ch
 57         return self.__ch
 58
 59
 60 class RequestApi(object):
 61     def __init__(self, appid, secret_key, upload_file_path):
 62         self.appid = appid
 63         self.secret_key = secret_key
 64         self.upload_file_path = upload_file_path
 65
 66     # 根据不同的apiname生成不同的参数,本示例中未使用全部参数您可在官网(https://doc.xfyun.cn/rest_api/%E8%AF%AD%E9%9F%B3%E8%BD%AC%E5%86%99.html)查看后选择适合业务场景的进行更换
 67     def gene_params(self, apiname, taskid=None, slice_id=None):
 68         appid = self.appid
 69         secret_key = self.secret_key
 70         upload_file_path = self.upload_file_path
 71         ts = str(int(time.time()))
 72         m2 = hashlib.md5()
 73         m2.update((appid + ts).encode('utf-8'))
 74         md5 = m2.hexdigest()
 75         md5 = bytes(md5, encoding='utf-8')
 76         # 以secret_key为key, 上面的md5为msg, 使用hashlib.sha1加密结果为signa
 77         signa = hmac.new(secret_key.encode('utf-8'), md5, hashlib.sha1).digest()
 78         signa = base64.b64encode(signa)
 79         signa = str(signa, 'utf-8')
 80         file_len = os.path.getsize(upload_file_path)
 81         file_name = os.path.basename(upload_file_path)
 82         param_dict = {}
 83
 84         if apiname == api_prepare:
 85             # slice_num是指分片数量,如果您使用的音频都是较短音频也可以不分片,直接将slice_num指定为1即可
 86             slice_num = int(file_len / file_piece_sice) + (0 if (file_len % file_piece_sice == 0) else 1)
 87             param_dict['app_id'] = appid
 88             param_dict['signa'] = signa
 89             param_dict['ts'] = ts
 90             param_dict['file_len'] = str(file_len)
 91             param_dict['file_name'] = file_name
 92             param_dict['slice_num'] = str(slice_num)
 93         elif apiname == api_upload:
 94             param_dict['app_id'] = appid
 95             param_dict['signa'] = signa
 96             param_dict['ts'] = ts
 97             param_dict['task_id'] = taskid
 98             param_dict['slice_id'] = slice_id
 99         elif apiname == api_merge:
100             param_dict['app_id'] = appid
101             param_dict['signa'] = signa
102             param_dict['ts'] = ts
103             param_dict['task_id'] = taskid
104             param_dict['file_name'] = file_name
105         elif apiname == api_get_progress or apiname == api_get_result:
106             param_dict['app_id'] = appid
107             param_dict['signa'] = signa
108             param_dict['ts'] = ts
109             param_dict['task_id'] = taskid
110         param_dict['has_seperate'] = has_seperate
111         return param_dict
112
113     # 请求和结果解析,结果中各个字段的含义可参考:https://doc.xfyun.cn/rest_api/%E8%AF%AD%E9%9F%B3%E8%BD%AC%E5%86%99.html
114     def gene_request(self, apiname, data, files=None, headers=None):
115         response = requests.post(lfasr_host + apiname, data=data, files=files, headers=headers)
116         result = json.loads(response.text)
117         if result["ok"] == 0:
118             # print("{} success:".format(apiname) + str(result))
119             print('treating...')
120             return result
121         else:
122             # print("{} error:".format(apiname) + str(result))
123             exit(0)
124             return result
125
126     # 预处理
127     def prepare_request(self):
128         return self.gene_request(apiname=api_prepare,
129                                  data=self.gene_params(api_prepare))
130
131     # 上传
132     def upload_request(self, taskid, upload_file_path):
133         file_object = open(upload_file_path, 'rb')
134         try:
135             index = 1
136             sig = SliceIdGenerator()
137             while True:
138                 content = file_object.read(file_piece_sice)
139                 if not content or len(content) == 0:
140                     break
141                 files = {
142                     "filename": self.gene_params(api_upload).get("slice_id"),
143                     "content": content
144                 }
145                 response = self.gene_request(api_upload,
146                                              data=self.gene_params(api_upload, taskid=taskid,
147                                                                    slice_id=sig.getNextSliceId()),
148                                              files=files)
149                 if response.get('ok') != 0:
150                     # 上传分片失败
151                     print('upload slice fail, response: ' + str(response))
152                     return False
153                 # print('upload slice ' + str(index) + ' success')
154                 print('treating...')
155                 index += 1
156         finally:
157             'file index:' + str(file_object.tell())
158             file_object.close()
159         return True
160
161     # 合并
162     def merge_request(self, taskid):
163         return self.gene_request(api_merge, data=self.gene_params(api_merge, taskid=taskid))
164
165     # 获取进度
166     def get_progress_request(self, taskid):
167         return self.gene_request(api_get_progress, data=self.gene_params(api_get_progress, taskid=taskid))
168
169     # 获取结果
170     def get_result_request(self, taskid):
171         return self.gene_request(api_get_result, data=self.gene_params(api_get_result, taskid=taskid))
172
173     def all_api_request(self):
174         # 1. 预处理
175         pre_result = self.prepare_request()
176         taskid = pre_result["data"]
177         # 2 . 分片上传
178         self.upload_request(taskid=taskid, upload_file_path=self.upload_file_path)
179         # 3 . 文件合并
180         self.merge_request(taskid=taskid)
181         # 4 . 获取任务进度
182         while True:
183             # 每隔20秒获取一次任务进度
184             progress = self.get_progress_request(taskid)
185             progress_dic = progress
186             if progress_dic['err_no'] != 0 and progress_dic['err_no'] != 26605:
187                 # print('task error: ' + progress_dic['failed'])
188                 return
189             else:
190                 data = progress_dic['data']
191                 task_status = json.loads(data)
192                 if task_status['status'] == 9:
193                     # print('task ' + taskid + ' finished')
194                     break
195                 print('The task ' + taskid + ' is in processing, task status: ' + str(data))
196                 print('processing...')
197             # 每次获取进度间隔20S
198             time.sleep(20)
199         # 5 . 获取结果
200         return self.get_result_request(taskid=taskid)
201
202
203 def get_text_result(upload_file_path):
204     """
205     封装该接口,获取接口返回的内容
206     :param upload_file_path:
207     :return: 识别出来的文本数据
208     """
209     api = RequestApi(appid="xxx", secret_key="xxx", upload_file_path=upload_file_path)
210     return api.all_api_request()
211
212
213 # 注意:如果出现requests模块报错:"NoneType" object has no attribute 'read', 请尝试将requests模块更新到2.20.0或以上版本(本demo测试版本为2.20.0)
214 # 输入讯飞开放平台的appid,secret_key和待转写的文件路径
215 if __name__ == '__main__':
216     result = get_text_result('input/xxx.m4a')
217     print(result)
218     print(type(result))
appid 和 secret_key 需要你自己申请之后,配置上去。
配置好之后填写需要输入的音频,就可以运行该脚本作测试。
python weblfasr_python3_demo.py
treating...
treating...
treating...
treating...
treating...
The task e3e3284aee4a4e3b86a4fd506960e0f2 is in processing, task status: {"status":2,"desc":"音频并完成"}
processing...
treating...
The task e3e3284aee4a4e3b86a4fd506960e0f2 is in processing, task status: {"status":3,"desc":"音频写中"}
processing...
treating...
treating...
{'data': '[{"bg":"480","ed":"1810","onebest":"我好高兴!","speaker":"2"},{"bg":"1820","ed":"4440ebest":"啊明天就放假了!","speaker":"1"}]', 'err_no': 0, 'failed': None, 'ok': 0}
<class 'dict'>
情感倾向分析功能
这里是百度情感倾向分析的文档,可以选择 Python SDK 或者 API 接口,我选择的是 API 接口。并且我对它进行了一定程度的封装。
baidu_sentiment.py 文件有如下代码:
 1 #!/usr/bin/env python
 2 # -*- coding: utf-8 -*-
 3 """
 4 百度情感倾向分析:
 5 get_sentiment_result 用于 demo 进行调用
 6 # 参数    说明    描述
 7 # log_id    uint64    请求唯一标识码
 8 # sentiment    int    表示情感极性分类结果,0:负向,1:中性,2:正向
 9 # confidence    float    表示分类的置信度,取值范围[0,1]
10 # positive_prob    float    表示属于积极类别的概率 ,取值范围[0,1]
11 # negative_prob    float    表示属于消极类别的概率,取值范围[0,1]
12 """
13 import json
14 import requests
15
16
17 def get_sentiment_result(text):
18     """
19     利用情感倾向分析API来获取返回数据
20     :param text: 输入文本
21     :return response: 返回的响应
22     """
23     if text == '':
24         return ''
25     # 请求接口
26     url = 'https://aip.baidubce.com/oauth/2.0/token'
27     # 需要先获取一个 token
28     client_id = 'xxx'
29     client_secret = 'xxx'
30     params = {
31         'grant_type': 'client_credentials',
32         'client_id': client_id,
33         'client_secret': client_secret
34     }
35     headers = {'Content-Type': 'application/json; charset=UTF-8'}
36     response = requests.post(url=url, params=params, headers=headers).json()
37     access_token = response['access_token']
38
39     # 通用版情绪识别接口
40     url = 'https://aip.baidubce.com/rpc/2.0/nlp/v1/sentiment_classify'
41     # 定制版情绪识别接口
42     # url = 'https://aip.baidubce.com/rpc/2.0/nlp/v1/sentiment_classify_custom'
43     # 使用 token 调用情感倾向分析接口
44     params = {
45         'access_token': access_token
46     }
47     payload = json.dumps({
48         'text': text
49     })
50     headers = {'Content-Type': 'application/json; charset=UTF-8'}
51     response = requests.post(url=url, params=params, data=payload, headers=headers).json()
52     return response
53
54
55 if __name__ == '__main__':
56     print(get_sentiment_result('白日放歌须纵酒,青春作伴好还乡。'))
57     print(get_sentiment_result('思悠悠,恨悠悠,恨到归时方始休。'))
同样,你需要在百度创建应用,配置好你的 client_id 和 client_secret。你也可以运行该脚本进行测试。
python baidu_sentiment.py
{'log_id': 2676765769120607830, 'text': '白日放歌须纵酒,青春作伴好还乡。', 'items': [{'positive_prob': 0.537741, 'confidence': 0.245186, 'negative_prob': 0.462259, 'sentiment': 1}]}
{'log_id': 4078175744151108694, 'text': '思悠悠,恨悠悠,恨到归时方始休。', 'items': [{'positive_prob': 0.345277, 'confidence': 0.232717, 'negative_prob': 0.654723, 'sentiment': 0}]}
关键词提取功能
在这里可以找到讯飞的关键词提取的接口文档和示例代码。同样我也略作了改动,进行了封装。
WebLtp_python3_demo.py 文件代码:
 1 #!/usr/bin/python
 2 # -*- coding: UTF-8 -*-
 3 """
 4 讯飞关键词提取接口
 5 """
 6 import time
 7 import urllib.request
 8 import urllib.parse
 9 import json
10 import hashlib
11 import base64
12
13 # 接口地址
14 url = "http://ltpapi.xfyun.cn/v1/ke"
15 # 开放平台应用ID
16 x_appid = "xxx"
17 # 开放平台应用接口秘钥
18 api_key = "xxx"
19 # 语言文本
20 TEXT = "汉皇重色思倾国,御宇多年求不得。杨家有女初长成,养在深闺人未识。天生丽质难自弃,一朝选在君王侧。"
21
22
23 def get_keyword_result(text):
24     """
25     这是讯飞官方文档给出的示例
26     :param text: 输入文本
27     :return response: 返回对象
28     """
29     if text == '':
30         return ''
31     body = urllib.parse.urlencode({'text': text}).encode('utf-8')
32     param = {"type": "dependent"}
33     x_param = base64.b64encode(json.dumps(param).replace(' ', '').encode('utf-8'))
34     x_time = str(int(time.time()))
35     x_checksum = hashlib.md5(api_key.encode('utf-8') +
36                              str(x_time).encode('utf-8') +
37                              x_param).hexdigest()
38     x_header = {'X-Appid': x_appid,
39                 'X-CurTime': x_time,
40                 'X-Param': x_param,
41                 'X-CheckSum': x_checksum}
42     req = urllib.request.Request(url, body, x_header)
43     result = urllib.request.urlopen(req)
44     result = result.read()
45     return result.decode('utf-8')
46
47
48 if __name__ == '__main__':
49     keyword_result = get_keyword_result(TEXT)
50     print(keyword_result)
51     print(type(keyword_result))
配置好你的 x_appid 和 api_key。
注意:关键词提取还需要你在讯飞应用的后台设置白名单。
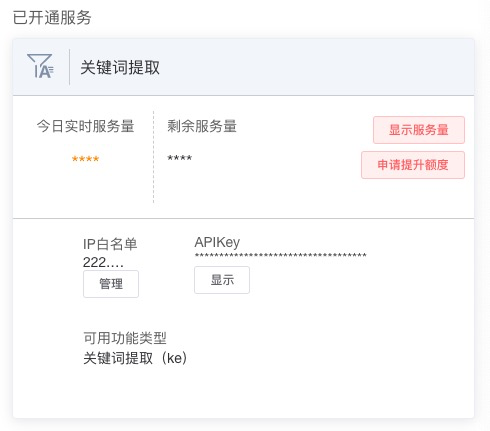
点击管理,配置好自己的公网 IP。试着运行一下脚本,会有如下输出:
python WebLtp_python3_demo.py
{"code":"0","data":{"ke":[{"score":"0.646","word":"汉皇"},{"score":"0.634","word":"御宇"},{"score":"0.633","word":"重色"},{"score":"0.632","word":"王侧"},{"score":"0.628","word":"思倾国"},{"score":"0.601","word":"自弃"},{"score":"0.600","word":"杨家"},{"score":"0.588","word":"深闺人未识"},{"score":"0.588","word":"求不得"},{"score":"0.586","word":"天生丽质"}]},"desc":"success","sid":"ltp000aed03@dx589210907749000100"}
<class 'str'>
把所有功能组合起来
用一个 Demo 把所有功能组合起来,并把结果存储到文件中。
demo.py 如下:
  1 #!/usr/bin/env python
  2 # -*- coding: utf-8 -*-
  3 """
  4 这是主要的demo
  5 流程是:
  6 音频->讯飞语音识别API->文本
  7 文本再作两种处理:
  8     文本->百度情绪识别API->情绪识别的响应
  9     文本->讯飞关键词提取API->关键词提取的响应
 10 """
 11 import sys
 12 import json
 13 from weblfasr_python3_demo import get_text_result
 14 from baidu_sentiment import get_sentiment_result
 15 from WebLtp_python3_demo import get_keyword_result
 16
 17 # 硬编码选定需要离线分析的音频
 18 # 以下是一些测试--------------------------
 19 # SOURCE_PATH = 'input/test.mp3'
 20 # SOURCE_PATH = 'input/test.pcm'
 21 # SOURCE_PATH = 'input/test.m4a'
 22 # SOURCE_PATH = 'input/test.wav'
 23 # 以上是一些测试--------------------------
 24 # 或者,通过命令行参数选定需要离线分析的音频
 25 # 如:python demo.py test.wav
 26 SOURCE_PATH = 'input/' + sys.argv[1]
 27 # STEP 1: 调用讯飞语音识别 API
 28 # 获取讯飞识别出来的响应
 29 TEXT_RESULT = get_text_result(SOURCE_PATH)
 30
 31
 32 def save_file(data, destin):
 33     """
 34     数据持久化函数
 35     :param data: 数据
 36     :param destin: 目标路径
 37     :return: None
 38     """
 39     data = str(data)
 40     if data:
 41         with open(destin, "w", encoding='utf-8') as f:
 42             f.write(data)
 43
 44
 45 def whole_method():
 46     """
 47     将音频文本不作区分地提取(两个人的对话不做区分)
 48     :return: None
 49     """
 50     # 解析语音识别出来的数据
 51     data_list = json.loads(TEXT_RESULT['data'])
 52     # text 用于拼接
 53     text_result = ''
 54     for data in data_list:
 55         text_result += data['onebest']
 56     print('text_result:', text_result)
 57     print('text_result completed')
 58     # 把文本写入到文件中
 59     save_file(text_result, 'output/text_result.txt')
 60     # STEP 2: 情感倾向分析
 61     # 输入文本,使用情绪识别函数获取响应
 62     sentiment_result = get_sentiment_result(text_result)
 63     # 保存数据
 64     save_file(sentiment_result, 'output/sentiment_result.txt')
 65     print('sentiment_result completed')
 66     # STEP 3: 关键词提取
 67     # 输入文本,调用讯飞提取关键词的接口,对文本做关键词提取
 68     keyword_result = get_keyword_result(text_result)
 69     # 保存数据
 70     save_file(keyword_result, 'output/keyword_result.txt')
 71     print('keyword_result completed')
 72
 73
 74 def seperate_method():
 75     """
 76     将音频文本作区分地提取(区分两个人的对话)
 77     :return: None
 78     """
 79     data_list = json.loads(TEXT_RESULT['data'])
 80     text_result1 = ''
 81     text_result2 = ''
 82     # 假设有两个人,把文本分别做整合
 83     for data in data_list:
 84         # print(data)
 85         if data['speaker'] == '1':
 86             text_result1 += data['onebest']
 87         else:
 88             text_result2 += data['onebest']
 89     print('text_result1', text_result1)
 90     print('text_result2', text_result2)
 91     print('text_result1 text_result2 completed')
 92     save_file(text_result1, 'output/text_result1.txt')
 93     save_file(text_result2, 'output/text_result2.txt')
 94     # STEP 2: 情感倾向分析
 95     # 输入文本,使用情绪识别函数获取响应
 96     # A 的对话
 97     sentiment_result1 = get_sentiment_result(text_result1)
 98     save_file(sentiment_result1, 'output/sentiment_result1.txt')
 99     print('result_get_result1 completed')
100     # B 的对话
101     sentiment_result2 = get_sentiment_result(text_result2)
102     save_file(sentiment_result2, 'output/sentiment_result2.txt')
103     print('result_get_result2 completed')
104     # STEP 3: 关键词提取
105     # 调用讯飞接口做文本的关键字提取
106     # A 的对话
107     keyword_result1 = get_keyword_result(text_result1)
108     save_file(keyword_result1, 'output/keyword_result1.txt')
109     print('keyword_result1 completed')
110     # B 的对话
111     keyword_result2 = get_keyword_result(text_result2)
112     save_file(keyword_result2, 'output/keyword_result2.txt')
113     print('keyword_result2 completed')
114
115
116 if __name__ == '__main__':
117     if TEXT_RESULT:
118         whole_method()
119         seperate_method()
输出大致如下:
python demo.py test.mp3
treating...
treating...
treating...
treating...
treating...
The task 8552d13470ed4839b11e0f3693f296f9 is in processing, task status: {"status":2,"desc":"音频合并完成"}
processing...
treating...
...
The task 8552d13470ed4839b11e0f3693f296f9 is in processing, task status: {"status":3,"desc":"音频转写中"}
processing...
treating...
treating...
text_result: 喂喂你好,是xxx的机主是吧?谁?呀我是xxx的工作人员,您在今天中午12点多在我们xxx提交了xxx是吧?那怎么?...那没有关系,我说您是否办理xxx?什么有什么有关系,啊有什么有关系啊。
text_result completed
sentiment_result completed
keyword_result completed
text_result1 喂喂你好,是xxx的机主是吧?呀我是xxx的工作人员,您在今天中午12点多在我们xxx提交了xxx是吧?...那没有关系,我说您是否办理xxx?
text_result2 谁?那怎么?...什么有什么有关系,啊有什么有关系啊。
text_result1 text_result2 completed
result_get_result1 completed
result_get_result2 completed
keyword_result1 completed
keyword_result2 completed
原文作者:雨先生
原文链接:https://www.cnblogs.com/noluye/p/11225024.html
许可协议:知识共享署名-非商业性使用 4.0 国际许可协议