准备工作
搭建DemoApi_III 过程和第一篇中的DemoApi_I 一致
唯一不同在于 appsettings.json 内的 ServiceName 改为demoAPi3 然后 Port 改为 1003、
修改网关配置
configuration.json 内的 ReRoutes添加节点


 // API:demo3
    {
      "UseServiceDiscovery": true,
      "DownstreamPathTemplate": "/api/{url}",
      "DownstreamScheme": "http",
      "ServiceName": "demoAPi3",
      "LoadBalancerOptions": {
        "Type": "LeastConnection"
      },
      "UpstreamPathTemplate": "/demo3/{url}",
      "UpstreamHttpMethod": [ "Get", "Post" ],
      "ReRoutesCaseSensitive": false, // non case sensitive
      //添加身份验证
      "AuthenticationOptions": {
        "AuthenticationProviderKey": "OcelotKey3",
        "AllowedScopes": [ "demoAPi3" ]
      }
    }
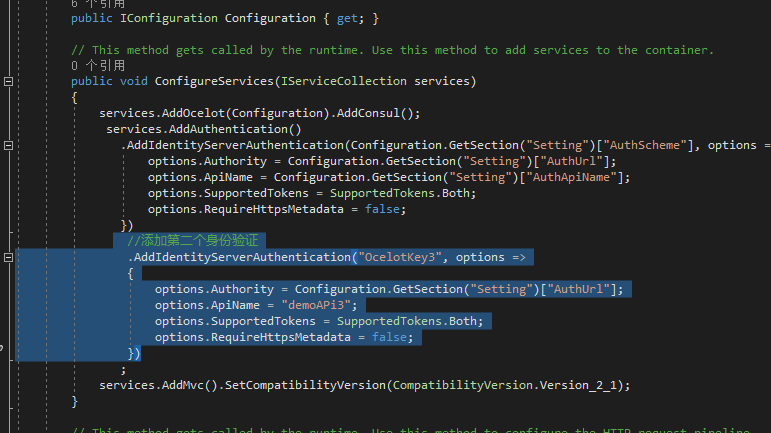
修改 Startup.cs
  //添加第二个身份验证
                .AddIdentityServerAuthentication("OcelotKey3", options =>
                {
                    options.Authority = Configuration.GetSection("Setting")["AuthUrl"];
                    options.ApiName = "demoAPi3";
                    options.SupportedTokens = SupportedTokens.Both;
                    options.RequireHttpsMetadata = false;
                })
如图所示:
此处 未考虑优化配置 demo级别
注意 :
1.apiName内的内容区分大小写 必须和身份验证服务内定义的ApiResources的APIName 名称一致
2.例子中第二个身份验证中的ocelotkey3 必须和第一个不同 即  这个值必须与之前定义的不同
且需要和configuration.json 中 此处的key值相同
身份验证服务修改

完成后即可
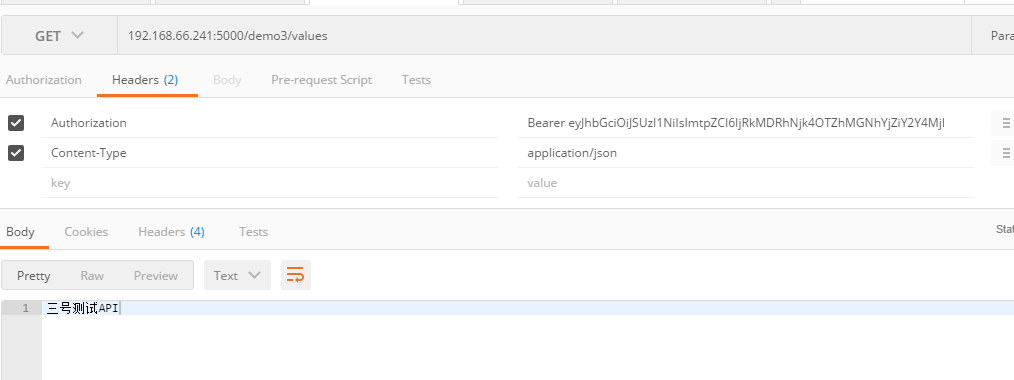
测试