最近项目需要新增一个发布文章的模块,用的是百度的Ueditor富文本编辑器。
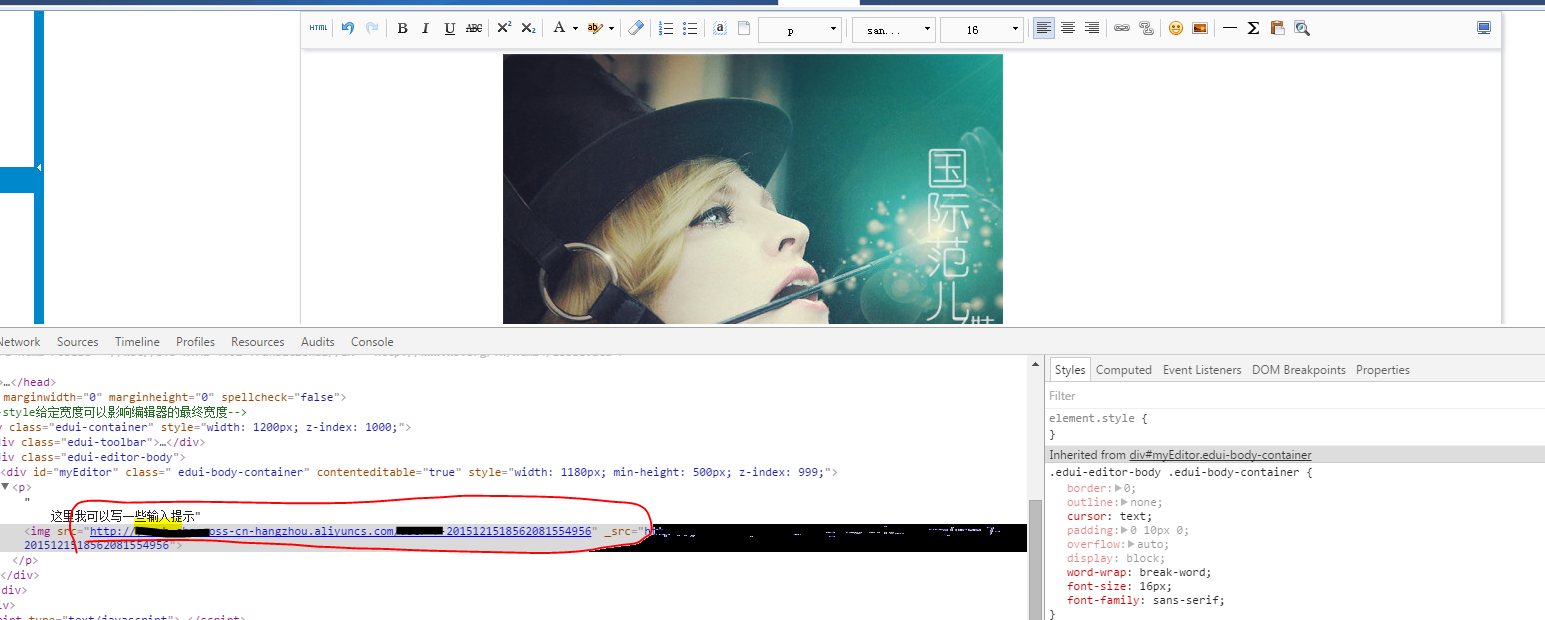
公司用的是阿里云的图片服务器,需要直接把文章中图片上传到服务器上,但是这个编辑器的上传图片是直接上传到Tomcat的根目录。
不能满足要求,尝试改造了一下上传图片的功能。
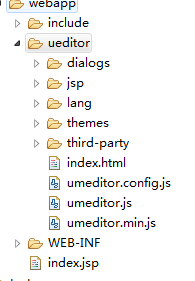
下载下来的编辑器直接导入项目webapp目录下
因为用的是Spring框架,基本已经包含了ueditor需要的几个jar包,所以不需要导入了。

需要注意的是,这个ueditor-1.1.1.jar的这个jar包,其实不需要导入,因为这个包里面就只有一个文件Uploader.java
而在ueditor的jsp目录下已经有了Uploader.java文件,所以直接把这个文件copy到工作区中,访问这个文件就可以了。
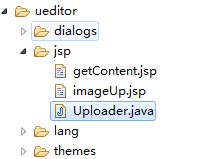
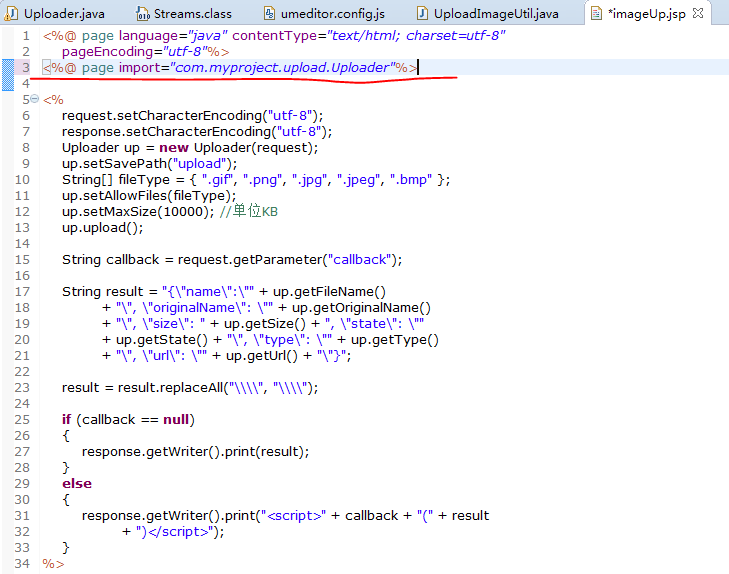
在调用的地方改一下目录
把
<%@ page import="com.baidu.ueditor.um.Uploader" %>
改成
<%@ page import="com.myproject.upload.Uploader"%>
如下图:
然后关键就是要改造一下Uploader.java这个类。
原有上传代码如下:
 1 public void upload() throws Exception {
 2         boolean isMultipart = ServletFileUpload.isMultipartContent(this.request);
 3         if (!isMultipart) {
 4             this.state = this.errorInfo.get("NOFILE");
 5             return;
 6         }
 7         DiskFileItemFactory dff = new DiskFileItemFactory();
 8         String savePath = this.getFolder(this.savePath);
 9         dff.setRepository(new File(savePath));
10         try {
11             ServletFileUpload sfu = new ServletFileUpload(dff);
12             sfu.setSizeMax(this.maxSize * 1024);
13             sfu.setHeaderEncoding("utf-8");
14             FileItemIterator fii = sfu.getItemIterator(this.request);
15             while (fii.hasNext()) {
16                 FileItemStream fis = fii.next();
17                 if (!fis.isFormField()) {
18                     this.originalName = fis.getName().substring(fis.getName().lastIndexOf(System.getProperty("file.separator")) + 1);
19                     if (!this.checkFileType(this.originalName)) {
20                         this.state = this.errorInfo.get("TYPE");
21                         continue;
22                     }
23                     this.fileName = this.getName(this.originalName);
24                     this.type = this.getFileExt(this.fileName);
25                     // 获取了存放文件的相对路径
26                     this.url = savePath + "/" + this.fileName;
27                     BufferedInputStream in = new BufferedInputStream(fis.openStream());
28                     File file = new File(this.getPhysicalPath(this.url));
29                     FileOutputStream out = new FileOutputStream( file );
30                     BufferedOutputStream output = new BufferedOutputStream(out);
31                     // 这里直接在服务器根目录生成了图片文件
32                     Streams.copy(in, output, true);
33                     this.state=this.errorInfo.get("SUCCESS");
34                     this.size = file.length();
35                     //UE中只会处理单张上传,完成后即退出
36                     break;
37                 } else {
38                     String fname = fis.getFieldName();
39                     //只处理title,其余表单请自行处理
40                     if(!fname.equals("pictitle")){
41                         continue;
42                     }
43                     BufferedInputStream in = new BufferedInputStream(fis.openStream());
44                     BufferedReader reader = new BufferedReader(new InputStreamReader(in));
45                     StringBuffer result = new StringBuffer();
46                     while (reader.ready()) {
47                         result.append((char)reader.read());
48                     }
49                     this.title = new String(result.toString().getBytes(),"utf-8");
50                     reader.close();
51
52                 }
53             }
54         } catch (SizeLimitExceededException e) {
55             this.state = this.errorInfo.get("SIZE");
56         } catch (InvalidContentTypeException e) {
57             this.state = this.errorInfo.get("ENTYPE");
58         } catch (FileUploadException e) {
59             this.state = this.errorInfo.get("REQUEST");
60         } catch (Exception e) {
61             this.state = this.errorInfo.get("UNKNOWN");
62         }
63     }
改造后如下:
 1     // 改造后的代码,百度原有代码注释了
 2     public void upload() throws Exception
 3     {
 4         boolean isMultipart = ServletFileUpload.isMultipartContent(this.request);
 5         if (!isMultipart)
 6         {
 7             this.state = this.errorInfo.get("NOFILE");
 8             return;
 9         }
10         try
11         {
12             MultipartResolver resolver = new CommonsMultipartResolver(
13                     this.request.getSession().getServletContext());
14             MultipartHttpServletRequest multipartRequest = resolver.resolveMultipart(request);
15             CommonsMultipartFile orginalFile = (CommonsMultipartFile) multipartRequest.getFile("upfile");
16
17             this.originalName = orginalFile.getOriginalFilename();
18             if (!this.checkFileType(this.originalName))
19             {
20                 this.state = this.errorInfo.get("TYPE");
21                 return;
22             }
23             this.type = this.getFileExt(this.originalName);
24             this.size = orginalFile.getSize();
25
26             // 这里是公司内部上传到阿里云服务器的工具类
27             String key = ImgUtils.uploadImage("xxxx",
28                     ImageKind.Picture,
29                     orginalFile.getInputStream(),
30                     this.size);
31
32             this.fileName = key;
33             this.url = "http://xxx.aliyuncs.com/" + key;
34             this.state = this.errorInfo.get("SUCCESS");
35         }
36         catch (Exception e)
37         {
38             this.state = this.errorInfo.get("UNKNOWN");
39         }
40     }
用到了Spring的这两个文件
import org.springframework.web.multipart.commons.CommonsMultipartFile;
import org.springframework.web.multipart.commons.CommonsMultipartResolver;
然后编辑器页面上显示的时候,img的src目录需要改一下
 1         callback: function (editor, $w, url, state) {
 2
 3             if (state == "SUCCESS") {
 4                 //显示图片计数+1
 5                 Upload.showCount++;
 6                 var $img = $("<img src='" + editor.options.imagePath + url + "' class='edui-image-pic' />"),
 7                 var $img = $("<img src='" + url + "' class='edui-image-pic' />"),
 8                     $item = $("<div class='edui-image-item edui-image-upload-item'><div class='edui-image-close'></div></div>").append($img);
 9
10                 if ($(".edui-image-upload2", $w).length < 1) {
11                     $(".edui-image-content", $w).append($item);
12
13                     Upload.render(".edui-image-content", 2)
14                         .config(".edui-image-upload2");
15                 } else {
16                     $(".edui-image-upload2", $w).before($item).show();
17                 }
18
19                 $img.on("load", function () {
20                     Base.scale(this, 120);
21                     Base.close($(this));
22                     $(".edui-image-content", $w).focus();
23                 });
24
25             } else {
26                 currentDialog.showTip( state );
27                 window.setTimeout( function () {
28
29                     currentDialog.hideTip();
30
31                 }, 3000 );
32             }
33
34             Upload.toggleMask();
35
36         }
大功告成。