前面主要是后台代码,spring以及mybatis的整合
下面主要是springmvc用来处理请求转发,展现层的处理
之前所有做到的,完成了后台,业务层和持久层的开发完成了
接下来就是展现层了
有很多的mvc框架,这里我们用springMVC
首先还是需要jar包
我们既然是web项目了
也是不可少的,所以需要增加这两个包
我们需要配置web.xml
一个web项目,启动的时候,容器这里指的是tomcat这种,会首先读取web.xml配置文件里面的配置
所以他是最根本的配置文件
spring的配置需要在这里设置下,我们用的tomcat容器就可以自动启动我们的spring容器了
<?xml version="1.0" encoding="UTF-8"?>
<web-app xmlns:xsi="http://www.w3.org/2001/XMLSchema-instance"
xmlns="http://java.sun.com/xml/ns/javaee"
xsi:schemaLocation="http://java.sun.com/xml/ns/javaee http://java.sun.com/xml/ns/javaee/web-app_3_0.xsd"
id="WebApp_ID"
version="3.0">
<!-- 1,从类路径下加载spring的配置文件,classpath关键字特指类路径下加载 -->
<context-param>
<param-name>contextConfigLocation</param-name>
<param-value>classpath:applicationContext.xml</param-value>
</context-param>
<!--2,负责启动spring容器的监听器,它将引用1处的上下文参数,获得spring配置文件的地址 -->
<listener>
<listener-class>
org.springframework.web.context.ContextLoaderListener
</listener-class>
</listener>
</web-app>
1. 首先是我们通过web.xml的上下文参数,指定配置文件的路径
2. 然后就是指定Spring所提供的ContextLoaderListener的web容器监听器
该监听器在web容器启动的时候自动启动,根据1 处的参数的值,获取配置文件路径,读取配置文件,并且启动spring
还需要配置servlet截获URL请求
<servlet>
<servlet-name>bbs</servlet-name>
<servlet-class>org.springframework.web.servlet.DispatcherServlet</servlet-class>
<init-param>
<param-name>contextConfigLocation</param-name>
<param-value>classpath:springmvc.xml</param-value>
</init-param>
<load-on-startup>1</load-on-startup>
</servlet>
注意:
配置了servlet,还需要有一个配置文件,这个配置文件
默认为WEB-INF目录下,名称为[<servlet-name>]-servlet.xml
下面这个,就是指定了配置文件的名字和位置
说白了就是,配置了servlet需要有一个对照的配置文件,要么按照人家默认规范的位置和名字写一个
要么就自己规定一个名字和位置
建议自定义一个
我们还要定义拦截的请求不是么
<servlet-mapping>
<servlet-name>bbs</servlet-name>
<url-pattern>*.do</url-pattern>
</servlet-mapping>
这个就是了,名字自然就是我们的servlet名字,匹配的就是.do结尾的,按道理来说,你设置成啥都是可以的
所以我们的web.xml
<?xml version="1.0" encoding="UTF-8"?>
<web-app xmlns:xsi="http://www.w3.org/2001/XMLSchema-instance"
xmlns="http://java.sun.com/xml/ns/javaee"
xsi:schemaLocation="http://java.sun.com/xml/ns/javaee http://java.sun.com/xml/ns/javaee/web-app_3_0.xsd"
id="WebApp_ID"
version="3.0">
<!-- 1,从类路径下加载spring的配置文件,classpath关键字特指类路径下加载 -->
<context-param>
<param-name>contextConfigLocation</param-name>
<param-value>classpath:applicationContext.xml</param-value>
</context-param>
<!--2,负责启动spring容器的监听器,它将引用1处的上下文参数,获得spring配置文件的地址 -->
<listener>
<listener-class>
org.springframework.web.context.ContextLoaderListener
</listener-class>
</listener>
<servlet>
<servlet-name>bbs</servlet-name>
<servlet-class>org.springframework.web.servlet.DispatcherServlet</servlet-class>
<init-param>
<param-name>contextConfigLocation</param-name>
<param-value>classpath:springmvc.xml</param-value>
</init-param>
<load-on-startup>1</load-on-startup>
</servlet>
<servlet-mapping>
<servlet-name>bbs</servlet-name>
<url-pattern>*.do</url-pattern>
</servlet-mapping>
</web-app>
springmvc.xml内容为
<?xml version="1.0" encoding="UTF-8"?>
<beans xmlns="http://www.springframework.org/schema/beans"
xmlns:mvc="http://www.springframework.org/schema/mvc"
xmlns:xsi="http://www.w3.org/2001/XMLSchema-instance"
xmlns:p="http://www.springframework.org/schema/p"
xmlns:context="http://www.springframework.org/schema/context"
xsi:schemaLocation="http://www.springframework.org/schema/beans
http://www.springframework.org/schema/beans/spring-beans-4.2.xsd
http://www.springframework.org/schema/context
http://www.springframework.org/schema/context/spring-context-4.2.xsd
http://www.springframework.org/schema/mvc
http://www.springframework.org/schema/mvc/spring-mvc-4.2.xsd">
<!-- 自动扫描带有@Controller注解的控制层,注入为bean -->
<context:component-scan base-package="com.bbs.web" />
<bean class="org.springframework.web.servlet.view.InternalResourceViewResolver">
<property name="prefix" value="/WEB-INF/views/" />
<property name="suffix" value=".jsp" />
</bean>
</beans>
配置好了之后,我们该开始写controller了
先写一个测试用的最基本的
在我们之前的web目录下面,我们新建一个class,名字为,LoginController
package com.bbs.web;
import javax.servlet.http.HttpServletRequest;
import org.springframework.beans.factory.annotation.Autowired;
import org.springframework.stereotype.Controller;
import org.springframework.web.bind.annotation.RequestMapping;
import com.bbs.service.UserService;
@Controller
public class LoginController {
@Autowired
private UserService userService;
@RequestMapping(value="/login")
public String toLoginPage(){
return "login";
}
}
@controller是controller的注解哈
我们返回一个视图
视图的名字是login
还记得么,我们在servlet的配置文件中,本项目中就是springmvc.xml中,配置了,页面文件的
位置
前缀后缀哦
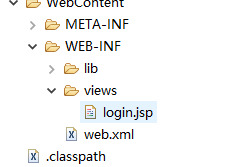
然后我们需要按照我们自己指定的位置,创建一个jsp文件,命名为login.jsp
<%@ page language="java" contentType="text/html; charset=UTF-8"
pageEncoding="UTF-8"%>
<!DOCTYPE html PUBLIC "-//W3C//DTD HTML 4.01 Transitional//EN" "http://www.w3.org/TR/html4/loose.dtd">
<html>
<head>
<meta http-equiv="Content-Type" content="text/html; charset=UTF-8">
<title>标题</title>
</head>
<body>
这个是首页
</body>
</html>
如上我们就写了一行代码作为测试
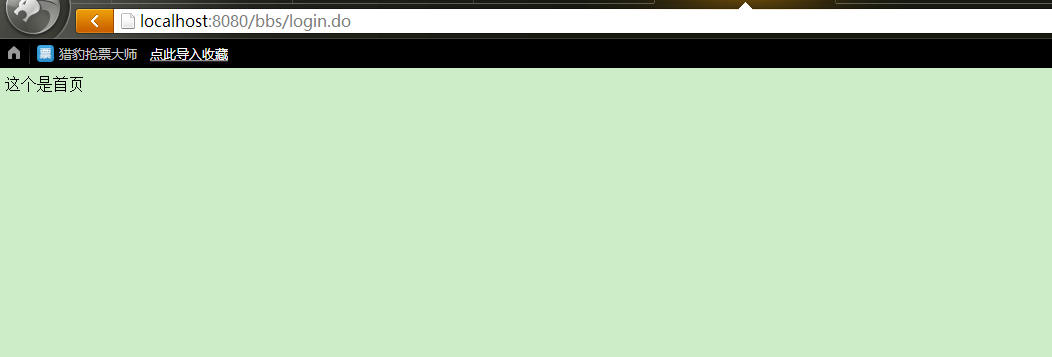
至此,我们的整个的过程就搭建好了,运行一下
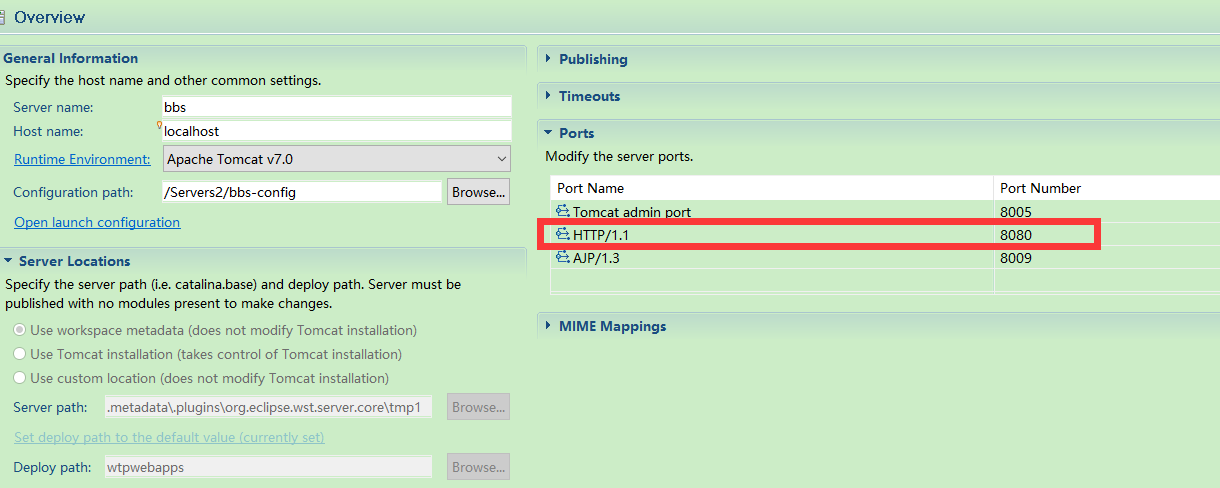
eclipse配置下tomcat,项目添加进去(右键 new server 创建一个server选择你电脑上安装好的tomcat即可)
http://localhost:8080/bbs/login.do
页面经过配置的servlet拦截,走到controller,controller帮我们找到页面
成功走通了
http://localhost:8080/bbs/login.do
8080这个是server的配置,看准端口哈,如果是修改成80的话,就不用写了可以省略
bbs是我们的项目的名字
login是我们的controller中的配置
do是配置文件中的后缀
spring原理 实践解析-简单的helloworld
spring原理案例-基本项目搭建 01 spring framework 下载 官网下载spring jar包
spring原理案例-基本项目搭建 02 spring jar包详解 spring jar包的用途
spring原理案例-基本项目搭建 03 创建工程运行测试 spring ioc原理实例示例
springmvc整合mybatis完整项目示例
springmvc 项目完整示例01 需求与数据库表设计 简单的springmvc应用实例 web项目
springmvc 项目完整示例02 项目创建-eclipse创建动态web项目 配置文件 junit单元测试
springmvc 项目完整示例04 整合mybatis mybatis所需要的jar包 mybatis配置文件 sql语句 mybatis应用
springmvc 项目完整示例05 日志 --log4j整合 配置 log4j属性设置 log4j 配置文件 log4j应用
springmvc 项目完整示例06 日志–log4j 参数详细解析 log4j如何配置
springmvc 项目完整示例07 设置配置整合springmvc springmvc所需jar包springmvc web.xml文件配置
springmvc 项目完整示例08 前台页面以及知识点总结
maven项目整合springmvc整合mybatis


