ng基础命令新建项目npm install –g @angular/cli
npm install -g @angular/cli@latestng serve –prot –aot 启动项目并压缩项目文件ng build 项目打包命令,也可以加上–prot –aot
ng new 项目名称//示例ng new angular-hello-word它将运行一段时间,进行npm依赖的安装,安装成功后我们将看到
Installed packages for tooling via npm.
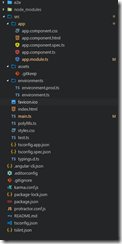
使用vs code打开刚刚创建项目的文件夹
- 运行应用
ng serve编译并运行应用,如果一切正常会出现以下信息
端口被占用错误,请使用
ng serve --port 4211
//4211为替换默认4200的端口
出现以下消息表示运行成功:
- 制作Component(组件)
执行命令创建组件
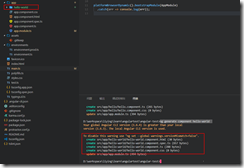
ng generate component hello-world// hello-world为组件名创建好后:
最基本的组件分为两部分:
- Component注解
- 组件定义类
组件代码讲解:
import { Component, OnInit } from '@angular/core';


// 1.import语句定义了我们写代码时要用到的那些模块。这里导入了Component和OnInit

// 2.我们从"@angular@/core"模块中导入了组件 { Component, OnInit }

// 3."@angular@/core"告诉程序到哪里查找这些依赖,新建的这个项目中定"@angular@/core"定义并导出了两个js/ts对象,分别是 { Component, OnInit } ]

// 4.OnInit能帮我们在组件的初始话阶段运行某些代码。如属性初始化
引入语法为:
import {things} from wherever导入依赖后我们还要声明组件:
@Component({
  selector: 'app-hello-world',
  templateUrl: './hello-world.component.html',
  styleUrls: ['./hello-world.component.css']
})

//1.我们可以把注解看做是添加到代码上的元数据.挡在hellowerld类上使用@Component时,就把helloworld“装饰”成了一个Component

//2.<app-hello-world>标签表示我们希望在html中使用该组件.要实现它,就得配置@Component并把selector指定为<app-hello-world
- 加载组件
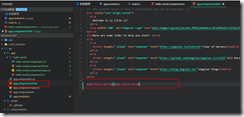
把<app-hello-world></app-hello-world>标签添加到app.component.html中


