看本文前最好对第二章(Mapping and Views)中的Map和View类有理解。
视图类有一个属性是Popup类型的popup,查阅API知道这个就是视图的弹窗,每一个View的实例都有一个popup。
这个popup属性在View对象实例化的时候就实例化了的,即随着View的出生,它也会出生,它拥有默认的样子,它显示的文字也是默认的样式。
我们看看Popup这个类:
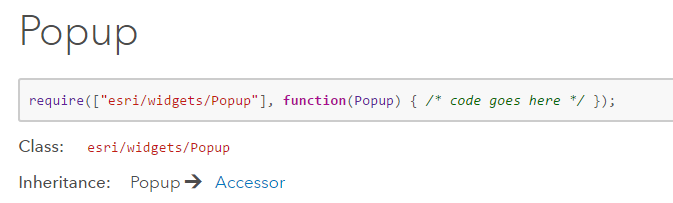
直接继承自Accessor,位于widgets模块下,说明Popup(弹窗)也是小部件的一种。但是为什么要单独拿出来讲呢?可能用法上比较复杂吧。
如果用户对弹窗有更高的样式要求,官方的说法是
可以自己new一个Popup对象,替换掉view默认的popup即可。
其实Popup有个兄弟类,叫PopupTemplate,它长得很像Popup,但是在功能上更服务于Layer和Graphic,即地理数据,而且也是高度可自定义的,在下一节会细说这两个的区别。
说完了Popup这个新玩意儿,我就来说说第一个例子吧!
它的功能就是点击View上的一个地方,就会弹出一个小窗,显示经纬度和其他信息。
引用
直接给:
require(
    [
      "esri/tasks/Locator",
      "esri/Map",
      "esri/views/MapView",
      "dojo/domReady!"
    ],
    function(){}
);
函数参数中因为Map和View 对象是经常性出现的,所以就用 var map = new Map(...);代替了(以后也是)
所以函数参数的关键代码是:
function(Locator, Map, MapView){
        var map = new Map(...);
        var view = new MapView(...);
        var locatorTask = new Locator({
            url : "https://geocode.arcgis.com/arcgis/rest/services/World/GeocodeServer";
     });
        view.on("click", funcion(event){...})
}
locatorTask是一个Locator类的对象,用于定位服务。这个不用知道太详细,因为本例中重点并不是它。
重点应该是view的事件“click”,写法同上,但是事件的方法体没有写完整。
我们就来看看这个事件的方法体具体是什么:
function(event){
        //获取经纬度
        var lat = Math.round(event.mapPoint.latitude * 1000) / 1000;
        var lon = Math.round(event.mapPoint.longitude * 1000) / 1000;
        view.popup.open({
            title: "Reverse geocode: [" + lon + ", " + lat + "]",
            location: event.mapPoint
        });

        //定位服务,可以省略,不是本例中的主要内容
        locatorTask.locationToAddress(event.mapPoint)
        .then(function(response) {
          var address = response.address.Match_addr;
          view.popup.content = address;
        })
        .otherwise(function(err) {
          view.popup.content =
            "No address was found for this location";
        });
}
我们看到了,从click事件的event参数中获取到了lat和lon,即经纬度,用Math.round方法对数字进行了一定的处理。
然后关键的一句:
view.popup.open({...});
我们先不说这个是什么,但是肯定是一个方法。
下面的then()方法,是Locator对象的locationToAddress方法的Promise返回对象的回调,用于获取地址成功后把地址显示到popup上。
关键的一句:
view.popup.content = address;
在下面otherwise()方法也有类似的。
现在,我们转到Popup这个类的定义。
Popup类
继承自Accessor类
主要属性:actions(Collection类型)、content(String或Node类型)、location(Point类型)、title(String类型)...
主要方法:open()、destroy()...
看得出,上面的代码使用了open方法,content属性、location属性、title属性。
open方法会把popup的visible属性改为true,然后显示到指定的位置:location。
是不是很简单呢?
更深一层的理解,既然能open,那么肯定是有这个实例的,更说明了popup这个属性是一个对象,在View实例化的时候就完成了实例化。
对其content、title属性进行设置就可以在弹出窗中看到想要的内容和标题了。
总结一下。
1. View对象自带Popup实例,并随着View对象实例化而实例化。
2. Popup使用open()方法显示出来,接受location、title、content等可选参数以指定内容、弹窗点等。
最后给个图:
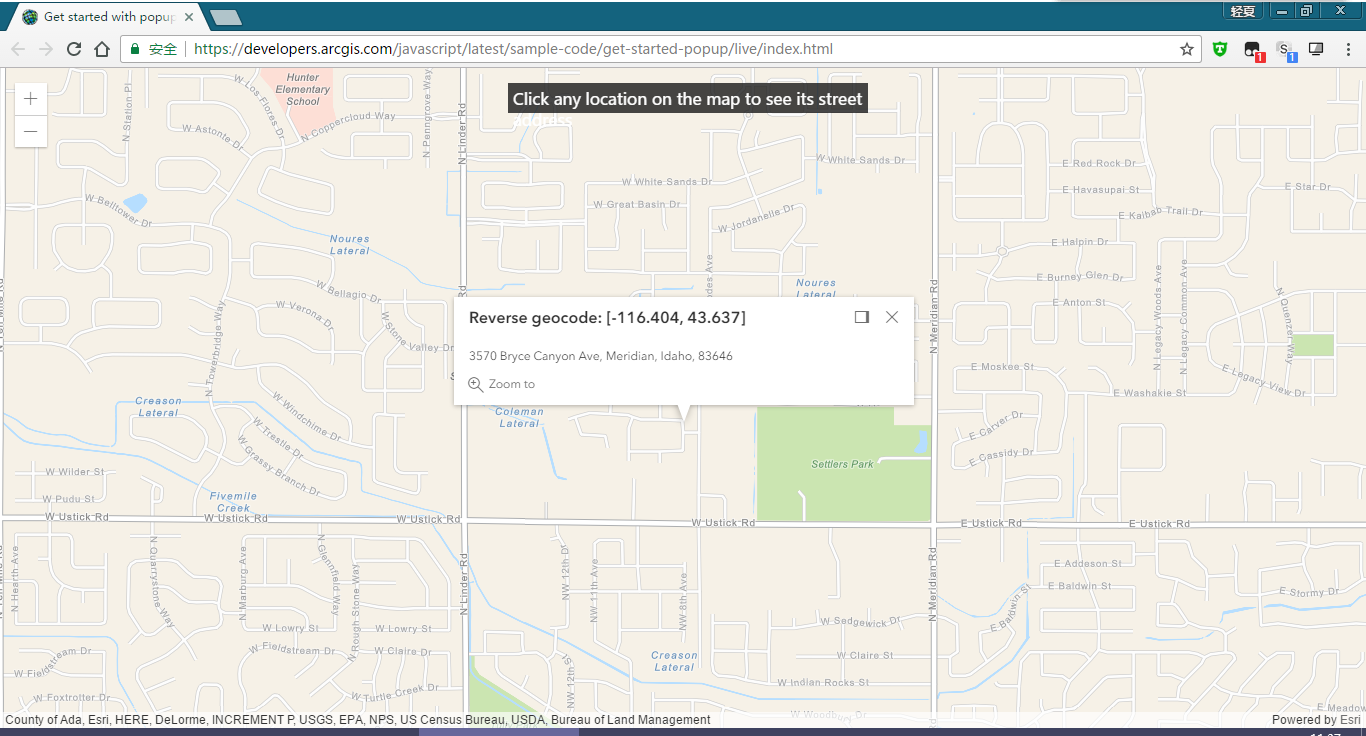
很显而易见。
给出官方的源代码(没有删除注释)


<!DOCTYPE html>
<html>
<head>
  <meta charset="utf-8">
  <meta name="viewport" content="initial-scale=1,maximum-scale=1,user-scalable=no">
  <title>Get started with popups - 4.2</title>

  <style>
    html,
    body,
    #viewDiv {
      padding: 0;
      margin: 0;
      height: 100%;
      width: 100%;
    }

    #instruction {
      z-index: 99;
      position: absolute;
      top: 15px;
      left: 50%;
      padding: 5px;
      margin-left: -175px;
      height: 20px;
      width: 350px;
      background: rgba(25, 25, 25, 0.8);
      color: white;
    }
  </style>

  <link rel="stylesheet" href="https://js.arcgis.com/4.2/esri/css/main.css">
  <script src="https://js.arcgis.com/4.2/"></script>

  <script>
    require([
      "esri/tasks/Locator",
      "esri/Map",
      "esri/views/MapView",
      "dojo/domReady!"
    ], function(
      Locator,
      Map,
      MapView
    ) {

      // Set up a locator task using the world geocoding service
      var locatorTask = new Locator({
        url: "https://geocode.arcgis.com/arcgis/rest/services/World/GeocodeServer"
      });

      // Create the Map
      var map = new Map({
        basemap: "streets-navigation-vector"
      });

      // Create the MapView
      var view = new MapView({
        container: "viewDiv",
        map: map,
        center: [-116.3031, 43.6088],
        zoom: 12
      });

      /*******************************************************************
       * This click event sets generic content on the popup not tied to
       * a layer, graphic, or popupTemplate. The location of the point is
       * used as input to a reverse geocode method and the resulting
       * address is printed to the popup content.
       *******************************************************************/
      view.on("click", function(event) {
        // Get the coordinates of the click on the view
        var lat = Math.round(event.mapPoint.latitude * 1000) / 1000;
        var lon = Math.round(event.mapPoint.longitude * 1000) / 1000;

        view.popup.open({
          // Set the popup's title to the coordinates of the location
          title: "Reverse geocode: [" + lon + ", " + lat + "]",
          location: event.mapPoint // Set the location of the popup to the clicked location
        });

        // Display the popup
        // Execute a reverse geocode using the clicked location
        locatorTask.locationToAddress(event.mapPoint).then(function(
          response) {
          // If an address is successfully found, print it to the popup's content
          var address = response.address.Match_addr;
          view.popup.content = address;
        }).otherwise(function(err) {
          // If the promise fails and no result is found, print a generic message
          // to the popup's content
          view.popup.content =
            "No address was found for this location";
        });
      });
    });
  </script>
</head>

<body>
  <div id="viewDiv"></div>
  <div id="instruction">Click any location on the map to see its street address</div>
</body>

</html>