不废话,实际操作中学习!!!
myeclipse版本
首先创建一个工程,添加上Spring的jar包。
右键工程名称,选择"MyEclipse"->"Add Spring Capabilites",如下图:
 。
。
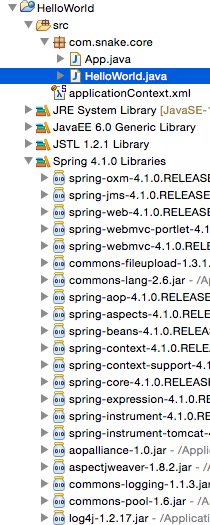
创建包 com.snake.core
包下面创建2个文件
1.App.class
2.Helloworld.class
工程结构图如下:

因为myeclipse版本问题,所以加入的Spring的jar包版本会不一致,前期学习没有影响。
Helloworld.class内容:
package com.snake.core;

public class HelloWorld {
    private String name;
    public void setName(String name) {
        this.name = name;
    }
    public void printHello() {
        System.out.println("Spring  : Hello ! " + name);
    }
}
App.class内容:
package com.snake.core;

import org.springframework.context.ApplicationContext;
import org.springframework.context.support.ClassPathXmlApplicationContext;

public class App {
    public static void main(String[] args) {
        ApplicationContext context = new ClassPathXmlApplicationContext(
                "applicationContext.xml"); HelloWorld obj = (HelloWorld) context.getBean("helloBean");
        obj.printHello();
    }
}
Spring配置文件内容
<beans xmlns="http://www.springframework.org/schema/beans"
    xmlns:xsi="http://www.w3.org/2001/XMLSchema-instance"
    xsi:schemaLocation="http://www.springframework.org/schema/beans
    http://www.springframework.org/schema/beans/spring-beans-4.1.xsd">
<!--特别提示,如果加入的spring的jar包版本不同,最后一行的spring-beans-?.?.xsd 需要进行对应的修改 像我目前的版本是4.1所以 我的文件上面是spring-beans-4.1.xsd-->


    <bean id="helloBean" class="com.snake.core.HelloWorld">
        <property name="name" value="Snake" />
    </bean>ß

</beans>
运行java控制台程序结果如下:

如果结果一样,那么恭喜你第一次使用spring进行一个helloworld工程成功。