一、Python生成器/迭代器
|
1
2
3
4
5
6
7
8
9
10
11
12
|
#!/bin/env python# -*- coding:utf-8 -*-def shaw(n): start = 0 while True: if start > n: return yield start # yield生成数据 start += 1for i in shaw(10): # for循环就为一个迭代器,访问数据(通过next一次一次去取) print(i) |
二、Python常用模块
a.自定义模块,第三方模块,内置模块
b.内置模块是Python自带的功能,在使用内置模块相应的功能时,需要【先导入】再【使用】
c.模块的搜索路径(优先搜索当前路径),接着查找初始化时使用python path环境变量的值
d.模块导入方法:
import 模块名
import module
from module.xx.xx import xx
from module.xx.xx import xx as rename
from module.xx.xx import *
e.添加模块路径
sys.path.append(‘path’)
1、time
时间相关的操作,时间有三种表示方式:
时间戳 1970年1月1日之后的秒,即:time.time()
格式化的字符串 2014-11-11 11:即:time.strftime('%Y-%m-%d')
结构化时间 元组包含了:年、日、星期等...time.struct_time 即:time.localtime()
|
1
2
3
4
5
6
7
8
9
10
11
12
13
14
15
16
17
18
19
20
|
>>> import time>>> time.time() # 1970年1月1日到现在经过的秒1466993850.1074505>>> time.ctime() # 当前日期时间(字符串格式)'Mon Jun 27 10:22:24 2016'>>> time.gmtime() # 格式化获取当前日期时间time.struct_time(tm_year=2016, tm_mon=6, tm_mday=27, tm_hour=2, tm_min=23, tm_sec=47, tm_wday=0, tm_yday=179, tm_isdst=0)>>> cuur = time.gmtime()>>> print('%s-%s-%s'%(cuur.tm_year,cuur.tm_mon,cuur.tm_mday))2016-6-27>>> time.strftime('%Y-%m-%d') # 格式化当前日期'2016-06-27'>>> time.strftime('%Y-%m-%d %H:%M:%S')'2016-06-27 10:26:01'>>> time.strptime('2016-06-12','%Y-%m-%d') # 将字符串格式转换成struct_time格式time.struct_time(tm_year=2016, tm_mon=6, tm_mday=12, tm_hour=0, tm_min=0, tm_sec=0, tm_wday=6, tm_yday=164, tm_isdst=-1) |
2.datetime
|
1
2
3
4
5
6
7
8
9
10
11
12
13
14
15
16
17
18
19
20
21
22
23
24
25
26
27
28
29
30
31
32
33
34
35
36
37
38
39
|
>>> import datetime'''datetime.date:表示日期的类。常用的属性有year, month, daydatetime.time:表示时间的类。常用的属性有hour, minute, second, microseconddatetime.datetime:表示日期时间datetime.timedelta:表示时间间隔,即两个时间点之间的长度timedelta([days[, seconds[, microseconds[, milliseconds[, minutes[, hours[, weeks]]]]]]])strftime("%Y-%m-%d")'''>>> s = datetime.datetime.now() # 获取当前时间>>> s.strftime('%Y-%m-%d %H:%M:%S')'2016-06-27 10:29:37>>> s.strftime('%x') # 获取当前日期'06/27/16'>>> s = datetime.date.today()>>> print(s)2016-06-27>>> s.strftime('%X') # 获取当前时间'00:00:00'>>> s.strftime('%w') # 获取今天是这周的第几天'1'>>> s.strftime('%U') # 获取本周是今年的第几周'26'>>> s.strftime('%j') # 获取今天是今年的第几天'179'>>> s = datetime.datetime.now() - datetime.timedelta(days=10) # 比现在少十天>>> print(s)2016-06-17 10:40:32.001361>>> s = datetime.datetime.now() - datetime.timedelta(hours=10) # 比现在少十小时>>> print(s)2016-06-27 00:41:26.448903 |
3.sys
用于提供对解释器相关的操作
|
1
2
3
4
5
6
7
8
9
10
11
12
13
14
15
16
17
18
|
import sys'''sys.argv 命令行参数List,第一个元素是程序本身路径sys.exit(n) 退出程序,正常退出时exit(0)sys.version 获取Python解释程序的版本信息sys.maxint 最大的Int值sys.path 返回模块搜索路径(优先搜索当前路径),初始化时使用PYTHON环境变量的值sys.platform 返回操作系统平台名称(windows为win32)sys.stdout 输出到屏幕相关'''# 输出进度条import sys,timefor i in range(5): sys.stdout.write('#') time.sleep(0.5) sys.stdout.flush()C:Python35python.exe H:/PyCharm/Python/PY_learn/lx3.py##### |
4.os
用于提供系统级别的操作
|
1
2
3
4
5
6
7
8
9
10
11
12
13
14
15
16
17
18
19
20
21
22
23
24
25
26
27
28
29
30
31
|
'''os.getcwd() 获取当前工作目录,即当前python脚本工作的目录路径os.chdir("dirname") 改变当前脚本工作目录;相当于shell下cdos.curdir 返回当前目录: ('.')os.pardir 获取当前目录的父目录字符串名:('..')os.makedirs('dirname1/dirname2') 可生成多层递归目录os.removedirs('dirname1') 若目录为空,则删除,并递归到上一级目录,如若也为空,则删除,依此类推os.mkdir('dirname') 生成单级目录;相当于shell中mkdir dirnameos.rmdir('dirname') 删除单级空目录,若目录不为空则无法删除,报错;相当于shell中rmdir dirnameos.listdir('dirname') 列出指定目录下的所有文件和子目录,包括隐藏文件,并以列表方式打印os.remove() 删除一个文件os.rename("oldname","newname") 重命名文件/目录os.stat('path/filename') 获取文件/目录信息os.sep 输出操作系统特定的路径分隔符,win下为"\",Linux下为"/"os.linesep 输出当前平台使用的行终止符,win下为"
",Linux下为"
"os.pathsep 输出用于分割文件路径的字符串os.name 输出字符串指示当前使用平台。win->'nt'; Linux->'posix'os.system("bash command") 运行shell命令,直接显示os.environ 获取系统环境变量os.path.abspath(path) 返回path规范化的绝对路径os.path.split(path) 将path分割成目录和文件名二元组返回os.path.dirname(path) 返回path的目录。其实就是os.path.split(path)的第一个元素os.path.basename(path) 返回path最后的文件名。如何path以/或结尾,那么就会返回空值。即os.path.split(path)的第二个元素os.path.exists(path) 如果path存在,返回True;如果path不存在,返回Falseos.path.isabs(path) 如果path是绝对路径,返回Trueos.path.isfile(path) 如果path是一个存在的文件,返回True。否则返回Falseos.path.isdir(path) 如果path是一个存在的目录,则返回True。否则返回Falseos.path.join(path1[, path2[, ...]]) 将多个路径组合后返回,第一个绝对路径之前的参数将被忽略os.path.getatime(path) 返回path所指向的文件或者目录的最后存取时间os.path.getmtime(path) 返回path所指向的文件或者目录的最后修改时间''' |
5.hashlib
用于加密相关的操作,代替了md5模块和sha模块,主要提供 SHA1, SHA224, SHA256, SHA384, SHA512 ,MD5 算法
|
1
2
3
4
5
6
7
8
9
10
11
12
13
14
15
16
17
18
19
20
21
22
23
24
25
26
27
28
29
30
31
32
33
|
>>> import hashlib######## md5加密:(不能反解) ########>>> ret = hashlib.md5()>>> ret.update(bytes('admin', encoding='utf-8'))>>> print(ret.hexdigest()) # md5加密后数据21232f297a57a5a743894a0e4a801fc3>>> print(ret.digest()) b'!#/)zWxa5xa7Cx89Jx0eJx80x1fxc3'######## sha1加密 ########>>> ret = hashlib.sha1()>>> ret.update(bytes('admin', encoding='utf-8'))>>> print(ret.hexdigest())d033e22ae348aeb5660fc2140aec35850c4da997######## sha256加密 ########>>> ret = hashlib.sha256()>>> ret.update(bytes('admin', encoding='utf-8'))>>> print(ret.hexdigest())8c6976e5b5410415bde908bd4dee15dfb167a9c873fc4bb8a81f6f2ab448a918######## sha384加密 ########>>> ret = hashlib.sha384()>>> ret.update(bytes('admin', encoding='utf-8'))>>> print(ret.hexdigest())9ca694a90285c034432c9550421b7b9dbd5c0f4b6673f05f6dbce58052ba20e4248041956ee8c9a2ec9f10290cdc0782######## sha512加密 ########>>> ret = hashlib.sha512()>>> ret.update(bytes('admin', encoding='utf-8'))>>> print(ret.hexdigest())c7ad44cbad762a5da0a452f9e854fdc1e0e7a52a38015f23f3eab1d80b931dd472634dfac71cd34ebc35d16ab7fb8a90c81f975113d6c7538dc69dd8de9077ec |
以上加密算法虽然依然非常厉害,但时候存在缺陷,即:通过撞库可以反解。所以,有必要对加密算法中添加自定义key再来做加密
|
1
2
3
4
5
|
>>> import hashlib>>> ret = hashlib.md5(bytes('898oaFs09f',encoding="utf-8"))>>> ret.update(bytes('admin',encoding="utf-8"))>>> print(ret.hexdigest())67929daefab29024d18340945036e291 |
Python内置还有一个 hmac 模块,它内部对我们创建 key 和 内容 进行进一步的处理然后再加密
|
1
2
3
4
5
|
>>> import hmac>>> ret = hmac.new(bytes('898oaFs09f',encoding="utf-8"))>>> ret.update(bytes('admin',encoding="utf-8"))>>> print(ret.hexdigest())17186c513df61e8b3fb4a134f474b130 |
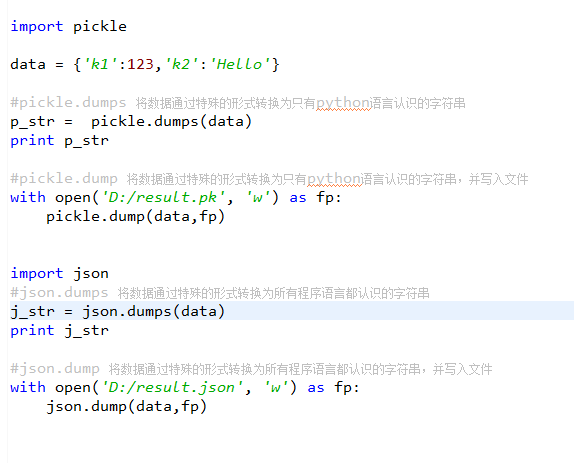
6.pickle,json
用于【python特有的类型】 和 【python基本数据类型】间进行转换
pickle模块提供了四个功能:dumps、dump、loads、load
pickle.dumps将数据通过特殊的形式转换为只有python语言认识的字符串
pickle.dump将数据通过特殊的形式转换为只有python语言认识的字符串,并写入文件
pickle.loads用于将形似字典,列表,元祖样式的字符串,转换成字典,列表,元祖(其中字典等样式的字符创必须用双引号扩起来)
pickle.load 直接读取文件内容(无需f.read),并把读取的内容转换成字典,列表等格式
|
1
2
3
4
|
import pickledata = {'k1':123,'k2':456}ret = pickle.dumps(data)print(ret) |
7.configparser模块
用于对特定的配置文件进行操作
[shangwu_WIFI]
manageip:192.168.0.52
SSID:shenfu-shangwu
manageuser:admin
passwd:ShenFu987Pay
[caiwu_WIFI]
manageip:192.168.0.53
SSID:shenfu-caiwu
manageuser:admin
passwd:ShenFu987Pay
[zong_WIFI]
manageip:192
SSID:shenfu-boss
manageuser:admin/shaw
passwd:ShenFu987Pay/Shawit12#$
实例如下:
|
1
2
3
4
5
6
7
8
9
10
11
12
13
14
15
16
17
18
19
20
21
22
23
24
25
26
27
28
29
30
31
32
33
34
35
36
37
38
39
40
41
42
43
44
45
46
47
48
49
50
51
52
53
54
55
56
57
58
59
60
61
62
63
64
65
66
67
68
69
70
71
|
import configparser######## 读数据 ########ret = configparser.ConfigParser()ret.read('wifi.txt',encoding='utf-8')sec = ret.sections() # 读第一层数据,结果为一个列表print(sec)['shangwu_WIFI', 'caiwu_WIFI', 'zong_WIFI']opt = ret.options('caiwu_WIFI') # 指定第一层名称,读取第二层数据print(opt)['manageip', 'ssid', 'manageuser', 'passwd']opt = ret.items('caiwu_WIFI') # 指定第一层名称,获取第二层数据print(opt)[('manageip', '192.168.0.53'), ('ssid', 'shenfu-caiwu'), ('manageuser', 'admin'), ('passwd', 'ShenFu987Pay')]opt = ret.get('caiwu_WIFI','manageip') # 指定第一层中的第二层的key,获取valueprint(opt)192.168.0.53opt = ret.getint('zong_WIFI','manageip') # 指定第二层的key,获取int(value)print(opt,type(opt))192 <class 'int'>######## 改数据 ########import configparserret = configparser.ConfigParser()ret.read('wifi.txt',encoding='utf-8')opt = ret.remove_section('caiwu_WIFI') # 在内存中删除某项(把caiwu_WIFI配置项删除)ret.write(open('wifi.txt','w')) # 重新把内存中的数据写入到文件opt = ret.has_section('zong_WIFI') # 判断是否有这一项print(opt)Trueopt = ret.add_section('name') # 在内存中添加某项ret.write(open('wifi.txt','w')) # 重新把内存中的数据写入到文件'''[shangwu_WIFI]manageip = 192.168.0.52ssid = shenfu-shangwumanageuser = adminpasswd = ShenFu987Pay[zong_WIFI]manageip = 192ssid = shenfu-bossmanageuser = admin/shawpasswd = ShenFu987Pay/Shawit12#$[name] # 新添加项'''ret.set('zong_WIFI','ssid','opsedu.com') # 更改某项数据ret.write(open('wifi.txt','w'))'''[zong_WIFI]manageip = 192ssid = opsedu.com # 更改项manageuser = admin/shawpasswd = ShenFu987Pay/Shawit12#$'''ret.remove_option('shangwu_WIFI','ssid',) # 删除某项ret.write(open('wifi.txt','w'))'''[shangwu_WIFI]manageip = 192.168.0.52manageuser = adminpasswd = ShenFu987Pay''' |
8.logging
用于便捷记录日志且线程安全的模块
单文件日志(注:只有【当前写等级】大于【日志等级】时,日志文件才被记录。)
|
1
2
3
4
5
6
7
8
9
10
11
12
13
14
15
16
17
18
19
20
21
22
23
24
25
26
|
import logginglogging.basicConfig( filename='wifi.txt', format='%(asctime)s - %(name)s - %(levelname)s -%(module)s: %(message)s', datefmt='%Y-%m-%d %H:%M:%S %p', level=30 # 记录日志级别,低于这个级别的日志不会记录) # 定义文件格式'''日志等级:CRITICAL = 50FATAL = CRITICALERROR = 40WARNING = 30WARN = WARNINGINFO = 20DEBUG = 10NOTSET = 0'''logging.debug('debug') # 写入debug内容(由于日志记录级别为30,所以debug不记录)logging.error('error') # 写入error内容2016-06-27 15:17:08 PM - root - ERROR -lx3: error ######## 其他方法 ########logging.info('info')logging.warning('warning')logging.critical('critical')logging.log(10,'log') |
日志记录格式:

9.shutil
高级的文件、文件夹、压缩包 处理模块
|
1
2
3
4
5
6
7
8
9
10
11
12
13
14
15
16
17
18
19
20
21
22
23
24
25
26
27
|
import shutil# 将文件内容拷贝到另一个文件中shutil.copyfileobj(open('wifi.txt','r'),open('new_wifi.txt','w'))# 拷贝文件shutil.copyfile('wifi.txt','wifi.log')# 仅拷贝权限。内容、组、用户均不变shutil.copymode('wifi.txt','new_wifi.txt')# 仅拷贝状态的信息,包括:mode bits, atime, mtime, flagsshutil.copystat('wifi.txt','new_wifi.txt')# 拷贝文件和权限shutil.copy ('wifi.txt','new_wifi.txt')# 拷贝文件和状态信息shutil.copy2('wifi.txt','new_wifi.txt')# 递归的去拷贝文件夹(扩展名为pyc的文件不拷贝+)shutil.copytree('folder1','folder2',ignore=shutil.ignore_patterns('*.pyc'))# 递归的删除文件shutil.rmtree('folder1')# 递归的移动文件,类似mv命令,即重命名shutil.move('folder1','folder2') |
压缩包管理配置
|
1
2
3
4
5
6
7
8
9
10
11
12
13
14
15
|
######## shutil管理压缩包 ########'''base_name: 压缩包的文件名,也可以是压缩包的路径。只是文件名时,则保存至当前目录,否则保存至指定路径, 如:www => 保存至当前路径 如:/users/shaw/www => 保存至/Users/shaw/format: 压缩包种类,“zip”, “tar”, “bztar”,“gztar”root_dir: 要压缩的文件夹路径(默认当前目录)owner: 用户,默认当前用户group: 组,默认当前组logger: 用于记录日志,通常是logging.Logger对象'''# 将C:IntelLogs下的文件打包放置当前程序目录,名称为shaw.tar.gzshutil.make_archive('shaw','gztar',root_dir='C:IntelLogs')shutil.make_archive('C:shaw','gztar',root_dir='C:IntelLogs') # 放到C盘 |
shutil 对压缩包的处理是调用 ZipFile 和 TarFile 两个模块来进行的
|
1
2
3
4
5
6
7
8
9
10
11
12
13
14
15
16
17
18
19
20
21
22
23
24
|
import zipfile# 压缩z = zipfile.ZipFile('laxi.zip', 'w')z.write('a.log')z.write('data.data')z.close()# 解压z = zipfile.ZipFile('laxi.zip', 'r')z.extractall()z.close()import tarfile# 压缩tar = tarfile.open('your.tar','w')tar.add('/Users/shaw/PycharmProjects/bbs2.log', arcname='bbs2.log')tar.add('/Users/shaw/PycharmProjects/cmdb.log', arcname='cmdb.log')tar.close()# 解压tar = tarfile.open('your.tar','r')tar.extractall() # 可设置解压地址tar.close() |
10.subprocess
可以执行shell命令
|
1
2
3
4
5
6
7
8
9
10
11
12
13
14
15
16
17
18
19
20
21
22
23
24
25
26
27
28
29
30
31
32
33
34
35
36
37
38
|
import subprocess# call 执行命令,返回状态码ret1 = subprocess.call('ls -l',shell=True) # 和ret2结果相同,写法不同ret2 = subprocess.call(['ls','-l'],shell=False)>>> print(ret1)0# check_call执行命令,如果执行状态码是 0 ,则返回0,否则抛异常>>>ret = subprocess.check_call("exit 1", shell=True)>>> print(ret)0>>> ret = subprocess.check_call("exit 1", shell=True) # 抛异常Traceback (most recent call last): File "<stdin>", line 1, in <module> File "/usr/lib64/python2.6/subprocess.py", line 505, in check_call raise CalledProcessError(retcode, cmd)subprocess.CalledProcessError: Command 'exit 1' returned non-zero exit status 1# check_output执行命令,如果状态码是 0 ,则返回执行结果,否则抛异常subprocess.check_output(["echo", "Hello World!"])subprocess.check_output("exit 1", shell=True)######## subprocess.popen() 用于执行复杂的系统命令 ########'''args shell命令,可以是字符串或者序列类型(如:list,元组)bufsize 指定缓冲。0 无缓冲,1 行缓冲,其他 缓冲区大小,负值 系统缓冲stdin, stdout, stderr 分别表示程序的标准输入、输出、错误句柄preexec_fn 只在Unix平台下有效,用于指定一个可执行对象(callable object),它将在子进程运行之前被调用close_sfs 在windows平台下,如果close_fds被设置为True,则新创建的子进程将不会继承父进程的输入、输出、错误管道,所以不能将close_fds设置为True同时重定向子进程的标准输入、输出与错误(stdin, stdout, stderr)。shell:同上cwd 用于设置子进程的当前目录env 用于指定子进程的环境变量。如果env = None,子进程的环境变量将从父进程中继承。universal_newlines 不同系统的换行符不同,True -> 同意使用
startupinfo与createionflags 只在windows下有效, 将被传递给底层的CreateProcess()函数,用于设置子进程的一些属性,如:主窗口的外观,进程的优先级等等''' |
终端输入的命令分为两种:
输入即可得到输出,如:ifconfig
输入进行某环境,依赖再输入,如:python
|
1
2
3
4
5
6
7
8
9
10
11
12
13
14
15
16
17
18
19
|
# 创建文件夹subprocess.Popen('mkdir t3',shell=True)subprocess.Popen('mkdir t3',shell=True,cwd='D:soft')# 输入python,再在python解释器中执行命令(print(1),print(2))obj = subprocess.Popen(["python"], stdin=subprocess.PIPE, stdout=subprocess.PIPE, stderr=subprocess.PIPE, universal_newlines=True)obj.stdin.write("print(1)
")obj.stdin.write("print(2)")obj.stdin.close()cmd_out = obj.stdout.read()obj.stdout.close()cmd_error = obj.stderr.read()obj.stderr.close()print(cmd_out)C:Python35python.exe H:/PyCharm/Python/PY_learn/lianxi2.py12 |
11.random
随机数
import random
print(random.random())
print(random.randint(1,2))
print(random.randrange(1,10))
随机验证码实例:
|
1
2
3
4
5
6
7
8
9
10
11
12
|
import randomcheckcode = ''for i in range(6): current = random.randrange(0,6) if current != i: temp = chr(random.randint(65,90)) else: temp = random.randint(0,9) checkcode += str(temp)print(checkcode)C:Python35python.exe H:/PyCharm/Python/PY_learn/lianxi.pyZDU19R |