Windows Server 2016 is the newest server operating system released by Microsoft in October 12th, 2016. In this tutorial I will go through step by step on how to install the Active Directory ( AD ) role on Windows Server 2016. If you are setting up the server for production is recommended to set a static IP address on the server before you start the AD installation. Also before you start the AD installation, rename the server now if you need to, once you have installed the AD role on the server, it is not easy to change the name without breaking a lots of things.
Table of contents
Note: You need to have administrator privileges on the server to install AD
Install Active Directory
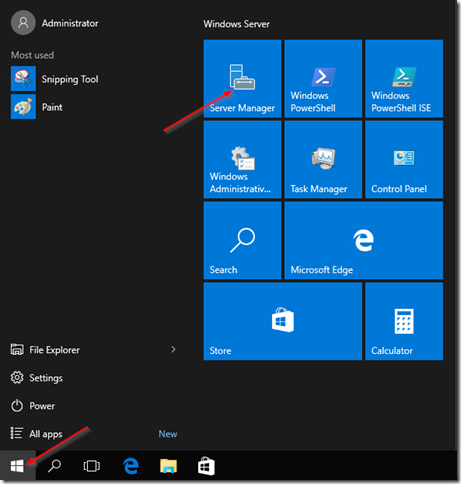
Login to the server, and click on the Start button, and then click on Server Manager:
On the Server Manager Dashboard, click on Add roles and features:
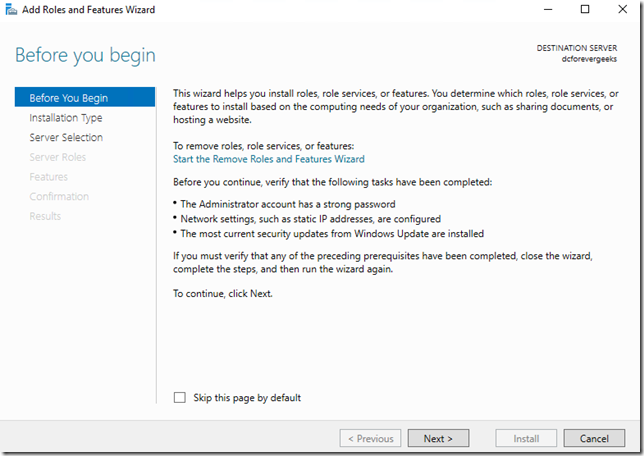
The Add role and features wizard will come up:
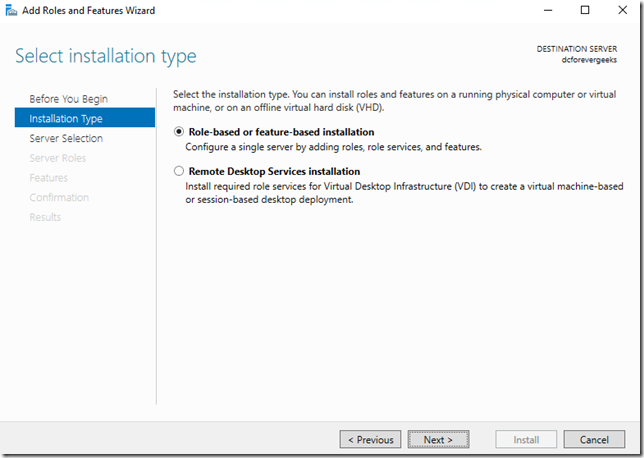
Click on Next. On the following Installation type screen, choose the first option “Role-based or feature-based installation:
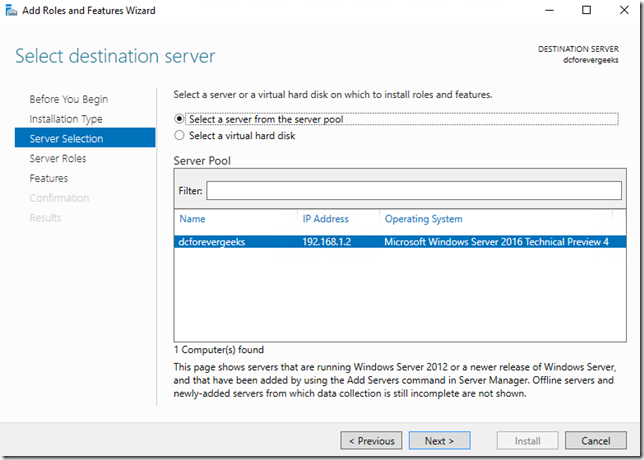
Click on Next. On the following screen select a server from the server pool. your local server should be listed:
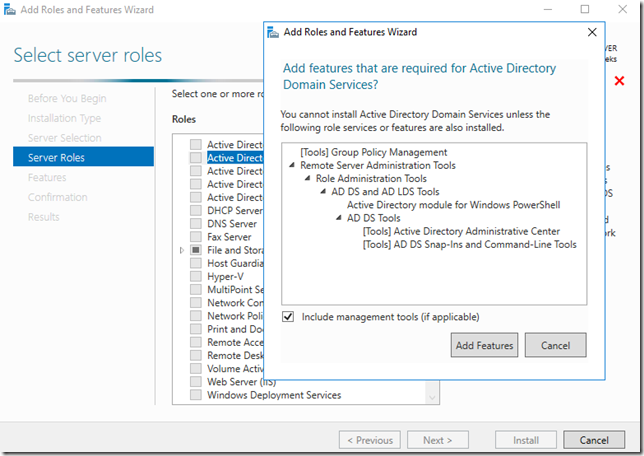
On the following screen click on Active Directory Domain Services and the Add features window will pop-up:
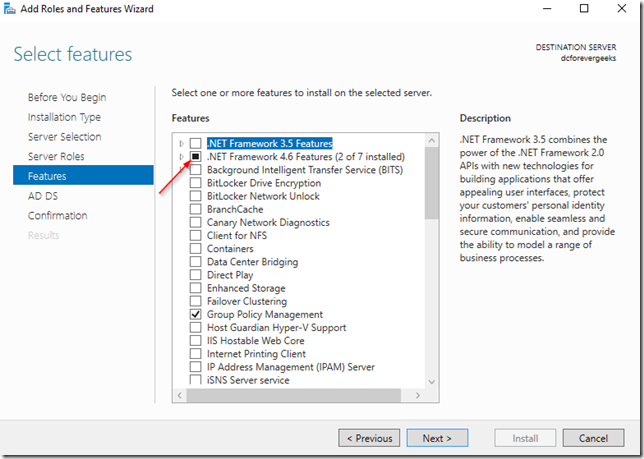
Click on Add Features and then click on Next. Make sure .NET 4.6 Features are checked on the following screen:
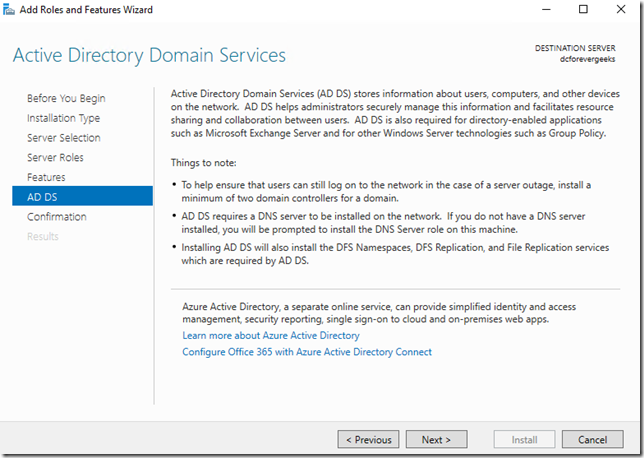
Then click on Next. On the following screen you will get a short overview of what a domain controller does, and the services that get installed. if this is your first domain controller you will be prompted to install the DNS service which is required on a domain controller:
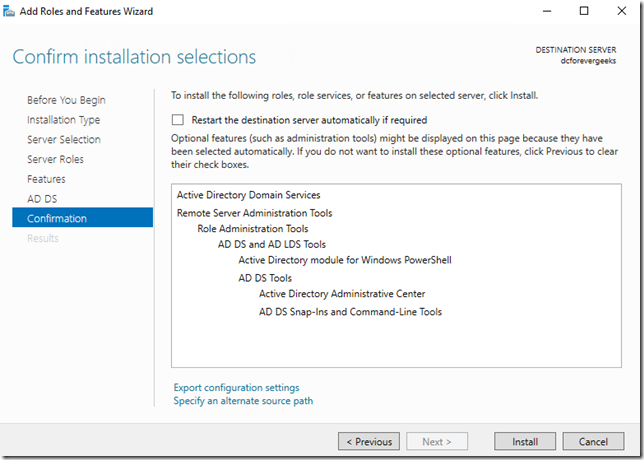
Click on Next. click on Install on the confirmation window:
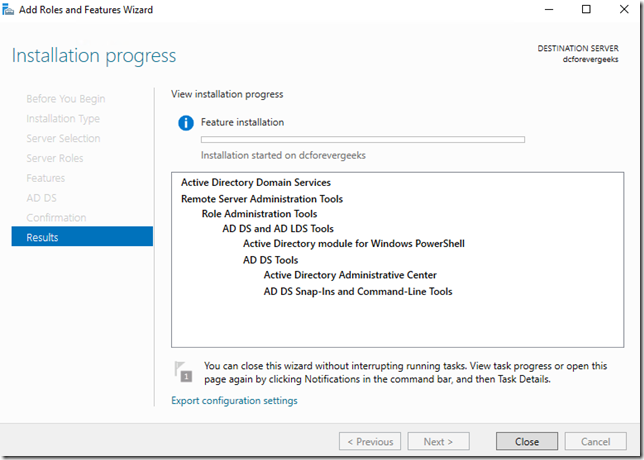
The Installation will begin:
Setup Domain Controller
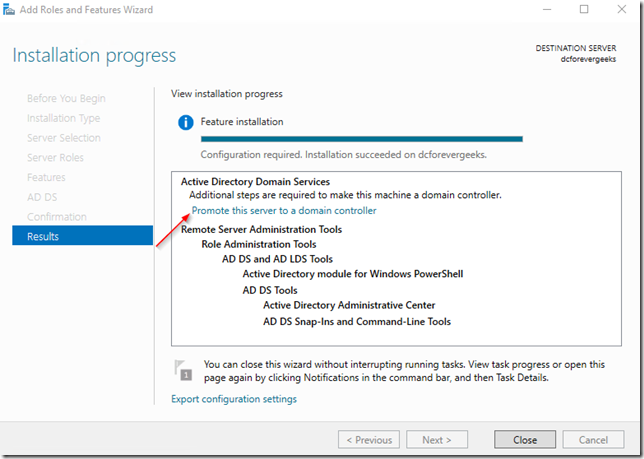
Once the AD role has been installed. click on Promote this server to a domain controller:
And the deployment configuration wizard will come up. Select Add new forest and choose your Root domain name:
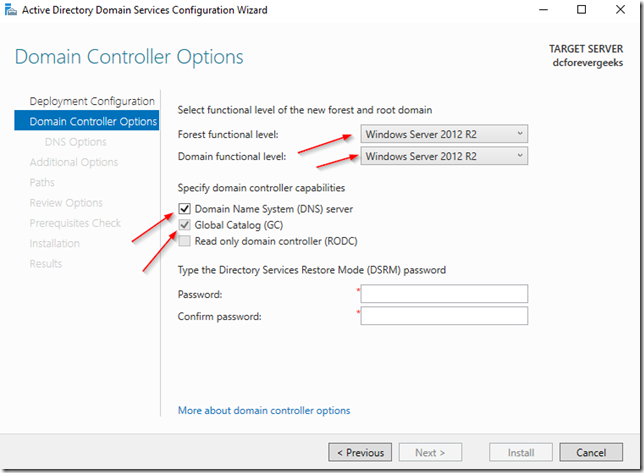
click on Next. on the next screen choose your Forest functional level and enter the Directory Service Restore Mode password: If this is your first domain controller choose “Windows Server 2016” as the Forest and Domain functional level. make sure the DNS option is checked, and because this is my first server, the Global Catalog ( GC) is already checked. click on Next:
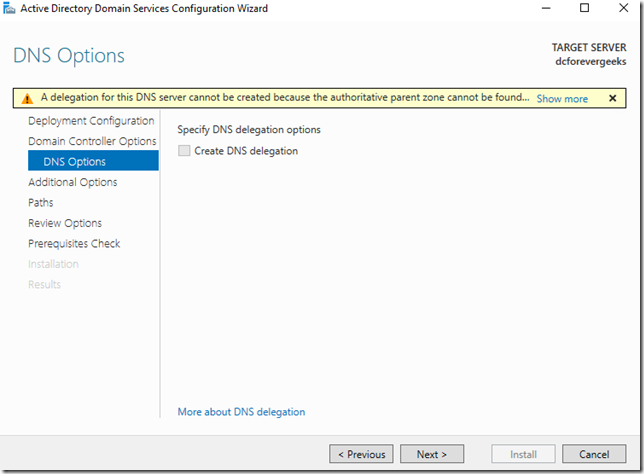
Because we are installing a forest root domain controller that is using Active Directory-integrated DNS, we are not going to worry about this warning message, click on Next:
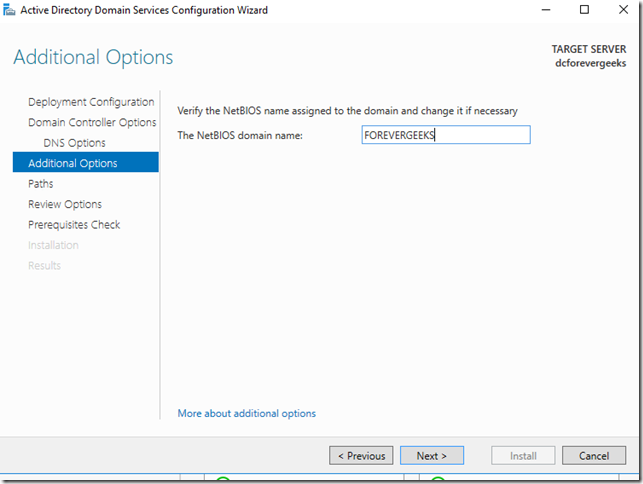
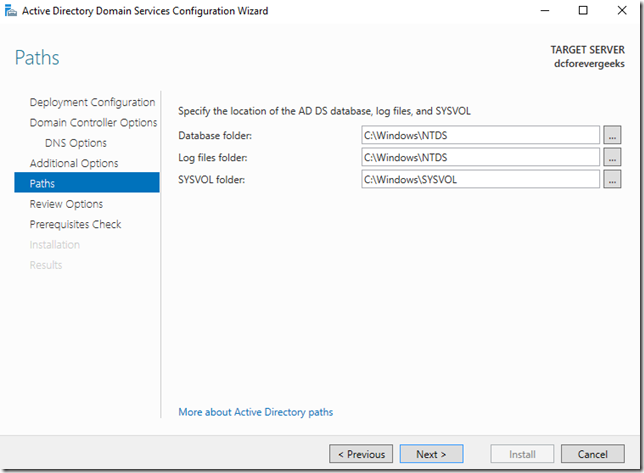
Choose the NetBIOS domain name (already selected ) and click Next choose the paths for the the AD database, normally the defaults are OK
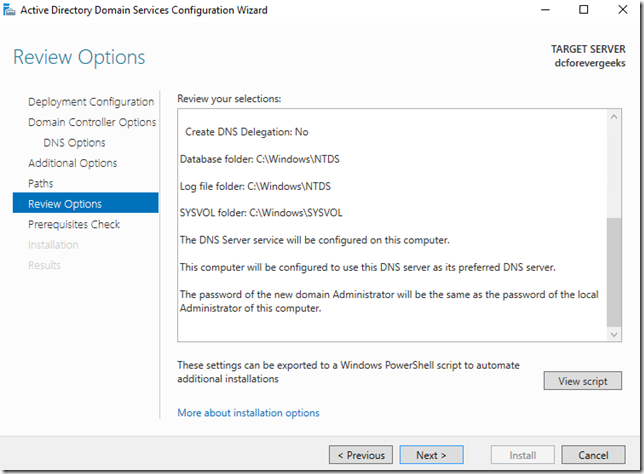
Review Options:
Click on Next.
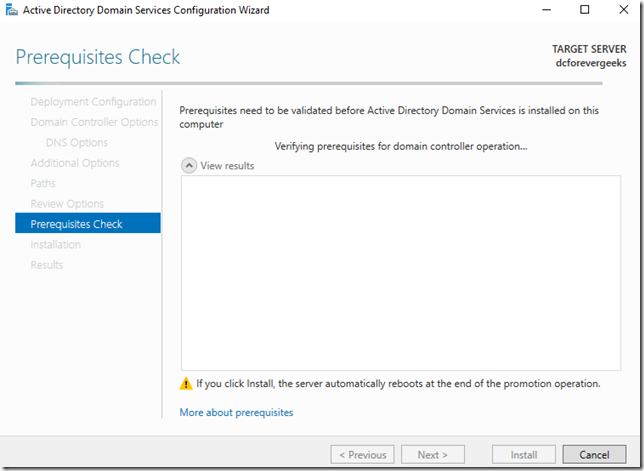
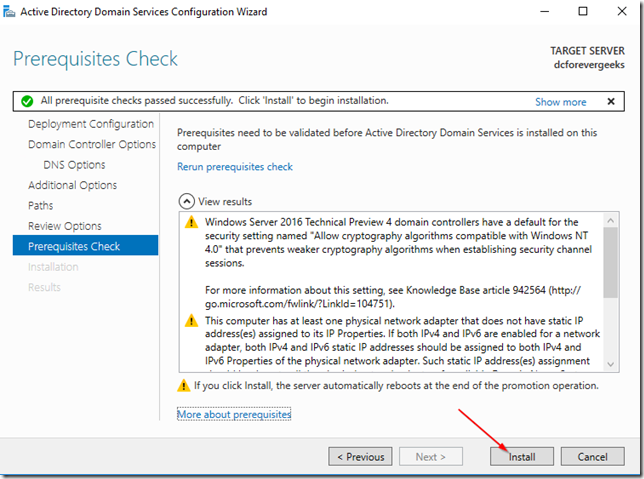
Do the Prerequisites check. if all the prerequisites check successfully. click on Install
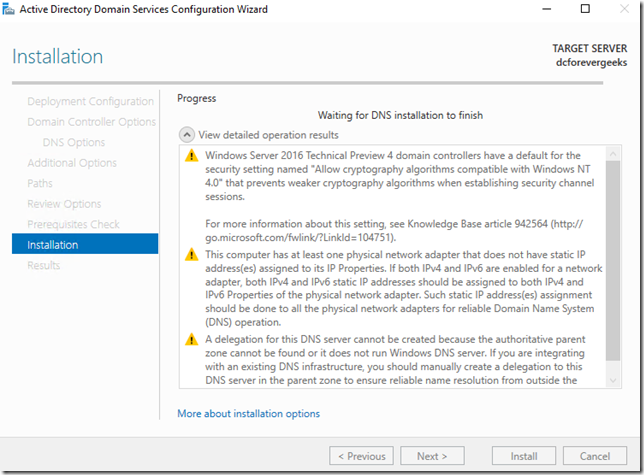
The Installation should begin. the server will reboot automatically when the installation finishes:
This message will pop-up on your screen when Windows Server 2016 is about reboot:
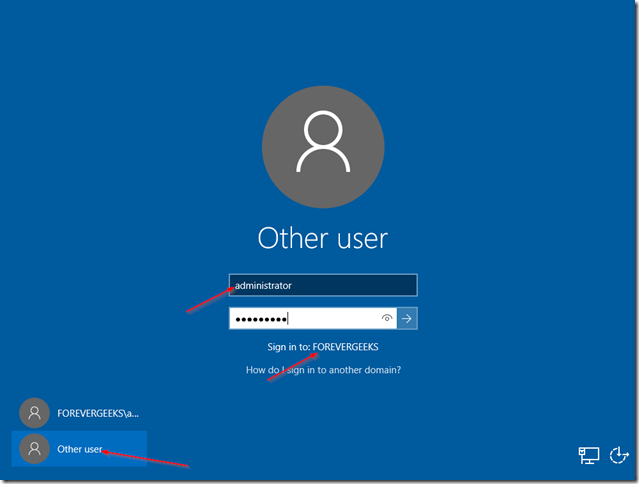
After your server reboots, you will have the option to login to your newly created network:
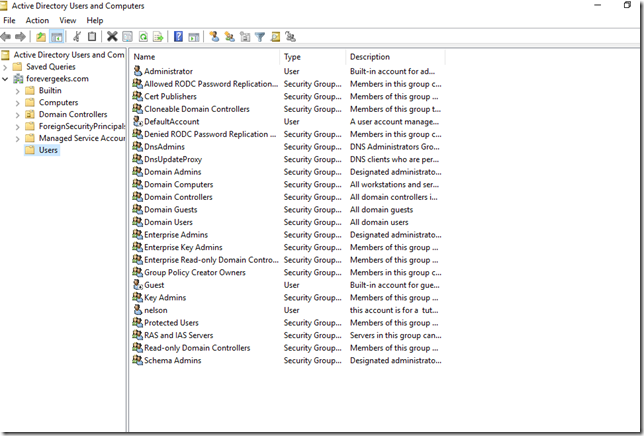
after you’re logged using your domain credentials, go to Administrative tools and open Active Directory Users and Computers to make sure your AD is working:
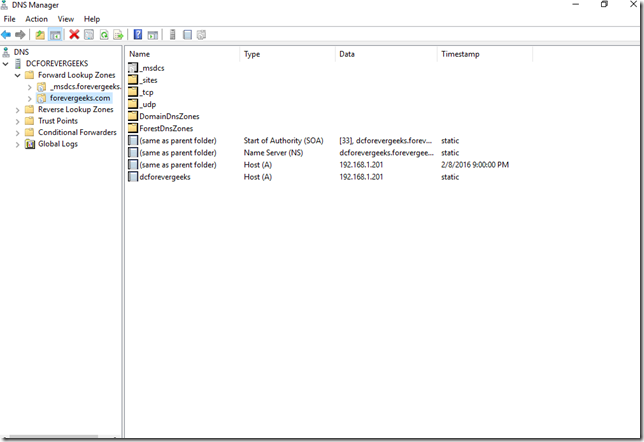
DNS
Conclusion
As you can see, installing Active Directory (AD) in Windows server 2016 is not much different than Installing AD in previous Windows server releases. I hope you found this guide useful. If you have any question please use the comments section below.
https://ittutorials.net/microsoft/windows-server-2016/setting-up-active-directory-ad-in-windows-server-2016/
