不用不知道,一用香到爆。
老哥是个屌丝前端,但也想写点web应用耍一耍。之前弄过了NodeJs,也弄过JAVA,最近由于写游戏的原因用C#,索性上手一波asp.net core。
这篇博客记录的是,如何在分分钟内搭建一个博客程序。包括:
- 发博客
- 看博客
- 用户注册登录
- 用户权限设置。
其中用的就是微软提供的EntityFrame和Identity类库。简直他妈爽出翔。
1.快速生成一个项目
反正增删改查就那么回事儿,快速生成一个项目模板才是主要的。

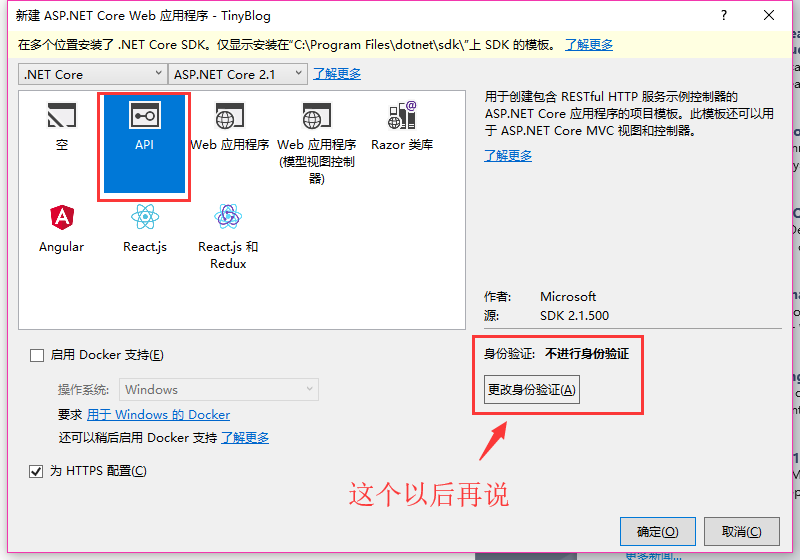
我不想创建一个带Razor页面的项目。因为我只需要API。老夫可是个前端!
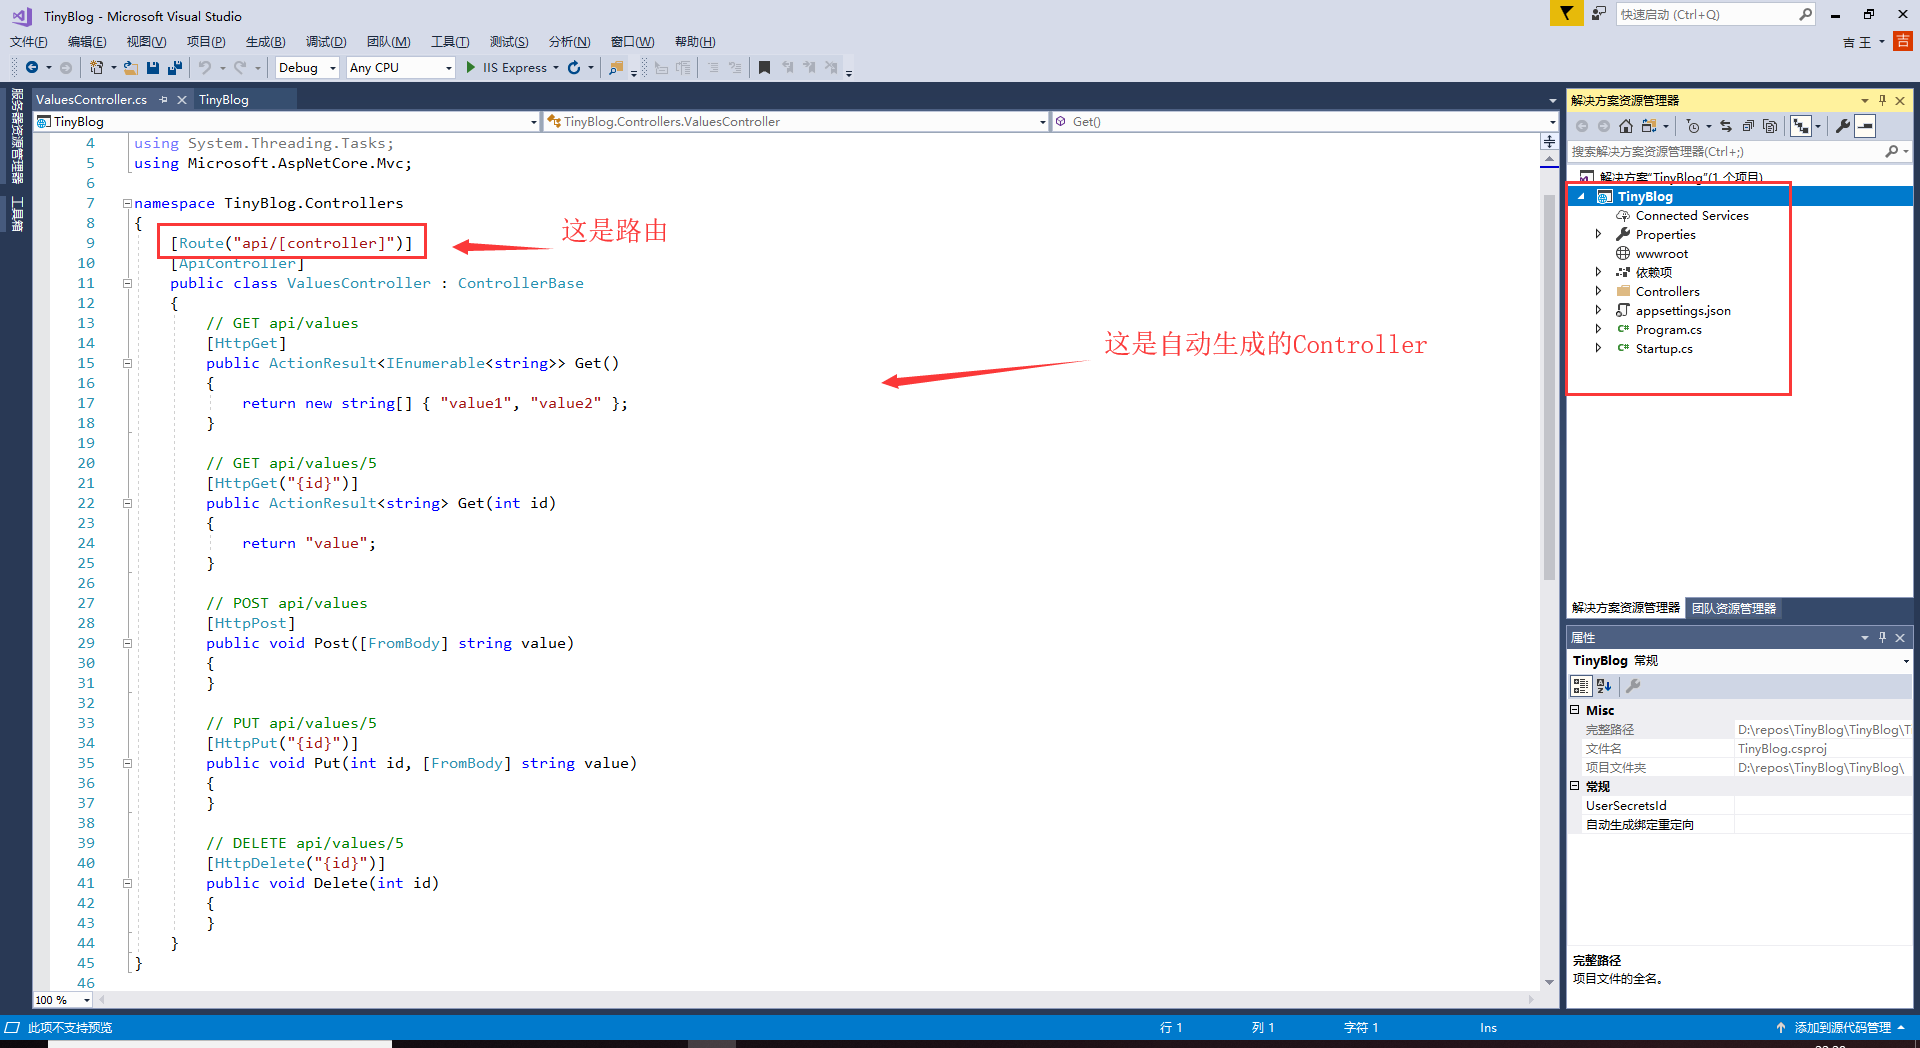
这个时候按F5运行网站,然后就可以用Postman向 http://localhost:55536/api/values发送请求了。如果有过开发经验的人一眼就能看明白这是怎么回事儿。
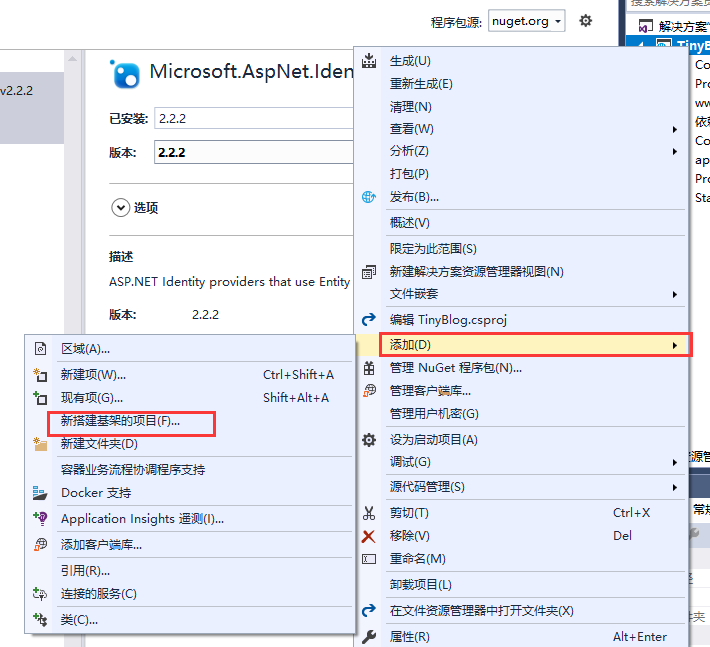
2.给程序添加用户系统。
添加用户系统的意思是,允许用户注册和登录。
如果我用NodeJs或者Java,我就要开始写数据库了,甚至设计数据表。可是微软已经把好用的东西给准备好了,那就是:Identity类库。这个类库老JB好了。我只需要轻轻点几下,一套完备的用户系统就能生成到我的代码上。

我现在来解释一波我进行了什么操作。
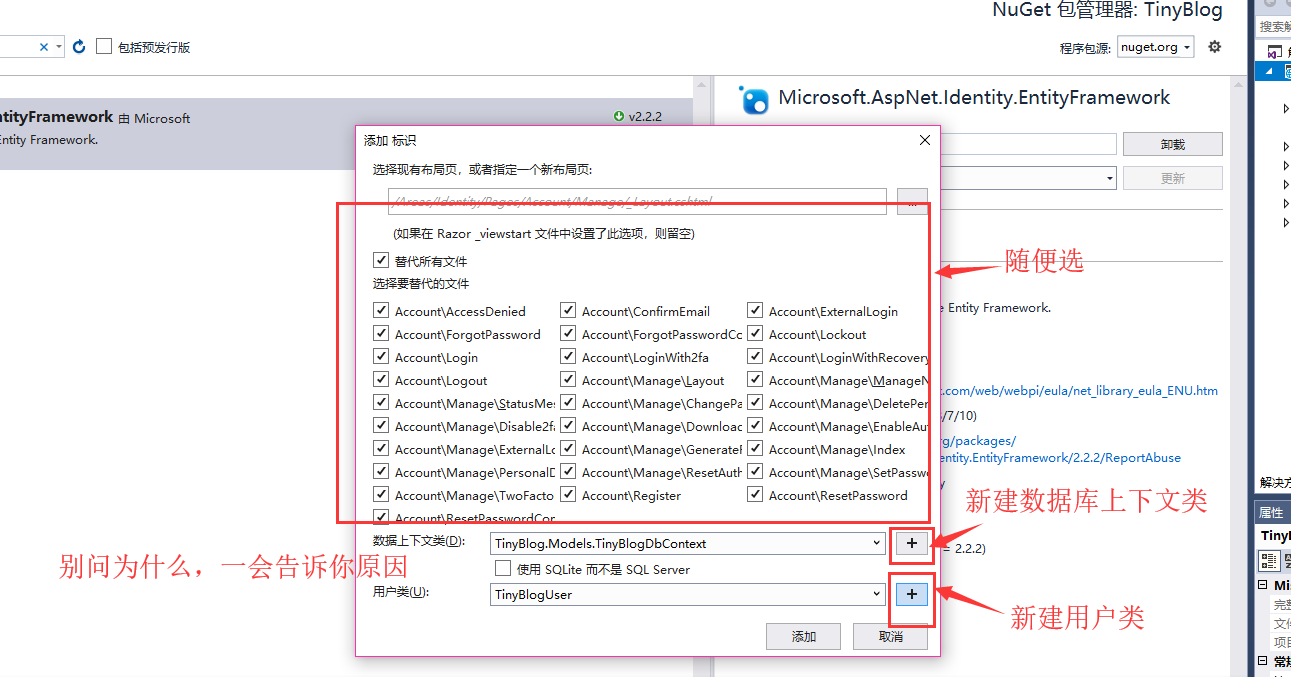
1.刚才我加的一大堆东西,其实就是最开始创建项目的时候,“身份验证”那一部分帮我们做的事。当时我没选,现在我手动加上。
2.上面这个图,“替代所有文件”这部分如果选中,框架会帮我们生成相应的业务逻辑和Html模板(当然是Razor模板)。
3.因为注册登录需要和数据库交互,所以“新建数据库上下文类”帮我们新生成了一个和数据库交互的上下文类。这个类是EntityFramework提供的。巨牛逼巨方便。
4.“新建用户类”,这没什么好说的吧?这个用户类用于和数据库的用户表进行对应。
这下我们牛逼了。然后你会发现项目目录里多了一些文件,这些都是asp.net core帮我们生成的。

可以随便探索一下。那个Readme.txt文件可以读一下。是一个指导手册,告诉你接下来要怎么做。
3.那么接下来要怎么做?
如readme文件所说,一步一步来。我还是贴出来readme文件:
Support for ASP.NET Core Identity was added to your project
- The code for adding Identity to your project was generated under Areas/Identity.

Configuration of the Identity related services can be found in the Areas/Identity/IdentityHostingStartup.cs file.

If your app was previously configured to use Identity, then you should remove the call to the AddIdentity method from your ConfigureServices method.
//生成的UI需要静态文件支持,用下面这段代码使你的app支持静态文件
The generated UI requires support for static files. To add static files to your app:
1. Call app.UseStaticFiles() from your Configure method
//用下面这段代码开启身份认证功能
To use ASP.NET Core Identity you also need to enable authentication. To authentication to your app:
1. Call app.UseAuthentication() from your Configure method (after static files)
//生成的UI需要MVC支持,用这面这段代码开启MVC功能
The generated UI requires MVC. To add MVC to your app:
1. Call services.AddMvc() from your ConfigureServices method
2. Call app.UseMvc() from your Configure method (after authentication)
//生成的数据库结构需要你执行Migration来同步数据库
The generated database code requires Entity Framework Core Migrations. Run the following commands:
//在cmd中执行下面两个命令
1. dotnet ef migrations add CreateIdentitySchema
2. dotnet ef database update
//或者 在包管理命令行执行下面两个命令
 Or from the Visual Studio Package Manager Console:
1. Add-Migration CreateIdentitySchema
2. Update-Database

Apps that use ASP.NET Core Identity should also use HTTPS. To enable HTTPS see https://go.microsoft.com/fwlink/?linkid=848054.
按照上面的操作来撸好app以后。框架就搭成了。牛逼到爆。一行代码都没写,一个非常完备的基础架子已经OK了。
需要注意的是,你要额外安装EntityFramework类库。这个百度教程太多了。我就不说了。
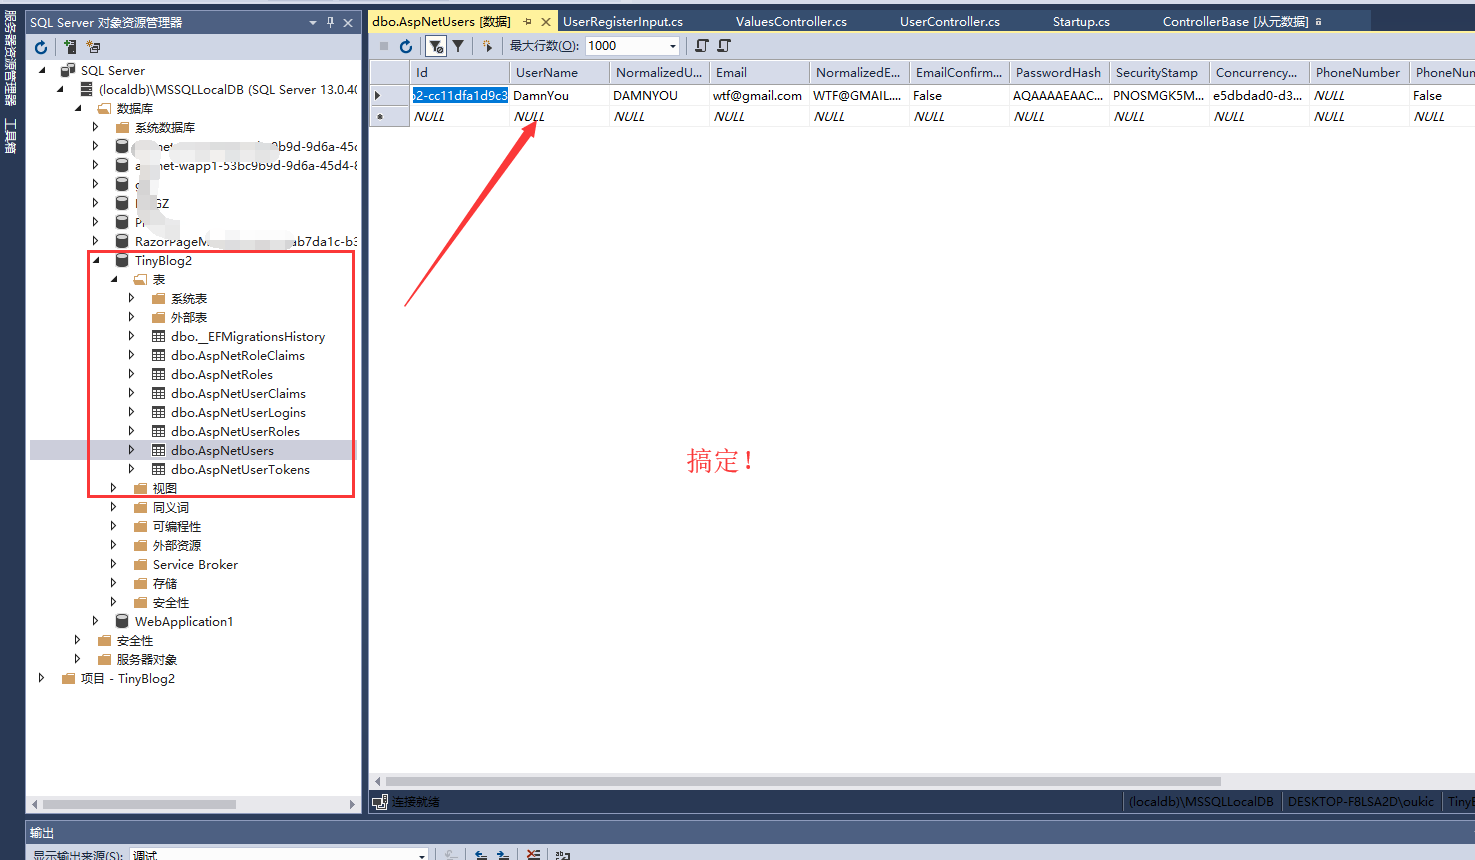
当你执行完那两个命令后,你会发现你的数据库里多了一些表。酷!成功了。
注:在这里执行命令的时候可能会说EntityFramework没安装什么的这时候不要虚,仔细看输出,会说你装了EF6和EFCore,你要指定一下用哪个EF来运行命令,asp.net core的话就用 EntityFrameworkCoreUpdate-Database
4.写一波注册用户的API吧!
其实注册的业务逻辑已经生成好了,直接拿来用就可以。去Areas/Identity/Pages/Account/Register.cshtml里面,可以看到这段代码。稍微改动一下就可以拿来用了。
首先是,我打算用Postman模拟用户前端的输入,后端在注册的时候接收3个值,邮箱,用户名,密码。于是俺创建一个类代表这个数据格式。强类型语言就是爽。
public class UserRegisterInput
    {
        public string UserName { get; set; }
        public string Email { get; set; }
        public string Password { get; set; }
        public bool RememberMe { get; set; }
    }
现在开始写controller。新建一个APIController,这个简直不用再描述了。最后Controller代码如下:
using System;
using System.Collections.Generic;
using System.Linq;
using System.Threading.Tasks;
using Microsoft.AspNetCore.Http;
using Microsoft.AspNetCore.Identity;
using Microsoft.AspNetCore.Mvc;
using TinyBlog2.Areas.Identity.Data;
using TinyBlog2.DTO;

namespace TinyBlog2.Controllers
{
    [Route("api/[controller]")]
    [ApiController]
    public class UserController : ControllerBase
    {
        private readonly UserManager<TinyBlog2User> _userManager;
        public UserController(UserManager<TinyBlog2User> userManager)
        {
            _userManager = userManager;
        }
        [HttpPost]
        [Route("Reg")] //这里是你的路由地址 post发往 https://localhost:55683/api/user/reg
        public async Task<IActionResult> Post([FromBody] UserRegisterInput Input)
        {
            var user = new TinyBlog2User { UserName = Input.UserName, Email = Input.Email };
            var result = await _userManager.CreateAsync(user, Input.Password);
            if (result.Succeeded)
            {
                return Ok("注册成功");
            }
            else
            {
                return BadRequest();
            }
        }

        [HttpGet]
        public ActionResult<IEnumerable<string>> Get()
        {
            return new string[] { "value1", "value2" };
        }
    }
}
然后我用Postman发一波请求试试。

注册的最后,查看数据库,你的用户显然已经存在数据库里了。这些数据表都是asp.net core + EntityFramework给我们建立好的。
5.用户权限校验
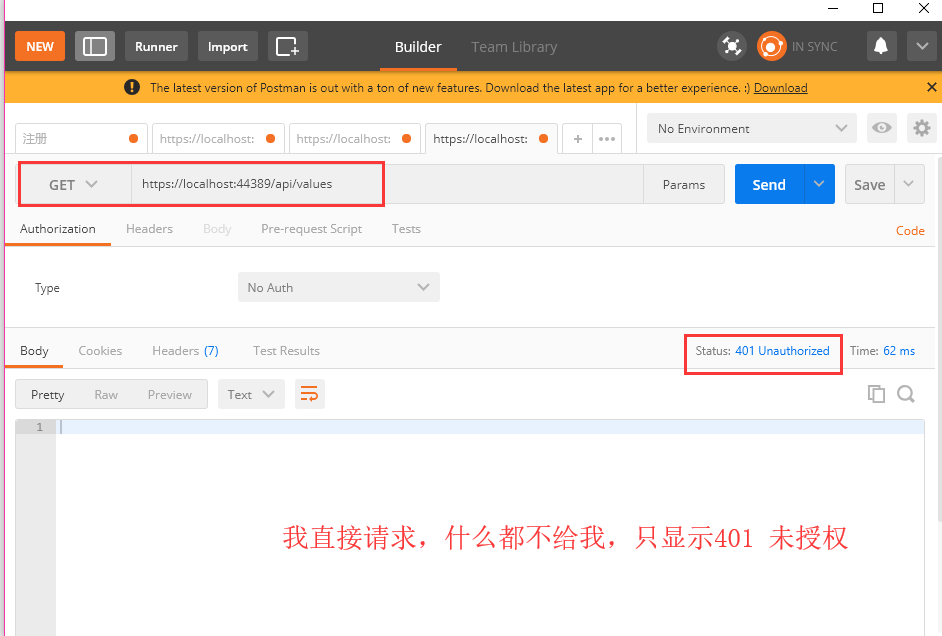
接下来我要做的是,给某个Action增加权限校验,说句白话就是,有的接口我希望登录用户才能访问,有的接口我希望管理员才能访问,或者有的接口我希望只有付费Vip才能访问。怎么做呢?
这里用已经存在的ViewController来举例子。目前为止,ValueController的数据是谁都可以访问的。但是我来加一行代码,就一行!
[HttpGet]
        [Authorize(Policy = "VipOnly")]//很明显,从此这个Action只能是Vip才能访问。
        public ActionResult<IEnumerable<string>> Get()
        {
            return new string[] { "value1", "value2" };
        }
显然我定制了一个策略,这个策略名字叫做VipOnly。那么接下来我要定义这个策略。
public void ConfigureServices(IServiceCollection services)
        {
            services.AddAuthorization(options =>
            {
                options.AddPolicy("VipOnly", policy => policy.RequireClaim("Role", "VipUser"));
            });
            services.AddMvc().SetCompatibilityVersion(CompatibilityVersion.Version_2_1);
        }
我在startup.cs里面加入这一行代码,应该显而易见。意思是:增加一个名为VipOnly的策略,这个策略的要求是,如果用户有一个属性Role,这个Role的值是VipUser,那么就符合这个策略。
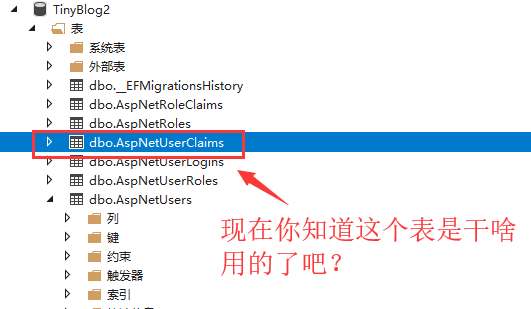
Claim就是用户的一个属性。这个属性可以在任何时候创建。这个Claim也是Asp.net core提供给我们的工具!很方便。来看一波代码吧。
5.1 如何给用户添加一个Claim
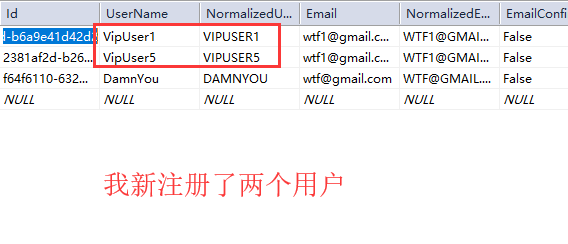
我更改了一下注册流程,每一个注册用户都被默认设置为VipUser
[HttpPost]
        [Route("Reg")]
        public async Task<IActionResult> Post([FromBody] UserRegisterInput Input)
        {
            var user = new TinyBlog2User { UserName = Input.UserName, Email = Input.Email };
            var result = await _userManager.CreateAsync(user, Input.Password);
            //给用户增加一个Claim
            var addClaimResult = await _userManager.AddClaimAsync(user, new System.Security.Claims.Claim("Role", "VipUser"));
            if (result.Succeeded)
            {
                return Ok("注册成功");
            }
            else
            {
                return BadRequest();
            }
        }
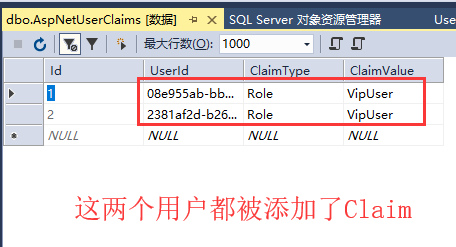
简单到爆炸不是吗?我现在注册一个用户,就会看到这个用户被添加了一个Claim,Role=VipUser
6.用户登录
用户登录的原理是JWT。是一个独立知识点。这里我只提供代码。教程网上一堆。需要我写的话请留言,我再补充。


using System;
using System.Collections.Generic;
using System.IdentityModel.Tokens.Jwt;
using System.Linq;
using System.Security.Claims;
using System.Text;
using System.Threading.Tasks;
using Microsoft.AspNetCore.Http;
using Microsoft.AspNetCore.Identity;
using Microsoft.AspNetCore.Mvc;
using Microsoft.Extensions.Configuration;
using Microsoft.IdentityModel.Tokens;
using TinyBlog2.Areas.Identity.Data;
using TinyBlog2.DTO;

namespace TinyBlog2.Controllers
{
    [Route("api/[controller]")]
    [ApiController]
    public class UserController : ControllerBase
    {
        private readonly UserManager<TinyBlog2User> _userManager;
        private readonly IConfiguration _config;
        private readonly SignInManager<TinyBlog2User> _signInManager;
        public UserController(UserManager<TinyBlog2User> userManager, IConfiguration configuration, SignInManager<TinyBlog2User> signInManager)
        {
            _config = configuration;
            _signInManager = signInManager;
            _userManager = userManager;
        }
        [HttpPost]
        [Route("Reg")]
        public async Task<IActionResult> Post([FromBody] UserRegisterInput Input)
        {
            var user = new TinyBlog2User { UserName = Input.UserName, Email = Input.Email };
            var result = await _userManager.CreateAsync(user, Input.Password);
            //给用户增加一个Claim
            var addClaimResult = await _userManager.AddClaimAsync(user, new System.Security.Claims.Claim("Role", "VipUser"));
            if (result.Succeeded && addClaimResult.Succeeded)
            {
                var key = new SymmetricSecurityKey(Encoding.UTF8.GetBytes(_config["Jwt:Key"]));
                //将加密后的密码用JWT指定算法进行加密
                var creds = new SigningCredentials(key, SecurityAlgorithms.HmacSha256);
                //拿到当前登录用户
                TinyBlog2User currentUser = await _userManager.FindByEmailAsync(Input.Email);
                //获取当前用户的Claims
                IList<Claim> claimsList = await _userManager.GetClaimsAsync(currentUser);
                var unSecruityToken = new JwtSecurityToken(_config["Jwt:Issuer"], _config["Jwt:Issuer"], claimsList, expires: DateTime.Now.AddMinutes(30), signingCredentials: creds);
                var token = new JwtSecurityTokenHandler().WriteToken(unSecruityToken);
                return Ok(new { user = user, token = token });
            }
            else
            {
                return BadRequest();
            }
        }

        /// <summary>
        /// 前后端分离,前端的登录请求发送到这里。
        /// 返回200或者401,代表登录成功和失败,如果登录成功,返回一个token。
        /// </summary>
        /// <param name="inputUser"></param>
        /// <returns>
        /// {"token": "eyJhbGciOiJIUzI1NiIsInR5cCI6IkpXVCJ9.eyJlbWFpbCI6IjFAMS5jb20iLCJqdGkiOiI0ZDNiZGFjMC1hNjYzLTQwNTMtYjU1Yy02Njg2YjAyNjk0MmIiLCJFbWFpbCI6IjFAMS5jb20iLCJleHAiOjE1NDQxODgwMDcsImlzcyI6Imh0dHA6Ly9sb2NhbGhvc3Q6NjM5MzkvIiwiYXVkIjoiaHR0cDovL2xvY2FsaG9zdDo2MzkzOS8ifQ.GTFmUKiAfLTaOuv7rZ-g4Cns033RWehB8u3iFB59rFM"}
        /// </returns>
        [HttpPost]
        [Route("Login")]
        public async Task<IActionResult> Login([FromBody]UserLoginInput inputUser)
        {
            //拿到用户名和密码,用asp.net Core 自带的Identity来进行登录
            var result = await _signInManager.PasswordSignInAsync(inputUser.UserName, inputUser.Password, inputUser.RememberMe, lockoutOnFailure: true);
            if (result.Succeeded)
            {
                //把你自己的密码进行对称加密
                var key = new SymmetricSecurityKey(Encoding.UTF8.GetBytes(_config["Jwt:Key"]));
                //将加密后的密码用JWT指定算法进行加密,这个加密算法有很多,可以去JWT官网上看
                var creds = new SigningCredentials(key, SecurityAlgorithms.HmacSha256);
                //拿到当前登录用户
                TinyBlog2User user = await _userManager.FindByEmailAsync(inputUser.Email);
                //获取当前用户的Claims
                IList<Claim> claimsList = await _userManager.GetClaimsAsync(user);
                //用各种信息组成一个JWT
                var unSecruityToken = new JwtSecurityToken(_config["Jwt:Issuer"], _config["Jwt:Issuer"], claimsList, expires: DateTime.Now.AddMinutes(30), signingCredentials: creds);
                //把JWT加密一下返回给客户端
                var token = new JwtSecurityTokenHandler().WriteToken(unSecruityToken);
                return Ok(new { token = token });
            }
            else
            {
                return Unauthorized();
            }
        }


        [HttpGet]
        public ActionResult<IEnumerable<string>> Get()
        {
            return new string[] { "value1", "value2" };
        }
    }
}
using System;
using System.Collections.Generic;
using System.Linq;
using System.Text;
using System.Threading.Tasks;
using Microsoft.AspNetCore.Authentication.JwtBearer;
using Microsoft.AspNetCore.Builder;
using Microsoft.AspNetCore.Hosting;
using Microsoft.AspNetCore.HttpsPolicy;
using Microsoft.AspNetCore.Mvc;
using Microsoft.Extensions.Configuration;
using Microsoft.Extensions.DependencyInjection;
using Microsoft.Extensions.Logging;
using Microsoft.Extensions.Options;
using Microsoft.IdentityModel.Tokens;

namespace TinyBlog2
{
    public class Startup
    {
        public Startup(IConfiguration configuration)
        {
            Configuration = configuration;
        }

        public IConfiguration Configuration { get; }

        // This method gets called by the runtime. Use this method to add services to the container.
        public void ConfigureServices(IServiceCollection services)
        {
            services.AddAuthentication(JwtBearerDefaults.AuthenticationScheme)
            .AddJwtBearer(options =>
            {
                options.TokenValidationParameters = new TokenValidationParameters
                {
                    ValidateIssuer = true,
                    ValidateAudience = true,
                    ValidateLifetime = true,
                    ValidateIssuerSigningKey = true,
                    ValidIssuer = Configuration["Jwt:Issuer"],
                    ValidAudience = Configuration["Jwt:Issuer"],
                    IssuerSigningKey = new SymmetricSecurityKey(Encoding.UTF8.GetBytes(Configuration["Jwt:Key"]))
                };
            });

            services.AddAuthorization(options =>
            {
                options.AddPolicy("VipOnly", policy => policy.RequireClaim("Role", "VipUser"));
            });
            services.AddMvc().SetCompatibilityVersion(CompatibilityVersion.Version_2_1);
        }

        // This method gets called by the runtime. Use this method to configure the HTTP request pipeline.
        public void Configure(IApplicationBuilder app, IHostingEnvironment env)
        {
            if (env.IsDevelopment())
            {
                app.UseDeveloperExceptionPage();
            }
            else
            {
                app.UseHsts();
            }
            app.UseStaticFiles();
            app.UseAuthentication();
            app.UseHttpsRedirection();
            app.UseMvc();
        }
    }
}
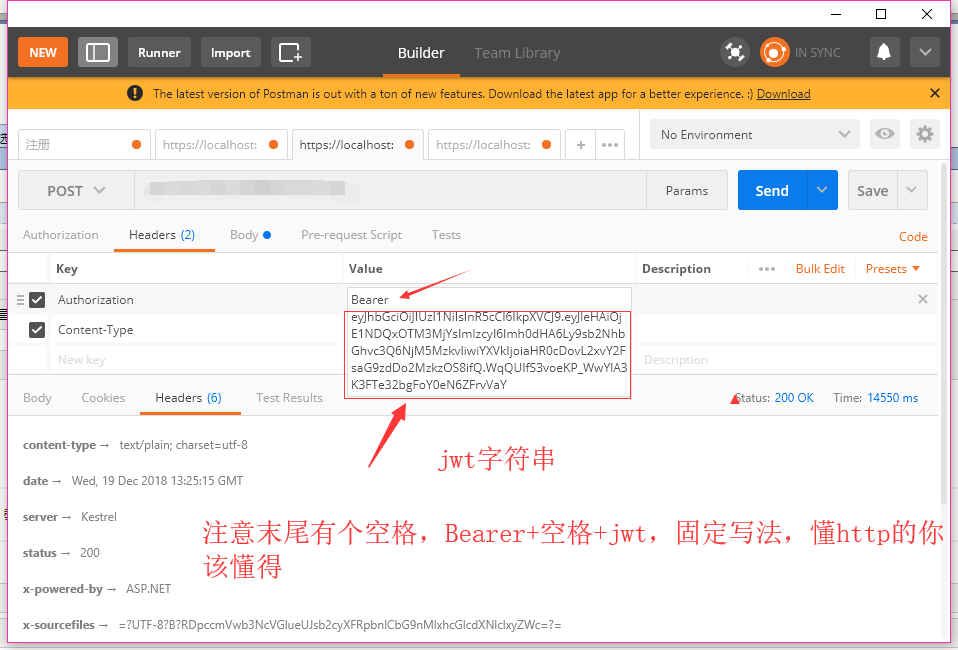
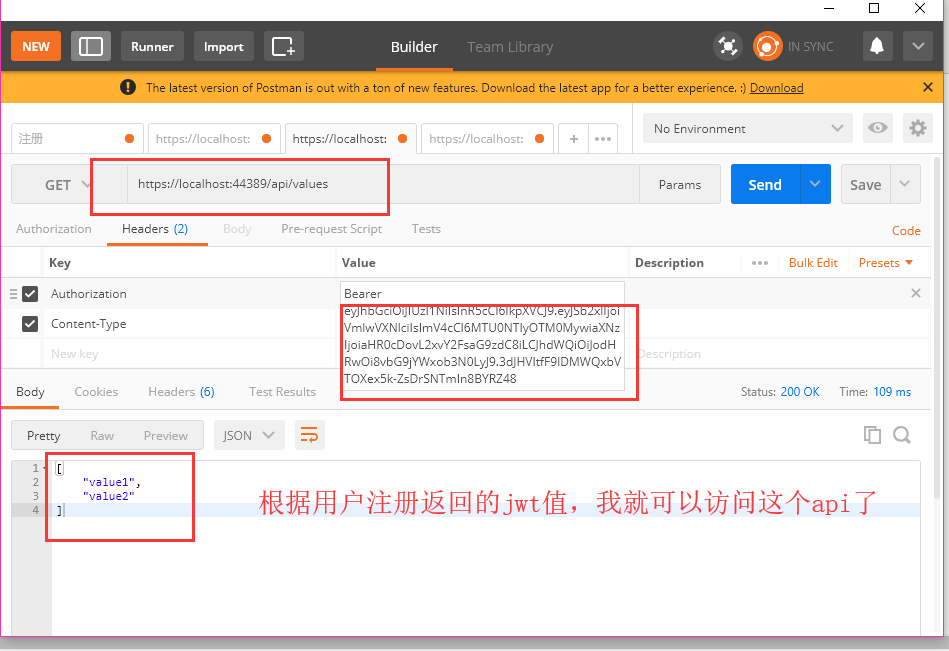
现在用户登录以后就会得到一串JWT。以后每次发请求的时候在头部附带JWT,浏览器就会认出用户的身份,并且方便的做权限验证了。这里附上PostMan设置。美滋滋。
7.试验一波
8.搞定和额外说明
- 用户注册默认是依靠UserName来注册的。
其实用户系统才是最大的门槛。至于帖子的增删改查。可以用很简单的一篇博客就能搞定了。祝你开心。