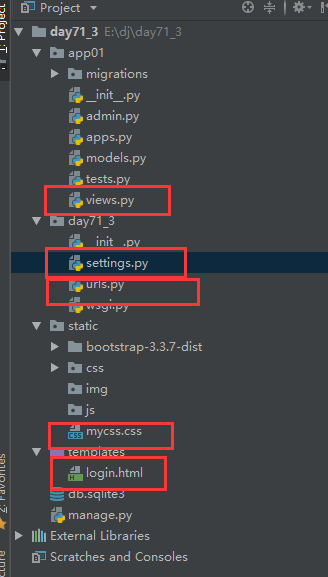
一: django中app的概念:
一个项目可以包含多个应用(app,类似于模块,主页打开多个模块就是多个app)
创建了app,要在配置文件中注册
二:模板路径配置:
1 templates文件夹
2 settings里注册一下

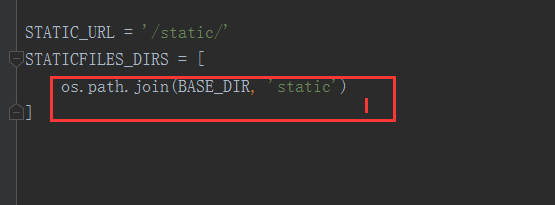
三:静态文件配置
1 STATIC_URL = '/static/' 一般不需要改动
2 创建一个static的文件夹
3 STATICEFILES_DIRS=[
os.path.join(BASE_DIR,'static'),创建的文件夹路径(可以写多个)
]_
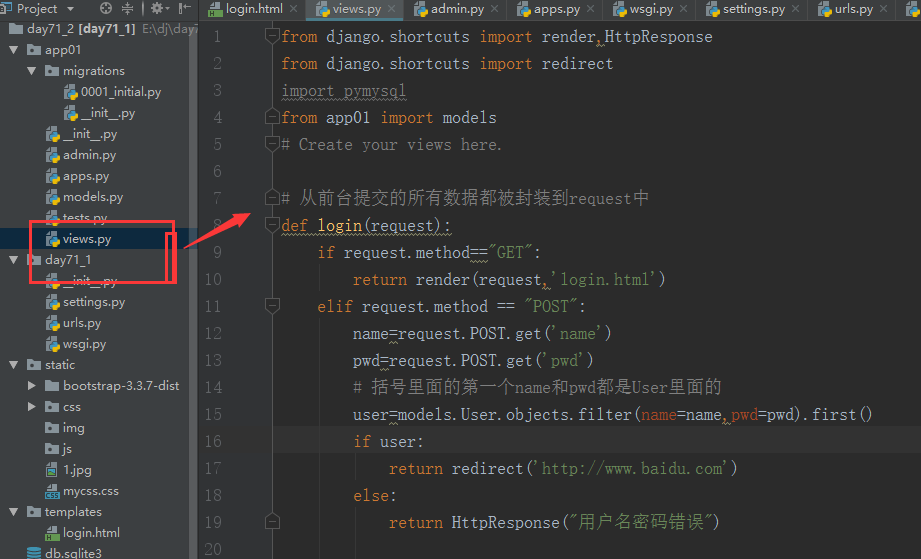
四:完整版登录功能


from django.conf.urls import url
from django.contrib import admin
from app01 import views
urlpatterns = [
    url(r'^admin/', admin.site.urls),
    url('login',views.login ),
]
from django.shortcuts import render, HttpResponse
import pymysql


# Create your views here.
def login(request):
    if request.method == "GET":
        return render(request, 'login.html')
    elif request.method == "POST":
        print(request.POST)
        name = request.POST.get('name')
        pwd = request.POST.get('pwd')
        # 链接数据库
        conn = pymysql.connect(host='127.0.0.1', port=3306, db='andy', user='root', password='admin')
        cur = conn.cursor()
        cur.execute('select * from user where name=%s and password=%s ', [name, pwd])
        user = cur.fetchone()
        if user:
            return HttpResponse("登录成功")
        else:
            return HttpResponse("登录失败")
"""
Django settings for day71login project.

Generated by 'django-admin startproject' using Django 1.11.9.

For more information on this file, see
https://docs.djangoproject.com/en/1.11/topics/settings/

For the full list of settings and their values, see
https://docs.djangoproject.com/en/1.11/ref/settings/
"""

import os

# Build paths inside the project like this: os.path.join(BASE_DIR, ...)
BASE_DIR = os.path.dirname(os.path.dirname(os.path.abspath(__file__)))

# Quick-start development settings - unsuitable for production
# See https://docs.djangoproject.com/en/1.11/howto/deployment/checklist/

# SECURITY WARNING: keep the secret key used in production secret!
SECRET_KEY = '*#^ssm!6iblsg&vm#b5133_u4a4j-ngov!i+*9p3n*4n^=@v&('

# SECURITY WARNING: don't run with debug turned on in production!
DEBUG = True

ALLOWED_HOSTS = []

# Application definition

INSTALLED_APPS = [
    'django.contrib.admin',
    'django.contrib.auth',
    'django.contrib.contenttypes',
    'django.contrib.sessions',
    'django.contrib.messages',
    'django.contrib.staticfiles',
    'app01',
]

MIDDLEWARE = [
    'django.middleware.security.SecurityMiddleware',
    'django.contrib.sessions.middleware.SessionMiddleware',
    'django.middleware.common.CommonMiddleware',
    # 'django.middleware.csrf.CsrfViewMiddleware',
    'django.contrib.auth.middleware.AuthenticationMiddleware',
    'django.contrib.messages.middleware.MessageMiddleware',
    'django.middleware.clickjacking.XFrameOptionsMiddleware',
]

ROOT_URLCONF = 'day71login.urls'

TEMPLATES = [
    {
        'BACKEND': 'django.template.backends.django.DjangoTemplates',
        'DIRS': [os.path.join(BASE_DIR, 'templates'),]
        ,
        'APP_DIRS': True,
        'OPTIONS': {
            'context_processors': [
                'django.template.context_processors.debug',
                'django.template.context_processors.request',
                'django.contrib.auth.context_processors.auth',
                'django.contrib.messages.context_processors.messages',
            ],
        },
    },
]

WSGI_APPLICATION = 'day71login.wsgi.application'

# Database
# https://docs.djangoproject.com/en/1.11/ref/settings/#databases

DATABASES = {
    'default': {
        'ENGINE': 'django.db.backends.sqlite3',
        'NAME': os.path.join(BASE_DIR, 'db.sqlite3'),
    }
}

# Password validation
# https://docs.djangoproject.com/en/1.11/ref/settings/#auth-password-validators

AUTH_PASSWORD_VALIDATORS = [
    {
        'NAME': 'django.contrib.auth.password_validation.UserAttributeSimilarityValidator',
    },
    {
        'NAME': 'django.contrib.auth.password_validation.MinimumLengthValidator',
    },
    {
        'NAME': 'django.contrib.auth.password_validation.CommonPasswordValidator',
    },
    {
        'NAME': 'django.contrib.auth.password_validation.NumericPasswordValidator',
    },
]

# Internationalization
# https://docs.djangoproject.com/en/1.11/topics/i18n/

LANGUAGE_CODE = 'en-us'

TIME_ZONE = 'UTC'

USE_I18N = True

USE_L10N = True

USE_TZ = True

# Static files (CSS, JavaScript, Images)
# https://docs.djangoproject.com/en/1.11/howto/static-files/

STATIC_URL = '/static/'

STATICFILES_DIRS = [
    # os.path.join(BASE_DIR, 'static'),
    os.path.join(BASE_DIR, 'static'),
    # os.path.join(BASE_DIR, 'static3'),
]
<!DOCTYPE html>
<html lang="en">
<head>
    <meta charset="UTF-8">
    <link rel="stylesheet" href="/static/bootstrap-3.3.7-dist/css/bootstrap.css">
    <link rel="stylesheet" href="/static/css/mycss.css">
    <title>登录</title>
</head>
<body>
<h1>登录</h1>
<div class="col-md-6 col-md-offset-3">

   <form action="/login2/" method="post">
    <p>用户名:<input type="text" name="name" class="form-control"></p>
    <p >
        密码:<input type="password" name="pwd" class="form-control">
    </p>
{#      type是button,不会往后台提交数据 #}
{#       <input type="button" value="提交">#}
{#       这两种会往后台提交数据#}
    <input type="submit" value="提交">
{#    <button>提交</button>#}

</form>

</div>


</body>
</html>
h1{
    color: red;
}
1 login.html
***重点***1 action:提交到后台的地址三种写法:
1 http://127.0.0.1:8000/login
2 /login/ 推荐用
3 空
2 method post方式
3 <input type="submit" value="提交">或<button></button>
type不可以是button
<form action="http://127.0.0.1:8000/login" method="post">
<p>用户名:<input type="text" name="name" class="form-control"></p>
<p >
密码:<input type="password" name="pwd" class="form-control">
</p>
<input type="submit" value="提交">
</form>
2 视图层:
1 request.method ----前台提交过来请求的方式
2 request.POST(相当于字典)----post形式提交过来的数据,(http请求报文的请求体重)
3 request.POST.get('name') ----推荐用get取值(取出列表最后一个值)
4 request.POST.getlist('name')-----取出列表所有的值_
5 前台get方式提交的数据,从request.GET字典里取
3 链接数据库(防止注入,推荐以下写法)
cur.execute('select * from user where name=%s and password=%s ',[name,pwd])
五: get请求和post请求
get:获取数据,页面,携带数据是不重要的数据(数据量有大小限制)
post:往后台提交数据
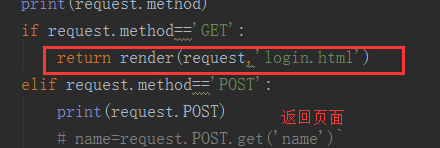
六: 新手三件套总结
1 render--返回页面
默认会去templates里找,注意路径
2 redirect--重定向
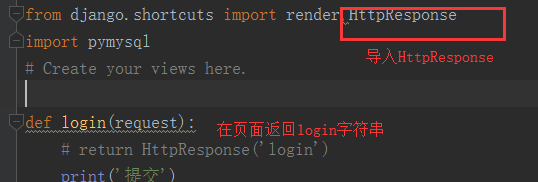
3 HttpResponse
本质:都是返回HttpResponse的对象(返回字符串)
三件套小结 :render Httpresponse redirect
HttpResponse: 带有字符串作为内容的HTTP响应类。用于回复浏览器的一种封装工具, 可以是接受字符串,也可以接收字符串类型的html标签
render: 把HttpResponse 封装在函数里,实现了更好的功能,可以返回一个html文件内容。
redirect:可以实现跳转网页的功能。
它核心的三件套是必须要掌握的,一切的功能都是基于这三者来实现的,

Httpresponse,--负责来响应浏览器的,需要浏览器返回什么就在它里面定义什么即可,浏览器的根本就是返回字符串,所以Httpresponse("str(ok)")这样写就可以

render, --负责接收request参数,然后还有一个渲染的页面(也就是一个HTML标签),以及保存数据用的一个字典数据类型的参数.这个render主要的功能就是渲染页面,在渲染的同时我们需要把一些参数填充到所渲染的页面里面去,就需要用到这个render功能,[那我们什么时候需要使用到参数去填充页面的情况呢,我们的页面是提前写好的,那是前端的时候,现在我们需要跟后端进行一些交互,这个时候前端显示的数据就会有所调整,根据特殊的要求来进行调整,这个时候我们的代码就需要后端来实现了,把后端改好的代码填充到前端去,就需要把前端的页面设置一块地方用来预存参数,当我的后端需要改变功能的时候可以启动到前端预存的那些参数然后进行修改,这个时候就需要使用到填充参数到所渲染的页面中去]

redirect,--负责跳转页面,后端的代码块码完之后我们想让页面往何处跳转就使用它去跳转,return redirect("/sogo/") 这里就是跳转的页面,之所以这样写,是因为我们的url域名里面都是这样的格式,https://i.cnblogs.com/EditPosts.aspx?postid=8269914,例如这里的http后面的域名就是这样的格式,

这里还有一个很重要的点就是request,它是一个参数,是我们在django里面写函数的时候需要传入的参数,这个参数是干什么用的呢,它里面包裹了大量的信息,都是关于请求的数据信息,

所有跟请求相关的数据都是由它来进行接收,我们的形参就是用来接收各种的参数的,它就是那样的一个形参,它只是接收跟请求相关的参数,我们以后会学到它的大量的用法,包括都有哪些是跟请求相关的,请求都是有哪些,等等.
一个不错的三件套总结博客:https://www.cnblogs.com/wangyuanming/p/7900459.html#label_13
七:orm
1 orm简介:
查询数据层次图解:如果操作mysql,ORM是在pymysq之上又进行了一层封装
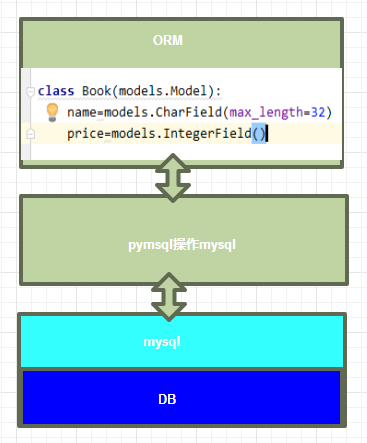
- MVC或者MTV框架中包括一个重要的部分,就是ORM,它实现了数据模型与数据库的解耦,即数据模型的设计不需要依赖于特定的数据库,通过简单的配置就可以轻松更换数据库,这极大的减轻了开发人员的工作量,不需要面对因数据库变更而导致的无效劳动
- ORM是“对象-关系-映射”的简称。
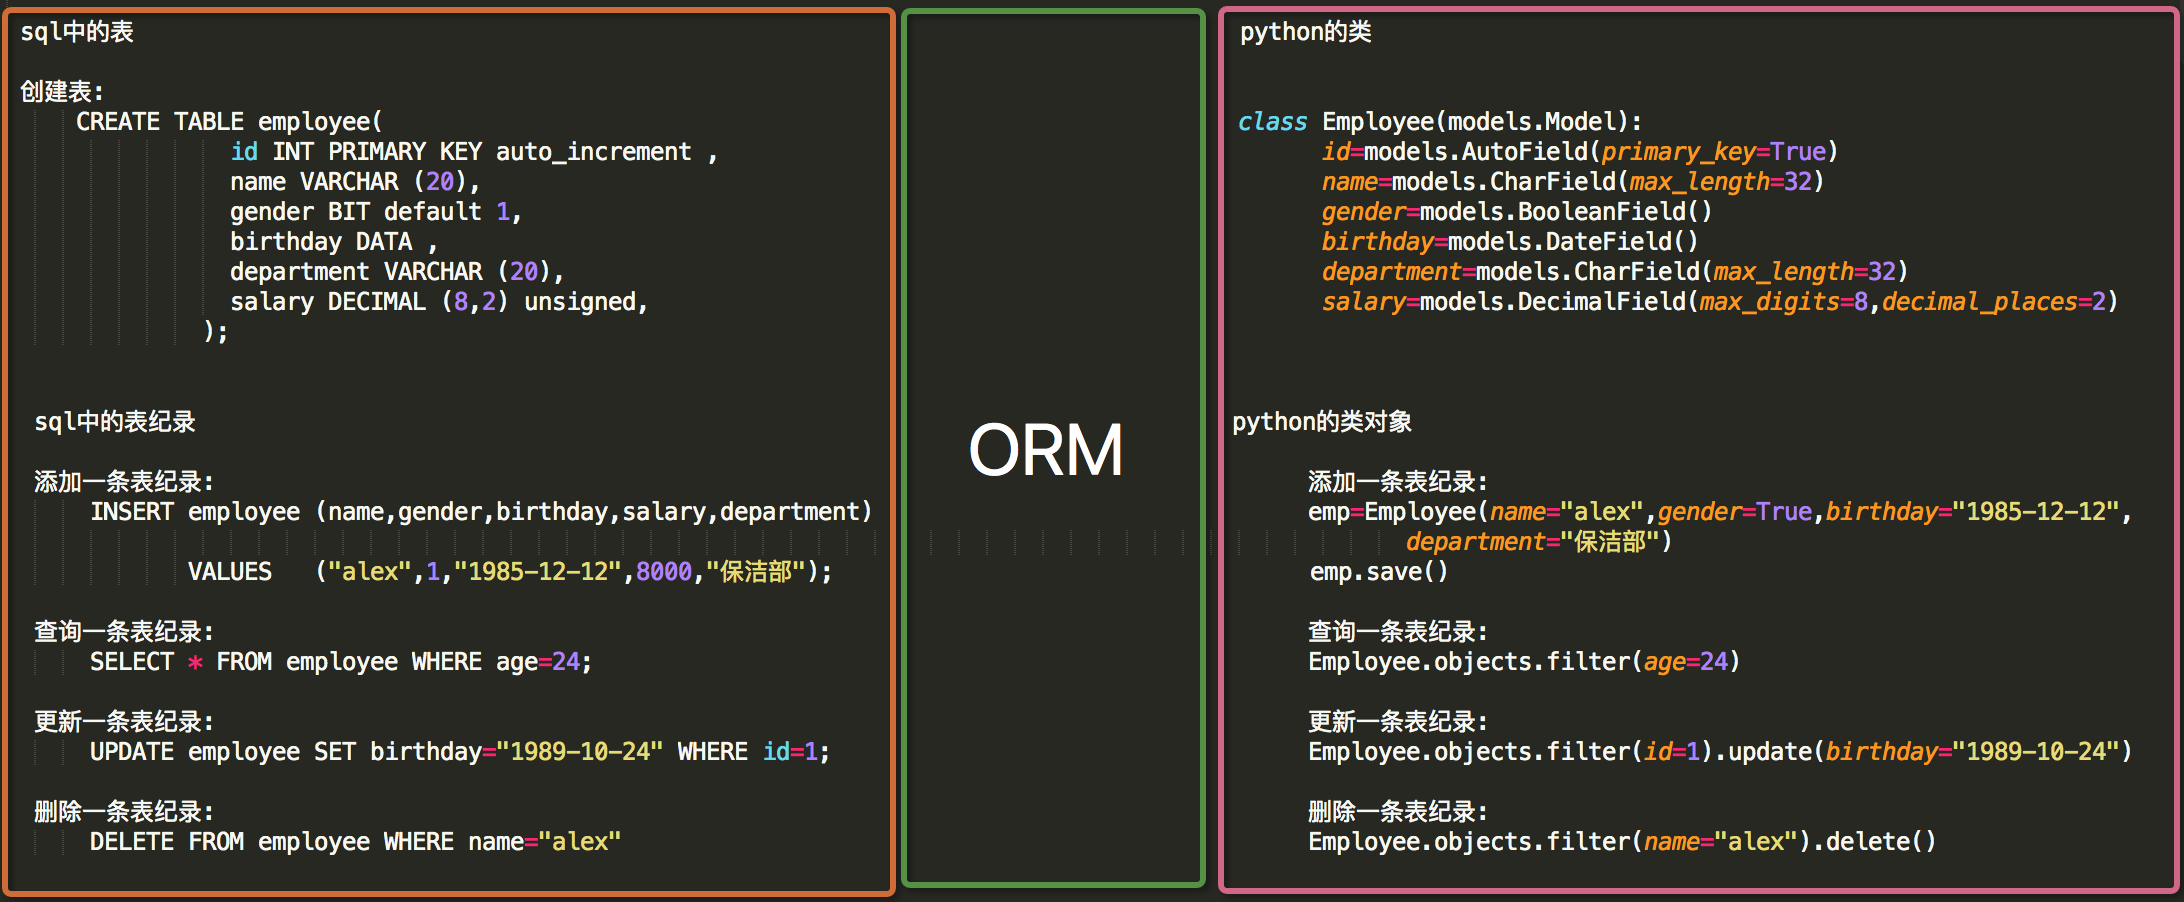
2 orm示例如下
#sql中的表

 #创建表:
     CREATE TABLE employee(
                id INT PRIMARY KEY auto_increment ,
                name VARCHAR (20),
                gender BIT default 1,
                birthday DATA ,
                department VARCHAR (20),
                salary DECIMAL (8,2) unsigned,
              );


  #sql中的表纪录

  #添加一条表纪录:
      INSERT employee (name,gender,birthday,salary,department)
             VALUES   ("alex",1,"1985-12-12",8000,"保洁部");

  #查询一条表纪录:
      SELECT * FROM employee WHERE age=24;

  #更新一条表纪录:
      UPDATE employee SET birthday="1989-10-24" WHERE id=1;

  #删除一条表纪录:
      DELETE FROM employee WHERE name="alex"


#python的类
class Employee(models.Model):
     id=models.AutoField(primary_key=True)
     name=models.CharField(max_length=32)
     gender=models.BooleanField()
     birthday=models.DateField()
     department=models.CharField(max_length=32)
     salary=models.DecimalField(max_digits=8,decimal_places=2)


 #python的类对象
      #添加一条表纪录:
          emp=Employee(name="alex",gender=True,birthday="1985-12-12",epartment="保洁部")
          emp.save()
      #查询一条表纪录:
          Employee.objects.filter(age=24)
      #更新一条表纪录:
          Employee.objects.filter(id=1).update(birthday="1989-10-24")
      #删除一条表纪录:
          Employee.objects.filter(name="alex").delete()
orm
orm介绍:
原理 :python代码-->转成sql-->数据库执行-->拿到数据转成对象返回来
orm即Object Relational Mapping 全称对象关系映射.
优点: 1 不用写sql,不会sql的人也可以写程序
2 开发效率高
缺点: 可能sql的效率低
以下是orm在settings中的相关配置

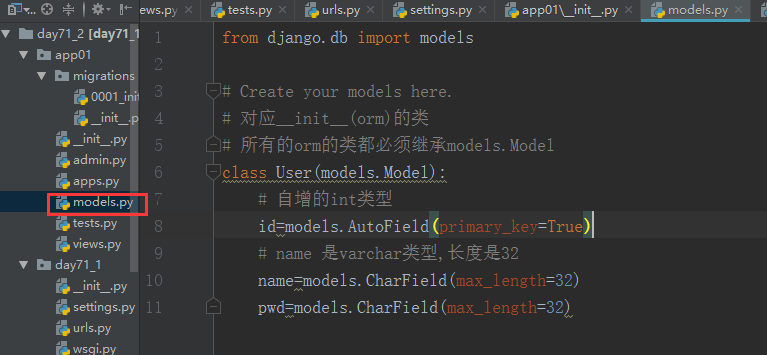
下面是在model中的配置
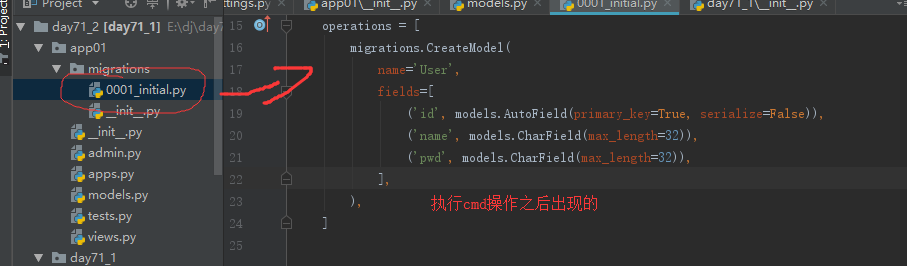
在cmd中执行
1 python3 manage.py makemigrations ----记录一下数据库的变化
2 python3 manage.py migrate ----将变化同步到数据库中
视图函数views里面的
orm链接:刘清正老师:https://www.cnblogs.com/liuqingzheng/articles/8980355.html#_label0