最近在学习安卓的广播,其中根据书上自定义广播的代码运行后却没有反应,百度后知道了解决方案,记录下来:
一、同一包内自定义广播
1.首先新建一个广播接收器类MyBroadcastReceiver.java
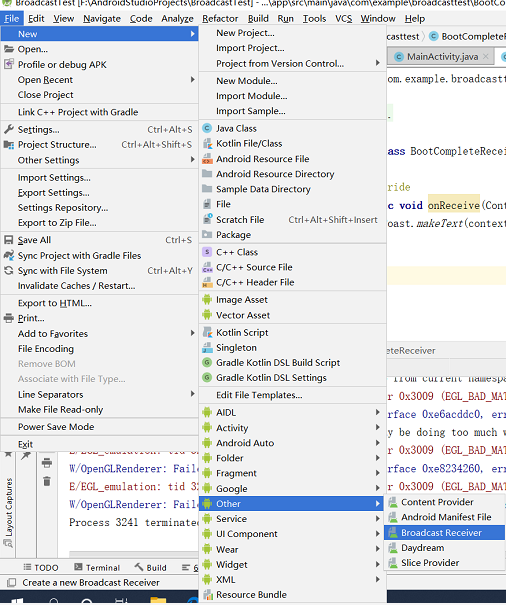
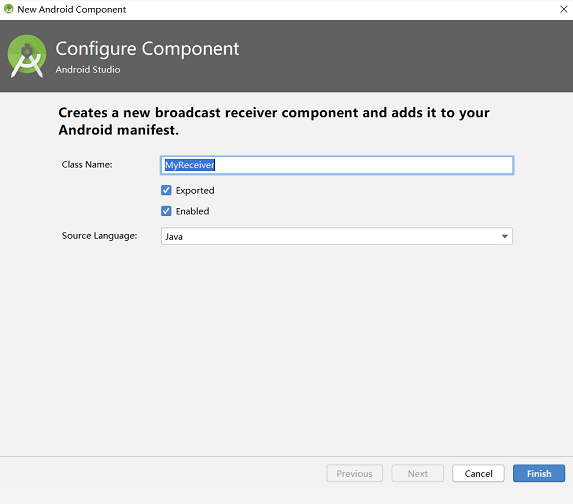
File-new-other-Brodecast Receiver,然后在弹出框输入广播接收器的类名


2.修改MyBroadcastReceiver.java代码
package com.example.broadcasttest;

import android.content.BroadcastReceiver;
import android.content.Context;
import android.content.Intent;
import android.widget.Toast;

public class MyBroadcastReceiver extends BroadcastReceiver {

    @Override
    public void onReceive(Context context, Intent intent) {
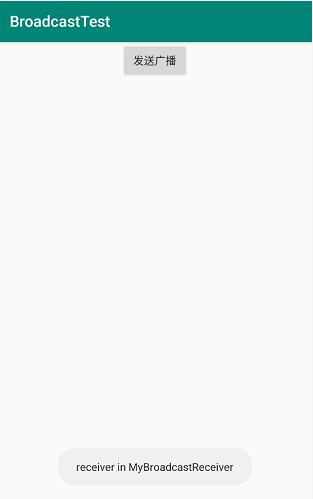
        Toast.makeText(context,"receiver in MyBroadercastReceiver",Toast.LENGTH_SHORT).show();

    }
}
3.修改AndroidManifest.xml代码
其中第5、6行、第19-21行是我自己加上去的,其他不用原本就有。
修改后可以看到,我们让MyBroadcastReceiver广播接收器接受一条com.example.broadercasttest.MY_BROADCAST的广播,因此我们需要发送一条这样的广播
 1 <?xml version="1.0" encoding="utf-8"?>
 2 <manifest xmlns:android="http://schemas.android.com/apk/res/android"
 3     package="com.example.broadcasttest">
 4
 5     <uses-permission android:name="android.permission.ACCESS_NETWORK_STATE" />
 6     <uses-permission android:name="android.permission.RECEIVE_BOOT_COMPLETED" />
 7
 8     <application
 9         android:allowBackup="true"
10         android:icon="@mipmap/ic_launcher"
11         android:label="@string/app_name"
12         android:roundIcon="@mipmap/ic_launcher_round"
13         android:supportsRtl="true"
14         android:theme="@style/AppTheme">
15         <receiver
16             android:name=".MyBroadcastReceiver"
17             android:enabled="true"
18             android:exported="true">
19             <intent-filter>
20                 <action android:name="com.example.broadercasttest.MY_BROADCAST"/>
21                 <category android:name="android.intent.category.DEFAULT"/>
22             </intent-filter>
23         </receiver>
24         <activity android:name=".MainActivity">
25             <intent-filter>
26                 <action android:name="android.intent.action.MAIN" />
27                 <category android:name="android.intent.category.LAUNCHER" />
28             </intent-filter>
29         </activity>
30     </application>
31
32 </manifest>
4.修改activity_main.xml,添加一个发送按钮
<LinearLayout xmlns:android="http://schemas.android.com/apk/res/android"
    android:orientation="vertical"
    android:layout_width="match_parent"
    android:layout_height="match_parent">

    <Button
        android:id="@+id/button"
        android:layout_width="wrap_content"
        android:layout_height="wrap_content"
        android:layout_gravity="center"
        android:text="发送广播"/>
</LinearLayout>
5.修改MainActivity.java,给按钮设置点击事件
首先构建一个Intent对象,把要发送的广播值传入intent,而setComponent的方法就是告诉系统你该发给谁,换句话说就是谁接受广播,然后Content的sendBroadcast()方法将广播发送出去,这样所有监听 com.example.broadercasttest.MY_BROADCAST 这条广播的广播接收器就会收到消息,调用onReceive()方法。
 1 package com.example.broadcasttest;
 2
 3 import androidx.appcompat.app.AppCompatActivity;
 4
 5 import android.content.BroadcastReceiver;
 6 import android.content.ComponentName;
 7 import android.content.Context;
 8 import android.content.Intent;
 9 import android.os.Bundle;
10 import android.view.View;
11 import android.widget.Button;
12 import android.widget.Toast;
13
14 public class MainActivity extends AppCompatActivity {
15     @Override
16     protected void onCreate(Bundle savedInstanceState) {
17         super.onCreate(savedInstanceState);
18         setContentView(R.layout.activity_main);
19         Button button=(Button)findViewById(R.id.button);
20         button.setOnClickListener(new View.OnClickListener() {
21             @Override
22             public void onClick(View v) {
23                 Intent intent=new Intent("com.example.broadercasttest.MY_BROADCAST");
24                 intent.setComponent(new ComponentName(getPackageName(),"com.example.broadcasttest.MyBroadcastReceiver"));
25                 sendBroadcast(intent);
26             }
27         });
28 }
如果没有加 intent.setComponent(new ComponentName(getPackageName(),"com.example.broadcasttest.MyBroadcastReceiver")); 这一句,程序运行后是没有响应的。
第一个参数是目标广播接收器所在应用的包名,第二个参数是目标广播接收器类全路径(即MyBroadcastReceiver类的路径)。

二、不同包内接收广播
即BrodecastTest程序发出的广播是可以被其他的应用程序接收到的
1.新建一个项目BrodecastTest2,然后新建一个广播接收器AnotherBrodecastReceiver.java
修改AnotherBrodecastReceiver.java
 1 package com.example.brodecasttest2;
 2
 3 import android.content.BroadcastReceiver;
 4 import android.content.Context;
 5 import android.content.Intent;
 6 import android.widget.Toast;
 7
 8 public class AnotherBrodecastReceiver extends BroadcastReceiver {
 9     @Override
10     public void onReceive(Context context, Intent intent) {
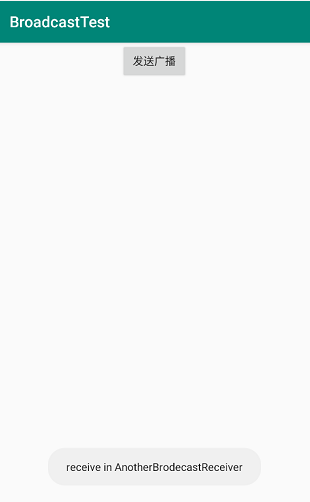
11         Toast.makeText(context,"receive in AnotherBrodecastReceiver",Toast.LENGTH_SHORT).show();
12
13     }
14 }
2.修改AndroidManifest.xml
在receiver加入<action android:name="com.example.broadcasttest.MY_BROADCAST"/>,说明AnotherBrodecastReceiver接收器也是接收com.example.broadcasttest.MY_BROADCAST这条广播
<receiver
            android:name=".AnotherBrodecastReceiver"
            android:enabled="true"
            android:exported="true">
            <intent-filter>
                <action android:name="com.example.broadcasttest.MY_BROADCAST"/>
            </intent-filter>
 </receiver>
3.回到BrodecastTest项目,修改MainActivity.java
将intent.setComponent(new ComponentName(getPackageName(),"com.example.broadcasttest.MyBroadcastReceiver"))修改为 intent.addFlags(0x01000000);会有红色下划线,但是不用理会。
4.依次运行两个程序,再回到手机里BrodecastTest软件的界面,点击发送广播按钮,会弹出两次提示信息

