一、环境准备
操作系统:CentOS release 7.5 (启动脚本理论上支持所有Linux发行版,建议CentOS 7)
JDK :jdk1.8.0_162 (建议安装Java 1.8+)
MySQL:5.7.26 (Apollo的表结构对timestamp使用了多个default声明,所以需要5.6.5以上版本)

架构:(官方默认支持DEV(开发环境)、FAT(功能测试)、UAT(回归测试)、PRO(生产环境),由于机器有限,只部署Dev,Pro)
Portal service:        172.16.150.131
Dev config&& admin     172.16.150.132
Pro config && admin    172.16.150.133
#自定义环境参考:https://github.com/ctripcorp/apollo/wiki/%E9%83%A8%E7%BD%B2&%E5%BC%80%E5%8F%91%E9%81%87%E5%88%B0%E7%9A%84%E5%B8%B8%E8%A7%81%E9%97%AE%E9%A2%98#42-%E6%B7%BB%E5%8A%A0%E8%87%AA%E5%AE%9A%E4%B9%89%E7%9A%84%E7%8E%AF%E5%A2%83


关闭防火墙
同步时间

#注意事项:
如果实际部署的机器有多块网卡(如docker),或者存在某些网卡的IP是Apollo客户端和Portal无法访问的(如网络安全限制),那么我们就需要在apollo-configservice和apollo-adminservice中做相关限制以避免Eureka将这些网卡的IP注册到Meta Server。
参考地址:https://github.com/ctripcorp/apollo/wiki/%E5%88%86%E5%B8%83%E5%BC%8F%E9%83%A8%E7%BD%B2%E6%8C%87%E5%8D%97#14%E7%BD%91%E7%BB%9C%E7%AD%96%E7%95%A5
二、服搭建数据库服务及创建相关库
1.搭建MySQL
wget https://dev.mysql.com/get/mysql80-community-release-el7-3.noarch.rpm
rpm -ivh mysql80-community-release-el7-3.noarch.rpm
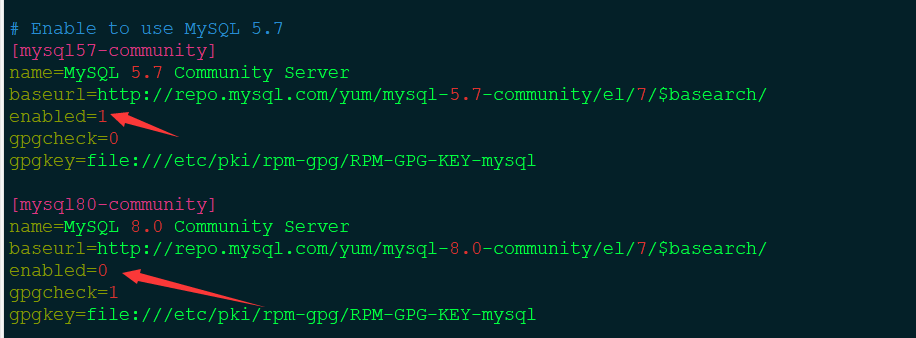
vim mysql-community.repo #启动5.7,禁用8.0
安装MySQL
yum clean all && yum makecache
yum install mysql-community-server -y
2.优化MySQL配置


[mysqld]
#
# Remove leading # and set to the amount of RAM for the most important data
# cache in MySQL. Start at 70% of total RAM for dedicated server, else 10%.
# innodb_buffer_pool_size = 128M
#
# Remove leading # to turn on a very important data integrity option: logging
# changes to the binary log between backups.
# log_bin
#
# Remove leading # to set options mainly useful for reporting servers.
# The server defaults are faster for transactions and fast SELECTs.
# Adjust sizes as needed, experiment to find the optimal values.
# join_buffer_size = 128M
# sort_buffer_size = 2M
# read_rnd_buffer_size = 2M
datadir=/var/lib/mysql
socket=/var/lib/mysql/mysql.sock
read_buffer_size = 4777216
read_rnd_buffer_size = 8554432
sort_buffer_size = 8554432
tmp_table_size = 32108864
join_buffer_size = 64217728


slow_query_log = 1
slow_query_log_file = /var/lib/mysql/slow.log
log_queries_not_using_indexes = 1
log_slow_admin_statements = 1
log_slow_slave_statements = 1
log_throttle_queries_not_using_indexes = 10
expire_logs_days = 7
long_query_time = 2
min_examined_row_limit = 100
binlog-rows-query-log-events = 1
log-bin-trust-function-creators = 1
log-slave-updates = 1


innodb_log_file_size=300M
innodb_page_size = 16384
innodb_buffer_pool_size = 300M
innodb_buffer_pool_instances = 8
innodb_buffer_pool_load_at_startup = 1
innodb_buffer_pool_dump_at_shutdown = 1
innodb_lru_scan_depth = 4096
innodb_lock_wait_timeout = 5
innodb_io_capacity = 10000
innodb_io_capacity_max = 20000
innodb_flush_method = O_DIRECT
innodb_file_format = Barracuda
innodb_file_format_max = Barracuda
innodb_undo_logs = 128
innodb_flush_neighbors = 0
innodb_log_buffer_size = 16777216
innodb_purge_threads = 4
innodb_large_prefix = 1
innodb_thread_concurrency = 64
innodb_print_all_deadlocks = 1
innodb_strict_mode = 1
innodb_sort_buffer_size = 67108864
innodb_write_io_threads = 16
innodb_read_io_threads = 16
innodb_file_per_table = 1
innodb_stats_persistent_sample_pages = 64
innodb_autoinc_lock_mode = 2

# Disabling symbolic-links is recommended to prevent assorted security risks
symbolic-links=0

log-error=/var/log/mysqld-error.log
pid-file=/var/run/mysqld/mysqld.pid
启动MySQL服务并设置登录密码
systemctl start mysqld
grep "temporary password" /var/log/mysqld.log   #获取MySQL初始化密码
mysql -uroot -p
Enter password:
Welcome to the MySQL monitor.  Commands end with ; or g.
Your MySQL connection id is 152
Server version: 5.7.26 MySQL Community Server (GPL)   #MySQL版本号
...
mysql> show databases;
ERROR 1820 (HY000): You must reset your password using ALTER USER statement before executing this statement.  #默认第一次登录MySQL需要重新设置root密码,否则报错

mysql> alter user 'root'@'localhost' identified by 'Qgg12#45';  #密码要符合一定的强度,或者修改MySQL密码策略
Query OK, 0 rows affected (0.00 sec)

mysql> flush privileges;
Query OK, 0 rows affected (0.00 sec)

mysql> q
Bye
#以上操作在三台服务器都需要执行
2.创建Apollo PortalDB数据库(在Portal service:172.16.150.131服务器上操作)
wget https://raw.githubusercontent.com/ctripcorp/apollo/master/scripts/db/migration/portaldb/V1.0.0__initialization.sql  #下载官方提供的SQL文件
mysql -uroot -p
mysql>  source /root/V1.0.0__initialization.sql  #手动导入
show databases;
use ApolloPortalDB;
show tables;
select `Id`, `Key`, `Value`, `Comment` from `ApolloPortalDB`.`ServerConfig` limit 1;
3.创建ApolloConfigDB数据库(172.16.150.132、172.16.150.133上部署)
wget https://raw.githubusercontent.com/ctripcorp/apollo/master/scripts/db/migration/configdb/V1.0.0__initialization.sql
source /root/V1.0.0__initialization.sql
select `Id`, `Key`, `Value`, `Comment` from `ApolloConfigDB`.`ServerConfig` limit 1;
三、安装Apollo服务
1.安装apollo-portal 服务(在Portal service:172.16.150.131服务器上执行)
https://github.com/ctripcorp/apollo/releases/download/v1.4.0/apollo-portal-1.4.0-wget github.zip
unzip apollo-portal-1.4.0-github.zip
cd apollo-portal/
cat config/application-github.properties  #ApolloPortalDB数据库连接串信息
# DataSource
spring.datasource.url = jdbc:mysql://172.16.150.131:3306/ApolloPortalDB?characterEncoding=utf8
spring.datasource.username = xxxx
spring.datasource.password = xxx

cat config/apollo-env.properties #配置apollo-portal的meta service信息
dev.meta=http://172.16.150.132:8080
pro.meta=http://172.16.150.133:8080
修改Apollo-portal启动脚本
[root@localhost ~]# grep "^export JAVA_OPTS"  apollo-portal/scripts/startup.sh  #根据实际情况修改相应的值
export JAVA_OPTS="-server -Xms1024m -Xmx1024m -Xss256k -XX:MetaspaceSize=128m -XX:MaxMetaspaceSize=256m -XX:NewSize=512m -XX:MaxNewSize=512m -XX:SurvivorRatio=8"
2.配置apollo-configservice、apollo-adminservice(172.16.150.132、172.16.150.133上操作)
https://github.com/ctripcorp/apollo/releases/download/v1.4.0/apollo-adminservice-1.4.0-github.zip
https://github.com/ctripcorp/apollo/releases/download/v1.4.0/apollo-configservice-1.4.0-github.zip
unzip apollo-adminservice-1.4.0-github.zip
unzip apollo-configservice-1.4.0-github.zip
[root@localhost ~]# cat apollo-adminservice/config/application-github.properties
# DataSource
spring.datasource.url = jdbc:mysql://172.16.150.132:3306/ApolloConfigDB?characterEncoding=utf8  #注意修改MySQL连接地址
spring.datasource.username = root
spring.datasource.password = xxxx
[root@localhost ~]# cat apollo-configservice/config/application-github.properties  #注意修改MySQL连接地址
# DataSource
spring.datasource.url = jdbc:mysql://172.16.150.132:3306/ApolloConfigDB?characterEncoding=utf8
spring.datasource.username = root
spring.datasource.password = xxx
修改apollo-configservice、apollo-adminservice启动脚本
[root@localhost ~]# grep "^export JAVA_OPTS" apollo-configservice/scripts/startup.sh #根据实际情况修改相应的值
export JAVA_OPTS="-server -Xms1024m -Xmx1024m -Xss256k -XX:MetaspaceSize=128m -XX:MaxMetaspaceSize=256m -XX:NewSize=512m -XX:MaxNewSize=512m -XX:SurvivorRatio=8"
[root@localhost ~]# grep "^export JAVA_OPTS" apollo-adminservice/scripts/startup.sh
export JAVA_OPTS="-server -Xms1024m -Xmx1024m -Xss256k -XX:MetaspaceSize=128m -XX:MaxMetaspaceSize=256m -XX:NewSize=512m -XX:MaxNewSize=512m -XX:SurvivorRatio=8"
3.启动服务
#要先启动apollo-configservice再启动apollo-adminservice等所有apollo-configservice和apollo-adminservice启动完成后再启动apollo-portal
scripts/startup.sh     #启动
scripts/shutdown.sh    #关闭服务
日志文件查看
apollo-configservice   /opt/logs/100003171/   #日志路径启动脚本中可定义路径
apollo-adminservice    /opt/logs/100003172
apollo-portal       /opt/logs/100003173
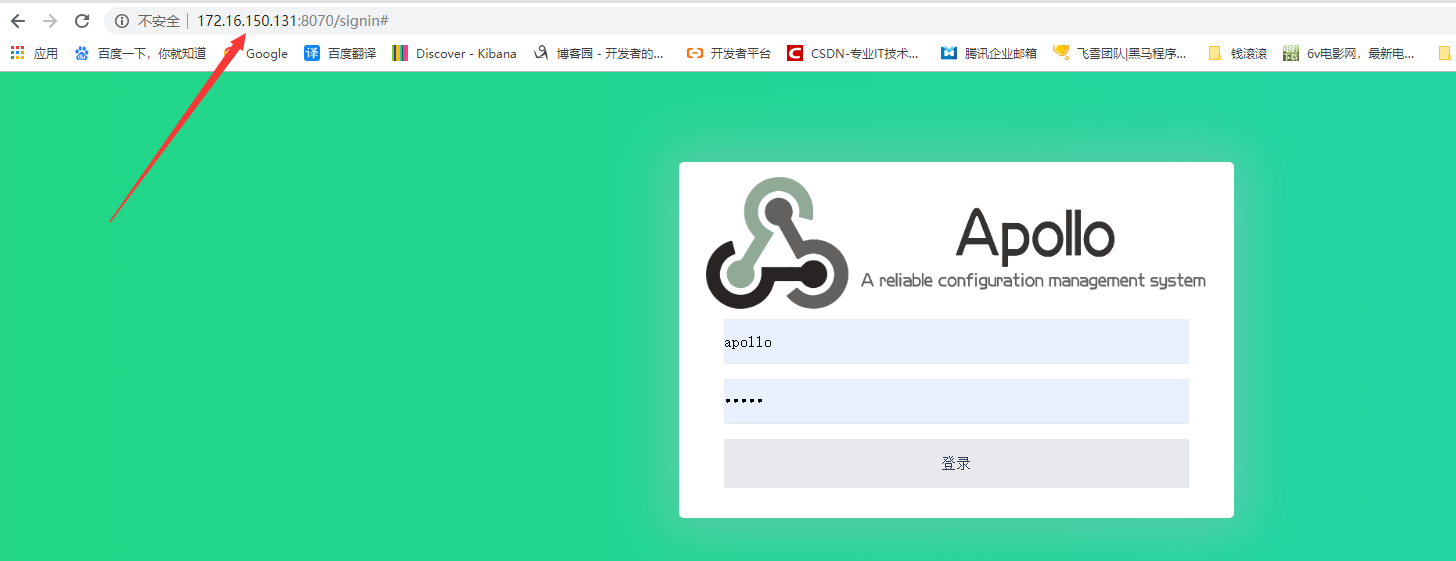
登录Apollo,浏览器访问apollo-portal服务,端口8070,初始用户名是apollo,密码是admin