微信公众号消息推送
前提
环境: python 3
框架: django 1.11.9
需要有自己的服务器来响应微信发送的Token验证~~
当然, 下面的代码用上了博主的服务器, 直接复制博主的也能用, 如果没有响应, 说明博主没启服务
测试环境
这里先介绍测试号的开发;
测试接口链接: https://mp.weixin.qq.com/debug/cgi-bin/sandbox?t=sandbox/login
点击链接进入页面,会看到一个二维码,用微信扫描后就会分配给你一个微信公众测试账号;
如下

当然也可以多人测试;
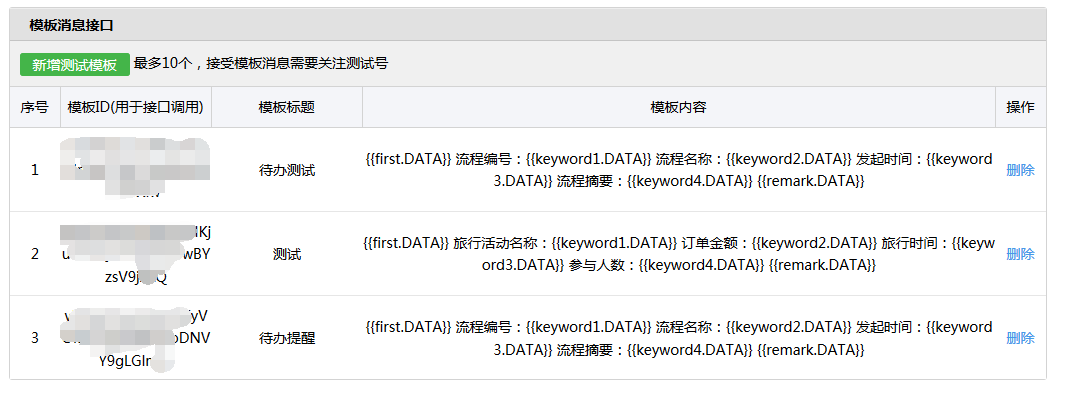
然后找到如下这个位置,点击“新增测试模板”按钮,填写


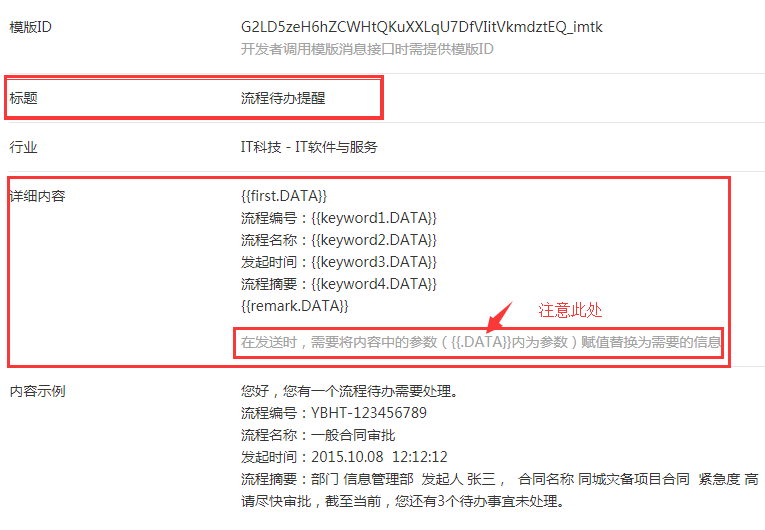
注意要修改的地方 :

下面是相关代码:

urlpatterns = [
    url(r'^bind/$', views.bind),
    url(r'^bind_qcode/$', views.bind_qcode),
    url(r'^callback/$', views.callback),
    url(r'^sendmsg/$', views.sendmsg),
]

# ############# 微信 ##############
WECHAT_CONFIG = {
    'app_id': '自己的测试号appID',
    'appsecret': '自己的测试号appsecret',
    'redirect_uri': 'http://140.143.63.45:8080/callback/',  # 服务器响应url
    'template_id': "自己的模板ID"
}

import json
import time
import functools
import requests
from django.conf import settings
from django.shortcuts import render, redirect, HttpResponse
from django.http import JsonResponse
from app01 import models


def bind(request):
    """
    关注公众号,并绑定个人微信(用于以后消息推送)
    """
    return render(request, 'bind.html')


def bind_qcode(request):
    """
    生成二维码
    """
    ret = {'code': 1000}
    try:
        access_url = "https://open.weixin.qq.com/connect/oauth2/authorize?appid={appid}&redirect_uri={redirect_uri}&response_type=code&scope=snsapi_userinfo&state={state}#wechat_redirect"
        access_url = access_url.format(
            appid=settings.WECHAT_CONFIG["app_id"],
            redirect_uri=settings.WECHAT_CONFIG["redirect_uri"],
            state=request.session['user_info']['uid']
        )
        ret['data'] = access_url
    except Exception as e:
        ret['code'] = 1001
        ret['msg'] = str(e)

    return JsonResponse(ret)


def callback(request):
    """
    用户在手机微信上扫码后,微信自动调用该方法。
    用于获取扫码用户的唯一ID,以后用于给他推送消息。
    """
    code = request.GET.get("code")

    # 用户UID
    state = request.GET.get("state")

    # 获取该用户openId(用户唯一,用于给用户发送消息)
    res = requests.get(
        url="https://api.weixin.qq.com/sns/oauth2/access_token",
        params={
            "appid": settings.WECHAT_CONFIG["app_id"],
            "secret": settings.WECHAT_CONFIG["appsecret"],
            "code": code,
            "grant_type": 'authorization_code',
        }
    ).json()
    # 获取的到openid表示用户授权成功

    openid = res.get("openid")
    if openid:
        models.UserInfo.objects.filter(uid=state).update(wx_id=openid)
        response = "<h1>授权成功 %s </h1>" % openid
    else:
        response = "<h1>用户扫码之后,发送的消息~~</h1>"
    return HttpResponse(response)


def sendmsg(request):
    def get_access_token():
        """
        获取微信全局接口的凭证(默认有效期俩个小时)
        如果不每天请求次数过多, 通过设置缓存即可
        """
        result = requests.get(
            url="https://api.weixin.qq.com/cgi-bin/token",
            params={
                "grant_type": "client_credential",
                "appid": settings.WECHAT_CONFIG['app_id'],
                "secret": settings.WECHAT_CONFIG['appsecret'],
            }
        ).json()
        if result.get("access_token"):
            access_token = result.get('access_token')
        else:
            access_token = None
        return access_token

    access_token = get_access_token()

    openid = models.UserInfo.objects.get(id=1).wx_id

    def send_custom_msg():
        body = {
            "touser": "oxdWJ1CwhFai5Gwq4GpZO3Cfls-0",
            "msgtype": "text",
            "text": {
                "content": '要发送的内容~~'
            }
        }
        response = requests.post(
            url="https://api.weixin.qq.com/cgi-bin/message/custom/send",
            params={
                'access_token': access_token
            },
            data=bytes(json.dumps(body, ensure_ascii=False), encoding='utf-8')
        )
        # 这里可根据回执code进行判定是否发送成功(也可以根据code根据错误信息)
        result = response.json()
        return result

    def send_template_msg():
        """
        发送模版消息
        """
        res = requests.post(
            url="https://api.weixin.qq.com/cgi-bin/message/template/send",
            params={
                'access_token': access_token
            },
            json={
                "touser": openid,
                "template_id": settings.WECHAT_CONFIG['template_id'],
                "data": {
                    "time": {
                        "DATA": "2018-12-28",
                        "color": "#173177"
                    },
                    "name": {
                        "DATA": "李二",
                        "color": "#173177"
                    },
                },
            }
        )
        result = res.json()
        print(result, '<--result')
        return result

    # result = send_custom_msg()
    result = send_template_msg()

    if result.get('errcode') == 0:
        return HttpResponse('发送成功')
    return HttpResponse('发送失败')
注意: 上面的代码并非完整的代码, 有些地方还需自行修改
