之前写过使用quartz、xxl实现任务调度,最近有空总结了使用springboot自带的scheduled方式实现任务调度
- 打开IDEA选择file->new->project
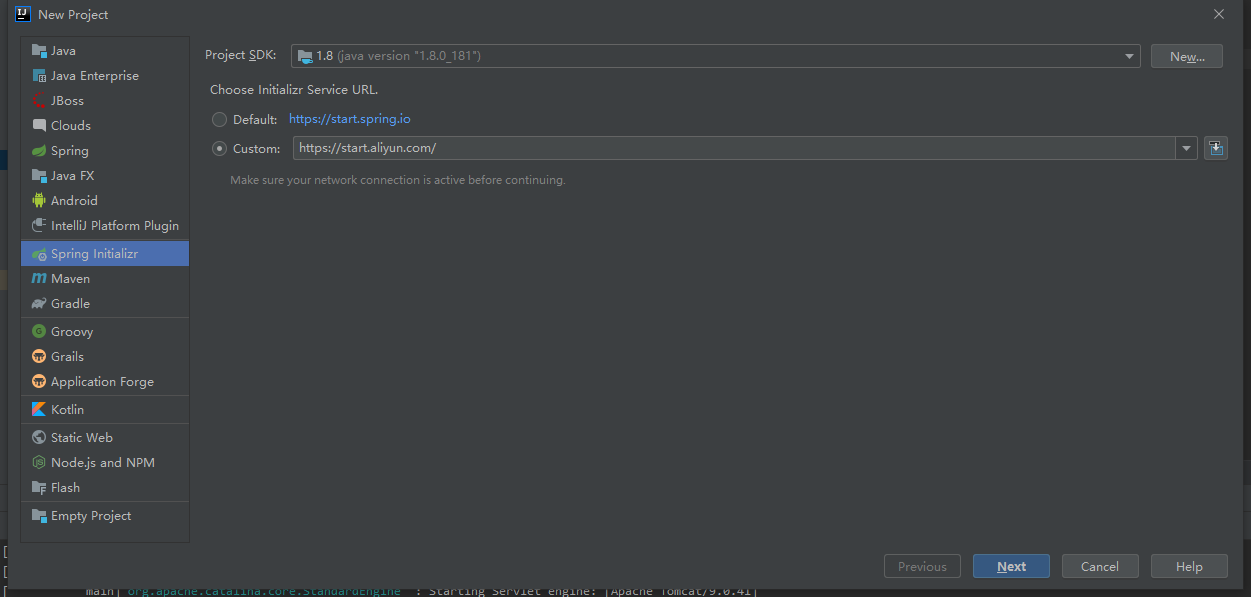
- 写上group名和artifact名

- 选择web项目,选择Spring Web,最后下一步完成即可

- pom.xml文件中添加日志打印依赖
     <!-- SLf4j 日志记录-->
        <dependency>
            <groupId>org.projectlombok</groupId>
            <artifactId>lombok</artifactId>
            <optional>true</optional>
            <version>1.18.12</version>
        </dependency>
- 添加service包,并创建TestJob类
package com.springboot.scheduled.service;

import lombok.extern.slf4j.Slf4j;
import org.springframework.scheduling.annotation.Scheduled;
import org.springframework.stereotype.Component;

import java.util.concurrent.TimeUnit;

@Component
@Slf4j
public class TestJob {
    @Scheduled(initialDelay = 1000, fixedRate = 1000 * 10)   //启动后1秒后执行,每10秒执行一次
    public void Task1() throws InterruptedException {
        log.info("task1 任务开始, 线程执行ID:" + Thread.currentThread().getId() + "线程名称:" + Thread.currentThread().getName());
        TimeUnit.SECONDS.sleep(10);
        log.info("task1 任务结束, 线程执行ID:" + Thread.currentThread().getId() + "线程名称:" + Thread.currentThread().getName());

    }

    @Scheduled(initialDelay = 1000, fixedRate = 1000 * 5)   //每5秒执行一次
    public void Task2() throws InterruptedException {
        log.info("task2 任务开始, 线程执行ID:" + Thread.currentThread().getId() + "线程名称:" + Thread.currentThread().getName());
        TimeUnit.SECONDS.sleep(10);
        log.info("task2 任务结束, 线程执行ID:" + Thread.currentThread().getId() + "线程名称:" + Thread.currentThread().getName());

    }
}
- 在入口程序,添加@EnableScheduling注解
package com.springboot.scheduled;

import org.springframework.boot.SpringApplication;
import org.springframework.boot.autoconfigure.SpringBootApplication;
import org.springframework.scheduling.annotation.EnableScheduling;

@SpringBootApplication
@EnableScheduling
public class ScheduledApplication {

    public static void main(String[] args) {
        SpringApplication.run(ScheduledApplication.class, args);
    }

}
- 完成后运行效果输出:
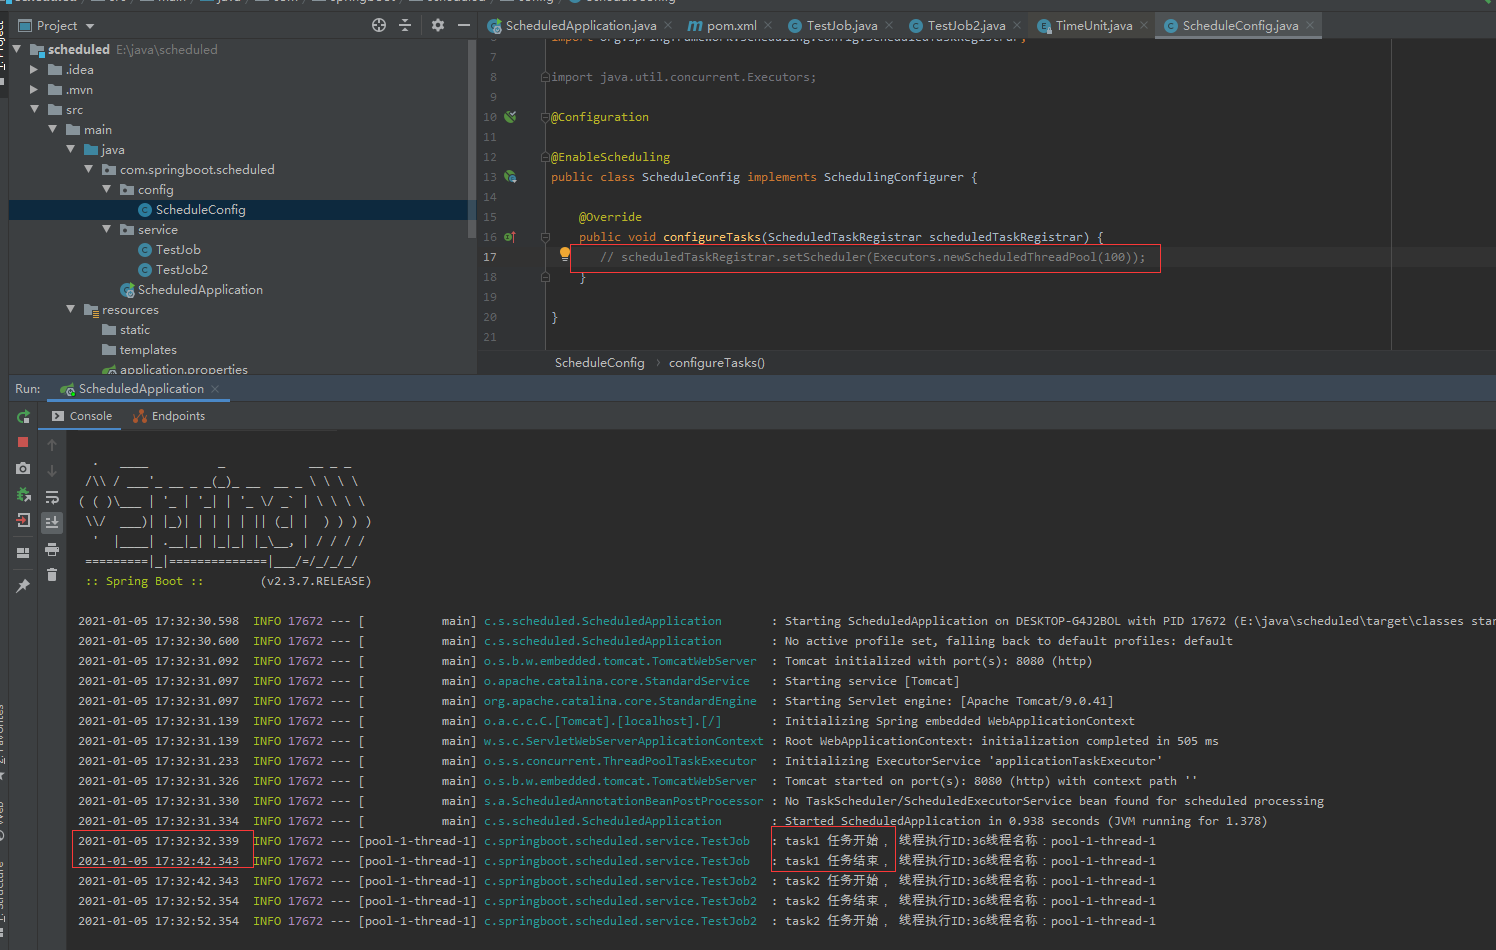
从上面的执行结果中,我们可以看出task1任务执行完成后,task2才开始执行,这是由于springboot中任务调度默认是单线程(串行)执行的,如果想多线程(并行)执行需要添加配置
package com.springboot.scheduled.config;

import org.springframework.context.annotation.Configuration;
import org.springframework.scheduling.annotation.EnableScheduling;
import org.springframework.scheduling.annotation.SchedulingConfigurer;
import org.springframework.scheduling.config.ScheduledTaskRegistrar;

import java.util.concurrent.Executors;

@Configuration

@EnableScheduling
public class ScheduleConfig implements SchedulingConfigurer {

    @Override
    public void configureTasks(ScheduledTaskRegistrar scheduledTaskRegistrar) {
        scheduledTaskRegistrar.setScheduler(Executors.newScheduledThreadPool(100));
    }

}
- 添加并行执行配置后,执行效果:
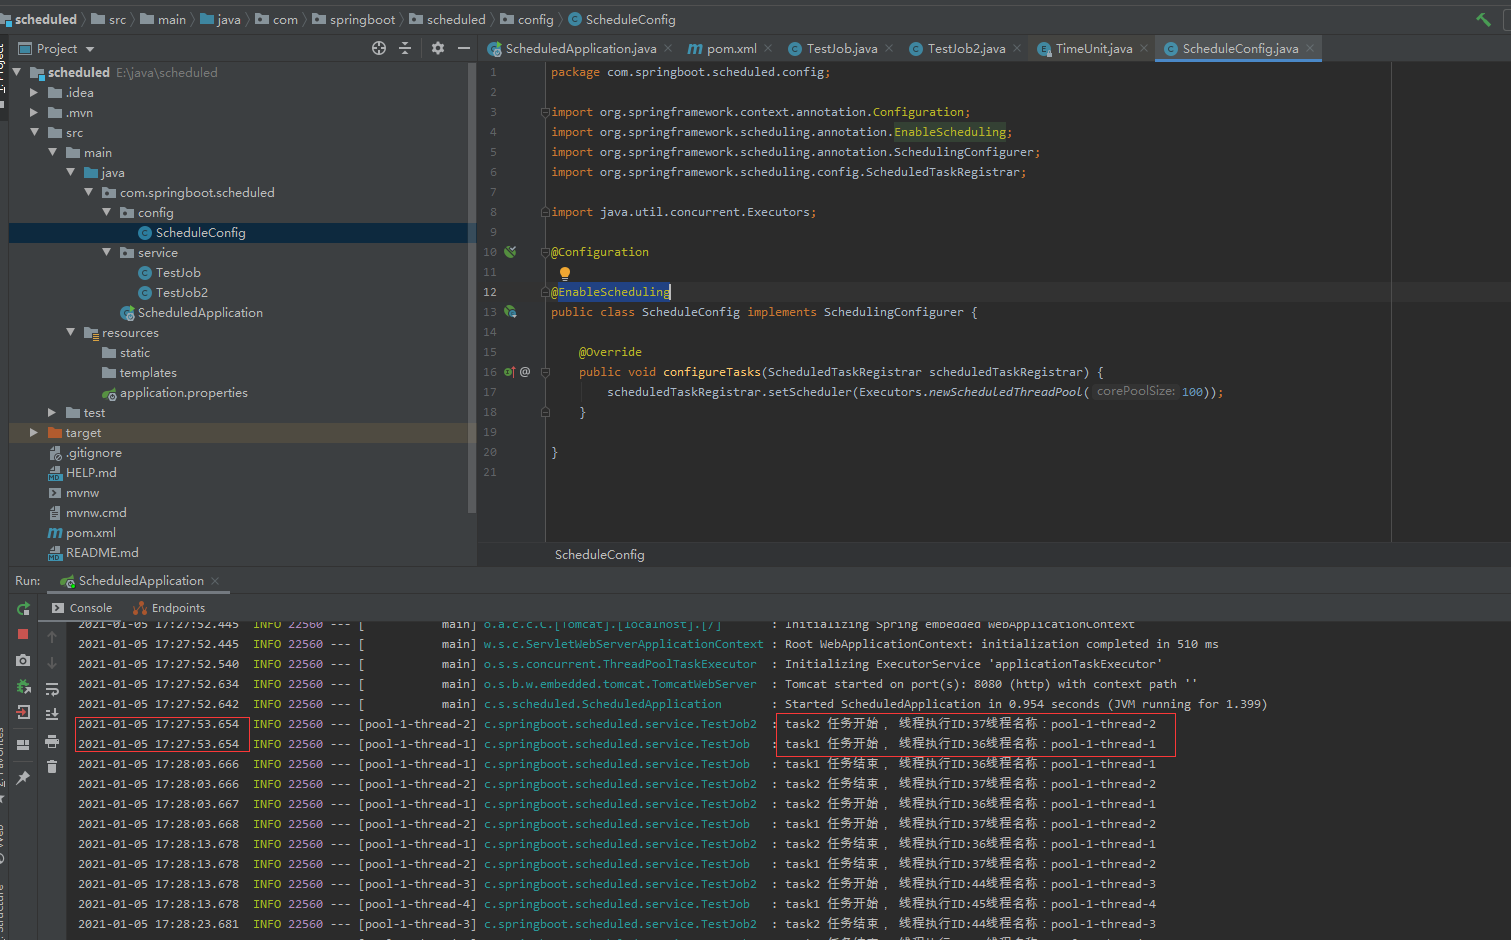
从上图可以看出,task1和task2同时执行了