## Get Ubuntu Version Info
lsb_release -a
## Get Linux kernal info
uname -a
## Get Computer name
echo $HOSTNAME
## Define Environment Variable
### Defining Variables Globally
Most Linux distributions tell you to change or add environment variable definitions in /etc/profile or other locations. Be sure to maintain and manage the environment variables and pay attention to the numerous files that can contain environment variables. In principle, any shell script can be used for initializing environmental variables, but following traditional UNIX conventions, these statements should be only be present in some particular files. The following files should be used for defining global environment variables on your system: /etc/profile, /etc/bash.bashrc and /etc/environment.
### Defining Variables Locally
You do not always want to define an environment variable globally. For instance, you might want to add /home/my_user/bin to the PATH variable but do not want all other users on your system to have that in their PATH too. The following files should be used for local environment variables on your system: ~/.bashrc, ~/.profile, ~/.bash_login and ~/.bash_logout.
To add a directory to PATH for local usage, put following in ~/.bashrc:
PATH="${PATH}:/home/my_user/bin"
To update the variable, re-login or source the file: $ source ~/.bashrc.
### Session Specific Variables
Sometimes even stricter definitions are required. One might want to temporarily run executables from a specific directory created without having to type the absolute path to each one, or editing ~/.bashrc for the short time needed to run them.
In this case, you can define the PATH variable in your current session, combined with the export command. As long as you do not log out, the PATH variable will be using the temporary settings. To add a session-specific directory to PATH, issue:
$ export PATH="${PATH}:/home/my_user/tmp/usr/bin"
## Print all environment variables
printenv
## 关机命令 shutdown
好像ubuntu的终端中默认的是当前用户的命令,只是普通用户,因此在终端器中可以使用sudo -sh 转换到管理员root用户下执行命令。
1)shutdown --help
可以查看shutdown命令如何使用,当然也可以使用man shutdown命令。
2) shutdown -h now 现在立即关机
3)shutdown -r now 现在立即重启
4)shutdown -r +3 三分钟后重启
5)shutdown -h +3 "The System will shutdown after 3 minutes" 提示使用者将在三分钟后关机
6)shutdown -r 20:23 在20:23时将重启计算机
7)shutdown -r 20:23 & 可以将在
## How to start GUI application
Add a "&" to the end of commandline
$ emacs &
$ p4v &
You can also "ctrl + z" to suspend current running process.
## 搜索文件
1.whereis 文件名
快速模糊查找.
2.find / -name 文件名
准确,但速度慢,消耗资源大
#find / -name php.ini
3.locate 文件名
强力推荐,最快,最好. To use locate in Mac, run "sudo launchctl load -w /System/Library/LaunchDaemons/com.apple.locate.plist"
Install locate:
ubuntu:sudo apt-get install locate;
centos:yum -y install mlocate;
第一次使用locate的时候,会有一个"mlocate.db:No such file or directoly"的错误,需要update db。
[root@ip-10-199-99-196 src]# locate .emacs
locate: can not stat () `/var/lib/mlocate/mlocate.db': No such file or directory
[root@ip-10-199-99-196 src]# updatedb
[root@ip-10-199-99-196 src]# locate .emacs
/etc/rpm/macros.emacs
/etc/skel/.emacs
/root/.emacs.d
/root/.emacs.d/auto-save-list
/root/.emacs.d/auto-save-list/.saves-11160-ip-10-199-99-196.ec2.internal~
/root/.emacs.d/auto-save-list/.saves-5002-ip-10-199-99-196.ec2.internal~
/root/.emacs.d/auto-save-list/.saves-5181-ip-10-199-99-196.ec2.internal~
/root/.emacs.d/auto-save-list/.saves-5215-ip-10-199-99-196.ec2.internal~
/usr/bin/etags.emacs
/usr/share/man/man1/etags.emacs.1.gz
## 查看磁盘剩余空间和文件夹大小
df -hl 查看磁盘剩余空间
df -h 查看每个根路径的分区大小
du -sh [目录名] 返回该目录的大小
du -sm [文件夹] 返回该文件夹总M数
Example:
[root@ip-12-345-678-910 users]# df -lh
Filesystem Size Used Avail Use% Mounted on
/dev/xvda1 7.9G 3.0G 4.9G 39% /
tmpfs 831M 0 831M 0% /dev/shm
Help:
df --help
du --help
## 用ps查看进程
ps命令可以用来查看当前的进程。
ps a 显示现行终端机下的所有程序,包括其他用户的程序。
ps -A 显示所有程序。
ps c 列出程序时,显示每个程序真正的指令名称,而不包含路径,参数或常驻服务的标示。
ps -e 此参数的效果和指定"A"参数相同。
ps e 列出程序时,显示每个程序所使用的环境变量。
ps f 用ASCII字符显示树状结构,表达程序间的相互关系。
ps -H 显示树状结构,表示程序间的相互关系。
ps -N 显示所有的程序,除了执行ps指令终端机下的程序之外。
ps s 采用程序信号的格式显示程序状况。
ps S 列出程序时,包括已中断的子程序资料。
ps -t<终端机编号> 指定终端机编号,并列出属于该终端机的程序的状况。
ps u 以用户为主的格式来显示程序状况。
ps x 显示所有程序,不以终端机来区分。
常有人用ps aux | grep program_filter_word来利用grep过滤process。
## 用top来查看进程
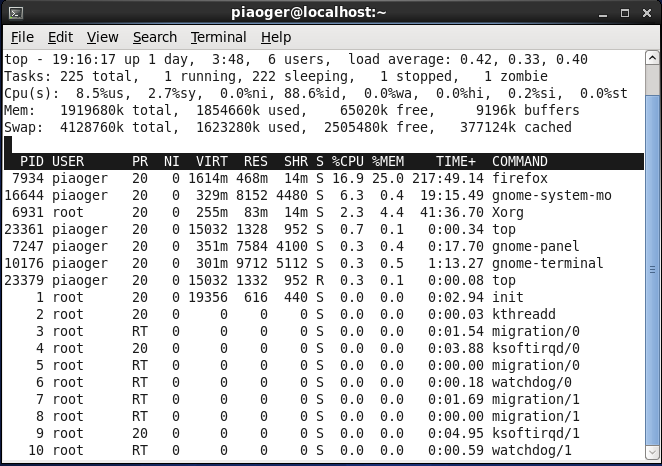
top命令用来动态显示系统当前的进程状况,与ps的主要区别也正在于这动态二字.
Options:
-b:使用批处理模式。
-c:显示程序并显示程序的完整相关信息,如名称、路径等。
-i:忽略闲置或已经冻结的程序。
-d<delay>:以秒为单位,设定监控程序执行状况的时间间隔。
-n<iterations>:设定监控信息的更新次数。
-p<进程号>:指定进程。
-s:安全模式。
-u<somebody>:指定用户名。
-v:显示版本信息。
-h:显示帮助信息。

## 用pstree来显示进程树
pstree命令列出当前的进程,以及它们的树状结构。
## kill来杀死进程
kill [ -s signal | -p ] [ -a ] pid ...
kill -l [ signal ]
参数
-s:指定发送的信号。
-p:模拟发送信号。
-l:指定信号的名称列表。
pid:要中止进程的ID号。
Signal:表示信号。
信号量9杀死Zombie Process并清理内存
kill -9 pid
free
## 查看可执行程序和动态链接库所以来的动态链接库
在Windows下,我们可以使用Dependency Walker来查看依赖,在Linux下,我们可以简单使用ldd来达到同样的目的.
[root@ip-12-345-678-910 users]# ldd ./test
linux-vdso.so.1 => (0x00007fff491ff000)
libstdc++.so.6 => /usr/lib64/libstdc++.so.6 (0x00007f9b10b84000)
libm.so.6 => /lib64/libm.so.6 (0x00007f9b10900000)
libgcc_s.so.1 => /lib64/libgcc_s.so.1 (0x00007f9b106eb000)
libc.so.6 => /lib64/libc.so.6 (0x00007f9b1035c000)
/lib64/ld-linux-x86-64.so.2 (0x00007f9b10e8b000)
但是,我们要注意可能存在安全问题:
ldd工具可能比你想象的更容易被攻击。程序员和系统管理员经常使用ldd工具在Linux和UNIX操作系统内列出可执行文件所依赖的共享库。但是一位黑客用事例证明,在一个可执行文件中运行ldd,可能会导致其执行任意代码。一位用户指出,这个问题很早被发现了,“Program Library HOWTO”就警告:不要在自己不信任的程序内运行ldd,ldd是通过设置特殊的环境变量工作和运行程序的,一个可疑的程序可能会迫使ldd用户执行任意的代码,而不是列出共享库。
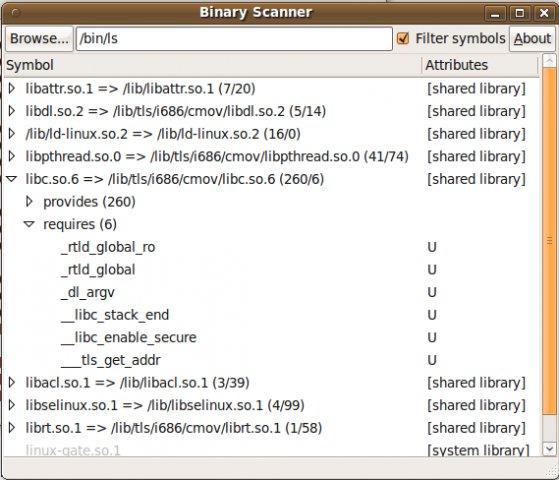
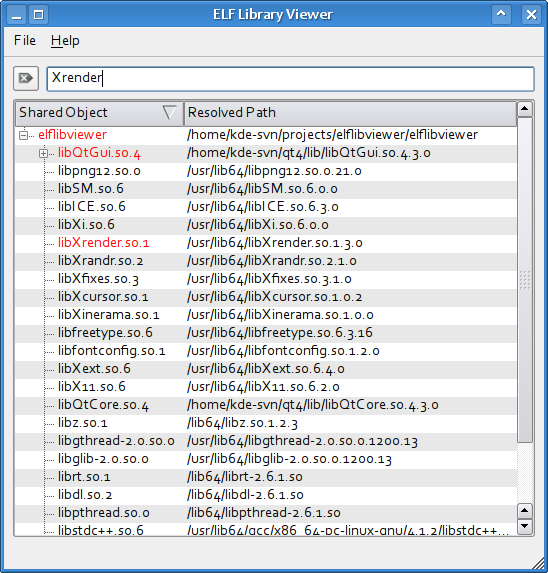
当然,除了ldd,我们也可以使用elflibviewer或binscan:
binscan: http://sourceforge.net/projects/binscan/

elflibviewer:http://www.purinchu.net/software/elflibviewer.php

## 显示动态链接库的导出的符号
这个功能在Windows下的Dependency walker也有,在Linux下,它是nm。
[root@ip-12-345-678-910 users]# nm ./test
0000000000600ad8 d _DYNAMIC
0000000000600cc0 d _GLOBAL_OFFSET_TABLE_
0000000000400863 t _GLOBAL__sub_I_main
...
0000000000400968 R _IO_stdin_used
00000000004007c0 t frame_dummy
00000000004007e4 T main
## 压缩与解压
———————————————
.tar/.tar.gz/tar.bz
必须的参数:(3个参数不能共存)
-c :创建压缩文件c代表create。
-x :解压缩文件
-t :查看压缩包里面的文件!
辅助参数:
-z :用 gzip 压缩/解压缩
-j :用 bzip2 压缩/解压缩
-v :显示压缩/解压缩的进度条
-f :使用档名(注意:f后面不要接参数,也就是说-zxfv是不对的,要写成-zxvf)
实例:
解压一个文件:tar -zxvf abc.tar.bz2
(解压缩abc.tar.bz2)
创建压缩文件:tar -zcvf abc.tar.bz2 one.mp3 two.mp3
(把one.mp3和two.mp3压缩成abc.tar.bz2)
———————————————
———————————————
安装:Redhat、Fedora、Centos安装命令:yum install p7zip
安装:Debian、Ubuntu安装命令:apt-get install p7zip
解压实例:
7z x filename.7z
———————————————
———————————————
.zip
zip参数列表:
-a 将文件转成ASCII模式
-F 尝试修复损坏的压缩文件
-h 显示帮助界面
-m 将文件压缩之后,删除源文件
-n 特定字符串 不压缩具有特定字尾字符串的文件
-o 将压缩文件内的所有文件的最新变动时间设为压缩时候的时间
-q 安静模式,在压缩的时候不显示指令的执行过程
-r 将指定的目录下的所有子目录以及文件一起处理
-S 包含系统文件和隐含文件(S是大写)
-t 日期 把压缩文件的最后修改日期设为指定的日期,日期格式为mmddyyyy
unzip参数列表:
-l 列出压缩文件所包含的内容
-v 显示详细的执行过程
解压:unzip FileName.zip
压缩:zip -r FileName.zip DirName
———————————————
## Find all file descripters
列出打开FileDescripter数目: ls -l | wc -l
http://www.cyberciti.biz/tips/linux-procfs-file-descriptors.html