1.0 通用部分
和常见的测试工具一样,gtest提供了单体测试常见的工具和组件。比如判断各种类型的值相等,大于,小于等,管理多个测试的测试组如testsuit下辖testcase,为了方便处理初始化数据减少重复代码,提供了setup和teardown函数。
关于TEST宏,这是一个一层包一层的宏定义,虽然google编程规范说不建议用宏,但是gtest却大量的使用宏来创建类和函数,使用宏可以给用户更加简洁的接口,在效率上也有优势,但是读起来很晦涩。一般的,在基础工具和底层API中,宏还是由广大的应用空间,因为这一部分基本上不怎么变化,那些写底层工具的大牛们有能力驾驭这种反常规的写法。
使用宏来实现底层的重复性工作或者封装复杂的接口,在开源项目中是很常见的方式。
-
Sample #1 shows the basic steps of using googletest to test C++ functions.
-
Sample #2 shows a more complex unit test for a class with multiple member functions.
-
Sample #3 uses a test fixture.
-
Sample #4 teaches you how to use googletest and
googletest.htogether to get the best of both libraries. -
Sample #5 puts shared testing logic in a base test fixture, and reuses it in derived fixtures.
-
Sample #6 demonstrates type-parameterized tests.
-
Sample #7 teaches the basics of value-parameterized tests.
-
Sample #8 shows using
Combine()in value-parameterized tests. -
Sample #9 shows use of the listener API to modify Google Test's console output and the use of its reflection API to inspect test results.
-
Sample #10 shows use of the listener API to implement a primitive memory leak checker.
1.1 sample1
官方sample1有2个函数,阶乘函数int Factorial()和判断素数函数bool IsPrime(int n)。
测试用例分为2个testsuit。
FactorialTest包含3个阶乘函数的测试用例:
-
Negative: 输入负数测试阶乘
-
Zero:输入为0测试阶乘
-
Positive:输入为正数测试阶乘
TEST(FactorialTest, Negative) { // This test is named "Negative", and belongs to the "FactorialTest" // test case. EXPECT_EQ(1, Factorial(-5)); EXPECT_EQ(1, Factorial(-10)); EXPECT_GT(Factorial(-10), 0); } // Tests factorial of 0. TEST(FactorialTest, Zero) { EXPECT_EQ(1, Factorial(0)); } // Tests factorial of positive numbers. TEST(FactorialTest, Positive) { EXPECT_EQ(1, Factorial(1)); EXPECT_EQ(2, Factorial(2)); EXPECT_EQ(6, Factorial(3)); EXPECT_EQ(40320, Factorial(8)); }
IsPrimeTest包含3个素数检测函数的测试用例:
-
Negative:输入为负数和极限值INT_MIN
-
Trivial:输入为几个特殊的值如临界点的数
-
Positive:输入为正数
// Tests negative input. TEST(IsPrimeTest, Negative) { // This test belongs to the IsPrimeTest test case. EXPECT_FALSE(IsPrime(-1)); EXPECT_FALSE(IsPrime(-2)); EXPECT_FALSE(IsPrime(INT_MIN)); } // Tests some trivial cases. TEST(IsPrimeTest, Trivial) { EXPECT_FALSE(IsPrime(0)); EXPECT_FALSE(IsPrime(1)); EXPECT_TRUE(IsPrime(2)); EXPECT_TRUE(IsPrime(3)); } // Tests positive input. TEST(IsPrimeTest, Positive) { EXPECT_FALSE(IsPrime(4)); EXPECT_TRUE(IsPrime(5)); EXPECT_FALSE(IsPrime(6)); EXPECT_TRUE(IsPrime(23)); }
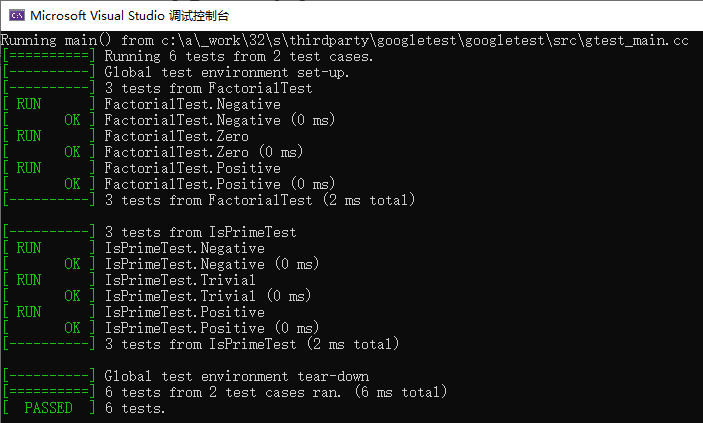
gtest直接运行即可,代码中没有main函数也可以执行。输出结果提示使用了gtest_main.cc函数。
输出显示来自2个testcase的6个用例被执行。两个case就是测试组FactorialTest和IsPrimeTest。
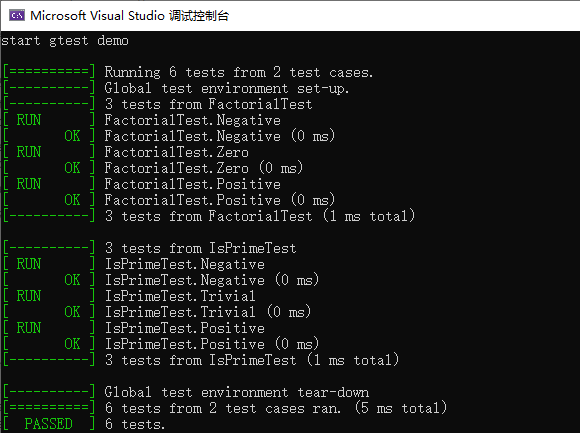
可以加上自己的main函数,调用RUN_ALL_TESTS()执行测试用例。
int main(int argc, char* argv[]) {
  cout << "start gtest demo
" << endl;
  ::testing::InitGoogleTest(&argc, argv);
  return RUN_ALL_TESTS();
}
1.2 sample2
官方sample 2,测试一个名为MyString的类,包括测试构造函数和成员函数。
该类有如下特征:默认构造函数把成员变量c_string指针初始化为nullptr,构造函数MyString接收一个char *字符串然后通过Set函数拷贝给c_string_。
class MyString { private: const char* c_string_; const MyString& operator=(const MyString& rhs); public: // Clones a 0-terminated C string, allocating memory using new. // 类方法 static const char* CloneCString(const char* a_c_string); // The default c'tor constructs a NULL string. // 默认构造函数 MyString() : c_string_(nullptr) {} // Constructs a MyString by cloning a 0-terminated C string. // 构造函数,禁止隐式转换 explicit MyString(const char* a_c_string) : c_string_(nullptr) { Set(a_c_string); } // Copy c'tor // 拷贝构造函数 MyString(const MyString& string) : c_string_(nullptr) { Set(string.c_string_); } // D'tor. MyString is intended to be a final class, so the d'tor // doesn't need to be virtual. ~MyString() { delete[] c_string_; } // Gets the 0-terminated C string this MyString object represents. const char* c_string() const { return c_string_; } size_t Length() const { return c_string_ == nullptr ? 0 : strlen(c_string_); } // Sets the 0-terminated C string this MyString object represents. // 成员函数 void Set(const char* c_string); };
类方法的实现和Set成员函数的实现。
// Clones a 0-terminated C string, allocating memory using new. const char* MyString::CloneCString(const char* a_c_string) { if (a_c_string == nullptr) return nullptr; const size_t len = strlen(a_c_string); char* const clone = new char[ len + 1 ]; memcpy(clone, a_c_string, len + 1); return clone; } // Sets the 0-terminated C string this MyString object // represents. void MyString::Set(const char* a_c_string) { // Makes sure this works when c_string == c_string_ const char* const temp = MyString::CloneCString(a_c_string); delete[] c_string_; c_string_ = temp; }
测试用例,构建了一个测试testcase叫做MyString,包含了4个test用例。
第一个用例:TEST(MyString, DefaultConstructor),测试默认构造函数, MyString() : c_string_(nullptr) {}。
  const MyString s;
  EXPECT_STREQ(nullptr, s.c_string());
  EXPECT_EQ(0u, s.Length());
第二个用例:TEST(MyString, ConstructorFromCString),测试 MyString(const char* a_c_string) 构造函数,sizeof(kHelloString)-1和 s.Length()相等,是因为这是c类型的字符串,最后结尾是�,sizeof计算的是分配给这个字符串的空间。
const char kHelloString[] = "Hello, world!"; // Tests the c'tor that accepts a C string. TEST(MyString, ConstructorFromCString) { const MyString s(kHelloString); EXPECT_EQ(0, strcmp(s.c_string(), kHelloString)); EXPECT_EQ(sizeof(kHelloString)/sizeof(kHelloString[0]) - 1, s.Length()); }
第三个用例:TEST(MyString, CopyConstructor),测试拷贝构造函数。
// Tests the copy c'tor.
TEST(MyString, CopyConstructor) {
  const MyString s1(kHelloString);
  const MyString s2 = s1;
  EXPECT_EQ(0, strcmp(s2.c_string(), kHelloString));
}
第四个用例:TEST(MyString, Set) ,测试Set成员函数。
// Tests the Set method. TEST(MyString, Set) { MyString s; s.Set(kHelloString); EXPECT_EQ(0, strcmp(s.c_string(), kHelloString)); // Set should work when the input pointer is the same as the one // already in the MyString object. s.Set(s.c_string()); EXPECT_EQ(0, strcmp(s.c_string(), kHelloString)); // Can we set the MyString to NULL? s.Set(nullptr); EXPECT_STREQ(nullptr, s.c_string()); }
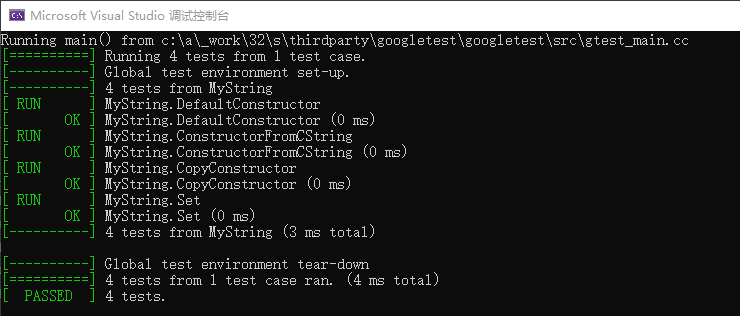
最终运行结果如下图,1个test case,4个tests,全部成功。
官方sample 3,展示了测试夹具的概念,为测试准备环境,每个test case都使用相同的环境初始化数据等。sample 3测试了一个自己编写的Queue模板类,这个Q实现了一个单向的链表。元素项使用template <typename E> class QueueNode 实现,内部有友元类Queue<E>。队列Queue类具有默认构造函数和以下成员:
-
-
Head() --队列头
-
Last() --队列尾
-
void Enqueue(const E& element) --入队
-
E* Dequeue() --出队,返回出队的元素
-
Queue* Map(F function) const -- 实现队列拷贝,并且对元素执行function操作,比如测试中就对元素乘以2倍入队,返回新的队列的每个元素都是旧队列元素的二倍大小。
sample3 例子展示了“test fixture”(测试夹具)的概念,“test fixture”就是实现测试前准备,比如创造一系列共用的函数和数据,每个测试case运行前都可以引用这些共有的条件。最常见的就是初始化Setup或善后处理TearDown函数,所以使用“test fixture”可以避免重复的代码。
test fixture 怎么写公共部分
-
test fixture的类名没有限制,可以按照测试需求起名字,这个类需要继承testing::Test类,class QueueTestSmpl3 : public testing::Test ,在测试夹具类中重写SetUp和TearDown方法。
-
如果使用了测试夹具,那么测试用例名就不能使用TEST来创建,而是使用TEST_F来创建,在TEST_F宏的第一个参数里,写测试夹具类名。
-
测试启动后,每个测试case执行前都会运行测试夹具类。达到一个准备测试环境的目的。
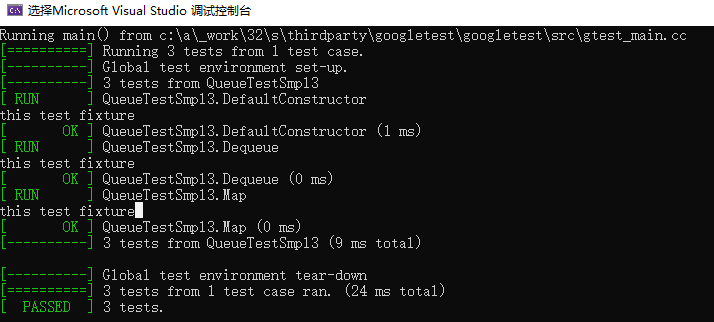
例如在测试夹具中加入一句打印:
  void SetUp() override {
    std::cout << "this test fixture" << std::endl;
    q1_.Enqueue(1);
    q2_.Enqueue(2);
    q2_.Enqueue(3);
  }
三个测试用例,会调用setup3次。
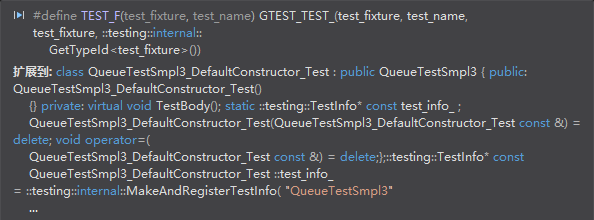
每个TEST_F都会创建一个类,并且继承test fixture类。例如TEST_F(QueueTestSmpl3, DefaultConstructor) 会被扩展为:
class QueueTestSampl3_DefaultConstructor_Test:public QueueTestSmpl3 {}
所以每个TEST_F运行时,都会调用一次QueueTestSmpl3类。
下面分析下第二个用例:
// Tests Dequeue(). TEST_F(QueueTestSmpl3, Dequeue) { int * n = q0_.Dequeue(); // q0 队列没有任何元素,setup没有设置q0,出队只会是nullptr EXPECT_TRUE(n == nullptr); n = q1_.Dequeue(); // q1 对列有一个元素:1 ASSERT_TRUE(n != nullptr); EXPECT_EQ(1, *n); EXPECT_EQ(0u, q1_.Size()); // 出队后,q1队列没有元素了 delete n; n = q2_.Dequeue(); // q2在setup时候输入了2,3两个元素 ASSERT_TRUE(n != nullptr); EXPECT_EQ(2, *n); EXPECT_EQ(1u, q2_.Size()); delete n; }
1.4 sample4
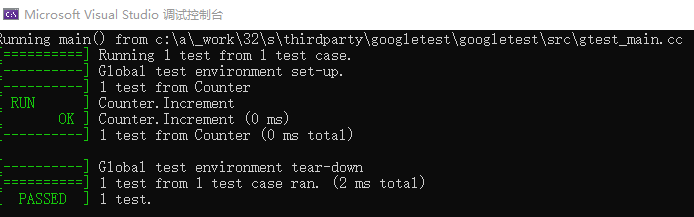
官方sample 4测试了一个Counter类,该类实现了Increment和Decrement两个函数,一个int类型数值自增,一个自减,值为0时不再减直接返回0。
TEST(Counter, Increment) { Counter c; // Test that counter 0 returns 0 EXPECT_EQ(0, c.Decrement()); // EXPECT_EQ() evaluates its arguments exactly once, so they // can have side effects. EXPECT_EQ(0, c.Increment()); EXPECT_EQ(1, c.Increment()); EXPECT_EQ(2, c.Increment()); EXPECT_EQ(3, c.Decrement()); }
测试很简单,注意的是第一次c.Increment()调用后,依然为0,是由于Incremen函数先返回值写入临时变量,然后再执行++操作。3个加执行完,c.counter_ = 3,减方法返回3,然后c.counter_=2.
int Counter::Increment() {
  return counter_++;
}
1.5 sample5
sample 3展示了测试夹具的概念,可以方便的为每个测试用例创建共用的部分,比如准备测试环境和数据。但是如果多个测试需要的环境类似,只有细小的差别,那么就可以把共用的部分抽出来放到基类--创建一个超级的test fixture,而各自的不同的测试夹具用继承来实现个性化--派生出各自的test fixture。
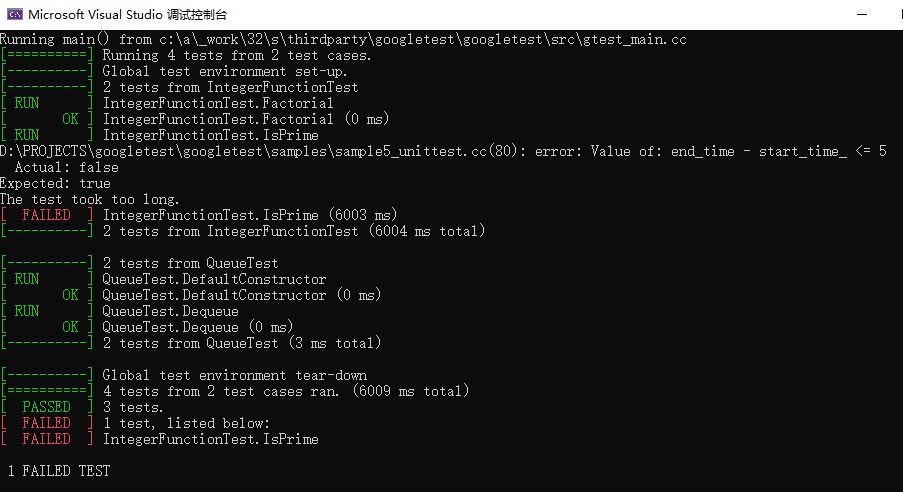
sample 5先创建了一个超级测试夹具,类名叫QuickTest,继承testing::Test类,QuickTest计算每个测试case的执行时间,方式很简单,SetUp里记录start_time,TearDown里记录end_time,相减就是执行时间。如果故意在test中Sleep(6),则会超时报错显示如下:
测试用例如下,TEST_F使用IntegerFunctionTest类作为test_fixture名字,而IntegerFunctionTest类继承于QuickTest,所以也可以计算时间。
class IntegerFunctionTest : public QuickTest { // We don't need any more logic than already in the QuickTest fixture. // Therefore the body is empty. }; TEST_F(IntegerFunctionTest, Factorial) { // **** 阶乘函数的tests } TEST_F(IntegerFunctionTest, IsPrime) { // **** 判断素数函数的tests }
第二个测试case展示了共用测试夹具的方法,如sample 3中,测试Queue时候,需要初始化队列,那么可以在这个test fixture类中初始化对列,并且继承于QuickTest类,那么测试case运行时候就可以执行统计执行时间的功能。
class QueueTest : public QuickTest { protected: void SetUp() override { // First, we need to set up the super fixture (QuickTest). QuickTest::SetUp(); // Second, some additional setup for this fixture. q1_.Enqueue(1); q2_.Enqueue(2); q2_.Enqueue(3); } // By default, TearDown() inherits the behavior of // QuickTest::TearDown(). As we have no additional cleaning work // for QueueTest, we omit it here. // // virtual void TearDown() { // QuickTest::TearDown(); // } Queue<int> q0_; Queue<int> q1_; Queue<int> q2_; };
测试case部分和sample 3一样,但是由于test fixture类继承了QuickTest,这个测试用例可以统计执行时间,并且执行TearDown函数里面的超时报错。
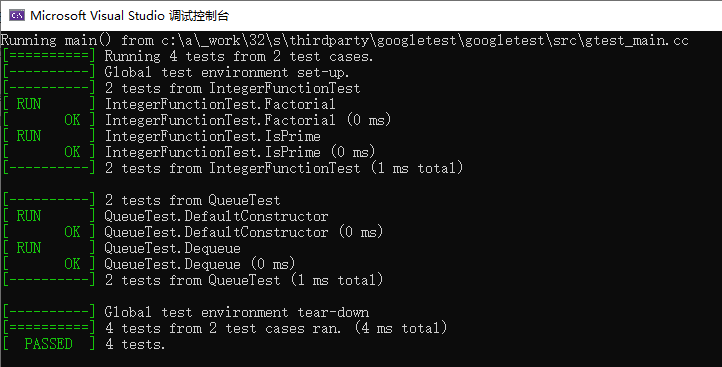
最终的执行结果如下图。共两个test case:IntegerFunctionTest和QueueTest,每个case有2个tests。
尊重技术文章,转载请注明!
Google单元测试框架gtest之官方sample笔记1--简单用例