这篇文章介绍如何训练官方的一个例子3dball。
确保在此之前已经安装好训练环境可以参考下面的文章。
https://www.cnblogs.com/pojdd/p/9804322.html
游戏打包的官方说明文档
https://github.com/Unity-Technologies/ml-agents/blob/master/docs/Learning-Environment-Executable.md
https://github.com/Unity-Technologies/ml-agents/blob/master/docs/Basic-Guide.md#play-an-example-environment-using-pretrained-model
打开官方的实例工程ml-agentsUnitySDK
这个工程是和插件项目在一起的
下载链接https://github.com/Unity-Technologies/ml-agents/
双击打开3dball路径是Assets/ML-Agents/Examples/3DBall/
1.打包游戏前的配置
- 打开Player Settings (菜单: Edit > Project Settings > Player).
- 在Resolution and Presentation下:
- 确保 Run in Background 是勾选上的.
- 确保 Display Resolution Dialog 设置成 Disabled.
- 打开 Build Settings 窗口(菜单:File > Build Settings).
- 选择 target platform.
- (optional) 选择“Development Build” to log debug messages.
- If any scenes are shown in the Scenes in Build list, make sure that the 3DBall Scene is the only one checked. (If the list is empty, than only the current scene is included in the build).
- Click Build:
- In the File dialog, navigate to your ML-Agents directory.
- Assign a file name and click Save.
- (For Windows)With Unity 2018.1, it will ask you to select a folder instead of a file name. Create a subfolder within the ML-Agents folder and select that folder to build. In the following steps you will refer to this subfolder's name as
env_name.
2.开启外部训练
打开Anaconda Prompt
输入
activate ml-agents
激活之前搭建好的环境
转到ml-agents目录下
输入
mlagents-learn ../config/trainer_config.yaml --env=3DBall --run-id=firstRun --train
--env=指的是你的游戏文件的路径,游戏程序不加后缀名
--run-id=是每次训练后打印的分割,可以自定义
--train告诉 learn.py 运行训练session(而不是inference会话)
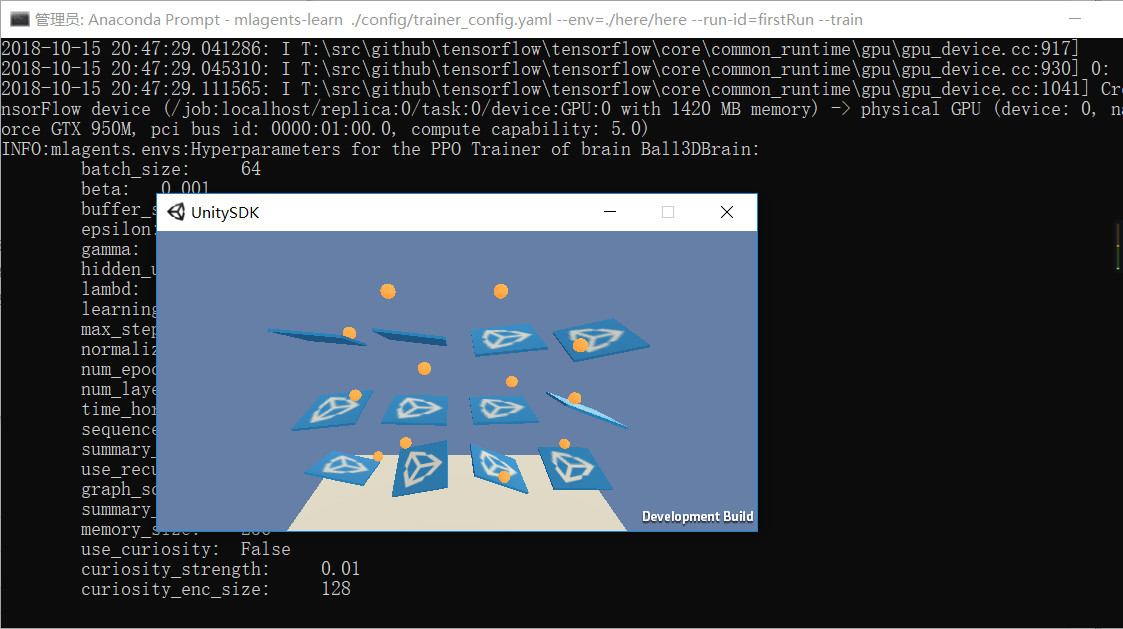
图中已经开始训练了。博主的GPU是GTX950M的,支持GPU加速。如何是n卡是不能加速的,这时候只能用cpu跑了,这样会慢不少。
训练好之后就可以在当前目录找到models文件夹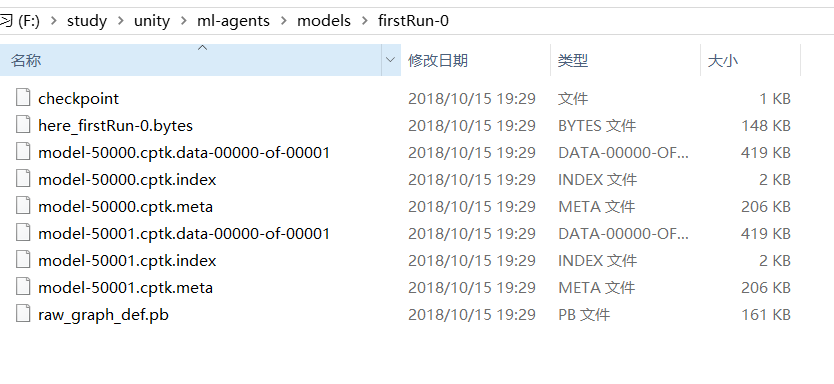
图中的bytes就是训练好的模型
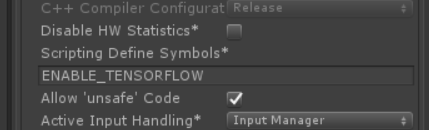
要想在unity中使用内部模式加载这个模型需要加上一个宏
ENABLE_TENSORFLOW
在playsetting中