1 安装
安装
yum install samba -y
卸载
yum remove samba* -y
配置文件
安装完成后可以查看到配置文件
ls /etc/samba
会自动产生三个文件 smb.conf
# See smb.conf.example for a more detailed config file or
# read the smb.conf manpage.
# Run 'testparm' to verify the config is correct after
# you modified it.

[global]
        workgroup = SAMBA      #设置主机工作组
        security = user        #以user或share验证方式访问

        passdb backend = tdbsam

        printing = cups
        printcap name = cups
        load printers = yes
        cups options = raw

[homes]
        comment = Home Directories
        valid users = %S, %D%w%S
        browseable = No
        read only = No
        inherit acls = Yes

[printers]
        comment = All Printers
        path = /var/tmp
        printable = Yes
        create mask = 0600
        browseable = No

[print$]
        comment = Printer Drivers
        path = /var/lib/samba/drivers
        write list = @printadmin root
        force group = @printadmin
        create mask = 0664
        directory mask = 0775
lmhosts
127.0.0.1 localhost
smb.conf.example 和smb.conf 类似
# This is the main Samba configuration file. For detailed information about the
# options listed here, refer to the smb.conf(5) manual page. Samba has a huge
# number of configurable options, most of which are not shown in this example.
#
# The Samba Wiki contains a lot of step-by-step guides installing, configuring,
# and using Samba:
# https://wiki.samba.org/index.php/User_Documentation
#
# In this file, lines starting with a semicolon (;) or a hash (#) are
# comments and are ignored. This file uses hashes to denote commentary and
# semicolons for parts of the file you may wish to configure.
#
# NOTE: Run the "testparm" command after modifying this file to check for basic
# syntax errors.
#
#---------------
# Security-Enhanced Linux (SELinux) Notes:
#
# Turn the samba_domain_controller Boolean on to allow a Samba PDC to use the
# useradd and groupadd family of binaries. Run the following command as the
# root user to turn this Boolean on:
# setsebool -P samba_domain_controller on
#
# Turn the samba_enable_home_dirs Boolean on if you want to share home
# directories via Samba. Run the following command as the root user to turn this
# Boolean on:
# setsebool -P samba_enable_home_dirs on
#
# If you create a new directory, such as a new top-level directory, label it
# with samba_share_t so that SELinux allows Samba to read and write to it. Do
# not label system directories, such as /etc/ and /home/, with samba_share_t, as
# such directories should already have an SELinux label.
#
# Run the "ls -ldZ /path/to/directory" command to view the current SELinux
# label for a given directory.
#
# Set SELinux labels only on files and directories you have created. Use the
# chcon command to temporarily change a label:
# chcon -t samba_share_t /path/to/directory
#
# Changes made via chcon are lost when the file system is relabeled or commands
# such as restorecon are run.
#
# Use the samba_export_all_ro or samba_export_all_rw Boolean to share system
# directories. To share such directories and only allow read-only permissions:
# setsebool -P samba_export_all_ro on
# To share such directories and allow read and write permissions:
# setsebool -P samba_export_all_rw on
#
# To run scripts (preexec/root prexec/print command/...), copy them to the
# /var/lib/samba/scripts/ directory so that SELinux will allow smbd to run them.
# Note that if you move the scripts to /var/lib/samba/scripts/, they retain
# their existing SELinux labels, which may be labels that SELinux does not allow
# smbd to run. Copying the scripts will result in the correct SELinux labels.
# Run the "restorecon -R -v /var/lib/samba/scripts" command as the root user to
# apply the correct SELinux labels to these files.
#
#--------------
#
#======================= Global Settings =====================================

[global]

# ----------------------- Network-Related Options -------------------------
#
# workgroup = the Windows NT domain name or workgroup name, for example, MYGROUP.
#
# server string = the equivalent of the Windows NT Description field.
#
# netbios name = used to specify a server name that is not tied to the hostname,
#                maximum is 15 characters.
#
# interfaces = used to configure Samba to listen on multiple network interfaces.
# If you have multiple interfaces, you can use the "interfaces =" option to
# configure which of those interfaces Samba listens on. Never omit the localhost
# interface (lo).
#
# hosts allow = the hosts allowed to connect. This option can also be used on a
# per-share basis.
#
# hosts deny = the hosts not allowed to connect. This option can also be used on
# a per-share basis.
#
	workgroup = MYGROUP
	server string = Samba Server Version %v

;	netbios name = MYSERVER

;	interfaces = lo eth0 192.168.12.2/24 192.168.13.2/24
;	hosts allow = 127. 192.168.12. 192.168.13.

# --------------------------- Logging Options -----------------------------
#
# log file = specify where log files are written to and how they are split.
#
# max log size = specify the maximum size log files are allowed to reach. Log
# files are rotated when they reach the size specified with "max log size".
#

	# log files split per-machine:
	log file = /var/log/samba/log.%m
	# maximum size of 50KB per log file, then rotate:
	max log size = 50

# ----------------------- Standalone Server Options ------------------------
#
# security = the mode Samba runs in. This can be set to user, share
# (deprecated), or server (deprecated).
#
# passdb backend = the backend used to store user information in. New
# installations should use either tdbsam or ldapsam. No additional configuration
# is required for tdbsam. The "smbpasswd" utility is available for backwards
# compatibility.
#

	security = user
	passdb backend = tdbsam


# ----------------------- Domain Members Options ------------------------
#
# security = must be set to domain or ads.
#
# passdb backend = the backend used to store user information in. New
# installations should use either tdbsam or ldapsam. No additional configuration
# is required for tdbsam. The "smbpasswd" utility is available for backwards
# compatibility.
#
# realm = only use the realm option when the "security = ads" option is set.
# The realm option specifies the Active Directory realm the host is a part of.
#
# password server = only use this option when the "security = server"
# option is set, or if you cannot use DNS to locate a Domain Controller. The
# argument list can include My_PDC_Name, [My_BDC_Name], and [My_Next_BDC_Name]:
#
# password server = My_PDC_Name [My_BDC_Name] [My_Next_BDC_Name]
#
# Use "password server = *" to automatically locate Domain Controllers.

;	security = domain
;	passdb backend = tdbsam
;	realm = MY_REALM

;	password server = <NT-Server-Name>

# ----------------------- Domain Controller Options ------------------------
#
# security = must be set to user for domain controllers.
#
# passdb backend = the backend used to store user information in. New
# installations should use either tdbsam or ldapsam. No additional configuration
# is required for tdbsam. The "smbpasswd" utility is available for backwards
# compatibility.
#
# domain master = specifies Samba to be the Domain Master Browser, allowing
# Samba to collate browse lists between subnets. Do not use the "domain master"
# option if you already have a Windows NT domain controller performing this task.
#
# domain logons = allows Samba to provide a network logon service for Windows
# workstations.
#
# logon script = specifies a script to run at login time on the client. These
# scripts must be provided in a share named NETLOGON.
#
# logon path = specifies (with a UNC path) where user profiles are stored.
#
#
;	security = user
;	passdb backend = tdbsam

;	domain master = yes
;	domain logons = yes

	# the following login script name is determined by the machine name
	# (%m):
;	logon script = %m.bat
	# the following login script name is determined by the UNIX user used:
;	logon script = %u.bat
;	logon path = \%LProfiles\%u
	# use an empty path to disable profile support:
;	logon path =

	# various scripts can be used on a domain controller or a stand-alone
	# machine to add or delete corresponding UNIX accounts:

;	add user script = /usr/sbin/useradd "%u" -n -g users
;	add group script = /usr/sbin/groupadd "%g"
;	add machine script = /usr/sbin/useradd -n -c "Workstation (%u)" -M -d /nohome -s /bin/false "%u"
;	delete user script = /usr/sbin/userdel "%u"
;	delete user from group script = /usr/sbin/userdel "%u" "%g"
;	delete group script = /usr/sbin/groupdel "%g"


# ----------------------- Browser Control Options ----------------------------
#
# local master = when set to no, Samba does not become the master browser on
# your network. When set to yes, normal election rules apply.
#
# os level = determines the precedence the server has in master browser
# elections. The default value should be reasonable.
#
# preferred master = when set to yes, Samba forces a local browser election at
# start up (and gives itself a slightly higher chance of winning the election).
#
;	local master = no
;	os level = 33
;	preferred master = yes

#----------------------------- Name Resolution -------------------------------
#
# This section details the support for the Windows Internet Name Service (WINS).
#
# Note: Samba can be either a WINS server or a WINS client, but not both.
#
# wins support = when set to yes, the NMBD component of Samba enables its WINS
# server.
#
# wins server = tells the NMBD component of Samba to be a WINS client.
#
# wins proxy = when set to yes, Samba answers name resolution queries on behalf
# of a non WINS capable client. For this to work, there must be at least one
# WINS server on the network. The default is no.
#
# dns proxy = when set to yes, Samba attempts to resolve NetBIOS names via DNS
# nslookups.

;	wins support = yes
;	wins server = w.x.y.z
;	wins proxy = yes

;	dns proxy = yes

# --------------------------- Printing Options -----------------------------
#
# The options in this section allow you to configure a non-default printing
# system.
#
# load printers = when set you yes, the list of printers is automatically
# loaded, rather than setting them up individually.
#
# cups options = allows you to pass options to the CUPS library. Setting this
# option to raw, for example, allows you to use drivers on your Windows clients.
#
# printcap name = used to specify an alternative printcap file.
#

	load printers = yes
	cups options = raw

;	printcap name = /etc/printcap
	# obtain a list of printers automatically on UNIX System V systems:
;	printcap name = lpstat
;	printing = cups

# --------------------------- File System Options ---------------------------
#
# The options in this section can be un-commented if the file system supports
# extended attributes, and those attributes are enabled (usually via the
# "user_xattr" mount option). These options allow the administrator to specify
# that DOS attributes are stored in extended attributes and also make sure that
# Samba does not change the permission bits.
#
# Note: These options can be used on a per-share basis. Setting them globally
# (in the [global] section) makes them the default for all shares.

;	map archive = no
;	map hidden = no
;	map read only = no
;	map system = no
;	store dos attributes = yes


#============================ Share Definitions ==============================

[homes]
	comment = Home Directories
	browseable = no
	writable = yes
;	valid users = %S
;	valid users = MYDOMAIN\%S

[printers]
	comment = All Printers
	path = /var/spool/samba
	browseable = no
	guest ok = no
	writable = no
	printable = yes

# Un-comment the following and create the netlogon directory for Domain Logons:
;	[netlogon]
;	comment = Network Logon Service
;	path = /var/lib/samba/netlogon
;	guest ok = yes
;	writable = no
;	share modes = no

# Un-comment the following to provide a specific roaming profile share.
# The default is to use the user's home directory:
;	[Profiles]
;	path = /var/lib/samba/profiles
;	browseable = no
;	guest ok = yes

# A publicly accessible directory that is read only, except for users in the
# "staff" group (which have write permissions):
;	[public]
;	comment = Public Stuff
;	path = /home/samba
;	public = yes
;	writable = no
;	printable = no
;	write list = +staff
samba 软件目录结构
/etc/samba/smb.conf #samba服务的主要配置文件
/etc/samba/lmhosts #samba服务的域名设定,主要设置IP地址对应的域名,类似linux系统的/etc/hosts
/etc/samba/smbusers #samba服务设置samba虚拟用户的配置文件
/var/log/samba #samab服务存放日志文件
/var/lib/samba/private/{passdb.tdb,secrets.tdb} #存放samba的用户账号和密码数据库文档
2 配置
2.1 找到win的工作组
转到Windows PC并启动命令提示符。输入命令:
> net config workstation
从输出中我们可以清楚地看到工作站域指向' WORKGROUP '。稍后将在Linux机器上对其进行配置。

2.2 设置smb.conf
先复制一份
cp smb.conf smb.conf.copy
编辑smb.conf
vim /etc/samba/smb.conf
[global]
workgroup = WORKGROUP
server string = Samba Server %v #samba服务注释
netbios name = centos-8
security = user
map to guest = bad user
dns proxy = no

[ttt]
path = /myweb
browsable =yes
writable = yes
guest ok = yes
;read only = no   #共享文件可读,不能与writable共用
2.3 全局参数设置
#全局设置参数

[global]
config file = /etc/samba/smb.conf.%U         #可以让你使用另一个配置文件来覆盖缺省的配置文件。如果文件 不存在,则该项无效。
workgroup = WORKGROUP                     #工作组名称
server string = Samba Server Version %v      #主机的简易说明
netbios name = MYSERVER                   #主机的netBIOS名称,如果不填写则默认服务器DNS的一部分,workgroup和netbios name名字不要设置成一样
interfaces = lo eth0 192.168.12.2/24 192.168.13.2/24 #设置samba服务器监听网卡,可以写网卡名称或IP地址,默认注释
hosts allow = 127. 192.168.12. 192.168.13.    #设置允许连接到samba服务器的客户端,默认注释
hosts deny =192.168.12.0/255.255.255.0        #设置不允许连接到samba服务器的客户端,默认注释
log level =1                                  #日志文件安全级别,0~10级别,默认0
log file = /var/log/samba/%m            #产生日志文件的命名,默认以访问者IP地址命名
max log size = 50                   #日志文件最大容量50,默认50,单位为KB,0表示不限制
2.3.1 security = share
#设置用户访问samba服务器的验证方式 ,一共四种验证方式。
1. share:用户访问Samba Server不需要提供用户名和口令, 安全性能较低。
2. user:Samba Server共享目录只能被授权的用户访问,由Samba Server负责检查账号和密码的正确性。账号和密码要在本Samba Server中建立。
3. server:依靠其他Windows NT/2000或Samba Server来验证用户的账号和密码,是一种代理验证。此种安全模式下,系统管理员可以把所有的Windows用户
和口令集中到一个NT系统上,使用Windows NT进行Samba认证, 远程服务器可以自动认证全部用户和口令,如果认证失败,Samba将使用用户级安全模式作为替代的方式。
4. domain:域安全级别,使用主域控制器(PDC)来完成认证。
2.3.2 passdb backend = tdbsam
#定义用户后台类型
1、smbpasswd:使用SMB服务的smbpasswd命令给系统用户设置SMB密码
2、tdbsam:创建数据库文件并使用pdbedit建立SMB独立用户,smbpasswd –a username建立samba用户并设置密码,不过建立samba用户
必须先建立系统用户,也可以使用pdbedit命令来建立samba用户:
pdbedit –a username:新建Samba账户。
pdbedit –x username:删除Samba账户。
pdbedit –L:列出Samba用户列表,读取passdb.tdb数据库文件。
pdbedit –Lv:列出Samba用户列表的详细信息。
pdbedit –c “[D]” –u username:暂停该Samba用户的账号。
pdbedit –c “[]” –u username:恢复该Samba用户的账号。
2.2.3 ldapsam:
基于LDAP服务进行账户验证
username map = /etc/samba/smbusers #配合/etc/samba/smbusers文件设置虚拟用户
2.4 共享文件设置参数
[share]  #自定义共享名称

comment =  This is share software    #共享描述
path  =  /home/testfile             #共享目录路径
browseable  =  yes/no                #设置共享是否可浏览,如果no就表示隐藏,需要通过IP+共享名称进行访问
writable  =  yes/no            #设置共享是否具有可写权限
read only  =  yes/no           #设置共享是否具有只读权限
admin users  =  root          #设置共享的管理员,如果security =share 时,引项无效,多用户中间使用逗号隔开,例如admin users = root,user1,user2
valid users  =  username        #设置允许访问共享的用户,例如valid users = user1,user2,@group1,@group2(多用户或组使用逗号隔开,@group表示group用户组)
invalid users  =  username        #设置不允许访问共享的用户
write list  =  username         #设置在共享具有写入权限的用户,例如例如write list  = user1,user2,@group1,@group2(多用户或组使用逗号隔开,@group表示group用户组)
public  =  yes/no             #设置共享是否允许guest账户访问
guest  ok  =  yes/no           #功能同public 一样
create mask = 0700                 #创建的文件权限为700
directory mode = 0700               #创建的文件目录为 700
2.5 不需要账号密码访问的共享(security = share )
ls -ld /home/smbuser/ #查看共享文件权限
chmod 777 /home/smbuser/ #分配共享文件最大权限
testparm #检查smb.conf配置文件是否有语法错误
netstat -tlnp | grep mbd #查看samba端口,TCP端口139,445 UDP端口 137,138
vim /etc/samba/smb.conf #设置smb.conf配置文件


[global]

workgroup = WORKGROUP                      #设置主机工作组
server string = Samba Server Version %v    #samba服务注释
log level = 1                             #设置日志文件安全级别为1
log file = /var/log/samba/%m              #设置日志文件名称,%m以IP地址为名称
max log size = 50                         #设置日志文件最大容量50KB,0表示不限制
security = share                          #以share验证方式访问
passdb backend = tdbsam                   #定义用户后台类型
load printers = no                        #关闭打印共享功能
cups options = raw                        #打印机选项


[usershare]

comment  =  Home Directories              #共享文件描述
path  =  /home/shareuser                  #共享路径
browseable  =  yes                        #共享文件可以浏览
writable  =  yes                          #共享文件可写
; read only  =  yes                       #共享文件可读,不能与writable共用
guest ok =  yes                           #允许guest用户访问
在linux操作需要进行挂载
yum -y install samba-client #在线安装samba-client才能使用smbclient命令
smbclient -L //192.168.2.234 #查看samba服务器共享目录
mount -t cifs //192.168.2.234/usershare /mnt/share #挂载
2.6 需要输入账号和密码访问的共享(security = user)
标注:创建samba用户之前必须先创建系统用户,系统用户和samba用户名一样,但密码可以设置成不一样
useradd test01 #创建系统用户test01
useradd test02 #创建系统用户test02
passwd test01 #设置系统用户test01密码
passwd test01 #设置系统用户test02密码
smbpasswd -a test01 #把系统用户test01添加为samba用户并设置samba用户登录密码
smbpasswd -a test02 #把系统用户test02添加为samba用户并设置samba用户登录密码
pdbedit –L #查看samba用户
mkdir /home/{smbadmin01,smbuser01} #home创建两个共享目录
chmod 777 /home/{smbadmin01,smbuser01} #目录分配最高权限
vim /etc/samba/smb.conf #设置smb.conf配置文件
[global]

workgroup = WORKGROUP                 #设置主机工作组
server string = Samba Server Version %v      #samba服务注释
log level = 1                              #设置日志文件安全级别为1
log file = /var/log/samba/%m                #设置日志文件名称,%m以IP地址为名称
max log size = 50                          #设置日志文件最大容量50KB,0表示不限制
security = user                           #以user验证方式访问
passdb backend = tdbsam                    #定义用户后台类型
load printers = no                          #关闭打印共享功能
cups options = raw                         #打印机选项

[usershare]

comment  =  Home Directories                #共享文件描述
path  =  /home/smbuser01                   #共享路径
browseable  =  yes                         #共享文件可以浏览
read only  =  yes                           #共享文件可读,不能与writable共用
valid users  =  test01,test02               #设置允许访问共享用户


[adminshare]

comment  =  Home Directories               #共享文件描述
path  =  /home/smbadmin01                 #共享路径
browseable  =  yes                        #共享文件可以浏览
writable  =  yes                          #共享文件可写
create  make  =  0664                     #设置用户创建文件权限0664
directory  make  =  0775                  #设置用户创建目录权限0775
write  list   =   test01                  #设置允许访问共享具有写入权限的用户
3 使用
启动
systemctl start smb.service
设为开机启动
systemctl enable smb.service
重启
systemctl restart smb.service
组成Samba运行的有两个服务,一个是SMB,另一个是NMB;SMB是Samba 的核心启动服务,主要负责建立 Linux Samba服务器与Samba客户机之间的对话, 验证用户身份并提供对文件和打印系统的访问,只有SMB服务启动,才能实现文件的共享,监听139 TCP端口;而NMB服务是负责解析用的,类似与DNS实现的功能,NMB可以把Linux系统共享的工作组名称与其IP对应起来,如果NMB服务没有启动,就只能通过IP来访问共享文件,监听137和138 UDP端口。
systemctl start nmb
设为开机启动
systemctl enable nmb.service
查看状态
systemctl status smb.service
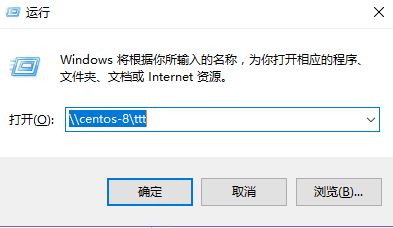
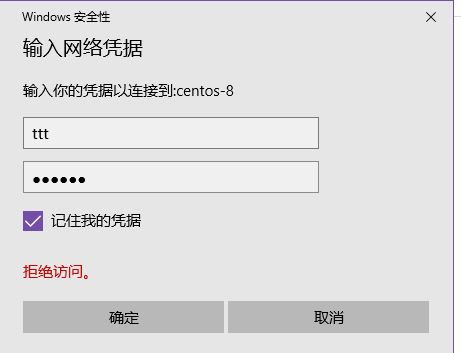
win连接
输入密码
参考阅读